I have always had a sense of adventure, always looking for new ways to discover the lively city of San Francisco. Renting a Lyft electric bike has truly transformed my experience.
With just a few taps on the Lyft app, I can effortlessly zip through the streets, feeling the wind in my hair and the thrill of the city at my fingertips.
It’s like having my own personal time machine, transporting me to new experiences and hidden gems.
So, if you’re ready to embark on your own urban adventure, let me show you how to rent a Lyft electric bike in SF.
Key Takeaways
- Download the Lyft app and sign in or create an account
- Enter your location and select the electric bike option
- Choose a bike near you and unlock it using the app
- Adjust the seat and handlebars and troubleshoot any app issues
Download the Lyft App
To rent a Lyft electric bike in SF, download the Lyft app. The Lyft app features a seamless and user-friendly interface that makes renting an electric bike a breeze. Once you have downloaded the app, simply open it and you will be greeted with a home screen that displays various transportation options, including electric bikes.
To start the electric bike rental process, all you need to do is tap on the electric bike icon on the home screen. This will take you to a map view that shows the available electric bikes in your area. You can easily locate the nearest electric bike by looking for the bike icons on the map.
Once you have found a bike that suits your needs, you can simply tap on it to unlock it. The app will provide you with a unique code that you can use to unlock the bike. Once the bike is unlocked, you are ready to start your ride.
Now, let’s move on to the next section where we will discuss how to sign in or create an account.
Sign in or create an account
You can easily sign in or create an account to get started with renting a LYDT electric bike in SF. Signing in or creating an account on the LYDT app has numerous benefits. First, it allows you to have a personalized experience, as you can save your preferences and payment information for future rides. Additionally, having an account enables you to track your ride history, making it easier to keep a record of your trips.
If you encounter any issues during the sign-in process, LYDT provides troubleshooting options to assist you. You can reset your password if you forget it or encounter any login errors. The app also offers support through their customer service, which can help address any account-related concerns.
Once you’re signed in, the next step is to enter your location. This is crucial as it helps LYDT find the nearest available electric bike for you. By simply allowing the app to access your location, it will provide you with a list of nearby bikes ready for rental. This feature ensures convenience and saves you time in searching for an available bike.
Now, let’s dive into how to enter your location and find the perfect electric bike for your ride.
Enter your location
Once you’ve downloaded the app, simply open it and allow access to your location to find the nearest available bike. The app uses GPS technology to locate the bike rental stations closest to you.
It’s as easy as a few taps on your phone, and you’ll be on your way to exploring the city on two wheels. Here are some tips to help you navigate the process:
- Check the app for the nearest bike rental station
- Walk or ride to the station and locate the bike marked with a bright green LYDT logo
- Scan the QR code on the bike using your phone’s camera
- The app will prompt you to enter your payment information and confirm your rental
- Once you’ve completed the rental process, the bike will unlock automatically
Finding bike rental stations has never been easier with the LYDT app. The app saves you time and effort by providing real-time information on bike availability and locations.
Now that you know how to find and unlock a bike, let’s move on to the next step: selecting the electric bike option.
Select the electric bike option
If you’re looking for a little extra speed and power, the app offers the option to choose an electric bike. Electric bike rentals are a popular choice for those who want to breeze through the city streets with ease. With just a few taps on your phone, you can unlock an electric bike and be on your way in no time.
Bike sharing programs have become increasingly popular in urban areas, and electric bikes are a great addition to these programs. They offer a convenient and eco-friendly way to get around town, without the hassle of parking or the effort of pedaling up steep hills.
To select the electric bike option, simply open the app and navigate to the bike rental section. From there, you’ll see a list of available bikes, including the electric bike option. Choose the electric bike that suits your needs and confirm your selection.
Once you’ve chosen your electric bike, the app will provide you with information on the bike’s location, battery level, and any additional instructions. This way, you can easily find and unlock your chosen bike near you.
Now that you’ve selected the electric bike option, it’s time to choose a bike near you.
Choose a bike near you
To find a nearby bike, open the app and check the map for available options. Once you’ve located a bike rental option that suits your needs, you’re ready to begin your ride.
Here are some important tips to keep in mind for a safe and enjoyable biking experience:
- Always wear a helmet to protect your head in case of any accidents.
- Obey traffic rules and signals, just like you would when driving a car.
- Stay alert and aware of your surroundings at all times.
- Use hand signals to indicate your intentions to other drivers and cyclists.
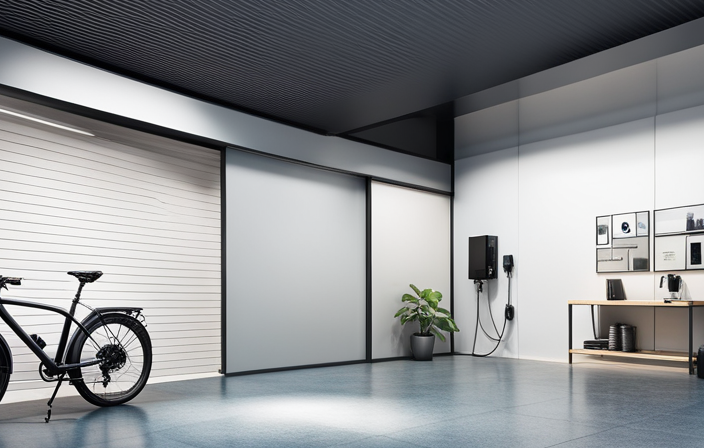
- Make sure to lock the bike securely when you’re not using it to prevent theft.
By following these bike safety tips, you can ensure a smooth and enjoyable ride.
Now that you’ve chosen a bike near you and are equipped with the necessary knowledge, it’s time to unlock the bike using the app. Simply locate the bike on the map, approach it, and use the app to scan the QR code on the bike. This will unlock it and allow you to start your adventure.
Unlock the bike using the app
After locating the bike on the map, simply approach it and use the app to scan the QR code to unlock it. The LYDT app makes the process seamless, allowing you to effortlessly unlock the bike and start your ride. However, in rare cases, you may encounter some app issues. If you experience any problems, try restarting the app or checking your internet connection. If the issue persists, contacting customer service would be the best course of action.
Once you have successfully unlocked the bike, you can adjust the seat height and handlebars to your comfort. To do this, locate the lever or quick-release mechanism near the seat post. Loosen the lever, adjust the seat to your desired height, and then tighten the lever securely. Similarly, adjust the handlebars by loosening the corresponding lever or quick-release mechanism and positioning them at a comfortable angle. Remember to tighten the lever to ensure stability.
Adjust the seat and handlebars to your comfort
Adjusting the seat and handlebars will help you find the right fit for your body and ensure a comfortable riding experience. Proper bike fitting techniques are crucial for preventing injuries and optimizing your performance on the bike. Whether you’re riding a road bike, mountain bike, or hybrid bike, the process of adjusting the seat height and handlebar position is relatively similar.
To determine the correct seat height, sit on the bike and place your heel on the pedal at its lowest point. Your leg should be straight, but not fully extended. Adjust the seat height accordingly. For the handlebars, start by positioning them parallel to the ground. This allows for a natural and comfortable riding position.
Here’s a table outlining some general tips for adjusting seat and handlebars on different types of bikes:
| Bike Type | Seat Height Adjustment | Handlebar Position Adjustment |
|---|---|---|
| Road Bike | Higher for power and speed | Lower for an aerodynamic position |
| Mountain Bike | Lower for control and stability | Higher for an upright position |
| Hybrid Bike | Mid-range height | Mid-range position for a balanced ride |
When adjusting the seat and handlebars, it’s important to avoid common mistakes such as setting the seat too high or low, or positioning the handlebars too far forward or back. These errors can lead to discomfort, inefficient pedaling, and potential injuries.
Now that you’ve adjusted the seat and handlebars to your comfort, it’s time to ensure your safety by putting on a helmet.
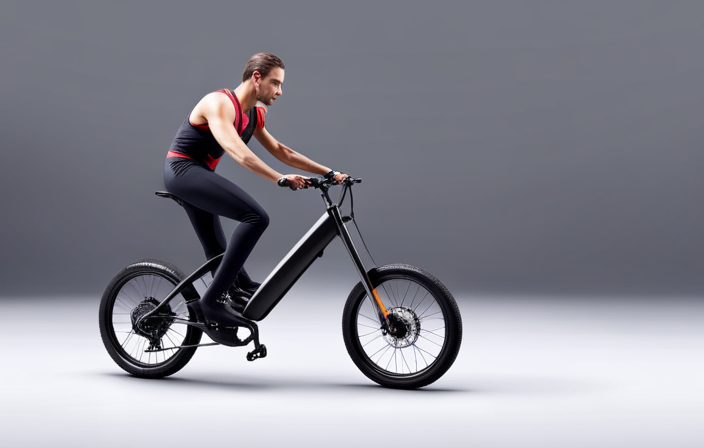
Put on a helmet for safety
Now that you’ve adjusted the seat and handlebars to your liking, it’s time to prioritize your safety by putting on a helmet. Helmets play a crucial role in protecting your head in case of any accidents or falls, reducing the risk of serious injuries.
The importance of wearing a helmet cannot be overstated. Head injuries can be life-threatening and can cause long-term damage to your brain. By wearing a helmet, you significantly decrease the chances of suffering from such injuries. It’s always better to be safe than sorry, especially when it comes to your well-being.
When riding an electric bike in San Francisco, it’s important to know and follow the helmet laws. In San Francisco, all cyclists, regardless of age, are required to wear a helmet while riding. This law is in place to ensure the safety of riders and minimize the risk of accidents.
So before you hop on your LYDT electric bike and embark on your adventure, make sure to grab a helmet and securely fasten it on your head. With your safety ensured, you can now enjoy your ride around San Francisco, taking in the beautiful sights and experiencing the city like never before.
Enjoy your ride around San Francisco
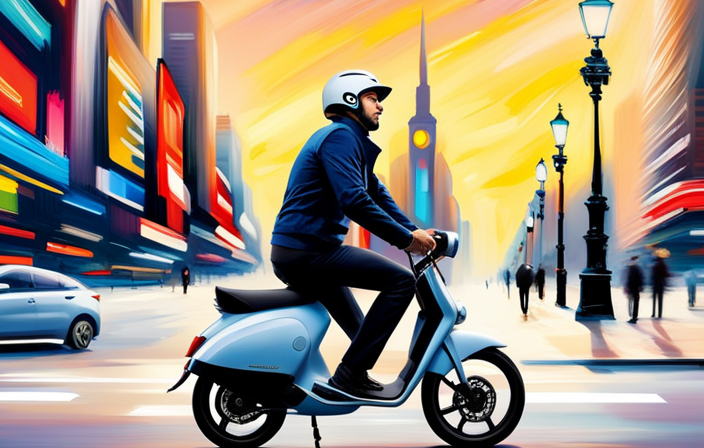
As you explore the vibrant streets of San Francisco, take in the breathtaking views and soak up the unique energy of the city. One of the best ways to truly experience the charm of this place is by renting a bike. Not only does it give you the freedom to explore at your own pace, but it also provides numerous benefits.
With bike rental, you can avoid the hassle of finding parking and save money on transportation. Plus, it’s a great way to stay active and enjoy the beautiful weather.
When it comes to popular bike routes in San Francisco, there are a few that stand out. The Golden Gate Park is a must-visit, with its winding paths and scenic landscapes. The Embarcadero is another favorite, offering stunning views of the bay and the iconic Bay Bridge. And of course, no trip to San Francisco is complete without a ride across the Golden Gate Bridge.
As you ride through the city, it’s important to remember to follow traffic rules and regulations. This ensures your safety and the safety of others around you. By obeying traffic signals, staying in designated bike lanes, and being aware of your surroundings, you can have a fun and safe biking experience in San Francisco.
So grab a bike, hit the road, and enjoy all that this incredible city has to offer.
Follow traffic rules and regulations
To ensure your safety while riding, remember to always obey traffic rules and regulations in San Francisco. It is crucial to follow these guidelines to protect yourself and others on the road. Here are some key points to keep in mind:
-
Obey traffic signals: Just like when driving a car, it is important to stop at red lights and yield at intersections. By following traffic signals, you can avoid accidents and maintain a smooth flow of traffic.
-
Share the road with other vehicles: As a cyclist, you are sharing the road with cars, buses, and pedestrians. Be mindful of your surroundings and always yield to other vehicles when necessary. Use hand signals to indicate your intentions and make sure you are visible to others.
-
Stay in designated bike lanes: San Francisco has designated bike lanes to ensure the safety of cyclists. Stick to these lanes whenever possible and avoid riding on sidewalks or in the wrong direction.
-
Be aware of your surroundings: Pay attention to your surroundings at all times. Look out for parked cars, opening doors, and pedestrians crossing the street. By staying alert, you can anticipate potential hazards and react accordingly.
-
Use lights and reflectors: When riding at night or in low visibility conditions, make sure your bike has proper lights and reflectors. This will increase your visibility and help other road users see you.
By adhering to these traffic rules and regulations, you can have a safe and enjoyable ride around San Francisco. Remember, it is essential to be a responsible cyclist and respect the rights of others on the road.
When you have finished your ride, remember to park the bike in a designated area.
Park the bike in a designated area when finished
When you’re done riding, make sure to park the bike in a designated area. It’s important to follow the parking regulations to ensure the safety and accessibility of the bikes for other riders. In San Francisco, there are specific designated parking areas where you can conveniently park your Lyft electric bike. These areas are marked with signage and are typically located near popular destinations, public transportation stops, or bike racks.
To give you a clearer picture, here is a table showing the designated parking areas for Lyft electric bikes in San Francisco:
| Area | Location |
|---|---|
| Downtown | Market St. |
| Mission District | Valencia St. |
| Fisherman’s Wharf | Jefferson St. |
| Golden Gate Park | John F. Kennedy Dr. |
By parking your bike in these designated areas, you are ensuring that it is parked safely and is readily available for the next rider. Additionally, it helps maintain order and prevents bikes from obstructing pedestrian walkways or causing any inconvenience.
Now that you know where to park, the next step is to end your ride in the app. This allows you to properly lock the bike and complete your rental.
End your ride in the app
Once you have parked the bike in the designated area, it’s important to properly end your ride in the app. This step ensures that you are no longer responsible for the bike and that you won’t be charged for any additional time.
To end your ride, simply open the LYDT app on your smartphone and select the ‘End Ride’ button. The app will prompt you to confirm the end of your ride, and once you do, you will receive a notification confirming that your ride has been successfully ended.
Ending your ride in the app is not only necessary for billing purposes, but it also allows LYDT to keep track of bike usage and availability. Additionally, if you encounter any issues with the bike during your ride, such as a flat tire or malfunctioning brakes, it is important to report these problems via the app. This way, LYDT can quickly address any maintenance or repair needs and ensure that the bikes are always in optimal condition for the next rider.
Now that you have successfully ended your ride and reported any issues, it’s time to pay for the rental through the app.
Pay for the rental through the app
Now you can easily pay for your rental through the app by selecting the ‘Payment’ option on the main menu. We understand that convenience is key, so we have made sure that paying for your Lydt electric bike rental is a seamless process. Once you have completed your ride, simply open the app and navigate to the ‘Payment’ section. Here, you will be able to view your rental fees and choose from a variety of payment methods.
To provide you with a clear overview of the available payment methods, take a look at the table below:
| Payment Method | Description |
|---|---|
| Credit Card | Securely pay for your rental using your credit card. |
| Apple Pay | Conveniently use your Apple Pay account for payment. |
| Google Pay | Easily pay for your rental using your Google Pay account. |
No matter which option you choose, rest assured that your payment information will be kept safe and secure. We value your trust and prioritize the protection of your personal data.
Once you have completed your payment, you can move on to the next step of your rental experience and rate your overall experience with Lydt electric bikes.
Rate your experience
After completing your payment, you can easily rate your experience with Lyft electric bikes. This feature allows you to provide feedback and share your thoughts about your rental experience. Rating your experience not only helps Lyft improve their service, but also gives other potential riders valuable insights.
Renting a Lyft electric bike offers numerous benefits. Firstly, it provides a convenient and eco-friendly way to explore the city. The electric bikes are equipped with a motor that assists with pedaling, making it easier to navigate hilly terrains. This means you can cover more ground without exerting excessive effort. Additionally, the bikes are equipped with a basket for carrying your belongings, making it a practical choice for running errands or commuting.
By rating your experience, you contribute to the overall improvement of the Lyft electric bike rental service. Your feedback helps Lyft identify areas for enhancement and ensures that future riders have a seamless experience. Whether it’s praising the ease of renting, the quality of the bikes, or suggesting improvements, your input matters.
Now that you’ve enjoyed your ride, it’s time to return the bike and explore more of the city on foot or by public transportation.
Return the bike and explore more of the city on foot or by public transportation
To explore more of the city, you can easily return the bike and continue your adventure on foot or by using public transportation. This gives you the flexibility to see nearby attractions without the hassle of finding parking or dealing with traffic.
Public transportation in the city has many advantages, including affordability, convenience, and environmental friendliness.
One of the advantages of using public transportation is cost-effectiveness. Instead of paying for gas, parking fees, and possibly tolls, you can save money by purchasing a day pass or using a reloadable transit card. Plus, public transportation often offers discounted fares for seniors, students, and children, making it an affordable option for everyone.
Public transportation also provides convenience. With a well-connected network of buses, trains, and light rail systems, you can easily reach popular tourist spots, shopping districts, and cultural attractions. The schedules are usually reliable, ensuring that you won’t waste time waiting for a ride.
Another advantage is the environmental impact. By choosing public transportation, you’re reducing your carbon footprint by decreasing the number of cars on the road. This helps to improve air quality and reduce congestion, making the city a more livable and sustainable place for both residents and visitors.
Frequently Asked Questions
Are there any age restrictions for renting a Lyft electric bike in San Francisco?
Yes, there are age restrictions for renting a Lyft electric bike in San Francisco. Riders must be at least 18 years old to rent and operate the bikes. Additionally, there is no maximum age limit.
As for rental duration, you can rent a Lyft electric bike for as long as you need, whether it’s a quick ride or an all-day adventure. Just make sure to return the bike within the designated rental period to avoid any additional fees.
What happens if I have an issue with the bike during my rental?
If I have an issue with the bike during my rental, I can rely on Lyft’s excellent customer support. They have a dedicated team available to assist me with any troubleshooting needs.
Whether it’s a technical glitch or a mechanical problem, I can reach out to them for prompt assistance. It’s comforting to know that I won’t be left stranded in case of any unexpected issues during my ride.
Can I rent a Lyft electric bike for multiple days?
Yes, you can rent a Lyft electric bike for multiple days. Lyft offers the option for longer rental durations, allowing you to enjoy their electric bikes for more than just a few hours.
With multiple day rentals, you can explore the city at your own pace and convenience. Simply book the bike for the desired duration through the Lyft app, and you’re all set to enjoy your extended ride.
Is there a time limit for how long I can rent a Lyft electric bike?
There is a time limit for how long you can rent a Lyft electric bike. The rental duration is typically capped at 24 hours. This means that you can use the bike for a maximum of one day before it needs to be returned.
It’s important to keep this time limit in mind when planning your rental and make sure to return the bike on time to avoid any additional charges or fees.
Are there any additional fees or charges associated with renting a Lyft electric bike?
Sure, there are a few additional fees and charges associated with renting a Lyft electric bike. You will be charged a base rental fee. There may be additional fees for exceeding the rental time limit or for any damages to the bike. It’s important to read the terms and conditions carefully to understand all the charges.
But don’t worry, the fees are reasonable and transparent, ensuring a hassle-free renting experience.
Conclusion
After following these simple steps, I successfully rented a Lyft electric bike in SF.
As I rode along the bustling streets, the wind gently brushed against my face, carrying the scent of freshly brewed coffee from nearby cafes.
The sun illuminated the vibrant city, casting a warm glow on the colorful murals that adorned the buildings.
With the ease of the Lyft app, I effortlessly explored the city’s hidden gems, feeling a sense of freedom and exhilaration with every pedal.
Renting a Lyft electric bike truly allowed me to experience the vibrant energy of San Francisco in a unique and unforgettable way.