I have always been a supporter of electric bikes, however, it can be quite frustrating when they experience mechanical issues.
Did you know that 75% of electric bike owners experience mechanical issues within the first year?
That’s why I’ve put together this detailed guide on how to repair an electric bike.
From basic maintenance to troubleshooting common problems, I’ll walk you through each step to get your bike up and running again.
So let’s dive in and get those wheels spinning!
Key Takeaways
- Regularly clean and lubricate the chain for smooth operation and to prevent wear
- Troubleshoot battery issues by checking connections, testing voltage, and inspecting for damage or swelling
- Learn how to change a flat tire and properly repair or replace the inner tube
- Understand how to adjust gears and derailleurs for optimal performance and smooth shifting
electric bike battery replacement kit
As an affiliate, we earn on qualifying purchases.
As an affiliate, we earn on qualifying purchases.
Basic Bike Maintenance
To keep your electric bike running smoothly, you’ll need to regularly perform basic maintenance tasks like cleaning and lubricating the chain. Start by troubleshooting battery issues. Check the battery connections to ensure they are secure and free from corrosion. If the battery still doesn’t work, it may need to be replaced.
Next, adjust the brakes and levers. Test the brakes to ensure they engage properly and adjust the tension if necessary. Check the brake pads for wear and replace if needed. Finally, make sure the levers are positioned comfortably for your reach and adjust them accordingly.
By regularly performing these maintenance tasks, you can ensure that your electric bike operates efficiently and safely.
Moving on to troubleshooting common issues, let’s address some other potential problems you may encounter.
Troubleshooting Common Issues
If you’re having problems with your e-bike, a simple solution might be to check the battery connection. Here’s a step-by-step guide on troubleshooting battery issues and diagnosing motor problems:
-
Check the battery connection: Make sure the battery is securely connected to the bike’s electrical system. Ensure that the connectors are clean and free from corrosion.
-
Test the battery voltage: Use a multimeter to measure the voltage of the battery. A fully charged battery should have a voltage of around 36-48 volts, depending on the model.
-
Inspect the battery pack: Look for any signs of damage or swelling on the battery pack. If you notice any abnormalities, it might be time to replace the battery.
-
Check the motor: If the battery is functioning properly, but the motor is not running, it could be a motor problem. Inspect the motor for any loose wires or damaged components.
By following these steps, you can troubleshoot common battery issues and diagnose motor problems with your e-bike.
Now, let’s move on to the next section about changing a flat tire.
Changing a Flat Tire
When it comes to changing a flat tire on an electric bike, there are three key steps to follow: removing the wheel, repairing or replacing the inner tube, and reinstalling the wheel correctly.
To begin, I’ll need to loosen the bolts or quick-release mechanism that secures the wheel to the frame, allowing me to easily remove it.
Once the wheel is off, I’ll need to locate the source of the puncture in the inner tube and either repair it with a patch or replace the entire tube if necessary.
Removing the wheel
You’ll need to carefully release the brakes before removing the wheel. First, locate the brake release lever near the brake caliper and squeeze it to open the brake pads.
Next, use a wrench to loosen the nuts or quick release lever on the axle. Once the nuts are loose, lift the bike off the ground and pull the wheel out of the dropouts.
To replace spokes or adjust the hub, you’ll need to remove the cassette or freewheel from the hub using a chain whip and cassette lockring tool. Inspect the spokes for damage and replace any broken ones by unscrewing the nipple at the rim and threading in a new spoke. Adjust the hub by tightening or loosening the cone nuts on each side.
Now that the wheel is removed, you can proceed to the next step of repairing or replacing the inner tube.
NEXT SUBTOPIC: ‘Repairing or Replacing the Inner Tube’
Repairing or replacing the inner tube
To fix a flat tire, start by deflating the tube completely before removing the wheel from the bike. Here are the steps to repair or replace the inner tube:
-
Locate the source of the puncture by listening for any hissing sounds or feeling for air escaping. Once found, mark the spot for easier identification later.
-
Use tire levers to carefully remove one side of the tire from the rim, exposing the inner tube. Take caution to avoid damaging the tube or rim during this process.
-
Remove the inner tube from the tire and inspect it for any visible damage or punctures. If a puncture is found, patch it with a tube repair kit or replace the entire tube if necessary.
By following these steps, you can troubleshoot battery issues and prevent future flat tires.
Now, let’s move on to reinstalling the wheel correctly.
Reinstalling the wheel correctly
Make sure you align the axle of the wheel with the dropouts on the frame before tightening the nuts or quick release skewer. To reinstall the wheel correctly, follow these steps:
- Lift the bike and position the wheel in the dropouts on the frame.
- Align the axle so that it sits flush against the dropouts.
- Ensure that the wheel is centered and straight, with equal clearance on both sides.
- Tighten the nuts or secure the quick release skewer, making sure they are snug but not overly tight.
- Check the spoke tension by squeezing pairs of adjacent spokes. They should have similar tension and feel firm but not overly tight.
- Spin the wheel and listen for any rubbing or scraping sounds, indicating misalignment.
- Make any necessary adjustments to the alignment before moving on to adjusting gears and derailleurs.
Now that the wheel is properly reinstalled, it’s time to move on to adjusting gears and derailleurs.
Adjusting Gears and Derailleurs
Start by checking if the gears on your electric bike are properly aligned with the derailleur. This is an important step in ensuring smooth gear shifting and optimal performance. Here are some derailleur adjustment tips and gear shifting techniques to help you get started.
First, shift your bike into the highest gear and inspect the alignment of the jockey wheels with the smallest cog. If they are not aligned, use the barrel adjuster to make necessary adjustments.
Next, shift through all the gears to make sure they engage smoothly. If there are any issues, adjust the cable tension accordingly. Remember to fine-tune the adjustments until you achieve seamless gear shifting.
Now, let’s move on to fixing electrical problems.
Transition: Once you have fine-tuned the gear shifting on your electric bike, it’s time to address any electrical problems you may encounter.
Fixing Electrical Problems
When it comes to fixing electrical problems on an electric bike, there are a few key points to keep in mind.
First, it’s important to check the connections and wiring to ensure everything is properly connected and functioning.
If there are any faulty components, they will need to be replaced with new ones.
Lastly, testing the battery and charger is crucial to ensure they are working correctly and providing the necessary power.
Checking connections and wiring
First, you should double-check if all the connections and wiring on your electric bike are secure. This is an essential step in troubleshooting any electrical issues. Start by inspecting the battery connections. Make sure they are tight and free from corrosion. Loose or corroded connections can cause poor performance or even complete failure of the electrical system. Next, examine the wiring harness. Look for any signs of damage, such as frayed wires or loose connectors. A damaged wiring harness can lead to short circuits or intermittent electrical problems. To assist you in your inspection, here is a table highlighting the key areas to check:
| Connections | Wiring Harness |
|---|---|
| Battery | Main controller |
| Motor | Throttle |
| Display | Brake sensors |
| Lights |
Once you have checked and ensured the integrity of the connections and wiring, you can move on to the next section on replacing faulty components, if necessary.
Replacing faulty components
To replace faulty components, you’ll want to begin by identifying the specific part that needs to be replaced. If you’re troubleshooting battery issues, it could be the battery itself or the wiring connected to it.
Start by disconnecting the battery from the bike and inspecting it for any visible damage or signs of wear. If you notice any frayed wires or loose connections, those will need to be replaced.
Carefully remove the faulty wiring, making sure to note the exact placement and connections. Then, install the new wiring by following the same path and connections as the old one.
Once the replacement is complete, you can move on to testing the battery and charger to ensure everything is functioning properly.
Testing the battery and charger
Now that you’ve replaced the faulty components, you’ll want to test the battery and charger to ensure they are functioning properly.
To test the battery, start by turning off the power to the electric bike. Connect the charger to the battery and plug it into a power outlet. The battery should start charging, indicated by a light on the charger. Pay attention to the charging time, which is usually mentioned in the user manual.
Once the battery is fully charged, disconnect the charger and turn on the power to the electric bike. Monitor the battery life as you ride, making note of any irregularities or sudden drops in power.
If the battery and charger are functioning correctly, you can proceed to the next section on replacing brake pads, ensuring a safe ride.
Replacing Brake Pads
Replacing brake pads is a relatively simple task that can greatly improve the performance of your electric bike.
To begin, gather the necessary tools: a set of replacement brake pads, a 5mm Allen wrench, and a pair of pliers.
Start by loosening the brake cable pinch bolt and removing the old brake pads.
Then, insert the new pads into the caliper, ensuring that they align with the rim.
Tighten the brake cable pinch bolt and check the brake lever for proper tension.
Next, inspect the brake calipers for any signs of wear or damage.
If necessary, adjust the brake calipers by loosening the mounting bolts and repositioning them to align with the rim.
Finally, test the brakes to ensure they engage smoothly and stop the bike effectively.
Now, let’s move on to servicing the motor.
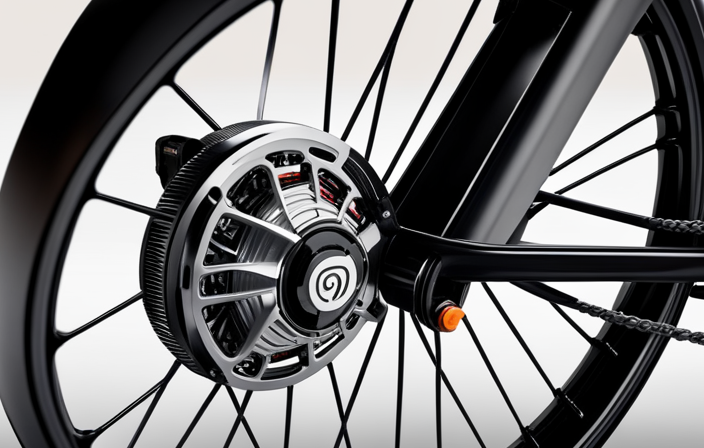
Servicing the Motor
When it comes to servicing the motor on an electric bike, there are a few key points to keep in mind.
First, it’s important to regularly clean and lubricate the motor to ensure optimal performance.
Next, it’s crucial to check for any loose or damaged parts that may need to be repaired or replaced.
Lastly, testing the motor performance is essential to ensure that it is running smoothly and efficiently.
Cleaning and lubricating the motor
To clean and lubricate the motor, make sure you have a soft cloth and some motor-specific lubricant. Follow these cleaning techniques and maintain a regular maintenance schedule to keep your electric bike running smoothly:
- Gently wipe the motor casing with a soft cloth to remove any dirt or debris.
- Apply a small amount of motor-specific lubricant to the moving parts of the motor, such as the bearings and gears.
- Use a clean cloth to evenly distribute the lubricant and remove any excess.
Regularly check the motor for signs of wear or damage, such as loose connections or cracks in the casing.
By regularly cleaning and lubricating your motor, you can prolong its lifespan and ensure optimal performance.
Now let’s move on to checking for any loose or damaged parts in the next section.
Checking for loose or damaged parts
Make sure you regularly inspect your motor for any loose connections or signs of damage. Begin by inspecting the frame of the motor. Look for any cracks or dents that could indicate structural damage.
Next, check all the screws and bolts on the motor. Tighten any loose screws to ensure a secure connection. Pay close attention to the areas where the motor connects to the bike frame, as these can often become loose over time.
Additionally, check for any frayed wires or loose electrical connections. These can cause performance issues and should be addressed immediately.
By inspecting the frame and tightening loose screws, you can ensure that your motor is in good working condition.
Now, let’s move on to testing the motor performance.
Testing motor performance
You can evaluate the performance of your motor by testing its speed and acceleration. To do this, follow these steps:
-
Find a flat and open stretch of road or pathway where you can safely test your electric bike.
-
Start by accelerating from a complete stop and note the time it takes for your bike to reach a certain speed, such as 20 miles per hour.
-
Measure the distance it takes for your bike to reach that speed, using a tape measure or GPS device.
By conducting these tests, you can determine if your motor is performing optimally or if it needs maintenance or repairs.
Once you have evaluated your motor’s performance, you can move on to upgrading and customizing your electric bike to enhance its capabilities and personalize your riding experience.
Upgrading and Customizing Your Electric Bike
When it comes to upgrading and customizing your electric bike, there are several key points to consider.
First, you can enhance your bike’s functionality and style by adding accessories like lights, racks, and fenders.
Next, you may want to install a different seat or handlebars to improve comfort and ergonomics.
Finally, upgrading the battery or motor can significantly enhance the performance and range of your electric bike.
In this discussion, I will guide you through each step, providing detailed instructions for a seamless customization process.
Adding accessories like lights, racks, and fenders
To enhance your electric bike, consider adding accessories such as lights, racks, and fenders. These accessories not only add functionality but also improve safety on the road. When adding accessories to your electric bike, it is important to take certain safety precautions. Make sure to follow the manufacturer’s instructions and use the appropriate tools. Here is a step-by-step guide on how to add these accessories to your electric bike:
| Accessory | Installation Steps | Safety Precautions |
|---|---|---|
| Lights | 1. Attach light brackets to the handlebars. 2. Connect wires to the battery pack. 3. Secure lights in place. | – Always wear gloves and safety goggles. – Ensure wires are properly insulated. |
| Racks | 1. Remove rear wheel. 2. Attach rack to the frame. 3. Reinstall the rear wheel. | – Use appropriate tools for installation. – Double-check the rack’s weight capacity. |
| Fenders | 1. Remove the front and rear wheels. 2. Attach fender brackets to the frame. 3. Reinstall the wheels. | – Be careful not to damage the bike’s frame. – Adjust fenders to avoid interference with wheels. |
Installing a different seat or handlebars
By swapping out the seat or handlebars, you can easily personalize your electric bike.
When it comes to seats, there are various options available to suit your comfort preferences. Start by removing the existing seat by loosening the bolts underneath.
Next, align the new seat with the seat post and tighten the bolts securely.
For handlebar customization, begin by loosening the stem bolts using an Allen wrench. Adjust the handlebars to your desired position, ensuring they are straight and aligned.
Finally, tighten the stem bolts back up to secure the handlebars in place.
Now that you’ve personalized your bike’s seat and handlebars, let’s move on to upgrading the battery or motor for enhanced performance.
Upgrading the battery or motor
It’s important to consider the compatibility of the new battery or motor before making any upgrades. Upgrading the battery capacity and improving motor efficiency can greatly enhance the performance of an electric bike. Here’s a step-by-step guide on how to do it:
-
Research and select the right battery: Look for a battery that has a higher capacity and is compatible with your bike’s voltage and connector type.
-
Remove the old battery: Disconnect the cables and carefully detach the old battery from its mount.
-
Install the new battery: Attach the new battery securely to the mount and connect the cables properly.
-
Upgrade the motor: Research and select a motor that offers better efficiency and power output.
-
Remove the old motor: Disconnect the cables and remove the old motor from its housing.
-
Install the new motor: Carefully install the new motor, making sure all connections are secure and properly aligned.
By upgrading the battery and motor, you can significantly improve the performance of your electric bike.
Now, let’s move on to some safety tips for riding an electric bike.
Safety Tips for Riding an Electric Bike
Make sure you wear a helmet when riding your electric bike to ensure your safety. When it comes to electric bike maintenance, one important aspect is choosing the right helmet.
Follow these steps to select a helmet that provides optimal protection:
- Measure your head circumference using a flexible tape measure.
- Choose a helmet that fits snugly but comfortably on your head.
- Look for a helmet that meets safety standards, such as CPSC or ASTM.
- Consider additional features like ventilation and adjustable straps for added comfort.
- Try on different helmets to find the one that suits you best.
By wearing a properly fitting helmet, you can minimize the risk of head injuries while enjoying your electric bike.
Now that you know how to choose a helmet, let’s explore resources for further assistance in maintaining and repairing your electric bike.
Resources for Further Assistance
If you need further assistance with your electric bike, there are various resources available to help you.
One option is to attend bike repair workshops. These workshops are specifically designed to teach you how to fix common issues with your electric bike. They provide hands-on training and expert guidance, ensuring that you have the knowledge and skills to troubleshoot and repair your bike.
Another option is to join online forums dedicated to electric bike enthusiasts. These forums are a great place to ask questions, share experiences, and seek advice from experienced riders and mechanics. You can find valuable tips and step-by-step guides on how to repair your electric bike, along with recommendations for tools and resources.
Utilizing these resources will empower you to confidently tackle any repair challenges you may encounter with your electric bike.
Frequently Asked Questions
What are the benefits of using an electric bike over a regular bike?
The advantages of using an electric bike over a regular bike are numerous. They include faster speeds, easier uphill climbs, reduced exertion, longer range, and the ability to switch to manual pedaling when desired. However, drawbacks include higher cost and reliance on battery power.
Can I ride an electric bike in the rain? Are they waterproof?
Yes, you can ride an electric bike in the rain, but it’s important to take precautions to protect it from water damage. To waterproof your electric bike, follow these steps: seal all electrical connections, cover the battery, and use fenders to prevent water splashes.
How often should I charge the battery on my electric bike?
I charge my electric bike battery based on its optimal charging frequency. This typically ranges from once every few days to once a week, depending on my usage. It’s important to follow the manufacturer’s recommendations for the best battery performance and lifespan.
Can I use a regular bike pump to inflate the tires on my electric bike?
Yes, you can use a regular bike pump to inflate the tires on your electric bike. To maintain proper electric bike tire pressure, follow these steps: 1) Attach the pump nozzle to the valve. 2) Pump air until the desired pressure is reached. 3) Check for any leaks or damage.
Are there any speed restrictions or regulations for riding an electric bike on public roads?
As a bike enthusiast, I’m here to shed light on the speed limits and safety regulations for riding electric bikes on public roads. It’s crucial to adhere to local laws and restrictions to ensure a safe and enjoyable ride.
Conclusion
To wrap things up, repairing an electric bike may seem daunting at first, but with the right knowledge and tools, it can be a rewarding experience.
Remember to always prioritize safety and follow the step-by-step instructions provided.
Whether you’re troubleshooting common issues, changing a flat tire, or servicing the motor, taking care of your electric bike will ensure its longevity.
So, hop on your ‘e-bike time machine’ and enjoy the ride knowing that you can handle any repairs that come your way.
Happy biking!