As someone passionate about cycling, I deeply appreciate the liberty and ease it offers. However, akin to all mechanical devices, bicycles are subject to damage and deterioration over time, necessitating occasional repairs to maintain their optimal performance. Acquiring bike repair skills is not just practical; it also has the potential to be economically beneficial over time.
In this article, I will take you through the step-by-step process of repairing your bike, from diagnosing the problem to maintaining your bike for optimal performance.
Before diving into the repair process, it is essential to gather the right tools. A well-equipped bike repair kit should include a set of Allen wrenches, screwdrivers, pliers, a tire pump, and a chain tool, among others. Once you have all the necessary tools, the next step is to diagnose the problem.
Common bike problems include flat tires, squeaky brakes, and chain derailment. By identifying the issue, you can determine the appropriate repair technique and save yourself time and effort. With the right tools and knowledge, repairing your bike can be a straightforward process.
Key Takeaways
- Diagnosing the problem is essential before beginning any repairs.
- Tool organization and maintenance are crucial for repairing a bicycle.
- Regular cleaning and lubrication are essential for bike maintenance.
- Professional help may be necessary for unusual noises or vibrations, difficulty shifting gears, and frequent flat tires.
Gather the Right Tools
Before beginning any repairs, it’s essential to gather all the necessary tools. Tool organization is crucial to keeping track of all the tools needed for repairing a bicycle.
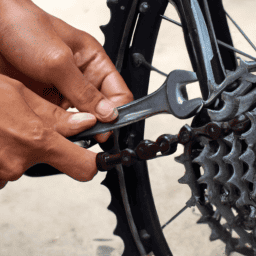
It’s essential to have a tool kit that contains all the necessary tools for any repair. This includes a set of Allen wrenches, tire levers, a chain tool, a spoke wrench, a screwdriver, and a set of pliers.
Tool maintenance is also an important aspect of repairing a bicycle. Before starting any repairs, it’s essential to check that all tools are in good working condition. Ensure that the screwdriver has a stable handle, the pliers are not rusted, and the Allen wrenches are not bent.
Having clean and well-maintained tools will make the repair process much smoother and quicker. Now, let’s move on to diagnosing the problem.
Diagnose the Problem
Now that I’ve gathered my tools, the next step in repairing my bicycle is to diagnose the problem. This involves inspecting the bike carefully and identifying the issue.
To begin, I’ll need to look closely at the various components of the bike to determine what may be causing the problem. Once I’ve identified the issue, I can begin to take the necessary steps to fix it.
Inspecting the Bike
First things first, take a closer look at your ride and give it a once-over to ensure everything is in tip-top shape.
Start by checking the tires. Make sure they’re properly inflated and examining them for any signs of wear and tear. Check for any punctures or cuts in the rubber and ensure the tread is still in good condition. A faulty tire can lead to a blowout and cause serious injury, so it’s crucial to catch any issues early on.
Next, examine the brakes. Give them a squeeze and make sure they’re responding properly. Check the brake pads for any signs of wear and tear and ensure they’re not rubbing against the rim. Make sure the cables are properly connected and not frayed. Faulty brakes can lead to accidents, so it’s important to catch any issues before hitting the road.
Once you’ve given your bike a thorough inspection, you can move on to identifying the issue and making any necessary repairs.
Identifying the Issue
Ready to hit the road? Let’s identify any potential issues with your ride!
As you inspect your bike, be on the lookout for common issues such as loose or damaged parts, worn out tires, or misaligned brakes. You can also check for any signs of rust or corrosion on the frame or other metal components.
If you notice any issues, don’t panic! The good news is that most bike problems can be easily fixed with a bit of troubleshooting. For example, if your brakes are squeaky or not working properly, you may need to adjust the brake pads or replace them altogether.
If your gears are skipping or not shifting smoothly, you may need to adjust the derailleur or replace the chain. By identifying the issue, you can then move on to the next step of repairing your bike.
Let’s get started!
Repair the Bike
Get your hands dirty and start examining the bike for any visible damage or loose parts that might need fixing. If you’ve identified the issue, it’s time to repair the bike.
Start by replacing any damaged parts with new ones. You can easily find replacement parts online or at your local bike shop. Make sure to get the correct size and type of parts that match your bike’s specifications.
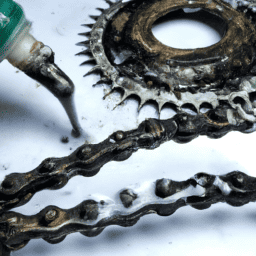
After replacing any damaged parts, it’s important to lubricate the bike’s moving parts to ensure smooth operation. Lubrication techniques vary depending on the type of bike and its components. For example, you should use a special chain lubricant for your bike’s chain and a different lubricant for its gears.
Make sure to apply the lubricant evenly and wipe off any excess. With proper lubrication, your bike will remain in top condition and last longer.
As you complete the repairs, remember to maintain the bike regularly to avoid any future issues.
Maintain the Bike
To keep your ride running smoothly, you’ll want to regularly maintain your bike by cleaning it after each ride and checking the tire pressure before hitting the road. Regular cleaning and lubrication are essential to keeping your bike in good condition. Dirt and grime can build up on the bike causing rust or damage to the components. By wiping down the bike with a soft cloth and using a degreaser to clean the chain and gears, you can help prevent damage and ensure a longer lifespan for your bike.
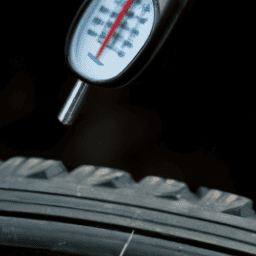
In addition to cleaning, checking the tire pressure and brake pads are also important aspects of maintaining your bike. Low tire pressure can cause difficulty in pedaling and make the ride less efficient. Using a pressure gauge, check the tire pressure and inflate them to the recommended level listed on the tire. The brake pads should also be checked for wear and tear. If they are worn down, they should be replaced immediately to ensure safe stopping. By regularly maintaining your bike, you can avoid costly repairs and ensure a smoother ride. However, there are times when professional help may be necessary, and it’s important to know when to seek it.
Know When to Seek Professional Help
Sometimes, it can be frustrating when our beloved bike isn’t working as it should. However, it’s important to recognize when we need to seek professional help. Here are some signs and symptoms that indicate it’s time to take our bike to the shop:
- Unusual noises or vibrations when riding
- Difficulty shifting gears
- Frequent flat tires
While we may be tempted to attempt a DIY repair, it’s important to weigh the risks and benefits. DIY repairs can be cost-effective, but if done incorrectly, they can cause even more damage to the bike and potentially be dangerous for the rider.
It’s always better to seek professional help if we’re not confident in our repair skills or if the issue appears to be more complex. Remember, safety should always be our top priority when it comes to bike repairs.
Frequently Asked Questions
How often should I replace my bike chain?
When it comes to bike chains, I always keep an eye out for signs of wear and tear. Chain maintenance tips include keeping it lubricated, cleaning it regularly, and replacing it every 2,000-3,000 miles. Look for elongation or skipping gears as signs of a worn out bike chain.
What is the proper way to adjust my bike’s brakes?
To adjust my bike’s brakes, I need to know common brake issues and fixes, brake adjustment techniques, and the tools needed for brake adjustments. Best practices for brake maintenance include regularly checking and cleaning brake pads and cables.
Is it necessary to replace my bike’s tires after a certain amount of time?
I’ve researched and discovered that bike tire lifespan depends on usage, but signs of wear and tear like cracks or thinning treads means it’s time to replace them. Regular checks can increase safety and longevity.
How do I know if my bike’s frame is damaged and needs to be replaced?
To determine if my bike’s frame is damaged, I check for cracks, dents, or bends. If found, I seek professional help for repairs or replacement. Ignoring bike frame damage can lead to safety hazards.
Can I repair a bent bike wheel or do I need to replace it entirely?
When a bike wheel is bent, it can often be repaired instead of replaced. Options include truing the wheel or replacing individual spokes. To prevent damage, avoid hitting curbs and regularly check for loose spokes.
Conclusion
So there you have it, folks, a step-by-step guide on how to repair your bicycle. Remember to always start by gathering the right tools for the job.
Next, diagnose the problem before proceeding to repair the bike. Don’t forget to maintain your bike regularly to prevent further issues from arising.
But what if you encounter a problem that you can’t seem to fix? When is it time to seek professional help? It’s important to know your limitations and not attempt repairs that are beyond your skill level. Don’t risk causing more damage to your bike or injuring yourself.
In conclusion, repairing your bicycle can be a rewarding experience, but it’s important to take the necessary precautions and know when to seek professional help. With the right tools and knowledge, you can keep your bike in top condition and enjoy smooth rides for years to come. Happy cycling!
