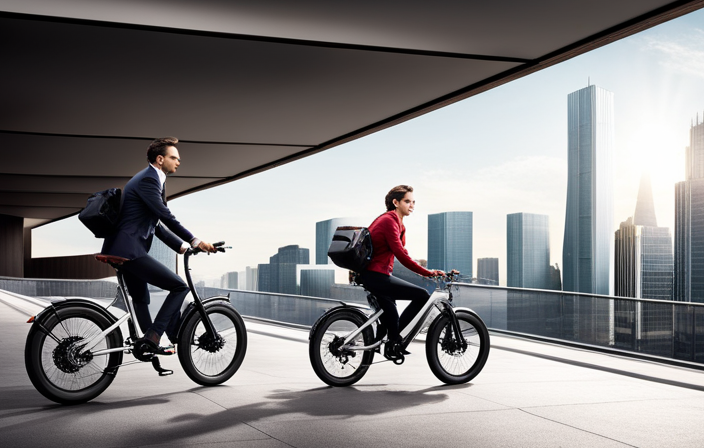

I’ve always enjoyed the sensation of smoothly cruising along the street on my Green Machine electric bike. However, when my chain snapped, it was a harsh reminder of reality. Fortunately, I was able to fix it on my own, and now I want to pass on that knowledge to you.
In this article, I’ll walk you through the steps, from gathering the necessary tools to performing regular maintenance on the chain. So let’s dive in and get your electric bike back to its smooth and functional state in no time!
Key Takeaways
- Apply high-quality lubricant and regularly maintain the chain to ensure optimal performance and prolong its lifespan.
- Inspect the chain for skipping, slipping, unusual noise, wear, or rust, and ensure proper tension and alignment with the gears.
- Clean the chain and the bike regularly using appropriate cleaning supplies and tools to prevent rust and dirt buildup.
- If faced with complex issues or severe damage, seek professional help from a qualified electric bike mechanic to prevent further damage and prioritize safety.

Schwinn Sporterra RX Gravel Bike, 700c Mens and Womens Bike, 14-Speed Drop Bar Gravel Bicycle, Mechanical Disc Brakes, Rigid Fork, Aerodynamic Riding Position, Quick Release Seat Post, Adult Bicycle
GRAVEL BICYCLE: Enjoy next level riding with the Sporterra RX by Schwinn. With 700c wheels, this mens and...
As an affiliate, we earn on qualifying purchases.
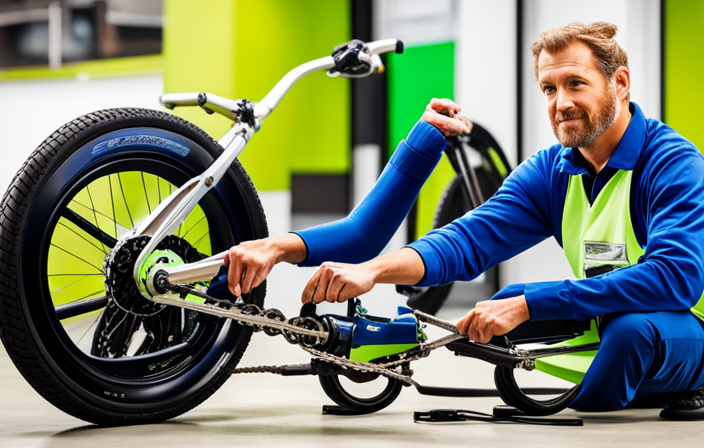
Gather the necessary tools
Before starting the repair, make sure you have all the necessary tools. To successfully repair the chain on your Green Machine electric bike, you will need a few specific tools.
First, you will need a chain breaker tool, which allows you to remove and replace the chain links. This tool is essential for repairing a broken chain. Additionally, you will need a pair of pliers to help with the removal and installation process. It is also recommended to have a small screwdriver to assist with any adjustments needed.
Once you have identified the tools, you can proceed to follow the repair instructions.
Now let’s move on to the next step and identify the broken section of the chain.

Happy Travel Bike Storage Shed Tent,Outdoor Portable Bicycle Storage Sheds with 210D Oxford Fabric PU4000 Waterproof for 2/3/4/6/8 Bikes,Bike Covers Shelter for Motorcycle,Garden Tools,Toys,Lawn Mower
【Superior Protection】:The bike tent outdoor storage waterproof is made of 210D Oxford cloth coated with silver and the...
As an affiliate, we earn on qualifying purchases.
Identify the broken section of the chain
First, you’ll want to find the damaged part of the chain. To troubleshoot common chain problems in a regular bike, follow these steps:
- Look for any twisted or bent links.
- Check for tight links that don’t move freely.
- Examine the chain for rust or excessive wear.
- Inspect the chain for any broken or missing pins.
Identifying the broken section is crucial before proceeding with the repair. A damaged chain can lead to poor performance and potential accidents.
Once you have located the problem area, you can move on to the next step of loosening the tension on the chain. This will ensure a smoother repair process and prevent any further damage to the chain or surrounding components.

Suncast 138 Cu Ft Horizontal Outdoor Storage Shed, 57.5"x79.75"x52" Glidetop Outdoor Shed with Sliding Lid, Resin Storage Sheds with Floor for Bikes, Motorcycles, & Lawn Mower, Made in The USA
DURABLE, WEATHERPROOF UTILITY SHED. Built with multi-wall resin panels that withstand rain, snow, & UV rays. This resin...
As an affiliate, we earn on qualifying purchases.
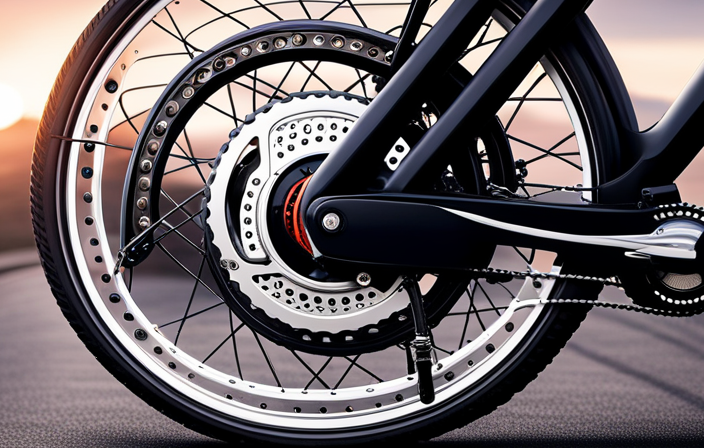
Loosen the tension on the chain
To make the repair process smoother and prevent additional damage, you should loosen the tension on the chain.
First, locate the chain tensioner on the rear wheel axle. Using a 15mm wrench, rotate the tensioner counterclockwise to decrease the tension. Keep an eye on the chain as you adjust it, ensuring it doesn’t become too loose or tight. Proper chain tension is crucial to prevent chain slippage and maximize power transfer.
Once you’ve achieved the desired tension, tighten the axle nuts to secure the adjustment.
Now that the tension is loosened, we can move on to the next step, which is to remove the broken link. This will allow us to repair the chain and restore its functionality.

PZT Upgraded Bike Tent with Rain Cover, Portable Outdoor Storage Shed for 2 Bikes, 210D Oxford Fabric PU4000 Waterproof, Bike Shed/Bike Cover for Motorcycles, Garden Tools, Lawn Mower
Innovative Upgrade: A rain cover is added on the top of this bike tent/bike shed to enhance wind...
As an affiliate, we earn on qualifying purchases.
Remove the broken link
Now that the tension is loosened, we can move on to the next step, which involves removing the broken link to restore the chain’s functionality.
To successfully remove the broken link, follow these steps:
- Gather the necessary tools: chain tool and replacement link.
- Position the chain tool around the chain, with the broken link aligned with the tool’s driving pin.
- Ensure that the chain tool is securely tightened.
- Align the driving pin with the rivet in the broken link.
- Slowly turn the handle of the chain tool clockwise to push the rivet out of the link.
- Take care not to apply excessive force to prevent damage to the chain.
- Continue turning until the rivet is fully pushed out.
- Carefully separate the broken link from the chain, ensuring that the other links remain intact.
With the broken link removed, we can now move on to preparing the replacement link for installation.
Prepare the replacement link
Once the broken link has been removed, we can proceed to getting the replacement link ready.
To replace the chain on a Green Machine electric bike, it is crucial to follow the correct chain repair techniques.
Begin by selecting a replacement link that matches the size and type of your current chain. Ensure that the new link is clean and free from any defects or damage.
Next, lubricate the replacement link using a high-quality chain lubricant. This will help reduce friction and extend the lifespan of the chain.
Attach the replacement link
After selecting and lubricating the replacement link, you can now attach it to the rest of the chain. This step is crucial in repairing your chain and ensuring smooth operation of your Green Machine electric bike. To guide you through the process, refer to the table below for a clear understanding of the steps involved in attaching the replacement link.
| Step | Instructions |
|---|---|
| 1 | Position the replacement link on the chain where the broken link was removed. |
| 2 | Align the pins of the replacement link with the inner and outer plates of the chain. |
| 3 | Use a chain tool to press the pins into the chain until they are fully inserted and flush with the outer plates. |
Adjust the tension on the chain
To ensure optimal performance, you’ll need to make sure the tension on your chain is properly adjusted. Incorrect chain tension can lead to poor shifting, increased wear on the drivetrain, and decreased efficiency. Follow these chain tensioning techniques to get it right:
- Start by locating the rear derailleur and the tension adjustment bolt.
- Loosen the bolt slightly to allow for adjustment.
- Use your hand or a chain tensioning tool to apply pressure to the chain, ensuring it has the appropriate tension.
- While maintaining pressure, tighten the adjustment bolt until the chain is properly tensioned.
Finally, check the tension by pushing down on the chain. It should have a slight amount of play but not be overly loose.
By adjusting the chain tension using these techniques, you’ll ensure smooth and efficient operation.
Now, let’s proceed to test the chain for smooth operation without skipping a beat.
Test the chain for smooth operation
Now, it’s time to see how smoothly the chain operates.
To test the chain, you will need some testing equipment, such as a bike stand or a friend to hold the bike steady.
Start by shifting the bike into the highest gear. Next, pedal the bike slowly while observing the chain’s movement. A smooth chain should move freely without any skipping or jumping.
If you notice any issues, such as a stiff or noisy chain, there are a few troubleshooting tips you can try. First, check for any dirt or debris that may be causing friction. Clean the chain thoroughly and apply lubricant if necessary.
Additionally, make sure that the chain tension is properly adjusted.
Lubricate the chain
After testing the chain for smooth operation, it is crucial to perform regular chain maintenance to ensure optimal performance and prolong the lifespan of your green machine electric bike.
One important aspect of chain maintenance is lubricating the chain. By keeping the chain properly lubricated, you can minimize friction, reduce wear and tear, and improve overall efficiency.
The benefits of chain lubrication include smoother shifting, quieter operation, and increased power transfer. To lubricate the chain, start by applying a high-quality bicycle chain lubricant to each link of the chain. Make sure to cover the entire chain evenly and avoid over-lubricating.
After applying the lubricant, allow it to penetrate for a few minutes before wiping off any excess. Proper chain lubrication should be done regularly to maintain optimal performance.
Now, let’s move on to the next section and check for any other issues.
Check for any other issues
Let’s now inspect for any additional problems with your bicycle. When it comes to troubleshooting your bike, it’s important to be thorough.
Here are some common chain problems to look out for:
- Chain skipping or slipping: This occurs when the chain doesn’t engage properly with the gears, causing it to jump or skip.
- Chain noise: If your chain is making unusual sounds, such as rattling or grinding, it may need some adjustments.
- Chain wear: Over time, the chain can stretch and wear out. Check for signs of elongation or rust.
- Chain tension: A loose or tight chain can affect your bike’s performance. Ensure the chain has the correct tension.
- Chain alignment: Misalignment can cause poor shifting and chain wear. Make sure the chain is properly aligned with the gears.
Now that we’ve identified any additional problems with your bike, let’s move on to cleaning the chain and bike.
Clean the chain and bike
Before we begin, it’s important to gather the necessary cleaning supplies for the chain and bike. For cleaning the chain, we will need a chain cleaning tool, a degreaser, a brush, and a clean rag. To clean the bike, we will need a bucket of soapy water, a sponge, a brush, and a hose for rinsing.
Now, let’s dive into the cleaning process. Start by placing the chain cleaning tool on the chain, ensuring it fits securely. Add the degreaser to the tool’s reservoir. Rotate the pedals backward, allowing the brushes inside the tool to scrub the chain thoroughly. Repeat this process a few times, then remove the tool.
Next, dip the brush in the soapy water and scrub the bike frame, wheels, and other components. Pay extra attention to any dirt or grime buildup. Rinse the bike with the hose, making sure to remove all the soap residue. Finally, use a clean rag to dry the chain and bike, leaving them spotless and ready for the next ride.
Perform regular maintenance on the chain
To maintain your chain’s performance, it’s crucial to regularly perform maintenance tasks.
Regular chain maintenance is important because it helps prolong the life of your chain and ensures smooth and efficient operation of your bike.
One common mistake to avoid during chain maintenance is neglecting to clean the chain before lubricating it. Cleaning the chain removes dirt and grime that can cause friction and wear.
Another mistake to avoid is over-lubricating the chain. Applying too much lubricant can attract more dirt and create a messy buildup. It’s important to apply a moderate amount of lubricant and wipe off any excess.
Avoid common chain issues
Make sure you regularly inspect and replace worn-out components to avoid common issues with your chain. This will help prevent chain rust and troubleshoot chain skipping problems.
To prevent chain rust, clean and lubricate your chain regularly. Use a degreaser to remove dirt and grime, then apply a high-quality chain lube to protect against rust.
Additionally, check for any signs of wear on your chain, such as stretched links or damaged rollers. If you notice any issues, it’s important to replace the worn-out components promptly to avoid further damage.
Troubleshooting chain skipping involves checking the tension and alignment of your chain, as well as inspecting the cassette and derailleur for any damage.
By following these maintenance tips, you can keep your chain in optimal condition and avoid common issues.
If you’re unsure about any of these steps, it’s always best to seek professional help.
Seek professional help if needed
Now that you know how to avoid common chain issues on your Green Machine electric bike, it’s important to recognize when it’s time to seek professional help.
While many chain problems can be solved with simple troubleshooting, there may be instances where the expertise of a professional is required.
If you encounter complex issues such as a severely damaged chain, misalignment of gears, or excessive wear and tear, it is best to consult a qualified electric bike mechanic. They possess the knowledge, tools, and experience to diagnose and address these problems effectively.
Additionally, seeking professional advice ensures that you won’t unintentionally cause further damage to your bike. Remember, safety should always be a top priority!
By seeking professional help when needed, you can ensure that your electric bike remains in optimal condition for your rides.
Now, let’s move on to the next section and learn how to enjoy your smooth and functional electric bike!
Enjoy your smooth and functional electric bike!
Once you’ve ensured your electric bike is running smoothly, it’s time to fully enjoy the ride. To keep your bike in top shape, here are some maintenance tips and troubleshooting common problems.
Regularly clean your bike, especially the chain, with a mild detergent and water. Lubricate the chain with bike-specific lubricant to reduce friction and prevent rust.
Check the tire pressure and inflate them to the recommended level. Inspect the brakes for any signs of wear and adjust them if necessary.
Keep an eye on the battery level and charge it regularly. If you encounter any issues, such as a sudden loss of power or strange noises, consult the user manual or contact the manufacturer for assistance.
With proper maintenance and troubleshooting, you can enjoy countless smooth and trouble-free rides on your electric bike.
Frequently Asked Questions
How do I know if my chain is broken?
To determine if your chain is broken, look for signs of a damaged chain such as a loose or sagging chain, skipping gears, or a noisy and rough ride. To fix a broken chain link, you will need a chain tool and a replacement link.
Is it necessary to replace the entire chain or just the broken section?
To determine whether to replace the entire chain or just the broken section, consider the extent of the damage and the cost of replacement. Repairing the chain can be cost effective if the damage is minimal and localized.
What type of replacement link should I use?
For chain repair on electric bikes like the Green Machine, using a quick link has both pros and cons. It offers convenience but may not be as durable. To choose the right replacement link size, measure the existing chain and consult the bike’s manual.
How do I properly adjust the tension on the chain?
To properly adjust the tension on the chain, start by locating the chain tensioner on your bike. Use a wrench to loosen the tensioner bolts and adjust the tension according to the manufacturer’s instructions. Check for proper chain tension and troubleshoot any issues that arise.
How often should I perform regular maintenance on the chain?
Regular maintenance on the chain is crucial to prevent wear and ensure optimal performance. To prevent chain wear, lubricate the chain regularly, ensuring each link is properly coated. This will extend its lifespan and keep your electric bike running smoothly.
Conclusion
Repairing the chain on my Green Machine electric bike was a challenging but rewarding task. Gathering the necessary tools and identifying the broken section of the chain allowed me to tackle the problem head-on.
By loosening the tension, removing the broken link, and preparing the replacement link, I ensured a smooth and functional chain.
Performing regular maintenance and avoiding common chain issues will keep my electric bike running smoothly. If needed, seeking professional help is always an option.
Now, I can enjoy the ride with the satisfaction of a job well done.