
Hello all, it’s your friendly neighborhood electric bike repair expert here!
I’m here to teach you how to fix any issue you might have with your electric bike. From broken brakes to flat tires, I’ve got all the tips and tricks of the trade for getting your ride back on the road in no time.
The best part about this process is that anyone can do it – no matter their experience or skill level when it comes to repairs. With a few simple tools and some guidance from yours truly, you’ll be able to get your e-bike up and running again as quickly and efficiently as possible – so let’s get started!
Identifying The Problem
At first glance, it may seem intimidating to repair an electric bike. However, with the right tools and knowledge, anyone can do it! As a certified electric bike repair technician, I’m here to help you understand what is needed for such a task.
The first step in any successful repair job is identifying the issue at hand by examining symptoms and diagnosing faults. This helps narrow down potential problems so that you can more quickly locate the source of the issue.
For example, if your electric bike stops working suddenly while riding, this could be caused by either a dead battery or something else entirely. By looking into these possibilities further, you’ll be able to determine which one it actually is – saving yourself time and hassle in the long run.
To ensure a successful fix, it’s important to have all of the necessary parts on hand before beginning work. Without them, the process will take longer than expected and might even result in failure due to incompatible parts being used. Gathering up everything ahead of time guarantees that no surprises come up during repairs.
With all materials ready to go, let’s move onto gathering the necessary tools and materials for our next section!
Gather The Necessary Tools And Materials
I always make sure I’m properly prepared before I start a repair job on an electric bike.
I bring a variety of tools including wrenches, screwdrivers, Allen keys, and a soldering iron.
When it comes to materials I make sure I have spare parts, grease, electrical tape, a voltage meter, wire cutters, pliers, and safety glasses.
Last but not least, I never forget to put on my gloves, helmet, and safety glasses for protection.
Tools
I’m gearing up for a repair job on an electric bike and it’s important that I have the right tools and materials at my disposal.
Before starting, I always do a supply check to ensure I have everything needed for the job. My go-to toolkit includes cable cutters, screwdrivers, pliers, wrenches, and soldering iron — plus some spare parts like batteries, nuts & bolts, switches, etc.
After ensuring all of these items are accounted for, I begin with a mechanical inspection of the bike itself to further assess what needs fixing. This helps me identify any additional supplies or replacements necessary in order to complete the job properly.
From there I can start taking apart the components required to get into place so they can be worked on accordingly.
No matter how big or small the project is though, having the right tools makes all of difference!
Materials
When it comes to electric bike repair, choosing the right parts is just as important as having the right tools.
I’m always sure to select components from reliable brands that are well-suited for my project to ensure a successful outcome. This includes batteries, switches, cords and cables, nuts & bolts — you name it!
Once I’ve got all of these materials gathered up, then I can begin assembling them into place with ease.
With everything in its proper location, I’m ready to get started on fixing up this bike good as new!
Removing The Battery
Working on an electric bike can be rewarding, as it allows you to help others get around with ease. Removing the battery is no exception – and when done correctly, can make a huge difference in terms of overall performance.
First things first, always disconnect any power sources before attempting to remove the battery from an electric bike. This includes both unplugging from electrical outlets or removing the cord from its storage compartment.
Once this is complete, locate the clamps that secure the battery to its mounting bracket. Make sure they are tight enough since loose connections can cause significant damage to your electric bike over time!
When it comes to testing and storing batteries for electric bikes, there are several important considerations such as:
- Checking voltage levels regularly
- Avoiding exposure to extreme temperatures
- Keeping terminals clean and dry
- Not leaving unused batteries plugged in for extended periods of time
Following these steps will ensure your battery remains healthy and continues to perform optimally when needed.
With safety measures taken care of and all necessary precautions observed, we’re now ready to move onto replacing brake cables on our electric bike – stay tuned!
Replacing Brake Cables
Hey there, let’s talk about replacing brake cables on an electric bike.
First, we need to identify which cables need replacing.
Then, we’ll have to remove the old cables and replace them with new ones.
It’s important to be careful while doing this, so I’d recommend taking your time.
Let’s get to work!
Identifying Brake Cables
When replacing brake cables on an electric bike, it’s important to first identify which type of cable you are dealing with. Checking the wear and inspecting for damage can help make sure that the replacement is a success.
I always check the ends of each cable – if there’s any fraying or corrosion then this may indicate that further checking is necessary. Taking time to properly inspect the condition of your bike’s brake cables will pay off in ensuring their longevity and the safety of those riding!
Additionally, looking for signs of abrasion or kinks around bends should also be checked before jumping straight into making repairs. So don’t forget to take time to check out what kind of cables you have and look for signs of wear and tear before attempting a repair job – it could save you from bigger problems down the road!
Removing And Replacing Brake Cables
Once you’ve identified and inspected the brake cables, it’s time to get started on removing and replacing them.
Depending on your bike, this may involve adjusting tension in certain components or installing levers in order to access the brakes.
Generally speaking, most electric bikes have very similar systems when it comes to brake cable replacement so I’m sure you’ll be able to handle it!
If you’re not comfortable doing the job yourself then don’t hesitate to contact a local bike shop – they can help identify any issues and advise on what parts are best for your specific model of electric bike.
With their expertise, they should be able to replace the cables quickly and avoid any unnecessary costs that could arise from mistakes being made by an inexperienced mechanic.
I always recommend taking some extra precautions when dealing with such delicate machinery as electric bikes; if done properly, replacing brake cables can extend their life expectancy significantly while keeping riders safe at all times.
So take care and keep those wheels spinning smoothly!
Tightening Handlebars And Seat Posts
Now that we’ve replaced the brake cables, it’s time to ensure your handlebar and seat post are securely tightened. It’s important that you check these components often during regular maintenance as they can loosen over time from riding or even just normal wear-and-tear.
The following table will provide a helpful guide for installing clamps and adjusting tensions on both parts:
| Handlebars | Seat Post | |
|---|---|---|
| Tools Needed | Hex Wrench/Screwdriver | Allen Key/Flathead Screwdriver |
| Installation Clamp Type | Quick Release (QR)| Threadless Stem | Standard Bolt | QR Lever |
| Tensioning Recommendations | Tighten until snug but not overly tight | Depends on type of clamp used – follow manufacturer instructions |
For quick release levers, make sure to press down firmly before tightening so that it’s secure. Then use an allen key or flat head screwdriver to tighten the bolt at the bottom of the lever until it’s secured in place. For threadless stems, make sure to insert the stem into steering tube completely before tightening with a hex wrench. When finished make sure there is no play between any of the components when moving around by hand.
That wraps up our section about securing handlebars and seat posts! Now let’s move onto replacing a broken chain which can be equally tricky if done improperly…
Replacing A Broken Chain
When it comes to electric bike repair, one of the most important components is the chain. This essential piece keeps your ride running smoothly and efficiently – that’s why it’s so critical to know how to replace a broken or damaged chain!
Replacing an old chain can be intimidating but with some basic tools and knowledge, anyone can do it.
First, you’ll need to remove any rust from the sprockets before installing a new chain. A wire brush will work best for removing rust particles and giving them a good scrubbing.
Once clean, you’re ready to install your new chain. To begin the process, start by threading the end of the new chain into its corresponding link on the rear sprocket.
From there, lay out about 1/4 inch of slack in order for it to fit snugly without causing damage when riding.
Finally, work your way along each sprocket until everything is properly linked together. With a little patience, replacing a broken or damaged electric bike chain is easy!
Replacing Damaged Gears
Moving on from the broken chain, it’s time to start replacing damaged gears. This process is slightly more complicated than fixing a simple chain but with patience and attention to detail you can get your electric bike repaired in no time.
For starters, make sure to inspect all of the parts before installing them as this will ensure that they meet the manufacturer’s specifications. It may be necessary to remove any debris or dirt using cleaning products and brushes so be prepared for that step if needed.
If you have access to spare parts, install those first and then begin inspecting each one individually. Make sure the teeth are aligned correctly and that there are no signs of wear or tear before moving on.
Once everything looks good, it’s time to start installing the new gears onto the rear wheel hub. Take special care not to over-tighten them as this could lead to damage down the line.
Once done, double check your work by spinning the wheels back and forth several times while also ensuring that none of the parts became loose during installation. With these steps complete, your electric bike should be ready for its next ride!
Replacing Tires And Tubes
As an electric bike repair technician, I’d like to show you how to replace tires and tubes. It’s pretty straightforward if you keep a few key tips in mind.
First off, make sure your tire is the right size for the wheel rim it needs to fit on – this will save you time and energy later!
Once that’s taken care of, installing new tubes is usually just a matter of deflating the old one, taking out the valve stem, and popping in a fresh tube with its own valve stem. Make sure not to pinch or puncture it while mounting it onto the rim!
Then comes inflating tires; use a proper air pump or compressor set at the correct pressure rating for your particular model of electric bike. This can make all the difference when trying to get maximum efficiency from your ride!
Finally, check for any signs of wear or damage before heading out on your next trip. A quick look-over as part of routine maintenance can help prevent unexpected issues down the line.
With all these steps completed properly, you should be ready to go – so let’s move on to replacing the motor!
Replacing The Motor
When it comes to replacing the motor on an electric bike, it’s important to choose the right one. I’d recommend doing your research to make sure the motor is compatible with your make and model.
Once you’ve got the motor, I’d suggest taking your time to install it properly. Make sure to double check any connections and that the motor is securely mounted.
If you’re having any trouble with the motor, consult your manual or a professional for advice. Troubleshooting the motor can be tricky, so if you’re unsure of what you’re doing it’s best to get some help.
With the right motor and a bit of patience, you should have your electric bike running smoothly again in no time!
Choosing A Motor
Choosing a motor for replacing the electric bike is an important decision that can’t be taken lightly. I’m here to help you figure out which one’s right for your ride.
When considering motor types, voltage selection and other factors like torque, power output, size constraints, and cost are all things to consider. Depending on what type of riding you plan on doing will determine how much power or torque you need from the motor.
A higher wattage means more power, but it also often comes with a heavier weight so the trade-off must be considered when selecting a replacement motor. For those looking for more speed motors in the 48V range tend to offer greater performance than their 36V counterparts as they have higher peak torques and speeds.
However, if you’re concerned about battery life then opting for a lower voltage model might make sense since there’ll be less draw from the battery when riding long distances at low speeds. Additionally, brushless DC motors (BLDC) generally provide smoother acceleration compared to brushed models which makes them ideal for street use.
Finally, no matter what kind of motor you decide upon, always ensure that it fits properly within your frame’s given space before making any final decisions!
Installing The Motor
Now that you’ve chosen the right motor, it’s time to install it on your electric bike. Installing a new motor can be tricky, so I’m here to provide some helpful guides and tips for getting yours up and running in no time!
Firstly, make sure the motor is compatible with your frame by checking its dimensions as well as any other mounting requirements that may be unique to your model.
Secondly, take the time to read through any installation instructions provided with the motor to ensure everything goes smoothly during setup.
Finally, when installing the motor itself, use care not to overtighten any bolts or screws which could cause damage – just tighten them until they’re snug and secure.
With these steps taken care of, you’ll soon have a fully functioning new electric bike motor ready for action!
Troubleshooting The Motor
Now that you’ve got your motor installed, it’s time to test it out and make sure everything is working as expected.
The first step in troubleshooting the motor is to check the voltage of the battery while running – if all looks good there, then it’s time to move onto testing other components such as wiring and connectors.
If you find any issues with these, then it’s likely that they’ll need replacing before your bike can run correctly again – and this could potentially be costly.
That said, taking the time to inspect each component thoroughly should help you identify any weak points or faulty parts early on so that repairs are kept to a minimum.
Plus, having an experienced electric bike repair technician work on your ride will ensure everything gets done properly!
Replacing Cranked And Pedals
Now that we’ve replaced the motor of our electric bike, it’s time to move onto replacing cranks and pedals.
Installing new cranks is fairly straightforward; you’ll need a few basic tools such as an adjustable wrench or socket set and some grease for lubrication. Make sure all bolts are tightened securely and your crank arms are aligned evenly before adjusting the pedals.
Adjusting the pedals requires more attention to detail, as there should be no extra play in them when they’re attached properly. The threads on both sides must also be lined up perfectly so that they don’t bind while pedaling. Once everything is connected correctly, you can use a torque wrench to tighten all screws and nuts.
Finally, with your newly installed crankset and pedal assembly ready to go, it’s time to start diagnosing any potential electrical problems with our electric bike. Electrical issues can sometimes be tricky but with careful attention and patience, any issue can be resolved quickly!
Diagnosing Electrical Problems
I know that diagnosing electrical problems can be intimidating, but don’t worry – I’m here to help.
Testing the battery is a good place to start, so let’s begin there.
We’ll then move on to troubleshooting any connection issues, and finally identifying any wiring problems.
I’ll walk you through the whole process so you can feel confident in repairing your electric bike.
Let’s get started!
Testing The Battery
Ahh, the dreaded electrical problem! It’s a real bummer when your electric bike isn’t working properly. There are all sorts of things that could be wrong – from wiring issues to faulty controllers and more. But one important area I always check is the battery. Testing it can help determine if you need a new one or just some basic maintenance.
To test the battery, start by checking its charging habits. Is it taking longer than usual to charge? That could indicate there’s an issue with the cells inside.
Make sure to also keep up on regular battery maintenance like cleaning off corrosion or applying dielectric grease to connections. Small steps like these can really help extend the life of your e-bike batteries and prevent major problems down the line.
It may take some time, but being thorough in this kind of testing goes a long way towards getting your electric bike back on two wheels again. So don’t be afraid to get hands-on with your diagnostic process – it’ll make for much smoother sailing in the end!
Troubleshooting Connections
Once you’ve tested the battery and made sure it’s charging properly, it’s time to move on to troubleshooting connections.
This includes checking fuses and inspecting wiring for signs of wear or corrosion. If a fuse is blown, that can easily be replaced – just make sure to use one with the same rated voltage as your bike’s system.
And if we find any frayed wires or corroded connectors, those should be cleaned up and re-soldered before being put back in place.
It’s also important to take extra care when dealing with electrical components like these. Use insulated tools whenever possible, double check all connections are secure and make sure you turn off the power source before beginning work – safety first!
These measures may seem tedious but they’ll ultimately save you both time and money down the line by ensuring everything works optimally once it’s all said and done.
At this point, most electrical issues should have been resolved; however, if problems remain then further diagnosis may be necessary. With some patience, knowledge and attention to detail though, even the toughest electric bike repair tasks can be conquered!
Identifying Wiring Issues
Now that we’ve checked the battery and established a solid connection, it’s time to move onto diagnosing wiring issues. This involves looking for shorts or grounding problems, which can be identified by testing voltage levels both before and after components in order to find any discrepancies. If either of these scenarios are present then they must be addressed immediately – failure to do so could cause further damage down the line!
Using an ohmmeter is a good way to detect shorts as it will measure resistance between two points on a circuit and alert us if there’s something out of place. It also helps when trying to isolate the source of power loss due to poor connections; this allows us to locate exactly where and how much electricity is being lost along its path from point A to B.
Once all these tests are complete, chances are you should have successfully diagnosed your electrical issue. With some patience, attention to detail and knowledge of basic tools like ohmmeters and wrenches, even the toughest electric bike repair tasks can be handled with ease – now let’s get back on that bike!
Troubleshooting Software Issues
Troubleshooting software issues on an electric bike is like a game of chess – you need to think several moves ahead. As the repair technician, it’s my job to anticipate and solve any problems before they occur.
The first step in troubleshooting software issues is updating the firmware. This ensures that all essential components are up-to-date and running correctly.
After this is done, I can begin diagnosing glitches or errors in the system. By carefully examining each component and looking for clues about what could be causing the issue, I am able to determine where there may be a problem and how best to fix it.
Once these steps have been taken, I’m ready to move onto cleaning and lubricating the bike so that it runs smoothly again.
With careful maintenance and attention to detail, electric bikes remain reliable for years to come!
Cleaning And Lubricating The Bike
Cleaning and lubricating your electric bike is the key to keeping it in good condition. It’s important for me as a repair technician to make sure that all parts of your bike are properly maintained so you can enjoy riding without any issues.
When it comes to cleaning, I use an old-fashioned brush and some soap and water. This gets rid of most dirt or mud from the frame and components like brakes, chains, gears, and wheels. Afterward, I spray on a coating of protective polish which helps keep things looking great while protecting against wear and tear over time.
As far as lubrication goes, this will depend on what type of drivetrain your bike has. For instance, if you have derailleurs then I’ll apply oil to them as well as around the chainrings and cassette cogs. Internal hub gear systems need special grease applied inside the hubs while belt drives require periodic replacement of their belts – something that should be done by someone who is experienced with these types of repairs.
With my guidance, you’ll know exactly how to maintain your bike! Now let’s move on to doing a final diagnostic test before calling it a day!
Doing A Final Diagnostic Test
Now that you’ve given your electric bike a good cleaning and lubing up, it’s time to do a final diagnostic test. This is essential for ensuring the safety and longevity of your ride.
Before we get started, let’s quickly review what testing protocols and tools are necessary:
- Appropriate motorcycle stand or lift
- Digital multi-meter
- Diagnostic code scanner
You’ll need to check all the electrical connections in order to make sure they’re secure and properly limited, as well as visually inspect the wiring harnesses connected throughout the bike. If anything looks damaged, frayed or corroded then replace it immediately.
Additionally, be sure to use a digital multimeter to measure both AC/DC voltage levels across various components such as relays and switches. Finally, consider running a diagnostics scan with an appropriate code reader should any issues arise during the inspection process.
Once all these tests have been conducted, if everything checks out correctly then congratulations! You can now confidently take your e-bike on its next adventure knowing that it has been serviced correctly — ready for another round of fun!
And don’t forget about storing your e-bike properly when not in use; that will go a long way towards preserving its condition over time.
Storing Your E-Bike Properly
Storing your E-Bike properly is essential for its longevity and performance. To ensure that you get the most out of your electric bike, there are several steps to consider when storing it during long periods of non-use.
First and foremost, protecting the battery should be a priority. The best way to protect the battery is by keeping it at a moderate temperature, as extreme heat or cold can damage the cells within the battery over time. Additionally, make sure to check if any liquid is leaking from the battery before charging or using it after storage – this could indicate an issue with one of the cells which needs immediate attention!
The motor also needs special care while in storage. Before putting away your e-bike, apply some lubricant to all moving parts such as pedals, wheels and chainrings so they don’t seize up due to rusting or corrosion caused by moisture buildup. In addition, cover it with a waterproof cover or tarpaulin during wet weather conditions in order to keep dirt and debris from gathering on top of your e-bike’s components.
We hope these tips help keep your electric bike running smoothly for years to come! With regular maintenance and proper storage techniques, you can enjoy cycling without worry about potential issues arising due to improper handling or careless storage practices.
Frequently Asked Questions
How Much Does It Cost To Repair An Electric Bike?
Repairing an electric bike can be done either by a professional service or with a DIY kit. Depending on the job, both can cost anywhere from $50 to several hundred dollars.
Professional services may have higher upfront costs but will often give you access to experienced technicians who know how to diagnose and repair complex issues quickly.
On the other hand, DIY kits are usually less expensive but require more time and effort for installation and troubleshooting.
In any case, it pays off to do your research before selecting the best option for your situation.
Can I Fix My Electric Bike Myself?
You may be able to repair your electric bike yourself with some DIY tips and a bit of battery maintenance.
As an experienced e-bike repair technician, I can tell you that there are plenty of resources out there for fixing your own two-wheeler.
Whether it’s changing the chain or replacing the motor, following some simple guidelines will help take care of any issues you might have encountered in no time!
With the right tools and knowledge, you’ll be back on the road (or trail) in no time!
What Safety Precautions Should I Take When Repairing My Electric Bike?
When repairing your electric bike, it’s important to take all necessary safety precautions.
Start by avoiding any potential hazards and always double check components for wear or damage before attempting repairs.
Make sure you’re wearing protective gear, such as gloves, goggles and a face mask, when dealing with electrical parts.
Additionally, be aware of the risk of electric shock if you come into contact with exposed wiring or terminals on batteries.
With these precautions in place, you can safely repair your electric bike yourself!
Are There Any Special Tools Needed To Repair An Electric Bike?
When repairing an electric bike, having the right tools can make all the difference.
Depending on the specific model of your electric bike and its battery type, you may need some specialized tools to help with repairs.
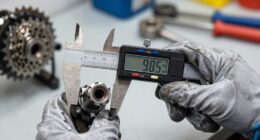
One important tool is a voltmeter for checking your bike’s battery life.
You’ll also want to have screwdrivers, spanners, and wrenches on hand in case any parts need replacing or tightening.
Proper maintenance will also be key to keeping your electric bike running smoothly- make sure you have a good set of lubricants and cleaning supplies too!
Is It Possible To Upgrade My Electric Bike’s Components?
When it comes to upgrading the components of your electric bike, there’s no need to worry. It can be done – and with a few simple steps you’ll have an even better ride than before!
Let me walk you through what needs to be done – starting with battery capacity and motor selection. If your current battery isn’t giving you enough mileage or power, then consider getting one with higher ratings. The same goes for the motor; if you want more speed or torque, look into selecting a new model that fits your requirements.
I’m sure by now you’re feeling confident about making these upgrades yourself – but don’t forget: always consult a professional repair technician first!
Conclusion
You might be feeling overwhelmed with all that needs to be done to repair your electric bike. But don’t fret – it’s not as hard as you think!
With the right tools, knowledge and safety precautions, you can have your electric bike up and running in no time.
And if you’re looking for a little extra zip on your ride, there are plenty of options available to upgrade components too.
So take a deep breath, put on those protective gloves, and get ready to embark on an electrifying journey of repairs and upgrades!