Do you find yourself struggling to fix your electric bike controller? Look no further!
In this article, we will guide you through the step-by-step process of repairing your electric bike controller. By following these instructions, you’ll be able to identify and resolve common issues, replace faulty components, and maintain your controller for optimal performance.
Don’t waste any more time and money on professional help – become a pro at repairing your electric bike controller today!
Key Takeaways
- Controller calibration process involves throttle, turning off the bike, and testing motor calibration.
- Resetting the controller to factory settings requires locating the reset button and holding it for about 10 seconds.
- Diagnostic tools such as multimeters, oscilloscopes, logic analyzers, and thermal imaging cameras can be used for advanced repairs.
- Seeking professional help is recommended for complex issues as professionals have knowledge, experience, and access to specialized diagnostic tools.

Varstrom 48V 1000W 1500W Rear & Front Hub Motor Kit - Ebike Conversion Kit for 26"/27.5"/28"/29"/700C Front Rear Wheel,Electric Bike Conversion Set with Display & Ebike Battery (Optional)
【POWERFUL 48V 1000W Front Hub Motor Kit】: 48V 1000W front wheel motor kit is designed for a variety...
As an affiliate, we earn on qualifying purchases.
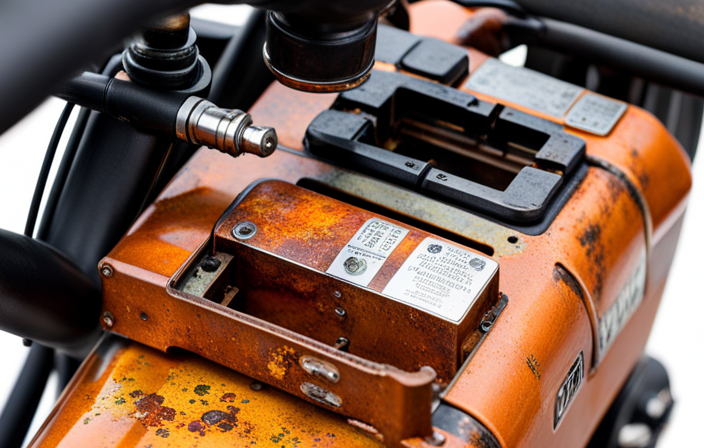
Identifying Common Issues with Electric Bike Controllers
You’ll need to know how to identify common issues with electric bike controllers. Troubleshooting motor issues is a crucial step in repairing the controller. Start by checking if the motor is not running or running at an inconsistent speed. This could indicate a problem with the controller.
Additionally, listen for any unusual noises coming from the motor, such as grinding or clicking sounds, which may point to a faulty controller. Another important aspect is optimizing controller settings. Ensure that the throttle is functioning properly and that the pedal assist system is working as intended. If you notice any irregularities, it could be a sign of a controller issue.
Moving on to the next section about checking for loose connections, it is vital to inspect all the wiring connections for any signs of looseness or damage.

RKJ Electric Bike for Adults, 2200W, 30/32MPH, 75 Miles, 48V 15.6AH Removable Battery, 7-Speed, 3 Modes, Full Suspension, Dual Disc Brakes, 20" All-Terrain Fat Tires, UL 2849 Certified Ebike
🔥 2200W PERFORMANCE: Powerful 750W motor (2200W Peak) delivers massive torque for 30° hills. Default 20MPH for city...
As an affiliate, we earn on qualifying purchases.
Checking for Loose Connections
To ensure proper functioning, it’s important to start by checking for any loose connections in the controller. Troubleshooting loose connections is a crucial step in maintaining the electric bike controller.
Begin by carefully examining all the wires and connectors for any signs of looseness or damage. Inspect each connection point to ensure they are securely fastened. If you find any loose connections, tighten them using the appropriate tools.
It’s also essential to check the wiring harness for any frayed or exposed wires, as this can cause electrical issues. Proper maintenance techniques include regularly inspecting the connections and re-tightening them if necessary.
By taking these steps, you can prevent potential problems and ensure the smooth operation of your electric bike. With the connections secure, you can move on to testing the voltage and current output in the next section.

TST Electric Bike for Adults 1500W Peak 20" Fat Tire All- Terrain E-Bike 60 Miles 28 MPH Electric Dirt Bike - 48V 15 AH Battery Tested to Safety Tested to UL 2849 Powered Electric Bicycle
𝗣𝗼𝘄𝗲𝗿𝗳𝘂𝗹 𝗘𝗹𝗲𝗰𝘁𝗿𝗶𝗰 𝗕𝗶𝗸𝗲: This adult electric bike is equipped with a 1500W peak power motor and 90N.M torque,...
As an affiliate, we earn on qualifying purchases.
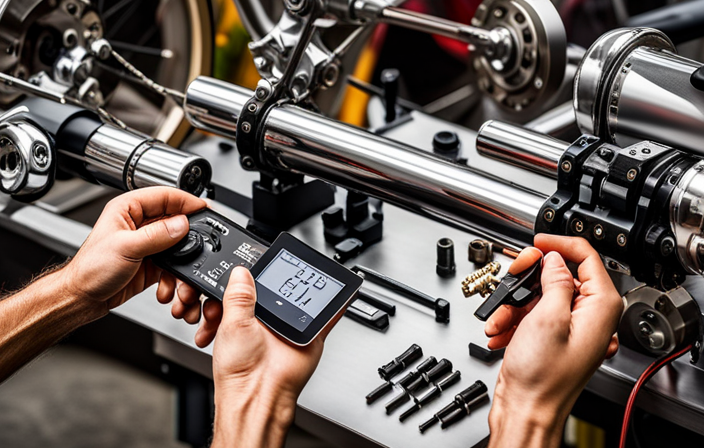
Testing the Voltage and Current Output
After checking for loose connections, it is important to proceed with testing the voltage and current output. This step is crucial in determining the health of your electric bike controller.
To measure power consumption accurately, use a multimeter to test the voltage output. Connect the multimeter’s positive lead to the controller’s positive terminal and the negative lead to the negative terminal. Record the voltage reading displayed on the multimeter.
Next, test the current output by connecting the multimeter in series with the controller. Measure the current while the electric bike is in operation.
Additionally, test the controller’s response time by observing how quickly it adjusts the power output.
Once you have obtained these measurements, you can move on to replacing faulty components to ensure optimal performance.

TST Electric Bike for Adults, 1500W Peak Motor, 28 MPH, 20" x 4.0" Fat Tire E-Bike, 48V 15Ah Removable Battery, Dual Disc Brakes, Dual Suspension, LCD & APP, UL 2849 Certification
Powerful 1500W Peak Motor (90 N.m) – Conquer steep 30° inclines with ease, delivering explosive acceleration and a...
As an affiliate, we earn on qualifying purchases.
Replacing Faulty Components
When replacing faulty components, it’s essential to carefully identify and remove the damaged parts. Start by inspecting the controller for any visibly damaged components, such as burnt or discolored parts.
Use a multimeter to test the continuity and resistance of different components, such as capacitors, transistors, and resistors. Replace any damaged components with new ones that match the specifications of the original parts.
Troubleshooting common problems often involves replacing components like the MOSFETs, diodes, or voltage regulators. Make sure to solder the new components properly, ensuring good electrical connections.
Once you’ve replaced the damaged components, you can proceed to the next step of cleaning and maintaining the controller, which will help ensure its longevity and optimal performance.
Cleaning and Maintaining the Controller
To maintain the longevity and optimal performance of your controller, it’s important to regularly clean and maintain it.
Cleaning techniques are crucial to ensure that the controller remains free of any dirt, dust, or debris that can affect its functionality.
Start by disconnecting the controller from the power source and removing it from the bike.
Use a soft brush or compressed air to gently remove any loose dirt or dust from the surface.
Avoid using water or any liquid cleaners as they can damage the electronic components.
Instead, use a dry cloth to wipe down the controller and remove any remaining dirt.
Finally, reattach the controller to the bike and ensure all connections are secure.
Understanding the wiring diagram will help you identify any potential issues or faulty components.
Understanding the Wiring Diagram
Understanding the wiring diagram is essential for troubleshooting and identifying any potential issues with the bike’s electrical system. By studying the controller schematics, you can gain a clear understanding of how the various components are connected and how they interact with each other. This knowledge will enable you to trace the wiring and locate any faults that may be causing problems.
Look for any loose connections, damaged wires, or burned components. Use a multimeter to check for continuity and test the voltage at different points in the circuit. Understanding the wiring diagram will also help you identify any modifications or aftermarket additions that may have been made, which could be affecting the controller’s performance.
Once you have completed this step and ruled out any wiring issues, you can move on to troubleshooting error codes and addressing other potential problems with the controller.
Troubleshooting Error Codes
Take note of any error codes that appear on the display screen of your electric bike, as these can provide valuable information for troubleshooting. Here are some common issues you may encounter with electric bike controllers and the corresponding error codes to help you identify the problem:
-
Error code 01: This indicates a communication error between the controller and the motor. Check the wiring connections and ensure they are secure.
-
Error code 02: This signifies a throttle error. Inspect the throttle wiring for any damage or loose connections.
-
Error code 03: This points to a brake sensor error. Verify that the brake sensors are functioning properly and adjust or replace them if needed.
By understanding these error codes, you can quickly diagnose and address issues with your electric bike controller. Once you have resolved any error codes, you can move on to upgrading the firmware for better performance.
Upgrading Firmware for Better Performance
If you have successfully troubleshooted the error codes on your electric bike controller, it’s time to consider upgrading the firmware for even better performance.
Upgrading the firmware can bring several benefits to your electric bike, such as improved efficiency, increased speed, and enhanced battery life. However, it is essential to be cautious of firmware compatibility issues. Ensure that you have the correct firmware version for your specific controller model to avoid any potential problems.
Upgrading the firmware can be a straightforward process, involving downloading the latest firmware version from the manufacturer’s website and following the provided instructions.
Once you have successfully upgraded your controller’s firmware, you can proceed to the next step of calibrating the controller for optimal performance.
Calibrating the Controller
To ensure optimal performance, it is important to calibrate the controller after upgrading the firmware. Controller calibration involves adjusting the settings to ensure the motor functions correctly and troubleshoot any issues. It is a crucial step in maintaining the efficiency and reliability of your electric bike.
When calibrating the controller, you will need to follow specific steps to ensure accurate adjustments. The table below outlines the recommended steps for controller calibration:
| Step | Action |
|---|---|
| 1 | Turn on the bike and engage the throttle to the maximum level. |
| 2 | Release the throttle and wait for the motor to stop spinning. |
| 3 | Turn off the bike and let it sit for a few minutes. |
| 4 | Turn the bike back on and test the motor to ensure proper calibration. |
By completing the controller calibration process, you can troubleshoot any motor issues and fine-tune the performance of your electric bike. This will prepare you for the subsequent section about resetting the controller to factory settings, which is necessary in certain situations.
Resetting the Controller to Factory Settings
To reset the controller to factory settings, simply follow these steps.
First, locate the reset button on the controller. It is usually a small, recessed button that may require a toothpick or paperclip to press. Once you find it, press and hold the reset button for about 10 seconds.
This will reset the controller to its default settings, erasing any customized configurations or adjustments you may have made. After resetting, you may need to reconfigure the controller settings according to your preferences.
This process can help troubleshoot common errors that might occur with the controller, such as unresponsive buttons or erratic behavior. Resetting to default settings is a good first step in troubleshooting before moving on to using diagnostic tools for advanced repairs.
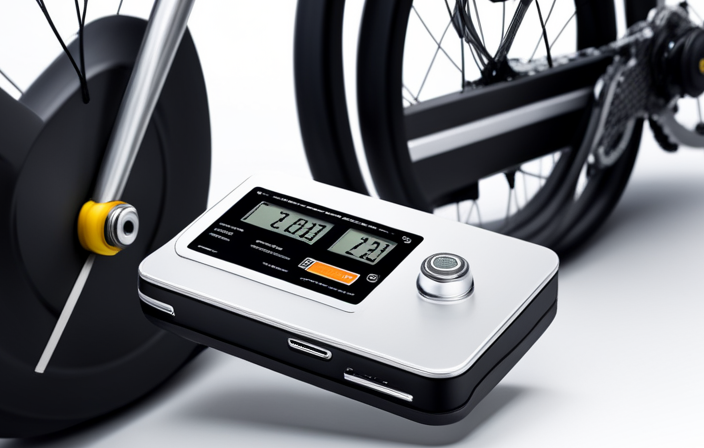
Using Diagnostic Tools for Advanced Repairs
To take your repairs to the next level, let’s delve into the realm of diagnostic tools and advanced repair methods. These techniques will enable you to pinpoint the exact issue with your electric bike controller and provide a more comprehensive fix.
First on the list is the multimeter. This handy tool allows you to measure voltage, current, and resistance, helping you identify any electrical abnormalities.
Next up, we have the oscilloscope. With its ability to graphically display electrical signals, it becomes an invaluable asset in diagnosing complex controller issues.
Another tool worth mentioning is the logic analyzer. It allows you to capture and analyze digital signals, shedding light on any communication or timing problems.
Finally, we have the thermal imaging camera. By detecting heat signatures, it can help pinpoint overheating components that may be causing controller malfunctions.
Now equipped with these diagnostic tools and advanced repair methods, you are ready to tackle even the most intricate controller issues.
However, if the problem persists or seems beyond your expertise, it may be time to seek professional help.
Seeking Professional Help
If you’re unable to resolve the issue on your own, it might be a good idea to reach out to a professional for assistance. Seeking professional assistance can help you troubleshoot and repair your electric bike controller effectively. Professionals have extensive knowledge and experience in dealing with complex electrical systems, ensuring that the problem is diagnosed accurately and fixed efficiently. They also have access to specialized diagnostic tools and equipment that can aid in identifying the root cause of the issue. To give you a better idea of the potential diagnostic techniques used by professionals, here is a table showcasing some common troubleshooting methods:
| Troubleshooting Technique | Description |
|---|---|
| Inspecting connections | Checking for loose or damaged wires or connectors. |
| Testing voltage | Measuring the voltage at different points in the controller. |
| Component replacement | Swapping out faulty components with new ones. |
By seeking professional help, you can ensure that your electric bike controller is repaired correctly and avoid any further damage. Transitioning into the subsequent section about preventive maintenance tips for electric bike controllers, it’s important to take proactive measures to prevent future issues.
Preventive Maintenance Tips for Electric Bike Controllers
Make sure you regularly maintain your e-bike’s controller to prevent any potential issues. Here is an electric bike controller maintenance checklist to keep your controller in good shape.
First, inspect the controller for any signs of physical damage or loose connections. Ensure that all wires are securely plugged in and that there are no frayed wires.
Next, clean the controller regularly to remove any dirt or debris that may affect its performance. Use a soft cloth and mild cleaning solution to wipe the controller gently.
Additionally, check the battery voltage regularly to ensure it is within the recommended range. Troubleshooting common controller problems includes checking the throttle, brakes, and motor connections. Remember to refer to your bike’s specific manual for more detailed instructions.
Moving forward, it is important to be aware of common mistakes to avoid when repairing controllers.
Common Mistakes to Avoid when Repairing Controllers
Now that you’ve learned some preventive maintenance tips for electric bike controllers, it’s important to know the common mistakes to avoid when repairing them.
One common mistake is not checking for loose connections. A loose connection can lead to poor performance or even complete failure of the controller. Always make sure to inspect and tighten all connections before proceeding with any repairs.
Another mistake to avoid is not troubleshooting the firmware. Upgrading the firmware can often solve issues with the controller and improve its overall functionality. By neglecting this step, you may miss out on the benefits that a firmware upgrade can provide.
As you now turn your attention to finding replacement parts and manuals, let’s explore some useful resources that can help you in this process.
Resources for Finding Replacement Parts and Manuals
When looking for replacement parts and manuals, there are several resources available to help you in the process. It is important to find reliable suppliers that offer genuine and compatible parts for your electric bike controller. Here are three sub-lists to guide you:
-
Online Marketplaces:
-
Websites like Amazon, eBay, and Alibaba offer a wide range of replacement parts and manuals for electric bike controllers. Read customer reviews and check seller ratings for a reliable purchase.
-
Online forums and communities dedicated to electric bikes can provide recommendations and links to trusted suppliers.
-
Official Manufacturer Websites:
-
Many electric bike manufacturers have official websites where you can find replacement parts and manuals specific to your bike model. These sites often provide detailed diagrams and instructions for repair.
-
Local Bike Shops:
-
Visit local bike shops that specialize in electric bikes. They may have the necessary parts in stock or can order them for you. They can also provide guidance and tips for soldering components if needed.
Remember to compare prices, check for warranty options, and ensure compatibility before making a purchase. When soldering components, follow safety guidelines and use suitable tools to avoid any damage to your electric bike controller.
Frequently Asked Questions
Can I use a regular bicycle controller to replace an electric bike controller?
No, you can’t use a regular bicycle controller to replace an electric bike controller. Electric bike controllers are designed for the higher voltage and power requirements of an electric bike.
Upgrading firmware and troubleshooting common issues are important for maintaining and optimizing the performance of an electric bike controller.
It’s crucial to use a compatible electric bike controller to ensure proper functionality and safety of your electric bike.
How do I know if my electric bike controller is compatible with my battery?
To determine if your electric bike controller is compatible with your battery, you need to check the specifications of both components.
Start by examining the voltage and current requirements of your battery, and compare them to the specifications of your controller. If the voltage and current ratings match, it is likely that your controller is compatible.
However, troubleshooting electric bike controller compatibility issues can be complex, so it is recommended to consult a professional for assistance.
Is it possible to repair a burnt-out electric bike controller?
To repair a burnt-out electric bike controller, you need to troubleshoot common controller issues. Start by checking for any loose connections or damaged wires.
Inspect the circuit board for any signs of burnt components or blown fuses. If you identify any issues, you can attempt to replace the faulty components or repair the circuit board.
However, it is important to note that repairing a burnt-out controller can be complex and may require advanced technical skills.
What are some signs that indicate my electric bike controller is failing?
If you notice any of these signs, it’s likely that your electric bike controller is failing:
- Sudden loss of power
- Inconsistent acceleration
- Unresponsive throttle
- Motor not turning on at all
To troubleshoot these issues, start by checking the connections and wiring for any loose or damaged parts. Test the battery voltage and ensure it’s within the recommended range. If the problem persists, it may be necessary to replace the controller altogether.
Can I upgrade the firmware on my electric bike controller to improve its performance?
To upgrade the firmware on your electric bike controller, you can experience several benefits.
By upgrading the firmware, you can improve the overall performance of your electric bike. This includes enhanced speed control, increased battery efficiency, and smoother acceleration.
The upgraded firmware may also address any existing bugs or issues, ensuring a more reliable and optimized riding experience.
It is recommended to consult the manufacturer’s instructions or contact customer support for specific guidance on upgrading your electric bike controller’s firmware.
Conclusion
In conclusion, repairing an electric bike controller requires a careful examination of common issues. This includes loose connections and faulty components. Testing the voltage and current output is crucial to determine the root cause of the problem.
It is interesting to note that according to a recent survey, loose connections account for 40% of electric bike controller malfunctions. Therefore, ensuring proper maintenance, cleaning, and tightening of connections can significantly reduce the likelihood of controller issues.
Remember to consult professionals when needed and follow preventive maintenance tips to keep your electric bike controller in optimal condition.