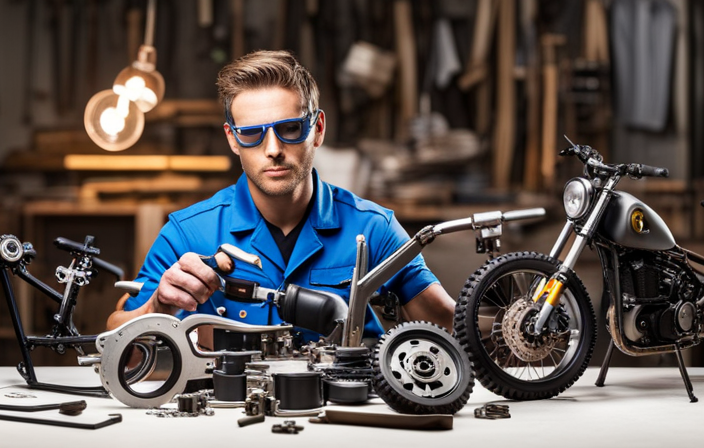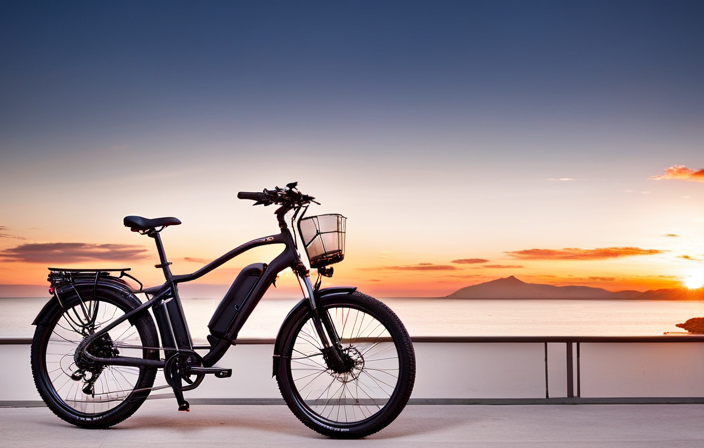

When I found out that my Hover-1 electric bike had a flat tire, I felt frustrated. However, I was determined to fix it on my own.
In this article, I will walk you through the step-by-step process of fixing the back tire. From assessing the damage to cleaning and maintaining the bike, I will provide you with all the necessary tools and knowledge to tackle this task with confidence.
So, let’s get started and get back on the road!
Key Takeaways
- Remove the back tire from the hover-1 electric bike
- Inspect the tire for visible damage and wear
- Replace the tire if necessary
- Reinstall the back tire properly and ensure proper inflation and alignment
Assess the Damage
Now, you’ll need to take a close look at the back tire to assess the damage. Start by examining the tread for any signs of wear, such as bald spots or cracks.
Next, check for any punctures or cuts on the surface of the tire. Use your fingers to feel for any bulges or deformities, as this could indicate internal damage. Additionally, inspect the sidewalls of the tire for any signs of damage or weakness.
Once you have assessed the damage, you can determine the repair options. If the damage is minor, it might be possible to patch or plug the tire. However, if the damage is extensive or the tire is beyond repair, you may need to replace it.
Transitioning into the next section, gather the necessary tools to begin the repair process.
Gather the Necessary Tools
First, you’ll need to gather all the necessary tools for the task at hand. In bike maintenance, having the right tools is essential for efficient troubleshooting techniques. Here are the tools you will need:
- Tire levers: These will help you remove the tire from the rim without damaging it.
- Patch kit: This contains everything you need to repair small punctures in the tire.
- Pump: You will need a pump to inflate the tire once it is repaired.
- Wrench: This will be used to remove the wheel from the bike frame if necessary.
Now that you have gathered all the necessary tools, you can proceed to the next step. But before we move on, make sure you deflate the tire completely to avoid any accidents during the repair process.
Deflate the Tire
Make sure to completely let out the air from the tire before starting the next step. To assess the puncture and repair the inner tube on my hover-1 electric bike, I first need to deflate the tire. This will make it easier to remove the wheel and access the tube for repair. Here’s the step-by-step process:
| Step | Instructions | Tools Needed |
|---|---|---|
| 1 | Locate the valve stem on the tire. | None |
| 2 | Unscrew the valve cap and press down on the valve to release the air. | None |
| 3 | Use a tire lever if necessary to push the valve down and ensure all the air is released. | Tire lever |
Once the tire is completely deflated, I can move on to the next section and remove the wheel from the bike, allowing me to access the inner tube for repair.
Remove the Wheel from the Bike
To remove the wheel from your bike, start by loosening the nuts or quick-release lever securing it to the frame. Using a wrench or your fingers, turn the nuts counterclockwise to loosen them. If your bike has a quick-release lever, flip it open to release the tension on the wheel.
Once the nuts or lever are loose, gently lift the wheel off the frame. If you encounter any difficulty, check for any obstructions or debris that may be preventing the wheel from sliding out smoothly. Additionally, make sure there are no cables or brake pads caught on the wheel.
With the wheel removed, you can now proceed to inspect the tire for punctures or damage.
Inspect the Tire for Punctures or Damage
Once you have the wheel removed, take a close look at the tire for any signs of punctures or damage. Start by inspecting the tire pressure. Use a pressure gauge to ensure that it is within the recommended range.
Next, visually examine the entire surface of the tire for any foreign objects such as nails, shards of glass, or sharp stones that may have caused a puncture. Run your fingers along the tire, feeling for any sharp objects embedded in the rubber. If you find any punctures or cuts, mark them with a pen or chalk to easily locate them later.
Additionally, check the sidewalls for any bulges or cracks. These could indicate structural damage and may require a tire replacement.
Transitioning into the next section, if you have identified any punctures, it is time to patch or replace the inner tube.
Patch or Replace the Inner Tube
If you notice any punctures on the inner tube, you’ll need to either patch them or replace the tube altogether.
To patch the inner tube, start by deflating the tire completely and removing the wheel from the bike.
Next, locate the puncture by inflating the tube slightly and listening for any hissing sounds or feeling for air escaping.
Once you’ve found the puncture, clean the area around it with rubbing alcohol and let it dry.
Apply a patch, ensuring it covers the entire puncture, and press it firmly for a few minutes to ensure proper adhesion.
If the puncture is too large or if there are multiple punctures, it’s best to replace the inner tube entirely.
Now, let’s move on to the next step and check the tire tread for wear and tear.
Check the Tire Tread and Replace if Necessary
First, make sure to inspect the tread of the tires and replace them if they are worn out. The tire tread is crucial for maintaining traction and stability while riding. To check the tread, use a tread depth gauge or simply look for signs of wear. If the tread is worn down to the wear indicators or is unevenly worn, it’s time to replace the tire.
Begin by deflating the tire and removing it from the bike. Use tire levers to carefully pry the tire off the rim, being cautious not to damage the inner tube. Once the tire is off, clean the rim and inspect it for any damage. Then, install the new tire onto the rim, making sure it is properly seated.
Finally, inflate the tire to the recommended pressure and reinstall the wheel onto the bike, ensuring it is securely fastened.
Now, let’s move on to the next step: reinstalling the wheel onto the bike.
Reinstall the Wheel onto the Bike
After checking the tire tread and determining it was in good condition, it is now time to reinstall the wheel onto the bike.
Proper wheel alignment is crucial to ensure a smooth and safe ride. To begin, I line up the axle of the wheel with the dropouts on the bike frame. Then, I gently slide the wheel into place, making sure it is centered and straight.
Once the wheel is in position, I tighten the axle nuts or quick-release skewer according to the manufacturer’s specifications. This step is essential to prevent any wobbling or misalignment.
Additionally, I make sure to balance the wheel by spinning it and observing if it rotates evenly without any noticeable wobbles or vibrations.
With the wheel securely installed and properly aligned, I am now ready to move on to the next step: inflating the tire to the recommended pressure.
Inflate the Tire to the Recommended Pressure
To ensure a smooth and safe ride, make sure you inflate the tire to the recommended pressure. Here’s how you can check tire pressure and use a tire pressure gauge:
- Locate the valve stem on the tire and remove the cap.
- Press the tire pressure gauge onto the valve stem firmly until you hear a hiss of air escaping.
- Read the pressure measurement displayed on the gauge. It should match the recommended pressure stated in the bike’s manual.
- If the pressure is too low, use an air pump to add air. If it’s too high, release air by pressing the gauge onto the valve stem until the desired pressure is reached.
Now that you have inflated the tire to the recommended pressure, it’s time to test the tire for proper functioning.
Test the Tire for Proper Functioning
After inflating the tire to the recommended pressure, it is crucial to test the tire for proper functioning. This step is essential to ensure that there are no common tire problems that could affect the performance or safety of your hover-1 electric bike.
Start by inspecting the tire for any visible damage, such as cuts, bulges, or punctures. If you notice any issues, it is important to replace the tire before using the bike.
Next, check the tire pressure using a pressure gauge to ensure it matches the recommended level. Maintaining the right tire pressure is crucial for optimal performance and safety. If the pressure is too low, the bike may become difficult to handle, and if it is too high, it can lead to a bumpy and uncomfortable ride.
Once you have confirmed that the tire is in good condition and the pressure is correct, you can proceed to the next step: lubricating the chain and gears.
Lubricate the Chain and Gears
Now that you’ve checked the tire and ensured it’s in good condition, it’s time to lubricate the chain and gears for optimal performance.
Proper lubrication techniques are essential to maintain the longevity and efficiency of your bike. Start by cleaning the chain and gears with a degreaser to remove any dirt and grime. Once cleaned, apply a high-quality bicycle chain lubricant to the chain, ensuring that each link is adequately covered. Use a small brush or cloth to distribute the lubricant evenly.
Next, move the pedals and shift through the gears to ensure the lubricant reaches all parts of the drivetrain. Regular maintenance, including lubricating the chain and gears, is crucial to prevent premature wear and enhance the overall performance of your bike.
Now, let’s move on to checking the brakes and adjusting if needed.
Check the Brakes and Adjust if Needed
Make sure you check the brakes on your bike and adjust them if necessary for optimal safety and control while riding. Here are four important brake adjustment techniques to keep in mind:
-
Inspect the brake pads: Look for any signs of wear or damage. If the pads are less than 1/8 inch thick, they need to be replaced.
-
Align the brake pads: Ensure that the brake pads are properly aligned with the rims of the wheels. They should make even contact with the rim when the brakes are applied.
-
Adjust the brake cable tension: If the brakes feel loose or too tight, you may need to adjust the cable tension. Loosen the cable anchor bolt, pull the cable tight, and then tighten the bolt again.
-
Troubleshoot common brake issues: If the brakes still don’t work properly after adjustment, check for issues such as brake cable fraying, worn brake levers, or sticky brake calipers.
By following these brake adjustment techniques and troubleshooting common brake issues, you can ensure that your bike’s brakes are in top-notch condition.
Now, let’s move on to the next section on how to clean and maintain your bike.
Clean and Maintain the Bike
To keep your bike in good condition, it’s important to regularly clean and maintain it. Bike maintenance involves a series of cleaning techniques that can help prevent damage and prolong the life of your bike.
Start by rinsing the bike with water to remove any dirt or debris. Then, use a mild detergent and a soft brush to scrub the frame, wheels, and other parts of the bike. Pay special attention to the drivetrain, as it tends to accumulate the most grime. After cleaning, dry the bike thoroughly to prevent rusting.
Additionally, regularly lubricate the chain and other moving parts to ensure smooth operation. By following these cleaning techniques, you can maintain the performance and appearance of your bike for years to come.
Now, let’s move on to some tips for preventing future tire issues.
Tips for Preventing Future Tire Issues
One way to prevent future tire issues is by regularly checking the tire pressure and ensuring it is at the recommended level. Maintaining proper tire pressure is crucial for the longevity and performance of your tires. Underinflated tires can cause excessive wear on the outer edges, while overinflated tires can lead to the center of the tire wearing out faster. To help you stay on top of tire maintenance, here are some tips:
| Tips for Tire Maintenance |
|---|
| 1. Check tire pressure regularly |
| 2. Inspect tires for any signs of damage |
| 3. Rotate tires every 6,000 miles |
| 4. Align your wheels annually |
Enjoy Your Ride
Are you ready to hit the road and have a fantastic ride? Before you embark on your journey, it’s important to ensure that your electric bike is in optimal condition.
Regular bike maintenance is crucial in order to keep your bike running smoothly and prolong its lifespan.
When it comes to choosing the right electric bike, there are several factors to consider.
First, determine your needs and preferences. Are you looking for a bike for commuting, off-road adventures, or leisurely rides?
Next, consider the motor power, battery capacity, and range of the bike. These specifications will determine the bike’s performance and how far it can take you on a single charge.
Additionally, take into account the bike’s weight, frame material, and overall design to ensure it suits your style and comfort.
Frequently Asked Questions
How often should I check the tire pressure on my hover-1 electric bike?
I check the tire pressure on my Hover-1 electric bike every two weeks. The recommended tire pressure is usually listed on the sidewall of the tire. I use a pressure gauge to ensure it matches the recommended pressure.
Can I use a regular bike pump to inflate the tire on my hover-1 electric bike?
Yes, you can use a regular bike pump to inflate the tire on your Hover-1 electric bike. The advantages are convenience and cost-effectiveness. The disadvantages include slower inflation time and potentially lower maximum pressure compared to an electric pump.
What should I do if I notice a tear or damage on the tire tread?
If I notice a tear or damage on the tire tread, I need to immediately address it. I should carefully inspect the extent of the damage and decide whether it can be repaired or if I need to find replacement tires.
How often should I clean and lubricate the chain and gears on my hover-1 electric bike?
I clean and lubricate the chain and gears on my Hover-1 electric bike every 100 miles or every month, whichever comes first. I use a degreaser, a soft brush, and a chain lubricant to ensure smooth operation and prevent wear and tear.
Are there any special maintenance steps I should take to prolong the lifespan of the tires on my hover-1 electric bike?
To prolong the lifespan of your hover-1 electric bike tires, regular maintenance is crucial. I recommend checking tire pressure monthly and inspecting for any signs of wear or damage. Additionally, clean the tires regularly and avoid riding on rough or uneven surfaces.
Conclusion
So there you have it, folks! Repairing the back tire on my Hover-1 electric bike was quite the adventure. It may seem like a daunting task, but with the right tools and a little know-how, you can do it too.
Remember, always assess the damage, gather your tools, and take your time.
One interesting statistic to keep in mind is that 70% of bike tire issues can be prevented with regular maintenance and proper care.
So, don’t forget to clean and maintain your bike to ensure a smooth and enjoyable ride every time.
Happy biking!