
Were you aware that about half of all bike flats are due to punctured tubes? If you’re fed up with dealing with flat tires and are interested in learning how to change a bike tube on your own, you’ve come to the right spot.
In this article, I will guide you through the step-by-step process of replacing a bicycle tube, providing you with the necessary tools, techniques, and tips to get you back on the road in no time.
Let’s dive in and get started!
Key Takeaways
- Use caution and the proper technique when removing the tire to avoid damaging the tube.
- Properly inflate the tire to the recommended pressure for optimal performance and ride quality.
- Thoroughly inspect the tire for any leaks, punctures, or damage before proceeding with the replacement.
- When reinstalling the wheel, ensure proper alignment, tighten the quick-release skewer or axle nuts, and adjust the brakes and derailleur for smooth operation.

Schwinn Sporterra RX Gravel Bike, 700c Mens and Womens Bike, 14-Speed Drop Bar Gravel Bicycle, Mechanical Disc Brakes, Rigid Fork, Aerodynamic Riding Position, Quick Release Seat Post, Adult Bicycle
GRAVEL BICYCLE: Enjoy next level riding with the Sporterra RX by Schwinn. With 700c wheels, this mens and...
As an affiliate, we earn on qualifying purchases.
Gather the necessary tools and materials
You’ll need a few tools and materials to replace a bicycle tube. First and foremost, you’ll need to choose the right size tube for your bicycle. It is important to select a tube that matches the size and width of your tire to ensure a proper fit.
Common mistakes to avoid when replacing a bicycle tube include using the wrong size tube, not checking for any debris inside the tire, and not properly inflating the tube before installing it.
Once you have gathered the correct tube size, you will also need tire levers to remove the old tube, a pump to inflate the new tube, and a patch kit in case of any small punctures.
Now that you have all the necessary tools and materials, let’s move on to the next step: locating the source of the flat tire.
SAVADECK Carbon Gravel Bike - T800 Carbon Frame & Fork, Shimano GRX400 10-Speed Groupset, Hydraulic Disc Brakes, 700C x 40mm Tires - Lightweight Design for Road & Off-Road Adventures (Black, 58cm)
【Ultra-Lightweight T800 Carbon Frame】Built with a T800 R21 carbon fiber frame and fork, this bike weighs just 10.4kg...
As an affiliate, we earn on qualifying purchases.
Locate the source of the flat tire
First, identify the spot where the tire is punctured. Check for puncture marks by inspecting the surface of the tire. Look for any visible nails, glass, or sharp objects that may have caused the flat. Once you have located the puncture, determine the cause of the flat tire. This can be done by examining the size and shape of the hole. It could be a small puncture caused by a thorn or a larger hole caused by a nail. By identifying the source of the flat tire, you can better understand how to fix it and prevent future flats. Now, let’s move on to the next step and deflate the tire completely.

SAVADECK Carbon Gravel Bike - T800 Carbon Frame & Fork | Shimano U6000 11-Speed Groupset | Hydraulic Disc Brakes | 700CX40mm All-Terrain Tires | Men & Women Road/Off-Road Bicycle (Gray, 53cm)
【Ultralight T800 Carbon Performance】: Featuring a premium T800 R21 carbon fiber frame and fork weighing just 10.4kg (22.92...
As an affiliate, we earn on qualifying purchases.
Deflate the tire completely
To fully deflate the tire, make sure to release all the air from it. Start by removing the cap from the valve stem and pressing down on the small metal pin inside. This will open the valve and allow the air to escape.
To deflate the tire more quickly, you can use a valve tool or a small object like a pen to press down on the pin. Be cautious not to press too hard and damage the valve.
When deflating the tire, keep the valve stem pointing away from your face to avoid injury in case it releases suddenly.
It is important to deflate the tire completely before proceeding to remove the wheel from the bicycle. This will ensure the tire is easier to work with and prevent any unnecessary strain on the tube.

StoreYourBoard SwivelStow Bike Rack Garage Storage Rack 2 Pack - 2 Road & Gravel Bike Wall Mounts - Heavy Duty Bike Hanger - No-Lift Bike Rack Garage Storage Rack - Holds 70 lb Capacity
SPACE-SAVING BIKE STORAGE - Maximize garage organization with this wall mount bike rack designed for easy storage and...
As an affiliate, we earn on qualifying purchases.
Remove the wheel from the bicycle
After completely deflating the tire, the next step is removing the wheel from the bike. To properly remove a wheel from a bicycle, it is important to follow the correct technique.
Start by shifting the gears to the smallest chainring and the smallest rear cog to release tension on the chain. Then, locate the quick-release lever or axle nuts on the wheel. If using a quick-release lever, flip it open and loosen the axle nuts.
Next, firmly grasp the wheel by the axle and lift it out of the dropouts. Be careful not to damage the derailleur or brake caliper when removing the wheel.
Common mistakes to avoid when removing a bicycle wheel include forgetting to release tension on the chain and not properly aligning the wheel with the dropouts.
Now, it’s time to move on to the next step: using tire levers to remove the tire from the rim.
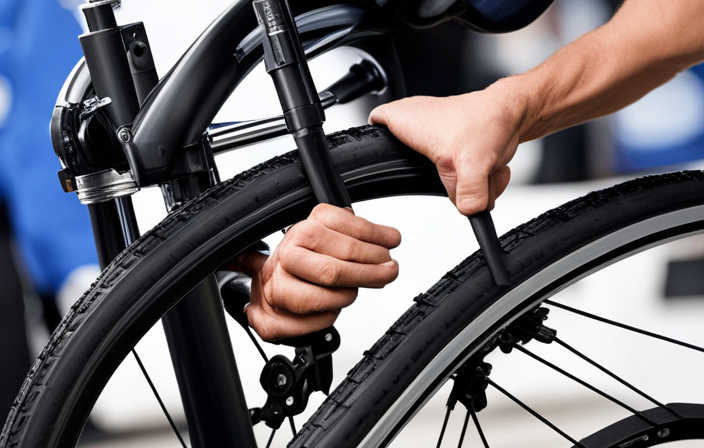
Use tire levers to remove the tire from the rim
Now, you’ll need to grab your tire levers and carefully insert them between the tire bead and the rim to begin removing the tire. Make sure to position the lever so that it hooks onto the bead of the tire.
Apply downward pressure to the lever, using it as a fulcrum, and pry the tire away from the rim. Repeat this process in multiple spots around the rim until the tire is completely detached. Be cautious not to use excessive force or twist the lever, as this can cause damage to the tire or rim.
Additionally, avoid using metal levers on carbon rims, as they can cause scratches or gouges. Remember to keep your hands clear of the tire levers to prevent any injuries.
Once the tire is off, you can proceed to inspect the rim tape and replace it if necessary.
Inspect the rim tape and replace if necessary
After successfully removing the tire from the rim using tire levers, it is important to inspect the rim tape for any signs of wear and tear.
The rim tape is a protective layer that covers the spoke holes in the rim, preventing the tube from getting pinched or punctured. Carefully examine the rim tape for any holes, cracks, or fraying edges. If you notice any damage, it is crucial to replace the rim tape before inserting a new tube.
Additionally, take this opportunity to clean the rim surface using a clean cloth or brush to remove any debris or dirt.
Once the rim tape has been inspected and replaced if necessary, the next step is to check the inside of the tire for any sharp objects that could potentially cause a flat.
Check the inside of the tire for any sharp objects
First, make sure to inspect the inside of the tire for any sharp objects that could cause a flat. Here’s what to look for:
-
Inspect the tire for wear and tear. Check for any signs of cracking, bulging, or thinning rubber. These could indicate that the tire is old and needs to be replaced.
-
Look out for specific types of punctures. Check for nails, glass shards, or thorns stuck in the tire. These objects can easily puncture the tube and cause a flat.
-
Run your fingers along the inside of the tire to feel for any sharp objects. Be thorough and pay attention to any bumps or rough spots. Sometimes, tiny shards of glass or metal can embed themselves in the tire and go unnoticed.
-
If you find any sharp objects, carefully remove them using a pair of tweezers or pliers. Be gentle to avoid damaging the tire further.
Now that you’ve inspected the tire for any potential hazards, it’s time to move on to the next step: inserting the new tube into the tire.
Insert the new tube into the tire
To insert the new tube into the tire, carefully slide it in while ensuring it is properly aligned with the valve stem. Start by deflating the tube completely and then insert one side of the tube into the tire, working your way around the circumference. Make sure the tube is not twisted or pinched between the tire and the rim.
It is crucial to avoid any sharp objects that may puncture the tube during this process. Pay close attention to the valve stem, ensuring it remains straight and aligned with the hole in the rim. Installing the new tube requires patience and precision to avoid common mistakes such as improper alignment or pinching.
Once the tube is securely in place, you can proceed to the next step of inflating the tube slightly and placing it back onto the rim without causing any damage.
Inflate the tube slightly and place it back onto the rim
Now that the new tube has been inserted into the tire, it’s time to reinflate it and place it back onto the rim.
Before fully inflating the tube, it’s important to inflate it slightly to ensure that it is properly seated within the tire. This helps prevent any twists or pinches that could cause future issues.
To reinflate the tube, use a bicycle pump with the appropriate valve attachment. Slowly pump air into the tube, checking for any leaks or unusual bulges. If you encounter any inflation issues, such as difficulty inflating or air escaping from the valve, double-check that the valve is securely tightened and not damaged. Additionally, inspect the tube and tire for any sharp objects that may have caused the initial puncture.
Once the tube is slightly inflated and properly seated, carefully place the tire back onto the rim using tire levers. This will be discussed in the subsequent section.
Use tire levers to carefully push the tire back onto the rim
Carefully use tire levers to push the tire back onto the rim. When using tire levers, it is important to avoid common mistakes that could damage the tube or tire.
One common mistake is using too much force, which can cause the tire lever to slip and potentially puncture the tube. To prevent this, place one lever between the tire and rim, then hook the other lever onto a spoke to hold it in place.
Gently push the first lever down and slide it along the rim, gradually working the tire back into place. If you find it difficult to use tire levers, there are alternative methods for pushing the tire onto the rim, such as using your hands or a plastic tire lever.
Once the tire is back on the rim, it is time to reinflate the tire to the recommended pressure, ensuring a safe and smooth ride.
Reinflate the tire to the recommended pressure
Make sure you reinflate the tire to the recommended pressure for a safe and smooth ride. Properly reinflating the tire is essential to ensure optimal performance and prevent any potential issues while cycling. To help you understand the importance of correct tire pressure, refer to the table below:
| Tire Pressure Level | Effect on Ride |
|---|---|
| Underinflated | Reduced speed and efficiency, increased risk of pinch flats |
| Overinflated | Uncomfortable ride, decreased traction, higher risk of blowouts |
| Recommended | Optimal ride quality, improved control and handling |
To reinflate the tire, use a bicycle pump or an air compressor. Attach the pump nozzle or air compressor fitting to the valve stem and inflate the tire. Keep an eye on the pressure gauge and adjust accordingly. If you encounter any issues during reinflation, such as a leaking valve or difficulty in achieving the recommended pressure, refer to the troubleshooting techniques in the previous section.
Now, let’s move on to the next step and check for any leaks or issues with the tire.
Check for any leaks or issues with the tire
First, inspect the tire for any signs of leaks or issues. Proper tire maintenance is essential for a smooth and safe ride. Begin by visually examining the tire for any punctures, cuts, or bulges. Run your fingers along the surface to feel for any sharp objects embedded in the rubber. Additionally, check the valve stem for any damage or looseness.
Common causes of tire leaks include punctures from sharp objects, worn-out or damaged valve stems, and improperly seated beads. If you notice any leaks or issues, it’s crucial to address them before proceeding.
Once you have ensured the tire is in good condition, you can move on to the next step of reinstalling the wheel onto the bicycle.
Reinstall the wheel onto the bicycle
To reinstall the wheel onto the bike, start by aligning the axle with the dropouts on the frame. Ensure that the axle is fully inserted into the dropouts and that it is centered between the brake pads. Once aligned, tighten the quick-release skewer or axle nuts to secure the wheel in place.
To realign the brakes, squeeze the brake lever and observe the clearance between the brake pads and the rim. Adjust the brake caliper position using the barrel adjuster until the pads are evenly spaced on either side of the rim.
Next, adjust the derailleur by shifting the chain onto the smallest chainring and the smallest rear cog. Loosen the derailleur cable anchor bolt and adjust the barrel adjuster until the chain runs smoothly on the smallest gears.
Now, test the tire to ensure it is properly inflated and secure.
Test the tire to ensure it is properly inflated and secure
Check if the tire on your bike is securely inflated. Proper tire inflation is crucial for optimal bicycle performance.
An underinflated tire can cause increased rolling resistance, making it harder to pedal, while an overinflated tire can lead to a harsh ride and decreased traction. To ensure proper inflation, use a pressure gauge to check the tire pressure against the recommended range indicated on the sidewall of the tire.
Additionally, make sure the tire is securely seated on the rim and that the bead of the tire is properly seated in the rim’s hook. Common mistakes to avoid when securing a bicycle tire include not fully seating the tire on the rim, which can result in a sudden loss of air, and over-tightening the valve nut, which can damage the tube.
Once the tire is properly inflated and secure, you can proceed to the next step, which is to dispose of the old tube properly.
Dispose of the old tube properly
After ensuring the tire is properly inflated and secure, it’s important to dispose of the old tube properly. Proper disposal of the old tube is essential to maintain environmental sustainability.
When replacing a bicycle tube, it is recommended to recycle the old one rather than throwing it in the trash. Many local bike shops offer recycling options for old tubes. They have designated bins where you can drop off the old tubes, ensuring they are disposed of in an environmentally friendly manner.
Additionally, some recycling centers accept rubber materials, including bicycle tubes. It’s important to check with your local recycling center to see if they accept bicycle tubes and what their specific requirements are.
By recycling the old tube, you are contributing to the reduction of waste and promoting a greener environment.
Frequently Asked Questions
How do I properly dispose of the old bicycle tube?
I can properly dispose of the old bicycle tube by recycling it. There are various recycling options available for bicycle tubes, such as taking it to a local recycling center or contacting a specialized recycling company.
What should I do if I cannot find the source of the flat tire?
What if you can’t locate the flat tire’s source? To patch a bicycle tube, first, remove the tube from the tire, inflate it, and submerge it in water to identify the puncture. To prevent future flats, use puncture-resistant tires or install tire liners.
Are there any specific tools or materials I need to gather before replacing the bicycle tube?
To replace a bicycle tube, you will need specific tools such as tire levers, a pump, and a wrench. Necessary materials include a new tube, patches, and talcum powder. These tools and materials are essential for a successful tube replacement.
How do I determine the recommended pressure for inflating the tire?
To determine the recommended pressure for tire inflation, refer to the sidewall of the tire. Look for the specified range, usually in PSI (pounds per square inch). Inflate the tire to the recommended pressure using a bike pump with a pressure gauge.
What should I do if I encounter any leaks or issues with the tire after reinstallation?
If you encounter leaks or issues with your tire after reinstallation, troubleshooting tips can help. Common causes include a faulty tube, improper installation, or punctures. Check for damage, ensure proper inflation, and inspect the tire for debris or sharp objects.
Conclusion
In conclusion, replacing a bicycle tube may seem like a daunting task, but with the right tools and knowledge, it can be easily accomplished.
Remember to gather all the necessary tools and materials before starting the process.
One interesting statistic to note is that according to a study conducted by the League of American Bicyclists, over 50% of bicycle flats are caused by punctures from sharp objects on the road. This highlights the importance of regularly checking and maintaining your tires to prevent potential flat tire situations.
So, next time you encounter a flat tire, don’t worry, you have the skills to fix it!