Mending a damaged spoke on a bike wheel can appear intimidating, yet with the proper tools and some expertise, it’s a job that can readily be done at home. As an enthusiastic biker, I’ve encountered numerous spoke issues, ranging from colliding with a pothole to being trapped in an unexpected storm. Nevertheless, I’ve discovered that by following a couple of straightforward steps, I can swiftly and effectively fix a damaged spoke and return to riding without delay.
In this article, I’ll walk you through the process of:
- Diagnosing a broken spoke
- Gathering the necessary tools
- Removing the damaged spoke
- Installing a replacement spoke
- Testing the wheel to ensure it’s in proper working order
By following these steps, you’ll be able to confidently replace a broken spoke on your own and keep your bike running smoothly for years to come. So, let’s get started!
Key Takeaways
- Diagnose the issue and select the correct size and length of replacement spoke.
- Avoid common mistakes and calculate spoke length for proper tension and support.
- Consider upgrading to stronger spokes and use spoke prep or thread locker to prevent loosening.
- Regularly maintain the bike, check spoke tension, and replace damaged or worn components to prevent accidents or malfunctions while riding.

Under Armour Squeeze Water Bottles, 32 oz Water Bottles, Sideline Sports Water Bottle with Quick-Shot Lid, Quick & Easy Hydration, Gym Water Bottles, Squeeze Bottle, 1 32oz Bottle
- Easy Hydration: Quick-shot lid and one-way valve
- On-the-Go Use: One-hand operation for active hydration
- Measurement Markings: Ounces and milliliters for tracking
As an affiliate, we earn on qualifying purchases.
Diagnose the problem
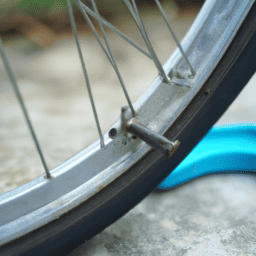
If you’re hearing a clicking sound when you ride, it’s likely your spokes need to be replaced. Identifying damage to individual spokes can be challenging, so it’s best to check your entire wheel for issues.
Common causes of spoke damage include collisions, uneven tension, and corrosion. If you notice a bent or broken spoke, then it’s time to replace the entire spoke, as this type of damage cannot be repaired.
Additionally, if the spokes are loose or uneven, then this can cause the wheel to wobble and result in a bumpy ride. To replace the spokes, you’ll need to gather the necessary tools. This includes a spoke wrench, replacement spokes, and a spoke nipple driver.
It’s important to ensure that you have the correct size replacement spokes for your wheel. Once you have these tools, you can move onto the next step of the process.
Gather the necessary tools
Before replacing bicycle spokes, I need to gather the necessary tools. I’ll need a spoke wrench, pliers, a spoke thread lubricant, a replacement spoke, and a nipple driver.
It’s important to select the correct size and length of replacement spoke for the specific wheel and hub. To ensure a successful repair, I’ll follow these tips for selecting replacement spokes.
List of tools needed
To replace your bicycle spokes, you’ll need a spoke wrench, a nipple driver, pliers, and a spoke holder. The spoke wrench is the most important tool as it allows you to remove the spoke from the hub and adjust the tension.
The nipple driver is used to tighten or loosen the nipple that holds the spoke to the rim. Pliers are also useful for holding the spoke in place while tightening the nipple. The spoke holder is used to keep the spoke in place while tightening the nipple, preventing it from twisting and causing damage to the spoke.
Common mistakes when replacing spokes include using the wrong size spoke wrench or over-tightening the nipple, which can lead to a weakened or broken spoke. It’s important to use the correct size spoke wrench and to only tighten the nipple to the appropriate tension.
If you encounter a stripped nipple, using a penetrating oil or heating the nipple with a heat gun can help loosen it. Alternative solutions include using a nipple grip or vice grip to hold the nipple in place while turning the spoke.
With the right tools and techniques, replacing bicycle spokes can be a straightforward process.
When selecting replacement spokes, there are a few tips to keep in mind. Look for spokes that are the same length, gauge, and color as the existing spokes on your wheel. It’s also important to choose spokes that are made from the same material as your existing spokes, whether it be stainless steel, titanium, or another material.
Additionally, consider the spoke pattern of your wheel and choose spokes that will fit that pattern. By taking these factors into account, you can ensure that your replacement spokes are a perfect match for your wheel.
Tips for selecting replacement spokes
When selecting new spokes, remember that matching the length, gauge, and material of your current spokes is key to maintaining a strong and balanced wheel, so don’t skimp on quality. Spoke length calculation is crucial as well, as the length must be precise to ensure proper tension and support. It’s best to measure the old spoke or have a bike shop determine the correct length for you.
In addition, consider the different spoke materials available, such as stainless steel, titanium, or aluminum. Each material has its own unique properties, such as durability, weight, and cost, so choose one that aligns with your needs and budget.
To further ensure the success of your spoke replacement, here are some additional tips to keep in mind:
- Purchase spokes from a reputable dealer or bike shop to ensure quality and accuracy.
- Consider upgrading to stronger spokes if you frequently ride on rough terrain or carry heavy loads.
- Use spoke prep or thread locker to prevent spokes from loosening over time.
- Replace all of the spokes on the affected wheel, rather than just the broken one, to maintain balance and prevent further damage.
Now that you’ve selected the appropriate replacement spokes, it’s time to move on to the next step: removing the broken spoke.
Remove the broken spoke
Before replacing a broken spoke, it’s essential to know how to remove it without causing damage to the wheel.
In this subtopic, I’ll provide step-by-step instructions for spoke removal and offer tips to avoid any further damage. By following these instructions carefully, you can ensure that the wheel remains intact and ready for the spoke replacement process.
Step-by-step instructions for spoke removal
First things first, you gotta loosen the spoke nipple with a spoke wrench before you can remove the spoke. Start by locating the broken spoke and identifying its position in relation to the hub and rim.
Then, follow these step-by-step instructions for spoke removal:
-
Use the spoke wrench to turn the spoke nipple counterclockwise to loosen it. Don’t completely remove the nipple, just loosen it enough to release the spoke tension.
-
Use a spoke tool or pliers to hold the spoke near the nipple, while turning the nipple counterclockwise with the spoke wrench.
-
Pull the spoke out of the hub and rim, being careful not to damage the surrounding spokes or the wheel.
Remember to take note of the spoke tension and length before removing the spoke, as you’ll need this information when replacing it.
Now, onto the next section about tips for avoiding damage to the wheel.
Tips for avoiding damage to the wheel
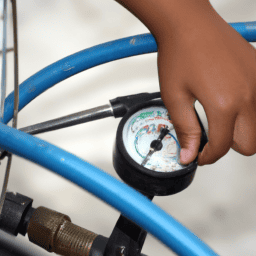
To avoid damaging your wheel, preventive measures must be taken. The first step is to evenly distribute the spoke tension. This means that you shouldn’t tighten one spoke more than the others or leave one loose, as this can cause the wheel to become unbalanced and unstable.
A simple way to ensure even tension is to use a spoke tension meter. This tool measures the tension of the spokes and helps you adjust them evenly. You can also listen to the pitch of each spoke as you tighten them, making sure they all sound the same.
Another maintenance technique to prevent damage to your wheel is to avoid applying excessive force when tightening the spokes with a spoke wrench or pliers. Over-tightening can cause the spoke to break, while under-tightening can cause the wheel to become wobbly.
It’s important to use the correct torque when tightening the spokes, as recommended by the manufacturer. Applying too much force can also cause the nipple to strip, making it difficult to remove or tighten the spoke.
By following these preventive measures and maintenance techniques, you can avoid damaging your wheel and ensure a smooth ride.
Now, let’s move on to the next step of the process and install the replacement spoke.
Install the replacement spoke
Gently insert the new spoke through the hub and weave it through the neighboring spokes, like threading a needle. Make sure the spoke is properly seated in the hub flange, and then slide the nipple onto the spoke thread. Begin tightening the nipple until it’s finger tight, and then use a spoke wrench to tighten it further.
Here are some tips to help you install the replacement spoke:
- Keep the spoke straight as you insert it through the hub to prevent any kinks or bends.
- Weave the spoke over and under the neighboring spokes in a pattern that matches the other spokes on the wheel.
- Make sure the replacement spoke has the same length and gauge as the other spokes on the wheel.
- Ensure proper spoke tension and wheel truing by checking the tension of all the spokes on the wheel before and after replacing any spokes.
Once you have installed the replacement spoke, it’s important to test the wheel to ensure it’s true and balanced.
Test the wheel
Now, you’ll want to spin the wheel and observe it closely, looking for any wobbling or bouncing, like a boat on choppy waters. This will help you determine if the spoke replacement has been successful or if there are any issues that need to be addressed. There are a few test techniques that you can use to ensure that the wheel is functioning properly.
One technique is to use a truing stand or a similar tool that can measure the wheel’s alignment. This will help you identify any areas that need to be adjusted. Another technique is to simply ride the bike and pay close attention to how the wheel feels. If you notice any wobbling or bouncing, it’s important to stop and make the necessary adjustments. It’s also a good idea to perform regular maintenance on your bike, including checking the spoke tension and making any necessary adjustments. By following these maintenance tips and test techniques, you can ensure that your bike is in good working order and that you can enjoy a smooth ride.
| Test Techniques | Maintenance Tips | ||
|---|---|---|---|
| Use a truing stand or similar tool to measure alignment | Check spoke tension regularly | ||
| Ride the bike and pay attention to any wobbling or bouncing | Make necessary adjustments as needed | ||
| Conduct regular maintenance on the bike | Ensure all components are properly lubricated | ||
| Inspect the wheel for any signs of damage | Replace any damaged or worn components | such as tires, spokes, or rims to prevent accidents or malfunctions while riding. |
Frequently Asked Questions
How can I prevent my bicycle spokes from breaking in the future?
To prevent bicycle spoke breakage, I take preventive measures such as ensuring proper tension and truing of the wheel, avoiding heavy impacts, and using high-quality spokes. Common causes of spoke breakage include overloading and fatigue from frequent use.
Can I replace just one spoke or do I need to replace all of them?
Replacing just one spoke may seem like a quick fix, but it can create imbalances and lead to further damage. Replacing multiple spokes ensures even tension and prevents future issues. Proper tensioning is key to preventing future breakages.
What kind of spoke wrench do I need and where can I buy one?
To tighten or loosen spokes, I need a spoke wrench. There are various spoke wrench types, including the standard wheel spoke wrench and Park Tool’s SW-0. I can buy them from local bike shops, online retailers, or bike tool manufacturers.
How do I know if the replacement spoke is the correct size for my wheel?
First, make sure to measure the spoke length needed for your wheel. Don’t make the common mistake of using an old spoke as a reference. Use a spoke ruler or caliper for accuracy. Then, ensure the replacement spoke matches the diameter and threading of your wheel.
Should I take my bike to a professional if I’m not confident in my ability to replace the spoke?
If I lack self-repair confidence, seeking professional assistance is advisable. Replacing spokes requires precision and knowledge of wheel mechanics. However, with practice, it can become a simple repair to perform independently.
Conclusion
In conclusion, replacing a bicycle spoke may seem daunting, but it can be easily accomplished with the right tools and a bit of patience.
To get started on the repair process, diagnose the problem and determine which spoke needs to be replaced. Remember to gather all the necessary tools, including a spoke wrench, before beginning the repair.
After removing the broken spoke, carefully install the replacement spoke. Make sure to thread it correctly and use the spoke wrench to adjust the tension as needed.
Finally, test the wheel to ensure that everything is working properly. Don’t forget to check the tension of all the other spokes to prevent future issues.
As the saying goes, "a stitch in time saves nine,"and replacing a broken spoke as soon as possible can prevent further damage to your wheel and keep you safely on the road.