As someone who is passionate about cycling and has a great love for bikes, vintage bicycles hold a special place in my heart. There’s an undeniable charm in reviving an ancient bicycle, especially after it has been gathering dust in a garage or basement for an extended period.
Restoring an old bike is not only a rewarding experience, but it’s also an environmentally friendly way to enjoy cycling without breaking the bank.
In this article, I’ll walk you through the steps to restore an old bicycle from start to finish. We’ll begin by assessing the condition of your bike and gathering the tools you’ll need. Then, we’ll move on to disassembling the bike and cleaning and repairing the parts. Finally, we’ll reassemble the bike and take it for a test ride to make sure everything is in working order.
So, grab your tools and let’s get started on restoring your old bike!
Key Takeaways
- Restoring an old bike is an environmentally friendly and cost-effective way to enjoy cycling.
- Before disassembling the bike, it’s important to assess it for rust, worn-out tires, and damaged parts.
- During the restoration process, customization with new parts or accessories is possible.
- Attention to detail and patience are required for a successful restoration.
Amazon Product B08W82ZG8G
As an affiliate, we earn on qualifying purchases.
Assess the Condition of Your Bike
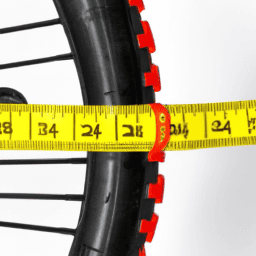
Take a good look at your old bike and check for rust, worn-out tires, and creaky pedals to see what needs fixing. It’s important to identify rust spots as they can weaken the frame and cause it to break over time.
Check the frame, handlebars, and other parts for any signs of rust. If you find any rust, use a wire brush or sandpaper to remove it. Once you’ve removed the rust, apply a rust inhibitor to the affected area to prevent further rusting.
Checking for bent frames is also crucial. A bent frame can affect the stability of your bike and make it unsafe to ride. To check if your frame is bent, place a level against the top tube and see if it’s level. If it’s not, your frame might be bent and will need to be repaired or replaced.
Once you’ve assessed the condition of your bike, gather the tools you’ll need to restore it to its former glory.
Amazon Product B0FMQYBNL5
As an affiliate, we earn on qualifying purchases.
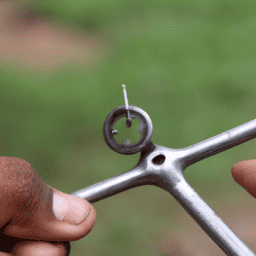
Gather the Tools You’ll Need
You’ll want to grab a set of wrenches to loosen any rusted bolts and nuts, making it easier to give your trusty two-wheeler a new lease on life. Depending on the condition of your bike, you may also need a few other tools to help with disassembly and cleaning. Here are some of the tools you should consider having on hand:
| Tool | Best Brands/Budget Options | Safety Gear/Protective Measures |
|---|---|---|
| Wrench Set | Craftsman, Kobalt, Tekton | Gloves, Eye Protection |
| Screwdrivers | Stanley, DeWalt, Husky | Dust Mask, Closed-toe Shoes |
| Pliers | Channellock, Knipex, IRWIN VISE-GRIP | Long-sleeve Shirt, Pants |
It’s important to choose the best brands or budget options for your tools to ensure they are durable and can withstand the task at hand. Additionally, don’t forget about safety gear and protective measures to keep yourself safe while working on your bike. Once you have all the necessary tools, you can move onto the next step of disassembling the bike.
Before disassembling the bike, it’s important to make sure you have all the necessary tools and safety gear. By gathering the tools listed above and taking the proper protective measures, you’ll be well on your way to restoring your old bicycle.
Amazon Product B07M5SV3JZ
As an affiliate, we earn on qualifying purchases.
Disassemble the Bike
Now it’s time to break down your bike piece by piece, like a detective examining a crime scene. Start by removing the wheels, pedals, chain, and seat. Then take off the handlebars, brakes, and derailleurs.
Keep track of all the screws, bolts, and washers in a container, so you don’t lose them. Depending on the condition of your bike, some parts may be rusted, corroded, or damaged beyond repair. If that’s the case, you can reuse parts that are still in good shape, recycle materials that can’t be salvaged, or upcycle with creative modifications.
One of the benefits of restoring an old bicycle is that you can customize it to suit your needs and style. For example, you can replace the handlebars with a different shape or size, or add accessories like fenders, lights, or a basket. You can also paint the frame a new color, or polish it to a shine.
However, before you can do any of that, you need to clean and repair the parts. That’s the next step in the restoration process.
Amazon Product B0FFMZLPY7
As an affiliate, we earn on qualifying purchases.
Clean and Repair the Parts
Now that the bike has been disassembled, it’s time to give each part the attention it deserves.
First, I’ll clean the frame thoroughly to remove any dirt, rust, or grime that may have accumulated over the years.
Next, I’ll inspect each part for any signs of damage or wear and tear, repairing or replacing them as needed.
Finally, I’ll lubricate all the moving parts, ensuring that they move smoothly and without resistance. This step is crucial to ensure that the bike runs smoothly and safely once it’s reassembled.
Clean the Frame
To get your old bike looking like new again, start by giving the frame a thorough cleaning using a mild soap and water solution. It’s important to remove any dirt, grime, and rust before beginning any paint restoration. Here’s a table outlining the steps to clean your bike’s frame:
| Step | Description | Tools Needed |
|---|---|---|
| 1 | Remove dirt and grime | Soft-bristled brush, mild soap, water |
| 2 | Remove rust | Rust remover solution, steel wool, sandpaper |
| 3 | Dry the frame | Clean cloth |
First, use a soft-bristled brush to remove any dirt and grime from the frame. Mix a mild soap and water solution and use a cloth or sponge to clean the frame thoroughly. Rinse the frame with clean water and dry it with a clean cloth.
Next, tackle any rust spots on the frame. Apply a rust remover solution to the affected areas and let it sit for the recommended amount of time. Use steel wool or sandpaper to scrub away the rust, being careful not to damage the frame’s paint. Once the rust is gone, rinse the frame with water and dry it with a clean cloth.
Now that your frame is clean and rust-free, it’s time to move on to repairing or replacing any damaged parts.
Repair or Replace Damaged Parts
Just like a car, a bike needs regular maintenance and sometimes parts need to be fixed or exchanged to keep it running smoothly. When restoring an old bicycle, it’s important to assess each damaged part and determine whether it’s more cost-effective to repair or replace it.
While some parts, such as chains and brake pads, may simply need to be adjusted or cleaned, others may need to be completely replaced. It’s important to weigh the costs and durability of each part before making a decision.
When it comes to finding affordable replacement parts for vintage bicycles, it can be a challenge. However, there are a few options to consider. First, check online marketplaces and forums for vintage bike enthusiasts. You may be able to find someone selling the exact part you need.
Additionally, many bike shops specialize in vintage bike restorations and may have the parts you’re looking for. Finally, consider purchasing a donor bike to salvage parts from. This can be a cost-effective way to acquire multiple parts at once.
By making smart decisions about repairing or replacing parts, you can ensure that your restored bike is both functional and durable.
To keep everything running smoothly, the next step is to lubricate all the moving parts.
Lubricate Moving Parts
Keeping your bike in top shape means regularly lubricating all the moving parts to ensure a smooth ride. Choosing the right lubrication is crucial to avoid damaging your bike’s components.
For most moving parts, a light oil or silicone spray will do the job. However, for the chain, a specific chain lubricant is recommended. Avoid using WD-40 or other penetrating oils as they can wash away the existing lubrication and cause damage in the long run.
When applying lubrication, it’s important to be precise and avoid over-lubricating. Too much lubrication can attract dirt and debris, making the moving parts less efficient. Apply lubrication to the pivot points, joints, and bearings, and wipe off any excess.
For the chain, apply the lubricant evenly along the entire length, and wipe off any excess with a clean rag. Once all the moving parts are lubricated, give the bike a spin to distribute the lubrication evenly.
With all the moving parts lubricated, it’s time to reassemble and test ride your bike. But before that, make sure to wipe off any excess lubrication and clean any dirty components. A clean bike is not only more efficient but also more enjoyable to ride.
Now, let’s move on to the next step of reassembling and testing your bike.
Reassemble and Test Ride Your Bike
Once you’ve reassembled your old bike, take it for a test ride to ensure it’s safe and ready to hit the road.
When you first hop on, test the brakes by squeezing them firmly. If they feel too loose or too tight, you may need to adjust them. To do so, look for the small barrel adjuster on the brake lever or caliper and turn it clockwise or counterclockwise until you achieve the desired tension. Remember to adjust both the front and rear brakes so they work evenly.
Next, make sure your saddle is adjusted to the correct height and angle. Sit on the bike and place your feet on the pedals. With the pedal in its lowest position, your leg should be almost fully extended but with a slight bend at the knee. Adjust the saddle height accordingly. Also, make sure it’s positioned at the correct angle. A level saddle is ideal, but some riders prefer a slight tilt forward or backward for comfort.
Once you’ve made all necessary adjustments, take your bike for a spin around the block. If anything feels off, stop and make further adjustments. With a little patience and attention to detail, you can restore your old bike to its former glory.
Frequently Asked Questions
Can I restore a bike that has been sitting outside for years?
Yes, it’s possible to restore a bike that’s been outside for years. Before beginning restoration, I recommend cleaning and prepping the bike thoroughly. Additionally, storing the bike properly after restoration can prevent future damage.
Is it necessary to replace every single part of the bike during restoration?
When restoring a bike, it’s not necessary to replace every part. Some parts can be reused if they’re still in good condition. However, it’s important to weigh the cost versus quality when deciding what to replace.
How long does the restoration process typically take?
The restoration process duration varies depending on the bike’s condition and extent of restoration. To expedite the process, I recommend using the best cleaning products for removing rust, such as vinegar or lemon juice.
What should I do if I am missing a specific tool needed for the restoration?
Well, if I don’t have the specific tool needed for the restoration, I’ll just have to get creative. There are always alternative tool options or I can try borrowing tools from a friend. That’s the beauty of restoration – it’s all about problem-solving.
Is it possible to restore the bike to its original paint and design?
Research vintage bike designs to find original paint and design. Look for replacement decals at bike shops or online. Properly clean and prep the bike before applying new paint and decals.
Conclusion
In conclusion, restoring an old bicycle is a satisfying experience that requires patience, attention to detail, and a passion for cycling. As I rode my restored bike for the first time, I felt a sense of accomplishment and nostalgia.
The bike represented more than just a means of transportation; it was a symbol of my dedication to preserving the past and my love for cycling.
Just like restoring a bike, life requires effort and care to make it functional again. Sometimes we need to disassemble our lives to clean and repair the parts that need attention.
It may seem daunting at first, but with the right tools and mindset, we can reassemble our lives like a restored bike and ride towards a brighter future.