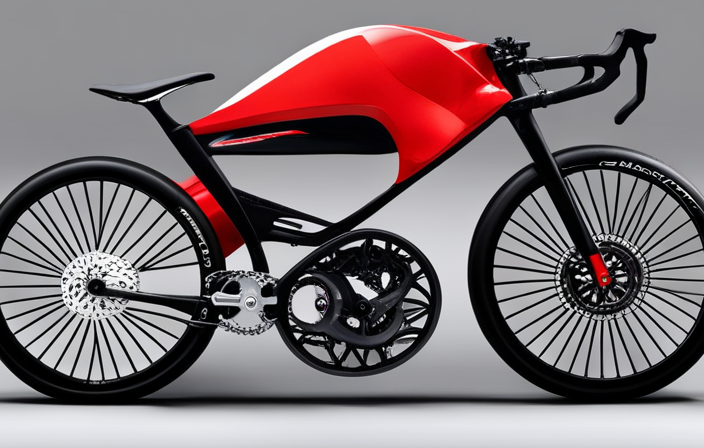
Revamping a bike is a fulfilling project that enables you to breathe new life into a tired, old bicycle and turn it into a completely operational, good-as-new vehicle.
In this article, I will guide you through the step-by-step process of restoring your bicycle, from assessing its condition to making necessary repairs and adjustments.
By following these detailed instructions, you will be able to bring your beloved bicycle back to life and enjoy many more miles of riding.
Let’s dive in and get started!
Key Takeaways
- Use a spoke tension meter to check and adjust the tension of each spoke for uniformity.
- Spin the wheels to identify and correct any wobbles by adjusting spoke tension with a spoke wrench.
- Take the bike for a test ride to ensure smoothness and make final adjustments.
- Regularly maintain and inspect the restored bike, checking wheel alignment, brake pads, chain, and frame for any issues.
Assess the Condition of Your Bicycle
Before you can start restoring your bicycle, you should assess its condition to determine what repairs are needed.
To assess the bike frame, check for any visible damage such as cracks, dents, or rust. Inspect the welds and joints for signs of weakness or separation. Ensure that the frame is aligned properly and not bent.
Next, check the tire pressure. Use a pressure gauge to ensure that the tires are inflated to the recommended PSI. Look for any signs of wear or damage on the tires, such as cuts or bulges.
Once you have assessed the condition of your bicycle, you can move on to cleaning it. This will help to prepare the surface for any necessary repairs or maintenance.
Clean Your Bicycle
To clean my bicycle, I start by removing all the dirt and grime accumulated on its surface. I use a sponge or a soft brush along with some soapy water to scrub away the dirt.
It is important to choose appropriate cleaning products and tools that won’t damage the bike’s paint or components.
Remove dirt and grime
Start by using a damp cloth to wipe away dirt and grime from your bicycle. This is an important step in bike maintenance as it helps to prevent rust and keeps your bike looking clean and shiny. To effectively remove dirt and grime, follow these cleaning techniques:
- Begin by focusing on the frame and handlebars, wiping them down thoroughly.
- Pay attention to hard-to-reach areas such as the chainrings and cassette.
- Use a small brush to scrub away stubborn dirt from the derailleur and brake calipers.
- Don’t forget to clean the wheels and rims, removing any debris that may affect their performance.
- Finally, wipe down the saddle and pedals to ensure a complete clean.
After removing dirt and grime, it’s time to move on to the next step: using appropriate cleaning products and tools.
Use appropriate cleaning products and tools
Once you have removed dirt and grime, it’s important to use the right cleaning products and tools. Proper cleaning techniques ensure that your bicycle is restored to its best condition.
To begin, choose a mild detergent or bike-specific cleaner to avoid damaging the frame or components. Avoid using harsh chemicals or abrasive cleaners, as they can strip away paint or corrode metal parts. A soft brush or sponge can be used to gently scrub the bike, paying attention to hard-to-reach areas like the cassette and chainrings. For stubborn stains, a degreaser may be necessary.
After cleaning, rinse the bike thoroughly with water to remove any residue. Remember to dry the bike completely to prevent rust.
With the bike now clean, it’s time to replace any worn or damaged parts, ensuring optimal performance and safety.
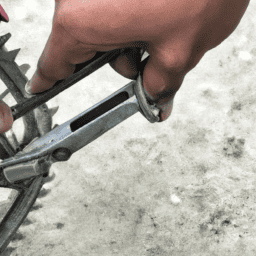
Replace Worn or Damaged Parts
First, check for any worn or damaged parts on your bicycle. This is an essential step in restoring your bike to its optimal condition.
Here are three repair techniques to troubleshoot common issues:
-
Inspect your tires for signs of wear, such as cracks or bald spots. Replace them if necessary to ensure proper traction and safety.
-
Examine the chain for rust, tight links, or excessive wear. Clean and lubricate it regularly, or replace it if it’s beyond repair to maintain smooth shifting and efficient power transfer.
-
Check the brake pads for wear or glazing. Replace them if they are too thin or hardened to guarantee reliable stopping power.
Now that you have replaced any worn or damaged parts, it’s time to move on to the next step of the restoration process: lubricating the moving parts.
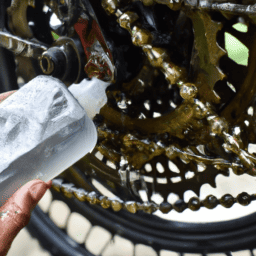
Lubricate Moving Parts
To properly maintain a bicycle, it’s crucial to lubricate the moving parts regularly. Applying lubrication to the chain, gears, and pedals ensures smooth and efficient operation.
Additionally, it’s important to lubricate the brake and derailleur systems to ensure their proper functioning.
By following these maintenance steps, you can keep your bicycle in top condition and enjoy a smooth and trouble-free ride.
Apply lubrication to the chain, gears, and pedals
You should apply lubrication to the chain, gears, and pedals to ensure smooth operation of your bicycle. Proper chain maintenance is essential for optimal performance and longevity.
Start by cleaning the chain thoroughly with a degreaser and a rag, removing any dirt or debris. Once the chain is clean, apply a bicycle-specific lubricant to each link, making sure to cover the entire length. Allow the lubricant to penetrate for a few minutes, then wipe off any excess.
Moving on to the gears, apply lubricant to each gear tooth, ensuring even coverage. Lastly, apply lubrication to the pedal bearings and threads to reduce friction and enhance rotation.
By properly lubricating these components, you will ensure smooth operation of brakes and derailleurs, allowing for a more enjoyable and efficient ride.
Ensure smooth operation of brakes and derailleurs
To ensure smooth operation of your brakes and derailleurs, it’s important to regularly check for any signs of wear or damage.
Start by inspecting the brake pads for excessive wear or contamination. If they appear worn or glazed, it’s time for a replacement.
Next, check the brake cables for fraying or stretching. Adjust the brake tension accordingly to ensure optimal stopping power.
Moving on to the derailleurs, check for any misalignment or excessive play. Make sure the derailleur hanger is straight and tighten any loose bolts.
Then, shift through all the gears to ensure smooth and precise shifting. Fine-tune the derailleur’s cable tension and limit screws as needed for precise gear changes.
With proper brake adjustment and derailleur tuning, your bike will operate smoothly and efficiently.
Now, let’s move on to adjusting the bike’s fit for maximum comfort and performance.
Adjust the Bike’s Fit
Start by adjusting the bike’s seat to ensure a comfortable ride. Proper bike fit is essential for a smooth and efficient cycling experience. Here are four key bike fit adjustments to consider:
-
Seat Height: Adjust the seat height so that your leg is almost fully extended at the bottom of the pedal stroke, with a slight bend in the knee.
-
Saddle Fore/Aft Position: Position the saddle forward or backward to achieve proper balance and weight distribution.
-
Handlebar Height: Adjust the handlebar height to a position that allows you to maintain a relaxed and natural riding posture.
-
Reach Adjustment: Customize the reach to the handlebars by adjusting the stem length or handlebar angle, ensuring your arms are comfortably extended.
By making these bike fit customization, you can enhance your comfort, efficiency, and overall enjoyment while cycling.
Now let’s move on to tune-up the bike’s gears and brakes for optimal performance.
Tune-Up the Bike’s Gears and Brakes
After adjusting the bike’s fit, the next step in restoring a bicycle is to tune up the bike’s gears and brakes. This is crucial for ensuring a smooth and safe ride. To perform this task, you will need a few tune-up tools such as a cable cutter, a set of Allen wrenches, and a chain lubricant.
Start by inspecting the gears and brakes for any signs of wear or damage. If you notice any issues, such as gears slipping or brakes not engaging properly, it’s time for some troubleshooting. Adjust the tension on the gear cables and brake cables as needed using the appropriate tools.
Additionally, make sure to lubricate the chain to prevent rust and improve performance.
With the gears and brakes properly tuned, we can now move on to the next step: truing the wheels.
True the Wheels
Make sure you inspect the wheels for any signs of wobbling or misalignment. Proper wheel alignment is crucial for a smooth and safe ride. Here are the steps to true the wheels and ensure they are perfectly aligned:
-
Check spoke tension: Start by checking the tension of each spoke using a spoke tension meter. Adjust the tension as needed to ensure uniformity.
-
Identify wobbles: Spin the wheels and look for any side-to-side or up-and-down movement. This indicates a wobble that needs to be corrected.
-
Adjust spoke tension: Use a spoke wrench to tighten or loosen the spokes on the side opposite to the wobble. This will help straighten the wheel.
-
Repeat and recheck: Continue adjusting the spoke tension until the wheel runs smoothly and without any wobbles.
With the wheels properly aligned, it’s time to move on to the next step – the test ride and making final adjustments.
Test Ride and Make Final Adjustments
Take the bike for a test ride to ensure everything feels smooth and make any final adjustments as needed.
Test ride safety is essential, so wear a helmet and ride in a safe environment.
Start by checking the brakes, making sure they engage smoothly and provide enough stopping power.
Shift through all the gears, ensuring smooth transitions between each one.
Pay attention to any unusual noises or vibrations, as these may indicate issues with the drivetrain or bearings.
If necessary, make final adjustments to the seat height, handlebar position, and pedal alignment to optimize comfort and efficiency.
Additionally, go through a final checklist, including tightening all bolts, checking tire pressure, and verifying that all components are secure.
Once everything feels dialed in, you can consider cosmetic upgrades to personalize your ride.
Consider Cosmetic Upgrades
After taking my restored bicycle for a test ride and making all the necessary adjustments, it’s time to consider cosmetic upgrades. This step allows me to personalize the appearance of my bike and make it truly my own.
Here are a few options to consider when upgrading the aesthetics of your bicycle:
-
Custom Paint Job: Give your bike a fresh look by choosing a new color or adding unique designs.
-
Decals and Stickers: Add some flair to your bike with decals or stickers that showcase your personality or interests.
-
Handlebar Tape or Grips: Upgrade your handlebars with new tape or grips that not only look great but also provide better comfort and control.
-
Saddle: Swap out the old saddle for a new one that suits your style and provides a more comfortable ride.
By upgrading the aesthetics of my restored bicycle, I can truly make it my own. However, it’s important to remember that maintaining and regularly inspecting your bike is crucial to its longevity and performance.
Maintain and Regularly Inspect Your Restored Bicycle
To ensure the longevity and performance of your refurbished bike, it’s crucial to regularly maintain and inspect it. Inspecting the various components of your bicycle is essential to identify any potential issues and address them promptly. Start by checking the alignment of the wheels to ensure they are straight and properly seated in the dropouts. Misaligned wheels can lead to poor handling and increased wear on the tires. Additionally, inspect the brake pads for wear and adjust them if necessary. Check the chain for any signs of rust or damage and lubricate it regularly to ensure smooth shifting. Don’t forget to inspect the frame for any cracks or dents that may compromise its integrity. By regularly inspecting and maintaining your restored bicycle, you can enjoy a safe and reliable ride for years to come.
| Component | Inspection Procedure |
|---|---|
| Wheels | Check for proper alignment and ensure they are securely seated in the dropouts. |
| Brake Pads | Inspect for wear and adjust if needed. |
| Chain | Look for signs of rust or damage and lubricate regularly for smooth shifting. |
| Frame | Carefully inspect for cracks or dents that may compromise the structural integrity of the bicycle frame. |
Frequently Asked Questions
How do I properly assess the condition of my bicycle before starting the restoration process?
To properly assess the condition of my bicycle before starting the restoration process, I would thoroughly inspect for rust, checking areas such as the frame, handlebars, and spokes. Additionally, I would carefully choose a suitable paint color to enhance the overall aesthetic appeal.
What are the essential steps to clean a bicycle thoroughly?
To clean a bicycle thoroughly, gather proper equipment such as a bucket, sponge, degreaser, and a soft brush. Follow these steps: 1. Rinse the bike. 2. Apply degreaser. 3. Scrub all parts. 4. Rinse again. 5. Dry with a clean cloth.
How can I identify which parts of my bicycle need to be replaced due to wear or damage?
To identify bicycle damage, inspect the frame, wheels, brakes, drivetrain, and handlebars. Look for cracks, dents, loose spokes, worn brake pads, chain wear, and bent handlebars. Replace worn parts like tires, chains, brake pads, and cables to ensure safe and efficient cycling.
What type of lubricant should I use and where should I apply it to ensure smooth movement of the bicycle’s parts?
To ensure smooth movement of the bicycle’s parts, I recommend using a high-quality bicycle lubricant. Apply it to the chain, derailleur pulleys, and pivot points of the brakes and gears for optimal performance and longevity.
Can you provide tips on how to adjust the bike’s fit for optimal comfort and performance?
To optimize comfort and performance, adjust the bike’s fit. Start by adjusting the saddle height and tilt, handlebar height and reach. Ensure proper alignment of the pedals, knees, and hips. These bike fit adjustments will enhance bike performance.
Conclusion
In conclusion, restoring a bicycle requires careful assessment, thorough cleaning, and replacing any worn or damaged parts.
It is crucial to lubricate the moving parts and adjust the bike’s fit for optimal performance.
Trueing the wheels and testing the bike’s ride are essential steps in ensuring a successful restoration.
Consider cosmetic upgrades to enhance the bike’s appearance.
Lastly, maintaining and regularly inspecting your restored bicycle will prolong its lifespan.
Are you ready to embark on the rewarding journey of restoring your bicycle to its former glory?