Are you prepared to elevate your mountain biking experiences to a whole new level? Search no more! This article will guide you on how to upgrade your reliable mountain bike with an electric motor kit, turning it into a high-performing and efficient electric mountain bike.
With just a few simple steps, you’ll be able to conquer any trail with ease. So, let’s dive in and get started on this electrifying journey!
Key Takeaways
- Analyze specific needs and preferences for battery positioning and mounting
- Test and fine-tune the electric motor for optimal performance
- Familiarize with electric assistance and adjust settings for safety and desired riding experience
- Utilize the added power of the electric motor to explore new trails and conquer challenging terrains

Schwinn Sporterra RX Gravel Bike, 700c Mens and Womens Bike, 14-Speed Drop Bar Gravel Bicycle, Mechanical Disc Brakes, Rigid Fork, Aerodynamic Riding Position, Quick Release Seat Post, Adult Bicycle
GRAVEL BICYCLE: Enjoy next level riding with the Sporterra RX by Schwinn. With 700c wheels, this mens and...
As an affiliate, we earn on qualifying purchases.
Assess Your Bike’s Compatibility
Assess if your bike’s components and frame are compatible with an electric motor. Before starting the retrofitting process, it is crucial to evaluate your bike’s condition.
Check if the frame is sturdy and in good condition, as it needs to support the added weight and vibrations of the motor. Additionally, examine the brakes, gears, and suspension to ensure they can handle the increased power and torque.
Once you have determined that your bike is suitable for retrofitting, it is time to select the appropriate motor kit. Consider factors such as the motor’s power output, battery capacity, and compatibility with your bike’s specifications. This will ensure a seamless integration of the electric motor into your mountain bike.
Now that you have evaluated your bike’s compatibility and selected the appropriate motor kit, let’s move on to the next section about choosing the right electric motor kit.

SAVADECK T800 Carbon Gravel Bike, with Shimano GRX610 12-Speed, Hydraulic Disc Brakes, 700x40c Tires for Road & Off-Road Adventure, Men's/Women's Bicycle(Elegant White, 51cm)
【With SHIMANO GRX Drivetrain Setup】Equipped with SHIMANO GRX610 shifters and RX822 rear derailleur, matched with a 12-speed M6100...
As an affiliate, we earn on qualifying purchases.
Choose the Right Electric Motor Kit
To find the ideal kit for your bike, start by considering the power output you need. Motor power selection is crucial for ensuring that your electric motor provides enough assistance for your riding style and terrain. If you mainly ride on flat roads or gentle trails, a lower-powered motor may be sufficient. However, if you frequently tackle steep inclines or rugged terrain, a higher-powered motor will give you the necessary boost.
Additionally, battery range considerations are important. Determine how far you typically ride and choose a battery with enough capacity to cover that distance. Keep in mind that factors like rider weight, cargo load, and terrain can affect battery range.
Once you have chosen the right electric motor kit, you can move on to gathering the necessary tools and equipment for the installation process.
ShunTongDa 48V 10.4Ah 14Ah Folding Ebike Battery 48 Volt DCH-006 Built in Electric Bike Batteries with 30A BMS Totguard for 250W 500W 750W 1000W Motor Foldable E-Bike Battery (48V10.4Ah A Grade Cell)
①Battery Type: 18650 lithium ion batteries, Voltage: 48V, Capacity: 10.4Ah, Real High-Label Capacity. 30A BMS, Wattage at 500Wh,...
As an affiliate, we earn on qualifying purchases.
Gather the Necessary Tools and Equipment
Gathering the necessary tools and equipment for the installation process is essential.
To successfully retrofit a mountain bike with an electric motor, you will need a few key items.
First and foremost, you will need a motor kit specifically designed for bikes. This kit typically includes the motor, battery, controller, and wiring harness.
Additionally, you will need a set of basic hand tools such as wrenches, screwdrivers, and pliers. It is also important to have a torque wrench to ensure that all the components are properly tightened. Other necessary items include cable ties, electrical tape, and a wire cutter/stripper.
Having a workstand or bike repair stand can make the installation process much easier.
Now that you have gathered all the necessary tools and equipment, you are ready to prepare your bike for the retrofitting process.
Amazon Product B0CYT6TBYX
As an affiliate, we earn on qualifying purchases.
Prepare Your Bike for the Retrofitting Process
Before beginning the retrofitting process, it’s crucial to remove any accessories or components that may interfere with the installation of the electric motor. This includes items such as water bottle cages, bike computers, and fenders.
Once these are removed, it’s important to thoroughly clean and inspect the bike’s frame and components. This ensures they are in good condition and free from any dirt or debris that could affect the retrofitting process.
Remove any Accessories or Components that May Interfere
First, make sure you remove any accessories or components that might interfere with the installation of the electric motor on your mountain bike. Assess interference and take the necessary steps to eliminate any potential issues. Here are three items to consider:
-
Remove the water bottle cage: The electric motor may require additional space on the frame, so it’s important to remove the water bottle cage if it is located in the way.
-
Take off any front or rear racks: These racks can obstruct the installation process and may need to be temporarily removed.
-
Detach fenders or mudguards: These can interfere with the motor’s mounting brackets and should be taken off before proceeding.
Now that you have removed any potential obstructions, you can move on to the next step: cleaning and inspecting your bike’s frame and components to ensure they are in optimal condition for the retrofitting process.
Clean and Inspect Your Bike’s Frame and Components
Once you have removed any potential obstructions, it’s important to thoroughly clean and inspect your bike’s frame and components to ensure they are in optimal condition for the installation process.
Start by assessing the frame condition. Look for any cracks, dents, or signs of damage that could compromise the integrity of the bike. It’s crucial to address any issues before proceeding with the retrofit.
Next, inspect the components for wear and tear. Check the drivetrain, brakes, and suspension system for any signs of damage or excessive wear. Replace any worn-out parts to guarantee a smooth and safe ride.
Cleaning the frame and components is also essential to remove any dirt, grease, or debris that could affect the performance of the electric motor.
Once you have completed this step, you can confidently move on to the next section and install the electric motor and battery.
Install the Electric Motor and Battery
To install the electric motor and battery on your mountain bike, you’ll need to make sure you have the necessary tools and equipment.
Start by installing the motor correctly. Begin by removing the bottom bracket of your bike’s frame using a bottom bracket tool. This will allow you to attach the motor in its place. Make sure to follow the manufacturer’s instructions for the specific motor you’re using.
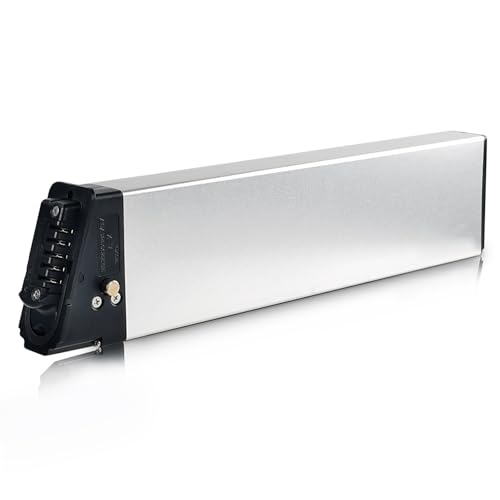
Next, choose the right battery size for your needs. Consider factors such as the distance you plan to ride and the power output you desire.
Once you have the motor and battery in place, you can connect the motor to the bike’s drivetrain. This will allow the motor to transfer power to the bike’s wheels and provide you with an assisted ride.
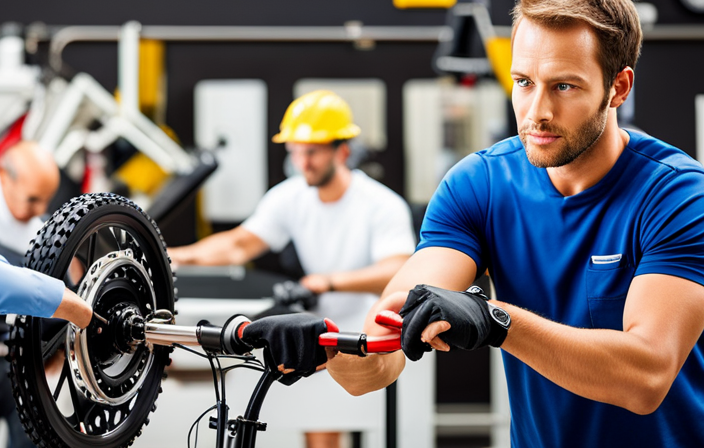
Connect the Motor to the Bike’s Drivetrain
Now, you’ll need to connect the motor to your bike’s drivetrain for a seamless transfer of power. Before starting, make sure the motor you have is compatible with your bike’s drivetrain system. Check the specifications of both the motor and your bike’s drivetrain to ensure they are compatible.
Begin by removing the existing chain from your bike’s drivetrain and placing it aside. Next, attach the motor to the bike frame using the provided mounting brackets. Align the motor with the drivetrain so that the sprocket lines up with the chainring. Securely fasten the motor to the frame using the bolts provided.
Once the motor is properly attached, you can proceed to securely attach the battery, which we will cover in the next section.
Securely Attach the Battery
To securely attach the battery to the bike, I need to choose an optimal position that ensures stability and balance. I will consider factors such as weight distribution and accessibility for charging and maintenance.
Additionally, I will use secure mounting hardware, such as sturdy brackets and straps, to prevent any movement or damage to the battery during rides.
By following these steps, I can ensure that the battery is securely attached to my bike, allowing me to enjoy a smooth and reliable electric biking experience.
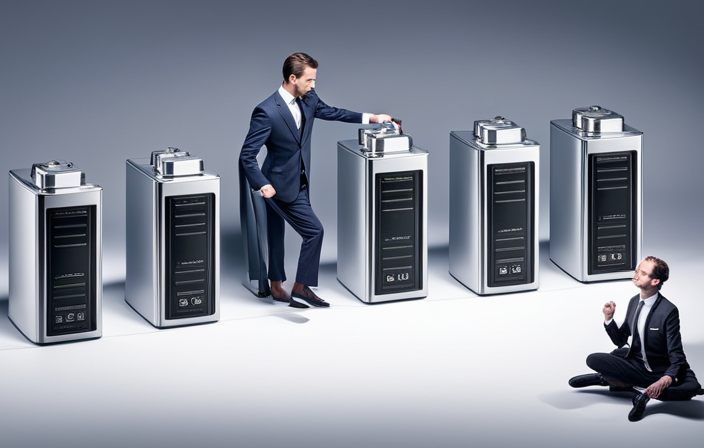
Choose an Optimal Position for the Battery
First, you’ll want to determine the optimal position for the battery on your mountain bike. Battery placement is crucial for achieving proper weight distribution and ensuring the bike’s stability and handling. Consider the following factors when choosing the ideal location:
| Position | Pros | Cons |
|---|---|---|
| Frame-mounted | – Low center of gravity | – Limited space for larger batteries |
| Rear rack-mounted | – Easy access for charging | – May affect rear suspension performance |
| Seat tube-mounted | – Balanced weight distribution | – Limited space for larger batteries |
By analyzing these options, you can make an informed decision based on your specific needs and preferences. Once you have determined the optimal position for the battery, you can move on to the next step and use secure mounting hardware to ensure it stays in place during your rides.
Use Secure Mounting Hardware
Once you’ve determined the optimal position for the battery, make sure to use secure mounting hardware to keep it in place. This is crucial to ensure the stability and safety of your electric motor retrofit.
Look for mounting hardware specifically designed for electric bike batteries, as it will provide the necessary strength and durability. Check the compatibility of the hardware with your bike frame and battery. Consider factors such as the size and weight of the battery, as well as the type of frame material.
Use strong and reliable screws, bolts, or clamps to attach the battery securely to your bike frame. Double-check the tightness of the mounting hardware before each ride to avoid any potential risks.
With the battery securely mounted, you can now move on to the next step of testing and fine-tuning the electric motor to ensure optimal performance.
Test and Fine-Tune the Electric Motor
Next, you’ll need to test and fine-tune the electric motor for your mountain bike. This step is crucial to ensure optimal performance and troubleshoot any common issues that may arise. Here are some key steps to follow:
- Start by checking the motor’s connections and wiring to ensure everything is securely fastened.
- Test the motor’s functionality by engaging the throttle and observing how smoothly it accelerates.
- Fine-tune the motor’s settings, such as speed and power output, to match your preferences and riding style.
- Pay attention to any unusual noises or vibrations during the test runs, as they could indicate potential issues.
- Take the time to troubleshoot common problems like overheating or battery drain, making adjustments as necessary.
By thoroughly testing and fine-tuning your electric motor, you’ll be able to enjoy your upgraded electric mountain bike to the fullest.
Enjoy Your Upgraded Electric Mountain Bike
When you first upgrade your mountain bike with an electric motor, it’s important to start with shorter rides to get familiar with the electric assistance. Take the time to understand how the motor works and how it affects your riding experience.
Once you feel comfortable, you can start exploring new trails and conquering challenging terrains with the added power of the electric motor. It’s an exciting way to take your mountain biking adventures to the next level.
Start with Shorter Rides to Get Familiar with the Electric Assistance
To become comfortable with the electric assistance, start by taking shorter rides on your retrofitted mountain bike. This will allow you to get a better understanding of the electric motor performance and how it affects your riding experience.
Before starting your rides, it is important to take safety precautions such as wearing a helmet, adjusting the electric assistance level to your comfort, and familiarizing yourself with the controls.
During your shorter rides, pay attention to how the electric motor enhances your pedaling power and speed. Gradually increase the distance and difficulty of your rides as you become more familiar with the electric assistance.
This will prepare you to explore new trails and conquer challenging terrains without feeling overwhelmed.
Explore New Trails and Conquer Challenging Terrains
After getting familiar with the electric assistance on shorter rides, it’s time to take your retrofitted mountain bike to the next level.
With the added power of the electric motor, you can now explore new trails and conquer challenging terrains that were previously out of reach. Whether it’s remote trails deep in the wilderness or steep inclines that test your endurance, the electric motor will provide the extra boost you need to push through.
You’ll be able to cover more ground and tackle tougher obstacles with ease. The improved endurance on steep inclines will give you the confidence to take on even the most demanding trails. So, get ready to embark on thrilling adventures and push your limits with your electric mountain bike.
But before you head out, it’s important to know how to maintain and care for your electric mountain bike to ensure its longevity and performance.
Maintain and Care for Your Electric Mountain Bike
It’s important to regularly maintain and care for your electric mountain bike. Proper maintenance ensures that your bike performs optimally and increases its lifespan. Here are five essential maintenance tasks to keep your electric mountain bike in top shape:
-
Clean and lubricate the drivetrain: Regularly clean and lubricate the chain, cassette, and derailleurs to prevent rust and ensure smooth shifting.
-
Check tire pressure: Maintaining the correct tire pressure is crucial for a smooth and efficient ride. Use a pressure gauge to ensure your tires are properly inflated.
-
Inspect and tighten bolts: Regularly check all bolts and fasteners to ensure they are tightened securely. Loose bolts can lead to safety hazards and affect the bike’s performance.
-
Monitor battery health: Keep an eye on your battery’s health and charge it as needed. Avoid overcharging or completely draining the battery to prolong its lifespan.
-
Troubleshoot common issues: Familiarize yourself with common electric mountain bike issues, such as motor malfunctions or electrical system failures. Learn how to troubleshoot these problems or seek professional help when needed.
By following these maintenance tasks, you’ll be able to enjoy a reliable and long-lasting electric mountain biking experience.
Frequently Asked Questions
How much does it cost to retrofit a mountain bike with an electric motor?
Retrofitting a mountain bike with an electric motor can cost anywhere from $500 to $2,000, depending on the type and quality of the motor. The benefits include increased speed, improved uphill performance, and extended range.
Can I still use my bike’s gears with an electric motor?
Yes, you can still use your bike’s gears with an electric motor. It’s like having a reliable co-pilot on tough terrains, effortlessly switching gears to maximize efficiency and power. Enjoy the benefits of seamless gear shifting and enhanced performance.
How long does it take to install an electric motor kit on a mountain bike?
The installation time for an electric motor kit on a mountain bike can vary depending on the individual’s mechanical skills and familiarity with the process. Typically, it takes around 2-4 hours to complete the installation using basic tools such as wrenches, screwdrivers, and pliers.
Will adding an electric motor affect the weight and balance of my mountain bike?
Adding an electric motor to a mountain bike can impact its weight and balance. The extra weight can affect handling, making it feel less nimble. Additionally, battery life and range should be considered to ensure a satisfactory riding experience.
Are there any legal restrictions or regulations for using an electric motor on a mountain bike?
There are legal restrictions and safety concerns when using an electric motor on a mountain bike. It is important to be aware of local regulations regarding speed limits, motor power, and required safety equipment.
Conclusion
As I ride my newly upgraded electric mountain bike, I can’t help but feel like I am soaring through the clouds, defying gravity with every pedal stroke.
The electric motor has breathed new life into my trusty old bike, transforming it into a powerful and efficient machine.
The process of retrofitting was not without its challenges, but the satisfaction of overcoming those obstacles is immeasurable.
I am now ready to conquer even the steepest of mountain trails, knowing that my electric mountain bike will carry me to new heights.