
As a passionate electric bike lover, I’ve always been intrigued by the inner workings of brushed motors. Today, I’m thrilled to provide you with a detailed guide on how to reverse a brushed motor for your electric bike.
By understanding the basics and following a few simple steps, you’ll be able to unlock a whole new level of control and versatility in your rides.
So, gear up and let’s dive into the technical world of reversing brushed motors!
Key Takeaways
- Proper brush cap alignment is essential for motor functionality and should be securely attached to the motor.
- Reversing the motor can be tested by connecting it to a power source and observing the spin direction. The opposite direction indicates successful reversal.
- If the motor doesn’t reverse, troubleshoot by double-checking wiring connections and consulting manufacturer’s instructions or seeking professional help.
- Fine-tune the motor direction by adjusting brush alignment or timing, and ensure secure attachment of brush caps. Regularly inspect and maintain the reversed motor for optimal performance.

GPUTEK Mini Bike Tire Air Pump: Fast Inflate Portable Small Bicycle Electric Pump for Presta and Schrader Valves, 120 Psi High Pressure Pump with Digital Gauge for Road Bike, Mountain Bike, E-Bike
Portable and Lightweight Design: The GPUTEK bike electric pump measures a compact 2.81 x 1.77 x 1.25 inches...
As an affiliate, we earn on qualifying purchases.
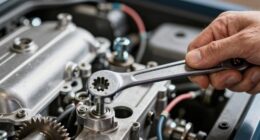
Understand the Basics of Brushed Motors
To understand the basics of brushed motors, you’ll need to know how the brushes and commutator work together to create motion.
Brushed motors are commonly found in many devices, including electric bikes. These motors rely on brushes, typically made of carbon, to conduct electricity to the commutator. The commutator is a cylindrical device with copper segments that are connected to the brushes.
As the commutator rotates, it switches the direction of the current flowing through the brushes, causing the motor to spin. Understanding this mechanism is crucial for brushed motor maintenance and troubleshooting brushed motor issues. By having a clear understanding of how the brushes and commutator work, you can effectively diagnose and resolve any problems that may arise.
Now, let’s move on to gathering the necessary tools and equipment for the task at hand.

HOTO Mini Bike Tire Pump, 25s Fast Inflate Bicycle Pump with Guage, 150PSI Portable Electric Bike Air Pump with Presta and Schrader Valve for Road Bike, Motorcycle, Mountain Bike, BMX, Sports Ball
NOTICE: The Presta valve adapter is a separate accessory, always attach the Presta adapter securely to the tire...
As an affiliate, we earn on qualifying purchases.
Gather the Necessary Tools and Equipment
You’ll need a few tools and equipment to get started on this task. Here are the essential items you’ll need:
- Screwdriver: A flathead or Phillips screwdriver will be necessary to remove any screws holding the motor in place.
- Wrench: Depending on the type of motor and bike, you may need an adjustable wrench to loosen and remove any nuts or bolts.
- Multimeter: This tool will help you test the motor’s connections and ensure everything is working properly.
Having these tools ready will make the process smoother and more efficient. Once you have gathered these items, you can proceed to the next step.
Now, it’s time to disconnect the power source and ensure your safety throughout the process.

CYCPLUS Electric Air Compressor Portable Bicycle Pump Car Tire Inflator, Max 150 PSI, Auto Shut-Off Air Pump with Presta and Schrader Valves for All Bicycles Motorcycles and Cars
【150PSI Fast Inflation】CYCPLUS Portable Air Compressor delivers 𝟏𝟓𝟎 𝐏𝐒𝐈/𝟏𝟎.𝟑 𝐁𝐚𝐫, allowing you to fully inflate a bike tire...
As an affiliate, we earn on qualifying purchases.
Disconnect the Power Source
First, make sure the power source is disconnected to ensure your safety during this step. This is crucial before working with any electrical components. Reconnecting the power source prematurely can result in electric shock or damage to the motor. Troubleshooting common issues related to the power source can include checking the circuit breaker, inspecting the wiring connections, and testing the voltage output.

CYCPLUS AS2 PRO Tiny Bicycle Pump with Gauge, Max 120 PSI Electric Mini Pump, Auto Stop, with Presta and Schrader Valve for E-Bike, MTB, and Road Bike (2025 Updated Version)
【Pocket Size & Portable】: Weight: 𝟒.𝟐𝟑 𝐨𝐳 (𝟏𝟐𝟎𝐠); Size: 𝟐.𝟕𝟓 𝐱 𝟏.𝟏𝟎 𝐱 𝟏.𝟗𝟐 inches - mini and...
As an affiliate, we earn on qualifying purchases.
Locate the Motor’s Brush Caps
Now that the power source is disconnected, let’s find the motor’s brush caps. These small covers house the brushes responsible for transferring electrical current to the commutator, which in turn spins the motor.
To locate the brush caps, follow these steps:
- Inspect the motor casing for any visible screws or tabs.
- Refer to the motor’s user manual for specific instructions.
- Use a flashlight to illuminate hard-to-see areas.
- Gently tap the motor casing to listen for a hollow sound, indicating the presence of the brush caps.
- Feel for any irregularities or protrusions on the motor casing.
Once you have located the brush caps, the next section will guide you on how to remove and clean them. This process is crucial for maintaining the performance and longevity of your motor.
Remove the Brush Caps
To remove the brush caps, gently pry them off using a flathead screwdriver or a small pry tool. This is an important step in order to access the brushes and perform maintenance on them.
Brush caps are small covers that protect the brushes inside the motor. They can become dirty or worn over time, which can affect the performance of the motor. By removing the brush caps, you can clean or replace the brushes as needed.
It’s recommended to clean the brush caps regularly to prevent any buildup of debris that could hinder the motor’s performance.
Once the brush caps are removed, you can proceed to identify the motor’s positive and negative terminals without any further steps.
Identify the Motor’s Positive and Negative Terminals
Once you’ve removed the brush caps, you can easily identify the motor’s positive and negative terminals. Identifying the correct polarity is crucial for troubleshooting motor issues and ensuring proper functioning.
The positive terminal is usually marked with a ‘+’ symbol, while the negative terminal is marked with a ‘-‘. It is essential to identify the correct terminals to avoid any potential damage to the motor or electrical system.
Polarity reversal is a common solution to rotate a brushed motor in the opposite direction. To do this, you need to swap the motor’s positive and negative wires.
This simple procedure will allow you to change the rotation direction of the motor, expanding its range of applications without requiring additional mechanical modifications.
Swap the Motor’s Positive and Negative Wires
Swapping the motor’s positive and negative wires allows you to change its rotation direction and expand its range of applications.
To reverse the direction of a brushed motor, first, locate the positive and negative terminals. Once identified, disconnect the power source and carefully remove the wires from their respective terminals.
Next, swap the positions of the wires, connecting the positive wire to the negative terminal and the negative wire to the positive terminal. This simple reversal changes the motor’s polarity, resulting in a reversal of its rotation direction.
Secure the Wires and Insulate Them
Now that the motor’s positive and negative wires have been swapped, it is crucial to secure the wires and insulate them properly to ensure safety and optimal performance. Wire insulation and cable management are vital steps in this process to prevent electrical hazards and maintain a neat and organized setup.
Here are five important considerations for securing and insulating the wires:
- Use zip ties or cable clips to secure the wires along the frame or designated cable routes.
- Avoid sharp edges or areas prone to friction that could damage the wire insulation.
- Apply heat shrink tubing or electrical tape to cover any exposed wire connections or splices.
- Bundle and organize the wires using wire looms or spiral wrap to minimize tangling and improve aesthetics.
- Double-check all wire connections to ensure they are tight and secure.
By following these guidelines, you can ensure that the wires are properly protected and the cable management is neat and efficient.
Now, let’s move on to reattaching the brush caps.
Reattach the Brush Caps
To complete the process, make sure to reattach the brush caps securely to the motor. Reattaching the brush caps is a crucial step in reversing a brushed motor for your electric bike. These caps play a vital role in the motor’s operation, ensuring proper contact and alignment of the brushes. Before reattaching the caps, it is essential to check their alignment to avoid any issues with the motor’s performance. Here is a table to guide you through the process:
| Brush Cap | Alignment |
|---|---|
| Cap 1 | Align |
| Cap 2 | Align |
| Cap 3 | Align |
Ensure that all three brush caps are aligned correctly before reattaching them securely to the motor. Once the caps are in place, proceed to the next section to test the reversed motor and ensure its proper functioning.
Test the Reversed Motor
Once you’ve reattached the brush caps, it’s time to test if the motor has been successfully reversed. To do this, connect the motor to a power source and observe the test results.
If the motor spins in the opposite direction compared to before, congratulations! You have successfully reversed the motor.
However, if the motor still spins in the same direction, don’t worry. There are some troubleshooting tips you can try.
First, double-check the wiring connections to ensure they are correct. Next, verify that the brush caps are securely attached.
If the motor still doesn’t reverse, you may need to consult the manufacturer’s instructions or seek professional help. Fine-tune the motor’s direction if needed by adjusting the brush alignment or motor timing.
Fine-tune the Motor’s Direction if Needed
If the motor is still not spinning in the desired direction, you might want to try adjusting the brush alignment or motor timing.
These adjustments can help fine-tune the motor’s direction and ensure it operates correctly.
To adjust the brush alignment, locate the brush holders on the motor and loosen the screws that secure them. Gently move the brushes slightly in the opposite direction of the desired rotation and retighten the screws. This can help change the motor’s direction.
If that doesn’t work, you can also try adjusting the motor timing. This involves changing the position of the brushes in relation to the commutator. By making small adjustments to the brush position, you can troubleshoot common motor issues and potentially resolve any direction problems.
Once you have finished adjusting the motor, you can move on to the next step of reconnecting the power source.
Reconnect the Power Source
After adjusting the motor, you can proceed by reconnecting the power source.
It is crucial to reconnect the power safely to avoid any electrical hazards. Start by double-checking the power cable connections from the motor to the battery.
Ensure that they are secure and properly inserted. If you encounter any issues, troubleshoot the power connection by inspecting the wires for any damage or loose connections.
If necessary, replace the damaged wires or tighten the loose connections. Once you have ensured a secure power connection, you can proceed to test if the motor is functioning properly.
This is an essential step to ensure the success of reversing the brushed motor for your electric bike.
Ensure the Motor is Functioning Properly
Before proceeding, make sure that the motor is working correctly to ensure the success of the next steps. Troubleshooting common motor issues is crucial for maintaining motor efficiency.
Here are some tips to help you diagnose and resolve common problems.
First, check the motor for any physical damage, such as loose wires or worn-out brushes.
Next, test the power supply and connections to ensure they are providing the correct voltage and current.
Finally, inspect the motor bearings for any signs of wear or excessive noise.
By addressing these issues, you can prevent further damage and optimize the performance of your motor.
With a properly functioning motor, you can proceed to the next section and enjoy your reversed brushed motor without any issues.
Enjoy Your Reversed Brushed Motor
Now that you have a functioning motor, you can start enjoying your newly modified electric bicycle. Reversing the motor in your electric bike offers several benefits that enhance your riding experience. Here’s what you can expect:
- Increased torque: Reversing the motor allows you to take advantage of the additional torque, giving you more power when climbing hills or accelerating.
- Improved braking: With a reversed motor, you can enjoy regenerative braking, which helps recharge your battery while you slow down or stop.
- Smoother ride: The reversed motor provides better control and stability, resulting in a smoother and more comfortable ride.
However, if you encounter any issues with your reversed motor, troubleshooting is essential. Common problems include incorrect wiring or faulty connections. Ensure all connections are secure and properly insulated to prevent any potential issues.
As you enjoy the benefits of your reversed motor, it’s important to consider safety precautions and regular maintenance to ensure a long-lasting and safe riding experience.
Consider Safety Precautions and Regular Maintenance
To ensure a safe and enjoyable ride, don’t forget to regularly check your brakes, tire pressure, and lights.
Maintenance is of utmost importance when it comes to safety measures for your electric bike. Regularly inspecting and maintaining your bike will help prevent potential accidents and ensure optimal performance.
Start by checking your brakes. Make sure they are properly aligned and have sufficient pad thickness.
Next, check your tire pressure. Proper inflation is crucial for good traction and control.
Lastly, inspect your lights. Ensure that all bulbs are functioning properly and that the wiring is intact.
Frequently Asked Questions
How can I tell if my motor is a brushed motor?
To identify a brushed motor, examine the motor’s construction. Look for brushes and commutator, which are characteristic features of brushed motors. Advantages of using a brushed motor include high torque and affordability.
Can I reverse the direction of any brushed motor?
Yes, any brushed motor can be reversed for a different application. However, it is important to consider potential risks such as increased wear and tear, reduced efficiency, and potential damage to the motor or other components.
What tools and equipment do I need to reverse a brushed motor?
To reverse a brushed motor, you will need a motor reversing switch or a motor controller with reverse capabilities. Additionally, troubleshooting common issues such as incorrect wiring connections or faulty components may be necessary.
Are there any safety precautions I should take before attempting to reverse my brushed motor?
Before attempting to reverse a brushed motor, it is crucial to prioritize safety. To mitigate potential risks, wearing safety gear such as gloves, goggles, and a face mask is necessary.
How often should I perform regular maintenance on my reversed brushed motor?
Regular maintenance on a reversed brushed motor is crucial to prolong its lifespan. By performing routine checks, such as cleaning, lubricating, and inspecting for wear, you can ensure optimal performance and prevent potential issues. The benefits of regular maintenance include improved efficiency, reduced risk of breakdowns, and increased overall durability.
Conclusion
In conclusion, reversing a brushed motor for an electric bike is a relatively simple process that can greatly enhance your biking experience. By following the steps outlined in this article, you can easily reverse the direction of your motor and enjoy a smoother ride.
Just remember to always prioritize safety and regularly maintain your motor to ensure optimal performance. So why wait? Take control of your electric bike and start enjoying the benefits of a reversed brushed motor today!