Connect with us

Electric Bike

How To Ride 600 Miles With Electric Bike

Published

on

An image showcasing a rider cruising along a scenic coastal road, surrounded by breathtaking mountains and vibrant greenery

Have you ever imagined going on an incredible journey, testing your limits and discovering new opportunities?

Imagine the thrill of riding 600 miles on an electric bike, gliding through picturesque landscapes and feeling the wind on your face.

In this article, I will share with you my personal journey and provide you with all the tips and strategies you need to conquer this incredible feat.

Get ready to experience the exhilaration of a lifetime as we delve into the world of long-distance electric bike riding.

Key Takeaways

  • Proper planning and preparation are essential for riding 600 miles with an electric bike.
  • Investing in the right gear and supplies, such as a sturdy backpack and puncture repair kit, is important for a successful ride.
  • Hydration and nutrition play a crucial role in maintaining energy levels throughout the journey.
  • Prioritizing rest and recovery, as well as ensuring safety and enjoyment, are important for a fulfilling experience.

Plan Your Route and Break it Down into Manageable Segments

Advertisement

You should plan your route and break it down into manageable segments so that you can ride 600 miles with your electric bike. Having a breakdown strategy is crucial for a successful long-distance ride.

Start by researching the best roads and bike paths that will take you to your destination. Consider factors like terrain, traffic, and scenery. Once you have your route planned, divide it into smaller segments based on your fitness level and the terrain you’ll be encountering. This will help you manage your time and energy effectively.

It’s important to set realistic goals for each segment and pace yourself accordingly. By breaking down the journey, you’ll not only stay motivated but also ensure that you reach your destination safely and enjoyably.

Now, let’s move on to the next section and make sure your electric bike is in top shape.

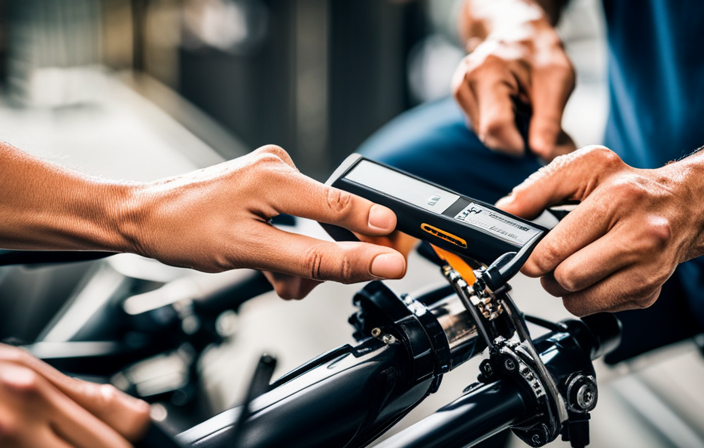
Make Sure Your Electric Bike is in Top Shape

Before you start your journey, make sure your e-bike is in optimal condition. Maintaining bike performance is crucial for a smooth and successful 600-mile ride.

Advertisement

Start by checking the tires for any signs of wear and tear. Make sure they are properly inflated.

Inspect the brakes and make sure they are functioning properly. You’ll need them for both safety and control.

Additionally, check the chain and gears for any signs of damage or rust. Lubricate them if necessary to prevent breakdowns and ensure smooth shifting.

Don’t forget to test the battery and make sure it is fully charged. It will provide the power needed for your long ride.

Taking the time to perform these maintenance tasks will help ensure a trouble-free journey.

Advertisement

Now that your e-bike is ready, let’s move on to the next step: packing all the necessary gear and supplies.

Pack All the Necessary Gear and Supplies

Now that your e-bike is prepared, it’s time to gather all the essential gear and supplies.

When packing for a long-distance electric bike ride, it’s important to consider the weight and size of your equipment. Start by investing in a sturdy and waterproof backpack or panniers to carry your belongings.

Advertisement

Pack lightweight and moisture-wicking clothing to stay comfortable during the ride. Don’t forget to bring a helmet, gloves, and sunglasses for safety and protection.

In terms of supplies, bring a puncture repair kit, multi-tool, spare batteries, and a portable charger for your e-bike. Additionally, pack enough water, energy bars, and snacks to keep you fueled along the way.

Remember, staying hydrated and fueling up with proper nutrition are crucial for a successful long-distance ride.

Stay Hydrated and Fuel Up with Proper Nutrition

Make sure to stay hydrated and fuel up with proper nutrition to keep your energy levels high during your long-distance journey.

Proper hydration and nutrition are key to the success of any endurance activity, and riding 600 miles with an electric bike is no exception. It is important to drink plenty of water throughout the ride to stay hydrated, especially in hot weather or during intense exertion.

Advertisement

Additionally, fueling your body with nutritious snacks and meals will provide the necessary energy to sustain you during the ride. Be sure to pack foods that are high in carbohydrates, such as fruits, energy bars, and sandwiches.

Remember, rest and recovery are just as important as staying hydrated and fueling up. Taking regular breaks to rest and stretch will help prevent fatigue and muscle soreness, allowing you to continue your journey with renewed energy.

Take Regular Breaks to Rest and Stretch

Be sure to take regular breaks during your journey to rest and stretch your muscles, as this will help prevent fatigue and keep you feeling refreshed.

Advertisement

Resting techniques are crucial to maintain your energy levels and prevent muscle strain. Find a comfortable spot to sit or lie down and take a few minutes to relax. Close your eyes, take deep breaths, and let your body rejuvenate.

Stretching exercises are also important to relieve any tension in your muscles and improve flexibility. Incorporate stretches for your legs, back, arms, and neck to prevent stiffness and soreness.

Remember to listen to your body and take breaks whenever you feel the need to. By pacing yourself and honoring your body’s signals, you can ensure a safe and enjoyable 600-mile electric bike journey.

Pace Yourself and Listen to Your Body

Take breaks and listen to your body’s signals to ensure a safe and enjoyable journey. Pace management is key when riding long distances on an electric bike. It’s important to find a comfortable speed that allows you to maintain a steady pace without overexerting yourself. Remember, this is a marathon, not a sprint.

Pay attention to your body’s signals and adjust your speed accordingly. Here are five things to keep in mind:

Advertisement
  • Start slow and gradually increase your speed as you build endurance.
  • Take short breaks every 20-30 miles to rest, stretch, and hydrate.
  • Use a heart rate monitor to gauge your effort level and avoid pushing too hard.
  • Listen to your body’s cues for fatigue, pain, or discomfort and adjust your pace accordingly.
  • Practice good body awareness by maintaining proper posture and engaging your core muscles.

By pacing yourself and listening to your body, you’ll have a more enjoyable and successful ride. As you continue your journey, it’s important to stay safe by wearing protective gear and following traffic rules.

Stay Safe by Wearing Protective Gear and Following Traffic Rules

After you’ve paced yourself and listened to your body, it’s crucial to prioritize your safety while riding your electric bike for 600 miles.

One of the most important safety measures is wearing proper protective gear. Make sure you wear a helmet that fits you correctly, as it can greatly reduce the risk of head injuries in case of an accident.

Additionally, wearing reflective clothing is essential, especially when riding at night or in low-light conditions. This helps increase your visibility to other road users, reducing the chances of collisions.

By taking these precautions, you can greatly enhance your safety on the road and minimize the risks associated with long-distance electric bike rides.

Now, as we move forward, let’s dive into the next section and discover how to enjoy the scenery and embrace the adventure along the way.

Advertisement

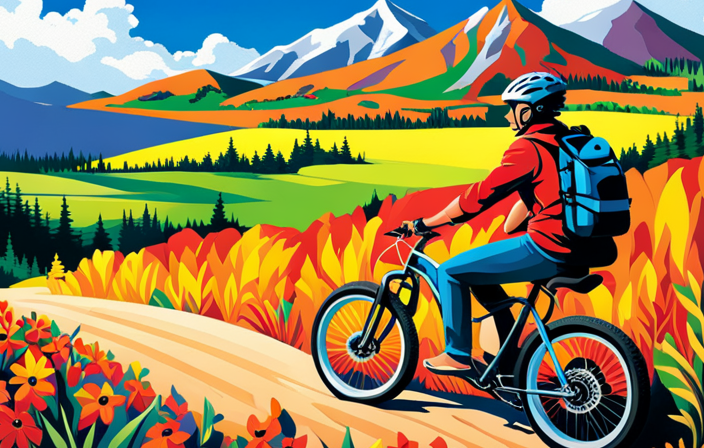
Enjoy the Scenery and Embrace the Adventure

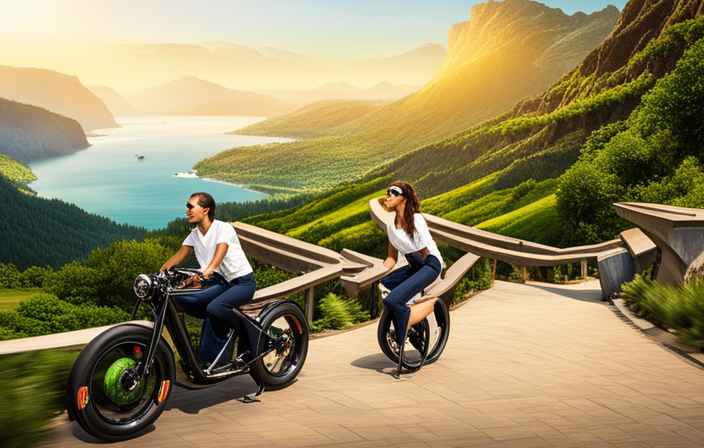
As you embark on your 600-mile journey, immerse yourself in the breathtaking scenery and embrace the thrilling adventure that awaits. Riding an electric bike allows you to truly connect with nature as you traverse through picturesque landscapes and scenic routes. The freedom that comes with riding an electric bike enables you to experience the beauty of the outdoors in a unique and exhilarating way.

To fully enjoy your ride, make sure to take breaks along the way and appreciate the natural wonders surrounding you. Stop at lookout points to take in panoramic views and listen to the sounds of nature. Additionally, explore local attractions and hidden gems to truly immerse yourself in the adventure.

Continuing your journey, the next step is to document your incredible experience by capturing it through photos and videos. Not only will this allow you to relive the memories, but it will also inspire others to embark on their own electric bike adventures. So grab your camera and get ready to capture the magic of your journey!

Document Your Journey with Photos and Videos

Don’t forget to document your incredible journey by capturing the magic through photos and videos.

Journey documentation is not only a way to preserve memories, but it also allows you to share your adventure with others and inspire them to embark on their own electric bike journeys. Visual storytelling is a powerful tool that can transport viewers to the places you’ve been and let them experience the beauty and excitement firsthand.

Advertisement

Whether it’s a breathtaking mountain view, a charming small town, or a memorable encounter with wildlife, every moment is worth capturing. So, grab your camera or smartphone and start recording the sights and sounds of your 600-mile ride. Remember to be creative, experiment with different angles and perspectives, and let your passion for cycling shine through.

Once you’ve completed your journey documentation, it’s time to celebrate your achievement and share your experience with others.

Celebrate Your Achievement and Share Your Experience with Others

Celebrate your amazing accomplishment by sharing your experience with others and inspiring them to embark on their own unforgettable journeys. Riding 600 miles with an electric bike is no small feat, and you should be proud of yourself.

Here are a few celebration tips to make the most of this achievement:

  1. Throw a small gathering: Invite your friends and family over for a celebratory meal. Share stories, show them your photos and videos, and let them know how this journey has impacted you.

  2. Share on social media: Create a post on your favorite social media platforms to document your journey. Include captivating photos and videos, along with a heartfelt caption, to inspire others to push their limits and explore the world on two wheels.

  3. Create a scrapbook: Compile all your memories from the trip into a beautiful scrapbook. Include maps, ticket stubs, and handwritten notes to make it a cherished keepsake that you can revisit whenever you want.

By celebrating your achievement and sharing your experience, you can inspire others to push their boundaries and create their own remarkable adventures.

Advertisement

Frequently Asked Questions

How long does it typically take to ride 600 miles with an electric bike?

Typically, it takes me around 3-4 days to ride 600 miles with my electric bike. The benefit of riding an electric bike for long distances is that it reduces fatigue and allows for a more enjoyable and efficient journey. Plus, the charging time is relatively quick.

What type of protective gear should I wear while riding long distances?

When riding long distances, it’s crucial to prioritize safety with the right protective gear. Statistics show that wearing a helmet reduces the risk of head injury by 69%. Recommended gear includes gloves, knee and elbow pads, and reflective clothing.

Are there any specific traffic rules or regulations for electric bike riders?

When it comes to electric bike safety, it’s important to know the legal requirements for riders. Familiarize yourself with local traffic rules, wear a helmet, use lights, and follow the same rules as regular cyclists.

How often should I charge my electric bike during a 600-mile ride?

During a 600-mile ride, I recommend charging my electric bike every 50-60 miles to ensure optimal battery life. Regularly charging the bike will keep it running smoothly and allow me to enjoy the journey without any worries.

Can I ride my electric bike at night and what precautions should I take?

I love night riding on my electric bike! To ensure safety, I use powerful headlights and taillights, wear reflective clothing, and follow traffic laws. Always be aware of your surroundings and ride defensively.

Advertisement

Conclusion

So there you have it, folks! Riding 600 miles with an electric bike is no small feat, but with the right preparation, it can be an exhilarating adventure.

From planning your route to packing all the necessary gear, it’s important to be organized and ready for anything. And don’t forget to stay hydrated and fuel up with proper nutrition, because you’ll need all the energy you can get!

So get out there, enjoy the beautiful scenery, and embrace the joy of riding your electric bike. And remember, it’s not just about the destination, but the journey itself.

So go ahead, document your experience, share it with others, and celebrate your amazing achievement! Happy riding!

Advertisement

Ralf is a devoted husband and father who loves spending time with his family. He enjoys riding his bicycle as much as possible, and takes every opportunity he can to get out on the open road. Ralf is a kind and gentle person who wants only the best for those around him.

Continue Reading
Advertisement

Electric Bike

How To Turn A Normal Bike Into An Electric Bike

Published

on

By

An image showing a person attaching a sleek, silver electric motor to the back wheel of a conventional bicycle

Upgrade your reliable bicycle into an exhilarating electric ride with this in-depth guide on converting a regular bike into an electric one.

From assessing your bike’s compatibility to choosing the right conversion kit, this article will equip you with the knowledge and tools needed to embark on this exhilarating journey.

We’ll delve into the step-by-step process, ensuring you have the necessary equipment and skills to successfully complete the conversion.

So, get ready to revamp your ride and experience the power and convenience of an electric bike.

Key Takeaways

  • Assess the bike’s frame and components for compatibility and condition before proceeding with a conversion kit
  • Gather the necessary tools and materials before starting the conversion process
  • Remove existing components such as the chain, derailleur system, pedals, crankset, brakes, and wheels
  • Install the conversion kit by securely attaching the electric motor to the bike frame, connecting it to the drivetrain, and mounting the battery and controller

Assess Your Bike’s Compatibility

Advertisement

Assess if your bike is compatible with an electric conversion kit. Before you can turn your normal bike into an electric one, it’s crucial to evaluate its compatibility.

Start by examining the frame and fork, ensuring they are sturdy and in good condition. The size of the frame should also be taken into consideration, as some conversion kits may not fit certain frame sizes.

Additionally, check the condition of your bike’s wheels, brakes, and gears, as these components may require necessary modifications for the conversion.

Assessing the compatibility of your bike is essential to ensure a successful electric conversion.

Once you have evaluated your bike’s compatibility, you can move on to the next step of choosing the right electric conversion kit, which will be discussed in the subsequent section.

Advertisement

Choose the Right Electric Conversion Kit

To choose the right electric conversion kit for your bicycle, you need to start by evaluating the specifications and features of different options. Research options and compare prices to find the best fit for your needs.

Here are three key factors to consider when selecting an electric conversion kit:

  • Motor Power: Determine the desired power output for your electric bike. Consider factors such as terrain and desired speed to choose an appropriate motor size.

  • Battery Capacity: Look for a battery with sufficient capacity to meet your riding distance requirements. Consider factors such as voltage, amp-hour rating, and battery chemistry.

  • Compatibility: Ensure that the conversion kit is compatible with your bike’s frame and wheel size. Check for any additional accessories or modifications needed.

Once you have chosen the right electric conversion kit, it’s time to gather the necessary tools and equipment to begin the conversion process seamlessly.

Gather the Necessary Tools and Equipment

Advertisement

Make sure you have all the tools and equipment you’ll need to complete the electric conversion of your bicycle seamlessly. Select the appropriate tools based on the type of bike you have and the electric conversion kit you’ve chosen. Common tools you may need include a wrench, screwdriver, pliers, and wire cutters.

Additionally, you’ll need to buy the necessary materials such as zip ties, electrical tape, and heat shrink tubing. These materials are essential for securing and insulating the electrical components of your electric bike.

Once you have all the tools and materials ready, you can move on to the next step and remove the existing components from your bike, making way for the installation of the electric conversion kit.

Remove the Existing Components

First, start by removing the existing components from your bicycle to prepare for the installation of the electric conversion kit. This step is crucial in the process of bike modification and performance enhancement. To ensure a smooth transition, consider the following:

  • Remove the chain and derailleur system.
  • Take off the pedals and crankset.
  • Disconnect the brake calipers and remove the brake levers.
  • Remove the front and rear wheel assemblies.
  • Disconnect the cables and wires connected to the existing components.

By removing these components, you create space for the new electric conversion kit. Once you have completed this step, you can proceed to the next section where you will install the electric conversion kit and begin the transformation of your normal bike into an electric bike.

Install the Electric Conversion Kit

Advertisement

Once you’ve removed the existing components, it’s time to install the electric conversion kit on your bicycle.

Begin by attaching the electric motor to the frame of the bike. Ensure that it is securely fastened and properly aligned.

Next, connect the motor to the drivetrain of the bike using a chain or belt, depending on the kit you have chosen. Make sure the connection is tight and the chain/belt is properly tensioned.

Then, mount the battery and controller onto the frame, ensuring they are securely fastened and well-protected.

Advertisement

Finally, connect the battery and controller to the electric motor using the provided wiring harness. Double-check that all connections are secure and properly insulated.

With the electric conversion kit installed, you are now ready to move on to the next step of connecting the battery and controller to complete the bike modification.

Connect the Battery and Controller

To connect the battery and controller, you’ll need to ensure a secure and tight connection between the two components. Start by identifying the wires coming from the battery and the controller. Typically, there will be a positive (red) and negative (black) wire from each component.

Connect the positive wire from the battery to the positive wire on the controller and the negative wire from the battery to the negative wire on the controller. Ensure that the connections are tight and properly insulated to avoid any loose connections or short circuits.

If you encounter any issues during the connection process, such as wires not fitting together or loose connections, carefully double-check the wiring diagram provided with your electric conversion kit. Additionally, troubleshoot common issues like loose or damaged wires, blown fuses, or faulty connections. It’s important to address these issues before proceeding to the next steps.

Advertisement

Now that the battery and controller are securely connected, you can move on to testing and fine-tuning your electric bike’s performance.

Test and Fine-Tune the Electric Bike

Now that you have connected the battery and controller, it’s time to test and fine-tune your electric bike. This step is crucial to ensure the efficiency of your bike and troubleshoot any potential issues. To do this, you will need to take your bike for a test ride and observe its performance. Pay attention to the speed, acceleration, and overall handling of the bike. If you notice any problems, such as a decrease in power or difficulty in controlling the bike, you may need to make adjustments to the battery or controller settings. By testing and fine-tuning your electric bike, you can optimize its performance and address any issues that may arise. Once you are satisfied with the results, you can proceed to the next section on how to upgrade your bike’s accessories.

Upgrade Your Bike’s Accessories

Upgrading the accessories on your bike can enhance its functionality and performance. When it comes to bike modification, choosing the right accessories can make a significant difference.

Start by upgrading your bike’s brakes. High-quality brakes will improve your bike’s stopping power and ensure a safe ride.

Next, consider upgrading your bike’s suspension system. A better suspension will provide a smoother and more comfortable ride, especially when tackling rough terrains.

Advertisement

Additionally, upgrading your bike’s tires to ones with better traction and durability will enhance its overall performance.

Finally, don’t forget to invest in a reliable bike lock to keep your newly upgraded electric bike secure.

Upgrading these accessories will not only improve your bike’s performance but also provide a more enjoyable riding experience.

Learn proper maintenance and care to ensure the longevity of your electric bike.

Learn Proper Maintenance and Care

Make sure you properly maintain and care for your electric bike to ensure its longevity and optimal performance. Proper cleaning is essential to keep your electric bike in good condition. Use a soft cloth and mild detergent to clean the frame, wheels, and other components. Avoid using high-pressure water as it can damage the electrical components. Regularly inspect the battery for any signs of damage or wear. Clean the battery terminals with a dry cloth to remove any dirt or debris. Additionally, keep the battery charged when not in use and avoid extreme temperatures that can affect its performance. Following these maintenance practices will help prolong the life of your electric bike and ensure that it continues to provide a smooth and enjoyable ride.

Advertisement

Now that you know how to properly maintain your electric bike, you can confidently enjoy your new electric bike experience.

Enjoy Your New Electric Bike Experience

Get ready to fully embrace and enjoy your exciting new ride on an electric bike. As you embark on this thrilling adventure, you’ll quickly realize the numerous benefits of owning an electric bike.

One of the key advantages is the added power and speed that an electric motor provides, allowing you to effortlessly conquer hills and cover longer distances without breaking a sweat. Additionally, electric bikes offer a more eco-friendly mode of transportation, reducing your carbon footprint while enjoying the great outdoors.

However, it’s important to prioritize safety when riding your electric bike. Always wear a helmet, follow traffic rules, and be aware of your surroundings. Take the time to familiarize yourself with the electric bike’s controls and features to ensure a smooth and safe riding experience.

So, hop on your electric bike and enjoy the ride of a lifetime!

Advertisement

Frequently Asked Questions

How much does it cost to convert a regular bike into an electric bike?

The cost of converting a regular bike into an electric bike varies depending on the type of electric bike conversion kit you choose. Factors to consider include the motor power, battery capacity, and additional features.

Can any type of bike be converted into an electric bike?

Yes, any type of bike can be converted into an electric bike. Converting a mountain bike offers the advantage of better off-road capability, while converting a road bike provides a more streamlined and efficient ride on paved surfaces. However, there are also disadvantages to consider, such as added weight and potential modifications needed for the conversion process.

Is it difficult to install the electric conversion kit?

Installing an electric conversion kit can be challenging. Pros include increased speed and range, while cons include added weight and potential damage to the bike. Common mistakes to avoid are improper wiring and incorrect installation of components.

How long does it take to complete the conversion process?

Converting a normal bike into an electric bike typically takes around 2-4 hours, depending on your experience and the complexity of the kit. Required tools include wrenches, screwdrivers, pliers, and possibly a drill.

Can the electric conversion kit be easily removed if I decide to go back to a regular bike?

Yes, the electric conversion kit can be easily removed if you decide to go back to a regular bike. However, it is important to consider the benefits of converting a bike into an electric bike and the pros and cons of using an electric conversion kit.

Advertisement

Conclusion

Congratulations on successfully converting your normal bike into an electric bike! By following the steps outlined in this guide, you have transformed your regular bicycle into an efficient and eco-friendly mode of transportation.

Did you know that electric bikes have been proven to increase the distance people are willing to travel by bike? A study conducted in the Netherlands found that e-bike riders were willing to cycle an average of 9.4 kilometers, compared to only 6.3 kilometers by regular bike riders.

So get out there and enjoy the benefits of your new electric bike!

Continue Reading

Electric Bike

How To Tighten Forward Break Ancher Electric Bike

Published

on

By

An image featuring a close-up shot of a gloved hand gripping a wrench, firmly tightening the bolt connecting the forward brake anchor to the frame of an electric bike

Were you aware that a loose anchor on the forward brake can impact the safety and efficiency of your electric bicycle? Recent studies reveal that defective brakes are a major contributing factor to cycling accidents.

But fear not! In this article, I will guide you through the step-by-step process of tightening your forward brake anchor. By following these simple instructions, you can ensure a secure and reliable braking system, allowing for safe and enjoyable rides on your electric bike.

So let’s get started!

Key Takeaways

  • Regular maintenance tasks are important for ensuring the optimal performance and safety of an electric bike.
  • Brake inspections should be conducted regularly to identify any issues and prevent brake failures.
  • Checking and inspecting brake components, such as brake pads and cables, is crucial for maintaining their functionality and responsiveness.
  • Proper adjustment of brake cables is necessary to maintain correct tension and ensure reliable brakes.

Gather the Necessary Tools

You’ll need to gather the necessary tools to tighten the forward brake anchor on your electric bike.

Advertisement

Choosing the right tools is crucial to ensure a successful and safe tightening process. Start by getting a set of metric Allen wrenches, as they are commonly used for bike repairs. Make sure to have a wrench that matches the size of the anchor bolt on your specific bike model.

Additionally, a torque wrench is recommended to ensure proper tightening without over-tightening. Common mistakes to avoid include using the wrong size wrench, which can damage the bolt or strip it, and not applying enough torque, which can cause the brake anchor to become loose again.

Once you have the tools ready, you can proceed to locate the forward brake anchor and begin the tightening process.

Locate the Forward Brake Anchor

First, find the anchor for the front brake on your e-bike. It is usually located near the front wheel, attached to the fork or the frame.

To inspect the forward brake anchor on your electric bike, follow these steps:

Advertisement
  1. Use a flashlight to get a clear view of the anchor and its components.
  2. Check for any signs of wear, such as rust or corrosion.
  3. Ensure that the anchor is securely fastened to the frame or fork.

Inspecting the forward brake anchor is crucial for maintaining and improving brake performance on electric bikes. By regularly checking and tightening the anchor, you can prevent any potential issues that may arise from loose or damaged components.

Once you have completed this inspection, you can move on to the next section about loosening the bolts or screws.

Loosen the Bolts or Screws

To begin, make sure the bolts or screws are properly loosened. This is a crucial step in the process of tightening the forward brake anchor on an electric bike. Loosening the bolts or screws allows for easier adjustment and ensures that the anchor can be properly tightened afterwards. When loosening the bolts or screws, it is important to use the correct technique to avoid causing any damage. One common mistake is using too much force, which can strip the threads or break the bolts. Another mistake is not loosening all the bolts or screws evenly, which can result in an uneven anchor and compromised braking performance. By following the correct loosening technique and avoiding common mistakes, you can ensure a successful tightening process. Now, let’s move on to the next step of adjusting the position of the brake anchor.

Adjust the Position of the Brake Anchor

Once the bolts or screws are properly loosened, you can adjust the position of the brake anchor.

Advertisement

To begin, locate the brake anchor and examine its current position. Use a wrench or pliers to loosen the anchor bolt, allowing for movement.

Adjust the position of the anchor to ensure proper brake cable tension. This adjustment will ensure that the brake pads engage with the wheel properly and provide optimal braking performance.

Once the anchor is in the desired position, tighten the anchor bolt securely.

Additionally, while adjusting the brake anchor, it is a good opportunity to inspect the brake pads. If they are worn or damaged, replace them with new ones to maintain effective braking.

With the brake anchor properly adjusted and the brake pads in good condition, you can now proceed to align the brake pads for optimal performance.

Advertisement

Align the Brake Pads

After adjusting the position of the brake anchor, the next step is to align the brake pads for optimal performance.

Proper brake alignment is crucial for ensuring efficient braking and preventing premature wear of the brake pads.

To adjust the brake tension and align the pads, start by loosening the bolts or screws that secure the brake pads in place.

Advertisement

With the bolts or screws slightly loose, squeeze the brake lever to bring the pads close to the rim or disc.

While holding the brake lever, carefully align the pads so that they make contact with the rim or disc evenly on both sides.

Once aligned, tighten the bolts or screws to secure the brake pads in their optimal position.

This will provide consistent and reliable braking power.

Moving on to the next step of tightening the bolts or screws…

Advertisement

Tighten the Bolts or Screws

First, make sure to securely fasten the bolts or screws. Proper bolt tightening techniques are essential to ensure the optimal performance and safety of your electric bike’s brake system. Loose bolts can lead to a variety of issues, such as decreased braking power, increased wear on brake pads, and potential accidents. To tighten the bolts or screws, use an appropriate-sized wrench or screwdriver and apply sufficient torque. Be careful not to overtighten, as this can damage the bolts or strip the threads. It is crucial to check all the bolts and screws related to the brake system, including those securing the brake calipers, brake levers, and brake pads. Once all the bolts and screws are properly tightened, you can proceed to test the brake functionality.

Test the Brake Functionality

To ensure your safety, try out the brakes to make sure they are functioning properly. Testing the brakes is an important step in tightening the forward brake anchor on an electric bike.

When testing the brake functionality, there are a few signs of brake functionality issues that you should look out for. These include a spongy or loose brake lever, excessive brake lever travel, or a lack of stopping power. If you experience any of these issues, it may indicate that the brakes need further adjustment or repair.

Once you have tested the brakes and identified any functionality issues, you can make additional adjustments if needed to ensure optimal brake performance. This will ensure that your electric bike stops smoothly and efficiently, providing you with a safe riding experience.

Make Additional Adjustments if Needed

You may need to make additional adjustments if necessary to ensure optimal brake performance. Here are some troubleshooting tips to help you with this task:

Advertisement
  1. Check the brake pads: Inspect the brake pads to ensure they are properly aligned and have sufficient thickness. If they are worn out or misaligned, replace or reposition them accordingly.

  2. Adjust the brake cable tension: If the brakes feel loose or sluggish, you may need to adjust the cable tension. Use the barrel adjuster on the brake lever or the cable anchor bolt to make the necessary adjustments.

  3. Align the brake caliper: A misaligned brake caliper can cause uneven braking. Loosen the mounting bolts, align the caliper with the brake rotor, and then tighten the bolts securely.

  4. Test and fine-tune: After making any adjustments, test the brakes to ensure they are working properly. If necessary, make further adjustments until the desired brake performance is achieved.

By following these additional adjustments and troubleshooting tips, you can improve the brake performance of your electric bike. Make sure to maintain regular brake inspections and maintenance for continued optimal performance.

Maintain Regular Brake Inspections and Maintenance

To ensure the optimal performance of your electric bike’s brakes, it is crucial to maintain regular brake inspections and maintenance. This will help identify any issues and prevent potential accidents. One important aspect of brake maintenance is brake pad replacement. Over time, brake pads can wear out and become less effective, compromising the braking power of your electric bike. By regularly inspecting and replacing worn brake pads, you can ensure that your bike’s braking system operates at its best. Additionally, brake cable adjustment is another vital maintenance task. Over time, brake cables can stretch or become loose, affecting the responsiveness of the brakes. By adjusting the brake cables as needed, you can maintain the correct tension and ensure a tight and reliable braking system. With these regular inspections and maintenance tasks, you can enjoy safe and smooth rides on your electric bike.

Enjoy Safe and Smooth Rides on Your Electric Bike

Ensure the optimal performance of your e-bike by regularly maintaining and inspecting its brakes.

Electric bike maintenance is crucial for the overall safety and functionality of your ride. One of the most important aspects of maintenance is ensuring the brakes are in proper working condition. Brake safety is of utmost importance, as it can prevent accidents and ensure smooth rides.

Regularly check the brake pads for wear and tear, and replace them if necessary. Additionally, inspect the brake cables for any fraying or damage, and adjust them if needed. It is also essential to maintain the proper tension in the brake system to ensure effective stopping power.

Advertisement

By prioritizing brake maintenance, you can enjoy safe and smooth rides on your electric bike, knowing that your brakes are in excellent condition.

Frequently Asked Questions

What are the necessary tools needed to tighten the forward brake anchor on an electric bike?

To tighten the forward brake anchor on an electric bike, the necessary tools include an adjustable wrench, a socket wrench, and a torque wrench. The tightening process involves loosening the bolts, aligning the anchor, and then tightening the bolts with the appropriate tool.

How do I locate the forward brake anchor on my electric bike?

To locate the forward brake anchor on your electric bike, start by identifying the brake caliper positioned near the front tire. The forward brake anchor is usually a metal bracket connecting the caliper to the bike frame.

What should I do if the bolts or screws are difficult to loosen?

If the bolts or screws are difficult to loosen, I recommend using alternative methods such as applying penetrating oil or heat to loosen them. If all else fails, seeking professional help may be necessary to prevent damage to the bike.

How do I adjust the position of the brake anchor once it is loosened?

To adjust the position of the brake anchor, first loosen the bolts or screws holding it in place. Then, carefully slide the anchor to the desired position. Once in position, tighten the bolts or screws securely. When troubleshooting brake anchor issues, follow these steps.

Advertisement

Is it necessary to regularly inspect and maintain the brake system on an electric bike?

Regular inspection and maintenance of the brake system on an electric bike is crucial. It ensures optimal performance and safety. Common issues include brake pad wear, loose cables, and misaligned calipers. Regularly check and adjust these components for a smooth and responsive braking experience.

Conclusion

Well, there you have it folks. You’ve now become a pro at tightening the forward brake anchor on your electric bike. Who needs a professional mechanic anyway?

With just a few simple steps, some basic tools, and a little know-how, you can ensure your brake system is in top-notch condition.

So go ahead, hit the road with confidence, and remember, nothing could possibly go wrong when you’re in control of your own bike maintenance.

Happy riding!

Advertisement

Continue Reading

Electric Bike

How To Turn A Bicycle Into An Electric Bike

Published

on

By

An image showcasing a step-by-step transformation of a bicycle into an electric bike

Want to give your bike an extra oomph? Ready to feel the excitement of riding an electric bike without spending a fortune? Your solution is here!

In this article, we will guide you through the process of turning your regular bicycle into an electric bike. With the help of electric bike conversion kits and some basic tools, you’ll be able to transform your two-wheeler into a high-performance, eco-friendly mode of transportation in no time.

So, grab your toolkit and let’s get started!

Key Takeaways

  • Adjust pedal assist levels and fine-tune motor power output to optimize bike performance.
  • Check electrical connections for damage and ensure proper battery installation and charge level for functionality and safety.
  • Experiment with different power levels and fine-tune pedal assist settings to adjust settings for performance.
  • Install additional features and accessories such as racks, phone mounts, fenders, lights, and comfortable seating or grips for customization and comfort.

Understanding Electric Bike Conversion Kits

Understanding electric bike conversion kits can be helpful when you want to turn your bicycle into an electric bike. These kits offer numerous benefits for bike enthusiasts looking to add an electric motor to their ride.

Advertisement

The first step is choosing the right motor for your needs. Consider factors such as power output, battery range, and compatibility with your bicycle. Higher power motors provide more speed and torque, while larger battery capacity allows for longer rides. Additionally, ensure that the motor is compatible with your bike’s frame and wheel size.

Once you have selected the right motor, you can move on to gathering the necessary tools and equipment. This will include items such as wrenches, screwdrivers, and a battery pack, which we will discuss in the next section.

Gathering the Necessary Tools and Equipment

To get started, you’ll need a few tools and equipment for the electric bike conversion process.

First, you’ll need a conversion kit, which typically includes a motor, battery, controller, and other necessary components. Make sure to choose a kit that is compatible with your bicycle’s frame and wheel size.

Additionally, you’ll need a set of wrenches and screwdrivers to remove the existing parts and install the new components. It’s also recommended to have a torque wrench to ensure proper tightening of bolts and nuts.

Advertisement

Other tools you may need include wire cutters, crimping tools, and electrical tape for wiring connections.

Lastly, don’t forget safety equipment such as gloves and safety glasses.

With these necessary tools and equipment, you can now move on to preparing your bicycle for the conversion by removing the pedals and other non-essential parts.

Preparing Your Bicycle for the Conversion

Advertisement

Once you have gathered the necessary tools and equipment, you can begin preparing your bicycle for the conversion by removing non-essential parts. This will make room for the electric components and ensure a smoother installation process. Start by taking off any accessories such as fenders, racks, and baskets. Next, remove the pedals and crankset using a pedal wrench and crank puller. Once these parts are off, detach the front and rear wheels by loosening the axle nuts or quick-release levers.

In terms of preparing tools, make sure you have a set of Allen wrenches, screwdrivers, and adjustable wrenches on hand. These will come in handy when disassembling and reassembling various components.

Now that your bicycle is stripped down to its essentials, you can move on to choosing the right battery for your electric bike conversion. Consider factors such as voltage, capacity, and size when making your selection. Keep in mind that a higher voltage battery will provide more power, but it may also be heavier and more expensive. Once you have chosen the battery, you can proceed to the next step of installing the electric motor.

Transitioning into the subsequent section about ‘installing the electric motor’, you can now move on to the exciting part of transforming your bicycle into an electric bike.

Installing the Electric Motor

Now that your bicycle is stripped down to its essentials, you can begin installing the electric motor.

Advertisement

Start by mounting the motor onto the frame using the appropriate brackets and screws. Ensure that the motor is securely attached and properly aligned.

Next, connect the motor controller to the motor and securely fasten it in place. Follow the manufacturer’s instructions to properly connect the wires and ensure that they are insulated and protected.

Once the motor and controller are installed, it’s important to test the system and troubleshoot any common motor installation issues. Check for proper wiring connections, ensure that the motor spins freely, and listen for any abnormal sounds.

If you encounter any issues, consult the manufacturer’s troubleshooting guide or seek professional assistance.

With the motor successfully installed, you can now move on to adding the battery and controller to complete your electric bike setup.

Advertisement

Adding the Battery and Controller

To add the battery and controller to your electric bike, you will need to carefully choose the right battery that suits your needs. Consider factors such as the battery’s capacity, voltage, and weight.

Once you have selected the battery, you can then proceed to install it along with the controller, ensuring proper wiring and connections are made for optimal performance.

Choosing the Right Battery for Your Needs

When choosing the right battery for your needs, you’ll want to consider factors such as capacity, voltage, and weight.

Advertisement

Battery capacity refers to the amount of energy a battery can hold and is measured in watt-hours (Wh). It determines how far you can go on a single charge. If you plan on longer rides or have hilly terrains, a higher battery capacity is recommended for better battery range.

Voltage, on the other hand, determines the power output of the battery. Higher voltage batteries provide more power, resulting in better acceleration and hill climbing ability.

Lastly, weight is an important consideration as it affects the overall weight of your electric bike. A lightweight battery will ensure better handling and maneuverability.

Now that you have chosen the right battery, let’s move on to installing the battery and controller.

Installing the Battery and Controller

Installing the battery and controller is the next step in the process of converting your regular bicycle into an electric bike. To ensure a successful installation, follow these steps:

Advertisement
  • Choose a suitable location on your bike to mount the battery, considering factors such as weight distribution and accessibility.

  • Securely attach the battery using mounting brackets or straps, ensuring it is well-protected from vibrations and impacts.

  • Connect the battery to the controller using the provided wiring harness, ensuring the connections are secure and insulated.

  • Program the controller according to your desired settings, such as maximum speed and battery capacity.

  • Test the system by turning on the controller and checking if the battery is properly supplying power to the electric components.

With the battery and controller successfully installed and programmed, you can now proceed to the next section about wiring and connecting the components, ensuring a well-functioning electric bike.

Wiring and Connecting the Components

After connecting the components, it’s important to ensure the wiring is secure. Start by carefully inspecting all the connections and making sure they are tight and properly connected. Double-check that all the wires are correctly routed and organized to prevent any potential issues.

It’s also essential to use zip ties or cable clips to secure the wires in place and avoid any loose or dangling cables. When it comes to wiring tips, make sure to follow the manufacturer’s instructions and color codes for each component. If you encounter any difficulties, consult the troubleshooting guide provided with the electric bike conversion kit.

Once the wiring is secure, you can proceed to the next step of testing and fine-tuning the electric bike’s performance and functionality.

Testing and Fine-Tuning the Electric Bike

To ensure proper functionality and safety of your electric bike, it’s crucial to perform thorough checks.

Advertisement

Start by inspecting the wiring connections, ensuring they’re secure and free from any damage.

Next, test the brakes, throttle, and motor to verify that they’re all working correctly.

Finally, make adjustments to the settings to optimize the bike’s performance. This could include adjusting the pedal assist levels or fine-tuning the motor power output.

Checking for Proper Functionality and Safety

Before you begin, make sure to properly check for functionality and safety of your electric bike conversion. Safety precautions are essential to ensure a smooth and secure ride.

Start by inspecting the electrical connections, ensuring they are secure and free from any damage. Check the battery’s charge level and make sure it is properly installed and secured.

Advertisement

Test the brakes to ensure they are responsive and functioning effectively. Additionally, check the throttle and motor to ensure they are working properly. If any issues arise, refer to troubleshooting tips provided in the conversion kit manual to diagnose and resolve the problem.

Once you have confirmed the functionality and safety of your electric bike, you can proceed to the next step of adjusting settings for performance optimization.

Adjusting Settings for Performance Optimization

Once you’ve ensured the functionality and safety of your electric bike conversion, you can adjust the settings for optimal performance.

To achieve performance upgrades, start by adjusting the power output of your electric motor. Most controllers have settings that allow you to increase or decrease the power level. Experiment with different levels to find the right balance between speed and battery consumption.

Additionally, you can fine-tune the pedal assist settings to suit your riding style.

Advertisement

Troubleshooting common issues is an essential part of optimizing performance. Check for any error codes or unusual behavior and consult the user manual for guidance. Common issues include motor overheating, poor battery performance, and inconsistent power delivery. Addressing these issues promptly will ensure a smooth and efficient ride.

Now that you’ve optimized your electric bike’s performance, it’s time to explore adding additional features and accessories to enhance your riding experience.

Adding Additional Features and Accessories

Adding additional features and accessories can greatly enhance the functionality and enjoyment of your electric bike. There are a variety of options available to customize your ride and make it more convenient and efficient.

One popular feature is the addition of a front or rear rack, which provides extra storage space for carrying groceries, a backpack, or other items. Another useful accessory is a phone mount, allowing you to easily navigate using GPS or listen to music while riding.

Additionally, fenders can be installed to protect you from mud and water splashes, especially when riding in wet conditions. Lights and reflectors are essential for visibility and safety, especially when riding at night. Finally, consider adding a comfortable saddle or ergonomic grips to improve comfort during long rides.

Advertisement

By incorporating these additional features and accessories, you can customize your electric bike to meet your specific needs and preferences.

When it comes to maintenance and care for your electric bike, there are a few key steps to keep it running smoothly.

Maintenance and Care for Your Electric Bike

To properly maintain and care for your electric bike, there are a few key points to keep in mind.

Regular cleaning and lubrication is essential to ensure the longevity and smooth operation of your bike. By keeping the chain, gears, and other moving parts clean and properly lubricated, you can prevent rust, corrosion, and unnecessary wear and tear.

Additionally, it is important to regularly check and replace any worn-out parts, such as brake pads or tires, to ensure optimal performance and safety.

Advertisement

By following these maintenance practices, you can enjoy a well-maintained and reliable electric bike for years to come.

Regular Cleaning and Lubrication

Regular cleaning and lubrication are essential for maintaining an electric bike. Neglecting regular maintenance can lead to premature wear and reduce the overall lifespan of your bike.

When it comes to cleaning, start by using a soft cloth or sponge soaked in soapy water to gently wipe down the frame, wheels, and components. Avoid using high-pressure water as it can damage sensitive electrical parts.

As for lubrication, choosing the right lubricant is crucial. Opt for a bicycle-specific lubricant that is designed for electric bikes and apply it to the chain, derailleur, and other moving parts. This will help reduce friction and keep your bike running smoothly. Remember to wipe off any excess lubricant to prevent attracting dirt and debris.

Regular cleaning and lubrication will ensure your electric bike performs at its best.

Advertisement

Now, let’s move on to checking and replacing worn-out parts.

Checking and Replacing Worn-Out Parts

First, you’ll want to regularly check and replace any worn-out parts on your electric bike. This is essential to ensure the optimal performance and longevity of your bike.

Start by inspecting the tires for any signs of wear or damage, such as cracks or bald spots. Replace them if necessary to maintain proper traction and safety.

Next, examine the brake pads to ensure they have enough thickness and aren’t worn down. Replace them if they are less than 1/8 inch thick.

Additionally, check the chain for any signs of rust, stretching, or tight spots. Lubricate it regularly and replace it if it’s excessively worn.

Advertisement

Troubleshooting common issues like loose bolts, loose spokes, or worn-out pedals is also crucial.

By regularly replacing worn-out parts and addressing common issues, you’ll enjoy a smooth and safe ride on your new electric bike.

Now, let’s move on to the next section about enjoying your new electric bike.

Enjoying Your New Electric Bike

When it comes to enjoying your new electric bike, there are two key points to consider:

  • Exploring new cycling routes and adventures: By taking your electric bike on new routes, you can discover scenic and challenging paths that you may not have considered before.

  • Sharing your electric bike experience with others: Additionally, sharing your electric bike experience with others can be a great way to introduce them to the benefits of electric biking and encourage them to try it out for themselves.

So, get out there and start exploring new routes while sharing your electric bike experience with others!

Advertisement

Exploring New Cycling Routes and Adventures

Exploring new cycling routes and adventures is a great way to spice up your biking routine. It allows you to discover new places, challenge yourself, and experience the thrill of riding your electric bike in different terrains.

To make the most out of your explorations, consider the following:

  • Invest in new cycling gear: Upgrade your helmet, gloves, and shoes to ensure maximum comfort and safety during your rides.

  • Finding the best cycling routes: Use apps like Strava or Komoot to discover popular trails and routes in your area. These apps provide detailed maps, elevation profiles, and user reviews to help you find the perfect route for your adventure.

  • Join a cycling group or club: Connecting with like-minded individuals who share your passion for biking can enhance your exploration experience. Not only can you learn from their expertise, but you can also discover new routes and share incredible adventures together.

By expanding your horizons and trying new cycling routes, you can create unforgettable memories and discover the full potential of your electric bike.

Next, let’s delve into how sharing your electric bike experience with others can amplify the joy of owning one.

Sharing Your Electric Bike Experience with Others

Sharing your electric bike experience with others can be a fantastic way to spread the joy and excitement of owning one. As an electric bike enthusiast, you can share tips and tricks with fellow electric bike owners to enhance their riding experience.

Advertisement

One way to do this is by organizing group rides and events specifically for electric bike owners. These events can be a great platform for exchanging knowledge, discussing modifications, and learning from each other’s experiences. Additionally, they offer an opportunity to explore new routes and adventures together, fostering a sense of community among electric bike enthusiasts.

By sharing your knowledge and organizing group rides, you not only contribute to the growth of the electric bike community but also create lasting connections with like-minded individuals who share your passion for this eco-friendly mode of transportation.

Frequently Asked Questions

Can I convert any type of bicycle into an electric bike?

Yes, you can convert most types of bicycles into electric bikes. However, bike compatibility is important, as some frames may not be suitable. To do this, you will need the necessary equipment such as a motor, battery, and controller.

How long does it typically take to complete the conversion process?

The conversion process typically takes around 4-6 hours, depending on your familiarity with the necessary tools. To complete the conversion, you’ll need tools such as a wrench, screwdriver, and wire cutters.

Can I still use my bike as a regular bicycle after the conversion?

Yes, you can still use your bike as a regular bicycle after the conversion. Converting your bike into an electric bike allows you the option of using it for exercise or enjoying the benefits of electric assistance.

Advertisement

How far can an electric bike travel on a single charge?

The electric bike range depends on various factors such as battery capacity, terrain, rider weight, and level of pedal assistance. On average, electric bikes can travel 20-50 miles on a single charge.

Are there any legal restrictions or regulations for riding an electric bike?

Riding an electric bike has numerous benefits, like gliding effortlessly through traffic. However, there are legal restrictions and regulations to ensure electric bike safety. Familiarize yourself with local laws to ride confidently and responsibly.

Conclusion

Congratulations! You’ve successfully transformed your ordinary bicycle into a marvelous electric bike. Just like a caterpillar metamorphosing into a beautiful butterfly, your two-wheeled companion has undergone a remarkable transformation.

With the help of an electric bike conversion kit, a few handy tools, and a dash of determination, you’ve unlocked a world of possibilities. Now, you can effortlessly conquer hills, soar through the streets, and experience the thrill of riding with a little extra oomph.

So, spread your wings, embrace the freedom, and enjoy the electric adventure that awaits you!

Advertisement

Continue Reading
Advertisement

Affiliate disclaimer

As an affiliate, we may earn a commission from qualifying purchases. We get commissions for purchases made through links on this website from Amazon and other third parties.

About us

We are a passionate team driven by the belief that cycling is a fantastic and accessible way to stay active while enjoying the beauty of the outdoors. Our mission is to share our love for cycling with as many people as possible. We provide a welcoming environment for individuals of all ages, abilities, and backgrounds to come together and ride bikes. With Ralf’s visionary leadership, Zane’s expertise in cycling adventures, and Olivia’s dedication to community building, we strive to create a vibrant space where everyone can experience the joy of cycling. Through group rides, workshops, and inclusive events, we inspire and empower individuals to embrace an active lifestyle. Join us in our quest to pedal together, embrace the joy of cycling, and foster connections that last a lifetime.

Advertisement

Trending