Are you prepared to elevate your electric bike experience? Discover how to properly maintain the hub on your electric bike conversion kit and ensure a smooth ride.
In this article, we’ll guide you through the step-by-step process of maintaining and caring for your hub motor system. With the right tools and a little know-how, you’ll be able to:
- Lubricate the motor
- Check and adjust the spokes
- Test the electrical system
- And more.
Get ready to ride with confidence and keep your electric bike in top shape.
Key Takeaways
- Replacing damaged or broken spokes is an important part of servicing the hub on an electric bike conversion kit.
- Proper inspection and testing of the electrical system is crucial for ensuring its functionality and safety.
- Wheel and brake adjustment is necessary to ensure that the wheel is securely attached and the brakes are properly working.
- Regular maintenance tasks such as checking tire pressure, cleaning and lubricating moving parts, and inspecting and tightening bolts are essential for maintaining the hub and overall performance of the electric bike conversion kit.

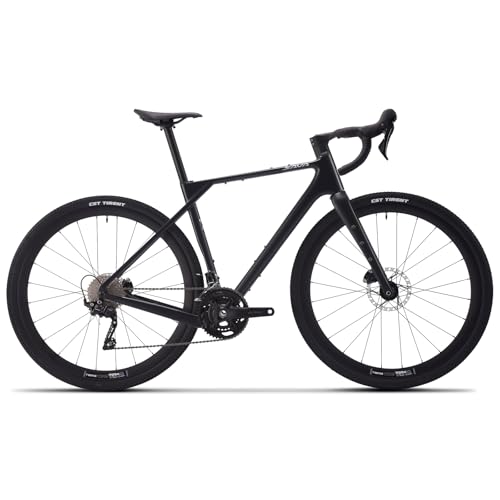
Schwinn Sporterra RX Gravel Bike, 700c Mens and Womens Bike, 14-Speed Drop Bar Gravel Bicycle, Mechanical Disc Brakes, Rigid Fork, Aerodynamic Riding Position, Quick Release Seat Post, Adult Bicycle
GRAVEL BICYCLE: Enjoy next level riding with the Sporterra RX by Schwinn. With 700c wheels, this mens and...
As an affiliate, we earn on qualifying purchases.
Understanding the Hub Motor System
To understand the hub motor system, you’ll need to familiarize yourself with its components and how they work together.
The hub motor system consists of three main components: the hub motor, the controller, and the battery.
The hub motor is the heart of the system, responsible for propelling the bike forward. It is usually located in the front or rear wheel hub and is controlled by the controller.
The controller manages the power flow from the battery to the motor, regulating speed and torque.
The battery supplies the necessary energy to power the motor. Understanding how these components interact is crucial for servicing the hub motor system.
Now that you have a grasp of the system, let’s move on to the tools and equipment needed for servicing.
SAVADECK Carbon Gravel Bike - T800 Carbon Frame & Fork, Shimano GRX400 10-Speed Groupset, Hydraulic Disc Brakes, 700C x 40mm Tires - Lightweight Design for Road & Off-Road Adventures (Black, 58cm)
【Ultra-Lightweight T800 Carbon Frame】Built with a T800 R21 carbon fiber frame and fork, this bike weighs just 10.4kg...
As an affiliate, we earn on qualifying purchases.
Tools and Equipment Needed for Servicing
You’ll need a few tools and equipment to properly maintain and repair the hub on your electric bike conversion kit. Here are four essential items you should have:
-
Hub Motor Repair Kit: This kit usually includes replacement bearings, seals, and other small parts that may need to be replaced during servicing. It ensures that you have everything you need to fix common issues with the hub motor.
-
Torque Wrench: A torque wrench is crucial for properly tightening the axle nuts and other fasteners on the hub motor. It helps you achieve the correct torque specifications, preventing damage to the motor and ensuring optimum performance.
-
Hub Motor Removal Tool: This tool allows you to safely remove the hub motor from the bike frame for servicing. It ensures that you can access all the necessary components without causing any damage.
-
Lubricants and Grease: Proper lubrication is essential for the smooth operation of the hub motor. Make sure to have high-quality lubricants and grease specifically designed for electric bike hub motors.
Now that you have the necessary tools and equipment, let’s move on to preparing the bike for servicing.

SAVADECK T800 Carbon Gravel Bike, with Shimano GRX610 12-Speed, Hydraulic Disc Brakes, 700x40c Tires for Road & Off-Road Adventure, Men's/Women's Bicycle(Elegant White, 51cm)
【With SHIMANO GRX Drivetrain Setup】Equipped with SHIMANO GRX610 shifters and RX822 rear derailleur, matched with a 12-speed M6100...
As an affiliate, we earn on qualifying purchases.
Preparing the Bike for Servicing
Once you’ve gathered the essential tools and equipment, it’s time to get the bike ready for servicing. Start by removing any accessories or attachments from the bike, such as lights or baskets, to ensure easy access to the hub motor.
Next, inspect the hub motor for any visible damage or signs of wear. Pay close attention to the wiring and connectors, ensuring everything is properly connected and in good condition.
Clean the hub motor using a soft cloth and mild detergent, removing any dirt or debris that may have accumulated.
Finally, check the tire pressure and adjust it accordingly. This will help ensure a smooth and efficient ride once the servicing is complete.
With the bike prepared, it’s now time to move on to lubricating the hub motor.

Swagman Standard Fork Mount Rooftop Bike Carrier
EASY TO ASSEMBLE: The STANDARD is easy to assemble with no tools required, sets up in just minutes...
As an affiliate, we earn on qualifying purchases.
Lubricating the Hub Motor
After gathering the necessary tools and equipment, it’s important to regularly lubricate the motor to ensure optimal performance. Proper lubrication reduces friction, heat, and noise, prolonging the lifespan of your hub motor. Here’s a step-by-step guide to help you through the process:
| Tools and Equipment | Lubrication Steps |
|---|---|
| Clean cloth | 1. Start by cleaning the motor housing and surrounding areas with a clean cloth to remove any dirt or debris. |
| Lubricant | 2. Apply a small amount of lubricant directly onto the motor shaft. Avoid using excessive amounts as it may attract more dirt and cause buildup. |
| Applicator brush | 3. Use an applicator brush to spread the lubricant evenly, ensuring it reaches all moving parts within the motor. |
| Wrench | 4. Finally, tighten any loose bolts or screws on the motor to prevent vibrations that could lead to further damage. |
Once you’ve completed the lubrication process, it’s essential to move on to checking and adjusting the spokes, as they play a vital role in maintaining the stability and balance of your electric bike.
Checking and Adjusting the Spokes
When it comes to maintaining the optimal performance of your bike, inspecting the spokes for tension and damage is crucial. Using a spoke wrench, you can easily adjust the tension to ensure that all spokes are properly tightened.
However, if you notice any damaged or broken spokes, it is important to replace them promptly to avoid any potential accidents or further damage to the wheel.
Inspecting the spokes for tension and damage
To ensure the optimal performance of your electric bike conversion kit, you should regularly inspect the spokes for tension and damage. Spokes play a crucial role in maintaining the structural integrity of the wheel and ensuring a smooth ride.
Begin by visually examining each spoke for any signs of damage, such as bends, cracks, or loose ends. Next, check the tension of the spokes by gently squeezing pairs of adjacent spokes together. They should have a consistent level of tension and not feel excessively loose or overly tight.
If you notice any spokes that are significantly out of tension or damaged, it is important to address these issues promptly to prevent further damage or potential wheel failure.
Now, let’s move on to the next step of using a spoke wrench to adjust the tension.
Using a spoke wrench to adjust the tension
Inspecting the spokes for tension and damage is an important step in ensuring the proper functioning of your electric bike conversion kit. Once you have identified any loose or damaged spokes, it is time to make the necessary adjustments using a spoke wrench.
This specialized tool allows you to tighten or loosen the spokes, thereby adjusting the tension and ensuring a well-balanced wheel. To begin, locate the spoke nipple at the rim where the adjustment is needed. Insert the spoke wrench onto the nipple and turn it clockwise to tighten or counterclockwise to loosen.
It is crucial to make small, incremental adjustments and check the tension regularly using a spoke tension meter. By using a spoke wrench to adjust the tension, you can optimize the performance and longevity of your electric bike conversion kit’s hub.
In the next section, we will explore the process of replacing damaged or broken spokes, which is crucial for maintaining a safe and reliable riding experience.
Replacing damaged or broken spokes
If you notice any damaged or broken spokes, you’ll need to replace them to ensure the continued functionality of your wheel. Here’s what you need to do:
- Start by removing the damaged spoke from the hub using a spoke wrench.
- Measure the length of the broken spoke to ensure you get the correct replacement.
- Insert the new spoke through the spoke hole in the hub and thread it into the nipple on the rim.
- Use the spoke wrench to tighten the nipple until the spoke is tensioned properly.
Replacing damaged or broken spokes is crucial for maintaining the structural integrity of your wheel.
Once you have replaced the spokes, it’s important to move on to inspecting the wiring and connections to ensure the overall safety and functionality of your electric bike conversion kit.
Inspecting the Wiring and Connections
Check if all the wiring and connections on your electric bike conversion kit are secure and intact. Properly inspecting the wiring and connections is crucial for maintaining the functionality and safety of your electric bike. Start by visually examining the wires for any signs of fraying, damage, or loose connections. Ensure that all connectors are tightly secured and free from corrosion. To assist you in this inspection process, refer to the table below which outlines the key components to check and the corresponding actions to take if any issues are found.
| Component | Inspection Action |
|---|---|
| Battery | Check for loose connections and signs of damage. |
| Motor | Examine wires for fraying or disconnection. |
| Controller | Verify all connections are secure and intact. |
| Throttle | Ensure proper functioning and tight connection. |
Testing the Electrical System
To ensure everything is functioning properly, you’ll want to start by testing the electrical system on your electric bike.
Begin by checking the battery voltage using a multimeter. Make sure it is within the recommended range specified by the manufacturer.
Next, test the throttle by twisting it and observing if the voltage output changes accordingly.
You can also check the power output by connecting a load, such as a light bulb, to the controller and verifying if it illuminates.
Additionally, test the brakes to ensure the motor stops when the brake levers are engaged.
Once you have tested and confirmed that the electrical system is working correctly, you can proceed to reassembling and reinstalling the hub motor, which we will discuss in the next section.
Reassembling and Reinstalling the Hub Motor
Now that you’ve successfully tested the electrical system on your electric bike conversion kit, it’s time to reassemble and reinstall the hub motor.
The first step is to align the hub motor with the dropouts on your bike frame, ensuring a proper fit. Once aligned, secure the motor with the appropriate torque to prevent any loosening during operation.
Aligning the hub motor with the dropouts
Make sure you’re aligning the hub motor with the dropouts before proceeding with the installation. This step is crucial to ensure proper functioning and alignment of the motor with the bike’s frame.
Here are some tips to help you align the hub motor correctly:
-
Check the alignment: Before installing the motor, examine the dropouts on your bike’s frame to make sure they are clean and free from any obstructions. This will ensure a smooth and accurate alignment process.
-
Use spacers if needed: Depending on the design of your hub motor and dropouts, you may need to use spacers to achieve a perfect alignment. These spacers can be placed between the motor and the dropout to adjust the position accordingly.
Once you have aligned the hub motor with the dropouts, you can proceed to secure the motor with the appropriate torque. This will ensure a secure and stable connection between the motor and the bike’s frame, preventing any unnecessary movement or damage during operation.
Securing the motor with the appropriate torque
Once you’ve aligned the motor with the dropouts, you can tighten it securely using the appropriate torque. This step is crucial to ensure that the motor stays in place and functions correctly. To determine the correct torque value, refer to the manufacturer’s instructions or the specifications provided with your electric bike conversion kit. Different kits may have different torque requirements, so it’s important to use the right one. Below is a table showing the recommended torque values for common electric bike conversion kits:
| Electric Bike Conversion Kit | Torque (Nm) |
|---|---|
| Kit A | 10 |
| Kit B | 12 |
| Kit C | 15 |
Reattaching the wheel and adjusting the brakes
After securing the motor with the appropriate torque, you can proceed to reattach the wheel and make necessary adjustments to the brakes.
Begin by aligning the wheel with the dropouts on the fork. Slide the wheel into place and ensure that the axle is fully seated in the dropouts. Tighten the axle nuts or quick-release skewer to the manufacturer’s recommended torque specifications.
Next, check the brake pads for proper alignment and adjust as needed. Loosen the brake caliper mounting bolts and position the brake pads so they are centered on the rim. Re-tighten the mounting bolts, ensuring that the brake pads are still aligned.
Finally, check the brake lever for proper tension and adjust if necessary.
With the wheel securely attached and the brakes adjusted, you are now ready to perform a test ride and fine-tune the electric bike conversion kit for optimal performance.
Performing a Test Ride and Fine-Tuning
Before you head out for a test ride, make sure to fine-tune your electric bike conversion kit to ensure optimal performance.
Start by checking the electrical connections, ensuring they are secure and free from any visible damage.
Then, adjust the throttle and pedal assist settings according to your preference.
Test the brakes and make necessary adjustments to ensure proper stopping power.
Additionally, check the tire pressure and make sure they are inflated to the recommended levels for a smooth and comfortable ride.
Lastly, take the bike for a short test ride, paying attention to any unusual noises or vibrations.
Fine-tuning your conversion kit will not only improve your riding experience but also prolong the lifespan of your components.
Now, let’s move on to regular maintenance and care tips to keep your electric bike running smoothly.
Regular Maintenance and Care Tips
To keep your e-bike running smoothly, it’s important to regularly check the tire pressure, clean the chain, and lubricate any moving parts. Maintenance is key to ensuring the longevity and optimal performance of your electric bike conversion kit. Here are some essential tips to help you maintain your e-bike:
| Maintenance Task | Frequency |
|---|---|
| Check tire pressure | Weekly |
| Clean and lubricate the chain | Every 100 miles |
| Inspect and tighten bolts | Monthly |
| Clean and lubricate moving parts | Every 200 miles |
| Check battery connections | Every 500 miles |
Conclusion
In conclusion, servicing the hub on your electric bike conversion kit is a crucial task that ensures optimal performance and longevity of your bike.
By understanding the hub motor system and using the right tools and equipment, you can effectively lubricate the motor, check and adjust the spokes, and test the electrical system.
Reassembling and reinstalling the hub motor and performing a test ride will help you fine-tune any adjustments needed.
Remember to also prioritize regular maintenance and follow care tips to keep your electric bike running smoothly.