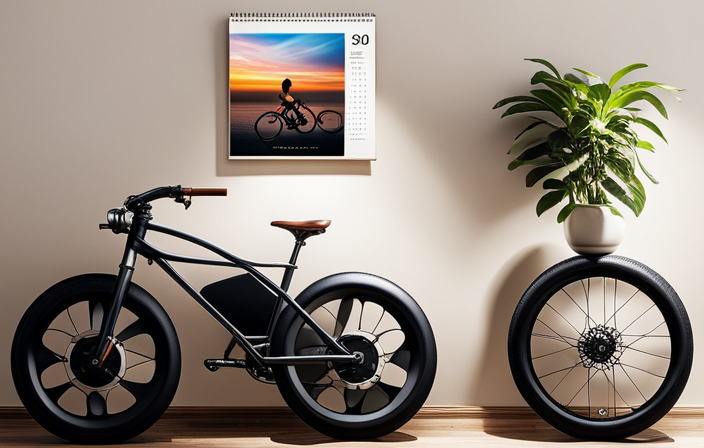

Picture the excitement of smoothly gliding through urban streets or conquering challenging landscapes on your own electric bike. With the appropriate know-how and equipment, assembling your electric bike can be a fulfilling and empowering journey.
In this article, I will guide you step-by-step through the process of choosing the perfect electric bike, assembling the components, and ensuring everything is properly connected. Get ready to unleash the power of electric biking and embark on unforgettable adventures.
Let’s dive in!
Key Takeaways
- Consider riding style and terrain preferences
- Gather the necessary tools and equipment
- Assemble the bike frame and components
- Install the electric motor and battery
Choosing the Right Electric Bike for Your Needs
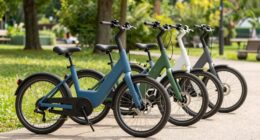
When choosing the right electric bike for your needs, it’s important to consider factors such as your riding style and terrain preferences. Start by comparing different electric bike models to find one that suits you best.
Understanding the range and battery life of electric bikes is essential, as it determines how far you can go on a single charge. Additionally, be aware of tips for maintaining your electric bike, as regular maintenance ensures optimal performance.
Don’t fall for common misconceptions about electric bikes, such as thinking they’re only for lazy riders. Electric bikes offer numerous benefits for commuting, including saving money on fuel and reducing your carbon footprint.
Prioritize safety considerations when riding, such as wearing a helmet and following traffic rules. Properly charging your electric bike battery is crucial for longevity.
Lastly, learn tips for riding in different weather conditions and keep an eye on the future of electric bikes in the transportation industry.
Gathering the Necessary Tools and Equipment
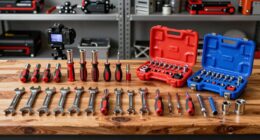
First, you’ll need to gather all the tools and equipment necessary to set up your electric bike. Choosing the right tools is crucial to ensure a smooth and successful installation process. Some essential tools you will need include a set of Allen wrenches, a torque wrench, wire cutters, and a multimeter. These tools will help you with tasks such as tightening bolts, measuring torque, cutting and stripping wires, and checking electrical connections.
Additionally, it’s important to understand the electric bike components before getting started. Familiarize yourself with the battery, motor, controller, and wiring system. This knowledge will help you troubleshoot any issues that may arise during the setup process.
With the right tools and understanding of the components, you’ll be well-equipped to set up your electric bike effectively.
Assembling the Bike Frame and Components
To assemble the frame and components, you’ll need to gather all the necessary tools and equipment. This step is crucial in ensuring a smooth and successful assembly process. Here is a table that lists the essential tools and equipment you’ll need:
| Tools | Equipment |
|---|---|
| Allen wrench set | Bike stand |
| Screwdriver set | Work gloves |
| Adjustable wrench | Safety glasses |
| Torque wrench | Cleaning supplies |
| Cable cutters | Lubricants |
Once you have all the tools and equipment ready, you can start the assembly process. Begin by attaching the bike frame components, such as the handlebars, fork, and seat post, following the manufacturer’s instructions. Ensure that all bolts and screws are tightened securely using the appropriate tools. Next, install the drivetrain components, including the chain, derailleur, and cassette. Pay attention to the proper alignment and adjustment of these components to ensure smooth and efficient shifting. Lastly, don’t forget to check and adjust the brakes for optimal performance. With careful attention to detail, your bike frame assembly and component installation will be successfully completed.
Installing the Electric Motor and Battery
You’ll need to install the electric motor and battery onto the bike frame. Here’s a step-by-step guide to help you get it done:
-
Start by finding the ideal location for the battery on the bike frame. Make sure it’s secure and won’t interfere with any moving parts.
-
Once you’ve found the right spot, use the provided brackets or straps to attach the battery to the frame. Double-check that it’s tightly secured to prevent any wobbling during rides.
-
Next, locate the motor and connect it to the bike frame according to the manufacturer’s instructions. This may involve using mounting brackets or bolts.
-
Now it’s time to wire the motor to the controller. Follow the wiring diagram that came with your electric bike kit, ensuring all connections are secure and properly insulated.
By following these steps, you’ll have your electric motor and battery installed securely onto your bike frame, ready to power your electric bike adventures.
Connecting the Wiring and Controls
Once the motor and battery are securely installed, the next step is to connect the wiring and controls.
This is a crucial step in setting up an electric bike as it ensures proper functionality and performance. Start by carefully following the manufacturer’s instructions for wiring connections. It’s important to double-check that all connections are secure and properly insulated to prevent any electrical hazards.
Additionally, take the time to learn about troubleshooting common issues that may arise with the wiring and controls. This knowledge will allow you to quickly identify and fix any potential problems.
To optimize battery performance, make sure to properly charge and maintain the battery according to the manufacturer’s recommendations. Regularly checking the battery’s voltage and ensuring it is within the recommended range will help extend its lifespan.
By paying attention to these details, you can ensure a smooth and successful setup of your electric bike.
Adjusting the Brakes and Gears
After securely installing the motor and battery, the next step is to adjust the brakes and gears for optimal performance.
First, adjust the brake pads by loosening the screw holding them in place and aligning them with the brake rims. Make sure they are evenly spaced and not rubbing against the rims.
Next, adjust the brake cables by loosening the cable clamp bolt and pulling the cable tight before re-tightening the bolt. This will ensure smooth and effective braking.
Moving on to the gears, start by adjusting the derailleur. Shift to the smallest gear and align the derailleur so that it is parallel to the smallest chainring.
Finally, adjust the seat position to ensure a comfortable and efficient riding experience.
Additionally, make sure to regularly maintain the electric motor by checking for loose connections, cleaning any debris, and lubricating the moving parts.
Testing and Troubleshooting
To ensure the electric bike is functioning properly, it’s important to test and troubleshoot any issues that may arise.
When troubleshooting common issues, start by checking the battery connections to ensure they are secure. Loose connections can cause the bike to not start or lose power. Additionally, inspect the battery for any visible damage or signs of wear. If the battery is damaged, it may need to be replaced.
To optimize battery performance, make sure to charge it fully before each ride and avoid leaving it in extreme temperatures. It’s also a good idea to periodically clean the battery contacts to ensure a good connection.
By testing and troubleshooting regularly, you can address any problems and keep your electric bike running smoothly.
Adding Accessories and Personalizing Your Electric Bike
You can easily personalize your electric bike by adding accessories that suit your preferences and needs.
When it comes to accessories selection, the options are plentiful. One of the most popular accessories is a bike rack, which allows you to carry items like groceries or camping gear with ease.
Another useful accessory is a phone mount, which enables you to securely attach your phone and use navigation apps while riding.
If you often ride at night, adding lights to your electric bike is a must for safety.
Additionally, you can personalize your bike with a comfortable saddle, ergonomic grips, or even a colorful basket for extra style.
Don’t forget to consider your specific needs and riding habits when choosing accessories to make the most of your electric bike experience.
Maintenance Tips for Long-Term Performance
One important maintenance tip for ensuring long-term performance is regularly cleaning and lubricating the moving parts of your e-bike. This includes the chain, gears, and brakes. A maintenance schedule can help you stay on top of these tasks.
Cleaning the chain and gears will prevent dirt and debris from building up, which can cause premature wear and tear. Lubricating these parts will reduce friction and ensure smooth operation.
Additionally, it is important to take proper care of the battery. Follow the manufacturer’s guidelines for charging and storing the battery. Avoid overcharging or letting the battery completely discharge. Regularly inspect the battery for any signs of damage or corrosion.
By following these maintenance tips, you can ensure that your electric bike performs optimally for years to come.
Enjoying Your Electric Bike and Exploring the Open Road!
Exploring the open road on your e-bike is a thrilling and enjoyable experience! There’s nothing quite like the feeling of the wind in your hair and the freedom to go wherever you please.
One of the greatest advantages of having an electric bike is the ability to explore scenic routes that may have been too challenging on a traditional bicycle. Whether it’s a leisurely ride through the countryside or a more challenging mountain trail, an e-bike allows you to effortlessly conquer any terrain.
Not only is it a fun way to enjoy the outdoors, but it also offers numerous benefits for fitness. Riding an electric bike can provide a low-impact cardiovascular workout, helping to improve your overall health and stamina.
So, hop on your e-bike, discover new roads, and embrace the joy of exploring the world around you!
Frequently Asked Questions
How long does it take to charge the electric bike battery?
The charging time of an electric bike battery depends on its capacity. Typically, it takes around 3-6 hours to fully charge a standard battery. However, larger capacity batteries may take longer to charge.
What is the maximum weight limit for an electric bike?
When it comes to electric bikes, the sky’s the limit, but the weight capacity isn’t. Electric bikes have weight restrictions, so it’s important to check the electric bike weight capacity before hitting the road.
Can I ride an electric bike in the rain?
Yes, you can ride an electric bike in the rain. However, there are some riding tips you should follow, such as reducing your speed and being cautious on wet surfaces. Additionally, regular maintenance tips include drying and lubricating your bike after riding in the rain.
How often should I check the tire pressure on my electric bike?
I recommend checking the tire pressure on my electric bike at least once a week. Maintaining optimal pressure ensures a smooth and safe ride. Use a tire pressure gauge to measure and adjust the pressure accordingly.
Are there any special regulations or laws I should be aware of when riding an electric bike?
When riding an electric bike, it is important to be aware of any special regulations or laws regarding electric bike safety and speed limits. Familiarize yourself with local laws to ensure a safe and legal ride.
Conclusion
So there you have it, my friends. Setting up an electric bike may seem like a daunting task, but with the right information and tools, it can be a rewarding experience.
Just like the feeling of gliding through the open road on your electric bike is as exhilarating as soaring through the sky like a bird.
Take your time, follow the steps carefully, and soon enough, you’ll be enjoying the convenience and thrill of your very own electric bike.
Happy riding!