As I began my gravel biking adventure, I soon learned how crucial it is to properly adjust my handlebars. There are numerous choices available and many factors to take into account, which can make the process overwhelming.
But fear not! In this article, I will guide you through the process of setting up your gravel bike bars step by step. From selecting the right width and shape to positioning your brake levers and shifters, we’ll cover it all.
So, let’s dive in and optimize your riding experience!
Key Takeaways
- Consider handlebar width based on shoulder width and personal preference for optimal control and stability on gravel trails.
- Adjust brake lever reach and shifter positioning for comfortable and easy access to brakes and smooth gear changes.
- Choose handlebar tape or grips that provide a secure grip and added comfort for long rides on rough terrain.
- Install bar ends or extensions for extra hand positions and aerodynamics, enhancing control and power transfer on gravel bike bars.
Understand the Different Handlebar Options
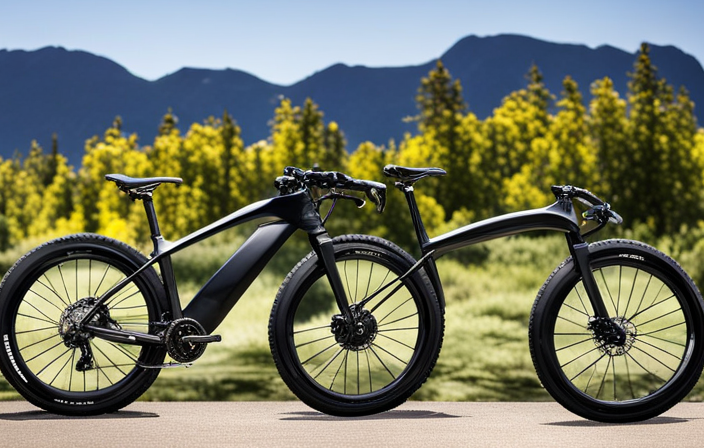
There are various handlebar options available for gravel bikes. When it comes to handlebar material options, the most common choices are aluminum and carbon fiber.
Aluminum handlebars are known for their durability and affordability, making them a popular choice among riders who prioritize these factors. On the other hand, carbon fiber handlebars offer a lighter weight option with increased shock absorption capabilities, which can be beneficial for longer rides on rough terrains.
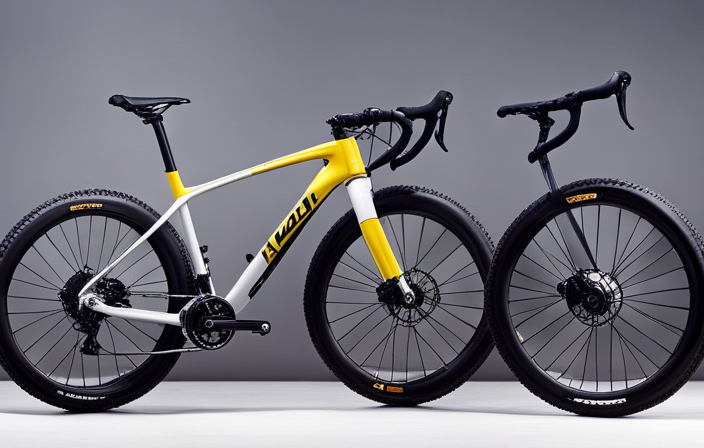
In addition to different materials, there are also various handlebar shapes to consider. Drop bars, commonly found on road bikes, provide multiple hand positions and aerodynamic benefits. They allow riders to achieve a more aggressive posture while riding at higher speeds. Alternatively, flat bars offer a more upright riding position that provides better control and stability on technical trails.
When determining the correct handlebar width for your gravel bike setup, it’s important to consider your shoulder width and riding preferences. A wider bar can provide more stability and control on rough terrain but may compromise aerodynamics. Conversely, a narrower bar can enhance aerodynamics but may feel less stable in challenging conditions.
Understanding the different handlebar options and their benefits is crucial in setting up your gravel bike bars correctly. Now let’s move on to how you can determine the correct handlebar width for your specific needs.
Determine the Correct Handlebar Width
To find the right handlebar width for your gravel bike, start by measuring the width of your shoulders. Stand up straight and have someone measure from the outer edge of one shoulder to the outer edge of the other. This measurement will give you a good starting point for determining the correct handlebar width.
Keep in mind that handlebars that are too narrow can cause discomfort and limit your control, while bars that are too wide can strain your shoulders and make steering difficult.
Once you have your shoulder width measurement, you can use it as a guide to calculate the ideal handlebar width. Start by dividing your shoulder measurement by 2.54 to convert it from inches to centimeters. Then, subtract 2-4cm from this number to account for personal preference and riding style.
For example, if your shoulder measurement is 40cm, divide by 2.54 to get approximately 15.75 inches. Then, subtract 2-4cm (0.79-1.57 inches) to arrive at a recommended handlebar width of around 14-15 inches.
When choosing a handlebar shape and drop, consider how they will affect your riding position and comfort on long rides or rough terrain. With these considerations in mind, you’ll be well on your way to setting up gravel bike bars that suit both your body measurements and riding preferences.
Consider the Handlebar Shape and Drop
When choosing handlebars for your gravel bike, consider how the shape and drop will affect your riding position and comfort on long rides or rough terrain.
There are two main types of handlebars commonly used in gravel biking: drop bars and flat bars. Drop bars have a curved shape that allows for multiple hand positions, which can be beneficial on longer rides as it helps to reduce fatigue. The drop refers to the lower section of the handlebar where the brake levers and shifters are positioned. This downward extension provides a more aerodynamic position when descending or riding into headwinds.
On the other hand, flat bars provide a more upright riding position, which can be advantageous when navigating technical off-road trails. They offer better control and stability, especially in challenging terrains where quick maneuvering is required. However, they may not be as comfortable on long rides due to limited hand positions.
For gravel biking specifically, aero handlebars can also be considered. These handlebars feature a more streamlined design that reduces drag and improves aerodynamics, making them ideal for riders who focus on speed and efficiency.
Transitioning into the next section about positioning the brake levers and shifters without using ‘step’, it’s important to carefully place these components to ensure optimal reach and comfort while riding.
Position the Brake Levers and Shifters
Placing the brake levers and shifters correctly ensures optimal reach and comfort while riding. When setting up your gravel bike bars, it’s crucial to adjust the brake lever reach to accommodate your hand size and riding style. Start by positioning the levers so that when you’re on the hoods, your fingers can comfortably wrap around them without straining or stretching. This will allow for quick and easy access to the brakes when needed.
In addition to adjusting the brake lever reach, it’s important to position the shifters for easy access. The shifters should be within reach of your fingers when you’re on both the hoods and in a more aggressive riding position, such as on the drops. This will ensure smooth gear changes without having to strain or reposition your hands unnecessarily.
To help visualize these adjustments, refer to the table below:
| Position | Brake Lever Reach | Shifter Position |
|---|---|---|
| Hoods | Comfortable | Within Reach |
| Drops | Comfortable | Within Reach |
By properly positioning both the brake levers and shifters, you’ll have better control over your bike while maintaining comfort throughout your rides. Now that we’ve covered this aspect of setting up gravel bike bars, let’s move on to adjusting handlebar height for an optimal riding position.
Adjust the Handlebar Height
For optimal comfort and riding position, it is important to adjust the height of your handlebars on your gravel bike. Finding the right handlebar height is crucial to ensure a proper fit and reduce strain on your back and shoulders.
To begin, loosen the stem clamp bolts using an Allen wrench. Next, raise or lower the handlebars to a height that feels comfortable for you. Keep in mind that adjusting handlebar reach may also be necessary depending on your body proportions and riding style.
Once you have set the desired height, make sure the handlebars are aligned with the front wheel. Tighten the stem clamp bolts securely to prevent any movement during rides. It’s important to note that excessively high or low handlebars can negatively impact bike handling and control.
Finding the right handlebar tape or grips is essential for a secure grip and added comfort while riding. The next section will guide you through this step by providing information on how to select suitable options based on your preferences and needs.
Remember, adjusting the handlebar height is a personal preference and may require some trial and error to find what works best for you. Take your time to make small adjustments until you achieve an ideal fit before moving onto selecting suitable handlebar tape or grips.
Find the Right Handlebar Tape or Grips
Choosing the right handlebar tape or grips is crucial for a comfortable and secure grip while riding. Whether you prefer the cushioning of tape or the grip of grips, it’s important to find the option that suits your needs. When it comes to handlebar tape installation, there are a few key considerations to keep in mind. First, determine whether you want a tacky or smooth surface. Tacky surfaces provide better grip but may be more difficult to clean. Smooth surfaces are easier to clean but may not offer as much traction. Next, consider the thickness of the tape or grips. Thicker options provide more cushioning but can also feel bulky in your hands. Thinner options offer a more direct connection with the bike but may not absorb as much vibration.
To help you make an informed decision, here’s a table comparing some popular handlebar tapes and grips:
| Brand | Material | Surface | Thickness |
|---|---|---|---|
| A | Cork | Tacky | Thick |
| B | Gel | Smooth | Medium |
| C | Leather | Tacky | Thin |
Now that you have an idea of what’s available, you can choose the option that best suits your preferences and riding style. Once you’ve selected your handlebar tape or grips, it’s time to install bar ends or extensions (if desired).
Install Bar Ends or Extensions (if desired)
To enhance your riding experience, consider installing bar ends or extensions (if desired). Bar ends are additional handles that can be attached to the end of your handlebars, while extensions are pieces that can be added to the existing handlebars to provide a longer reach.
Installing bar ends is a relatively simple process. First, remove the end plugs from your handlebars and slide on the bar ends. Make sure they are secure by tightening the screws or bolts provided.
Extensions, on the other hand, require removing your existing grips and attaching them directly to the handlebars using clamps or adhesive.
There are several benefits of using bar extensions. They provide extra hand positions, allowing you to change your grip and relieve pressure on certain parts of your hands during long rides. This can help reduce fatigue and discomfort. Additionally, bar extensions can improve aerodynamics by allowing you to get into a more streamlined position on the bike.
Now that you have installed your bar ends or extensions, it’s time to test and fine-tune the handlebar angle for optimal comfort and control while riding in our next section.
Test and Fine-Tune the Handlebar Angle
After installing bar ends or extensions, it’s important to test and fine-tune the handlebar angle to ensure optimal comfort and control while riding your gravel bike. This step is crucial as it allows you to customize the handlebar position according to your preference and riding style.
To begin, I recommend testing different handlebar positions by adjusting the stem bolts. Start by loosening them slightly, allowing you to rotate the handlebars freely. Make sure to keep both hands on the bars for stability during this process.
Here are a few key points to consider when fine-tuning the handlebar tilt:
- Experiment with various angles: Try adjusting the tilt of the handlebars up or down in small increments.
- Assess comfort and control: Pay attention to how each adjustment affects your grip, wrist alignment, and overall handling.
- Consider riding conditions: Take into account whether you’ll be primarily riding on rough terrain or smooth roads, as this can influence your ideal handlebar position.
- Seek input from experienced riders: If possible, consult with other gravel cyclists who have similar setups for their recommendations.
- Trust your instincts: Ultimately, go with what feels most comfortable and natural for you.
Once you’ve finished fine-tuning the handlebar angle, it’s time to move on to checking the handlebar alignment with the front wheel.
Check the Handlebar Alignment with the Front Wheel
To ensure proper alignment, make sure the handlebars on your gravel bike are parallel to the front wheel. Checking the handlebar alignment is crucial for a comfortable and efficient riding experience. Start by standing in front of the bike and visually inspecting the position of the handlebars in relation to the front wheel. They should be perfectly aligned, with no noticeable deviation from each other. If you notice any misalignment, it can be corrected by adjusting the stem bolts.
Next, sit on your bike and grip the handlebars firmly. Take a moment to assess how they feel in your hands. Are they positioned comfortably? Do they allow for easy reach and control? Make any necessary adjustments until you find a position that feels natural and ergonomic.
Properly aligning your handlebars ensures optimal handling and stability while riding your gravel bike. It promotes better control during turns and maneuverability over rough terrain. Once you have ensured correct handlebar alignment, you can move on to ensuring proper cable routing and housing length.
Transition: Now that we have established proper handlebar alignment, let’s focus on ensuring proper cable routing and housing length for optimal performance.
Ensure Proper Cable Routing and Housing Length
Now that we’ve established proper handlebar alignment, let’s make sure the cables are routed correctly and the housing length is appropriate for optimal performance. Proper cable routing ensures smooth shifting and braking on your gravel bike. Here are some cable routing tips to consider:
-
Minimize friction: Avoid sharp bends or kinks in the cables and housing. Smooth, gradual curves reduce friction, allowing for more responsive shifting and braking.
-
Separate brake and shift cables: Keeping the brake and shift cables separate prevents interference between them, ensuring consistent performance.
-
Securely fasten the housing: Use zip ties or clips to secure the housing along the frame or handlebars, preventing it from rattling or moving during rides.
-
Cut housing to appropriate length: The housing should be long enough to allow full range of motion for the handlebars but not so long that it creates unnecessary slack. Measure carefully before cutting.
Considerations for housing length:
- Longer lengths may be needed for wide handlebars or bikes with taller front ends.
- Shorter lengths can minimize weight and reduce cable drag.
- Consult your bike’s manufacturer guidelines for recommended housing lengths based on your specific setup.
Now that we’ve ensured proper cable routing and housing length, let’s evaluate the reach and drop for comfort in our next section about ‘evaluate the reach and drop for comfort.’
Evaluate the Reach and Drop for Comfort
Assessing the reach and drop of your handlebars is crucial for ensuring optimal comfort while riding. When evaluating the reach, you need to consider how far forward or backward the bars are in relation to your body. This can greatly affect your riding position and overall comfort. To evaluate the reach, start by sitting on your bike with a relaxed posture. Your hands should be resting comfortably on the hoods or drops of the handlebars. Check if there is any strain in your neck, shoulders, or back. If you feel discomfort, it may indicate that the reach needs adjustment.
Next, consider the drop of your handlebars. The drop refers to the vertical distance between the tops of the bars and their lowest point (usually found in the drops). A proper handlebar width will provide more control and stability while riding on gravel terrain. It should also allow for easy access to brakes and shifters without causing strain on your wrists.
Once you have evaluated both reach and drop, you can determine if any adjustments are necessary for optimal comfort during long rides on rough terrain. Consider adding accessories such as lights or a bike computer to enhance your gravel biking experience further.
In conclusion, assessing reach and drop is vital for achieving maximum comfort while riding a gravel bike. It ensures that your body is positioned correctly on the bike and minimizes discomfort during long rides on uneven surfaces. Once you have evaluated these factors, you can move onto considering additional accessories that can enhance your overall biking experience without compromising safety or functionality.
Consider Adding Accessories (e.g., lights, bike computer)
Consider adding accessories like lights or a bike computer to enhance your gravel biking experience on rough terrain. These additions can improve visibility and provide valuable data during your rides. When choosing a bike computer, look for features such as GPS tracking, speed and distance measurement, heart rate monitoring, and even turn-by-turn navigation. A bike computer can help you track your progress, set goals, and analyze your performance.
When it comes to bike lights, there are several types to choose from. Front lights illuminate the path ahead, while rear lights make you more visible to others on the road. Some lights even have flashing modes for added safety. Consider investing in rechargeable lights for convenience and environmental friendliness.
To summarize:
- Look for a bike computer with GPS tracking, speed measurement, heart rate monitoring, and turn-by-turn navigation.
- Choose front and rear lights to improve visibility during rides.
- Select lights with flashing modes for added safety.
- Opt for rechargeable lights for convenience and sustainability.
- Make sure the accessories you choose are compatible with your gravel bike’s handlebars.
Adding these accessories will not only enhance your riding experience but also contribute to safer travels. Once you have chosen your desired extras, it’s time to test ride them and adjust as needed before hitting the trails again.
Test Ride and Adjust as Needed
Before hitting the trails again, take your bike for a test ride and make any necessary adjustments. A test ride is crucial to ensure that your gravel bike bars are set up properly and provide you with optimal comfort and control on the trails.
During the test ride, pay attention to how your hands feel on the handlebars. Are they positioned in a way that feels natural and allows for easy access to the brakes and gear shifters? If not, you may need to adjust the handlebar position.
Start by loosening the stem bolts slightly so that you can move the handlebars forward or backward as needed. Take note of how these adjustments affect your riding experience. You may find that a slight adjustment can make a big difference in terms of comfort and handling.
Once you have found the ideal position for your gravel bike bars, tighten the stem bolts securely to ensure that they stay in place during rides. It’s important not to overtighten them, as this could damage your handlebars or stem.
If you’re unsure about how to properly adjust your gravel bike bars or if you encounter any difficulties during this process, it’s always best to seek professional help. They have the expertise and tools necessary to make precise adjustments based on your specific needs.
With your gravel bike bars properly set up, you’ll be ready to tackle those trails with confidence!
Seek Professional Help if necessary
If you’re unsure about how to properly adjust your handlebars or encounter any difficulties, it’s best to seek professional help. Seeking professional advice ensures that your gravel bike bars are set up correctly and optimally for your riding style and comfort. Professional bike mechanics have the expertise and experience to troubleshoot common handlebar issues and provide solutions tailored to your specific needs.
To highlight the importance of seeking professional help, let’s look at a table below that outlines common handlebar issues and their potential causes:
| Issue | Potential Cause |
|---|---|
| Handlebars feel loose | Loose stem bolts or headset |
| Handlebars too high | Excessive spacers under the stem |
| Handlebars too low | Insufficient spacers or stem angle |
By consulting with a professional, they can diagnose these issues accurately and make the necessary adjustments. They will ensure that your handlebars are secure, at the correct height, and angled appropriately for optimal performance.
With professional assistance, you can enjoy your optimized gravel bike bars! In the next section, we will discuss how to fully appreciate the benefits of having well-adjusted handlebars while exploring different terrains.
Enjoy Your Optimized Gravel Bike Bars!
Once your handlebars are properly adjusted, you can fully enjoy the benefits of optimized gravel bike bars. When your handlebars are set up correctly, it allows for better control and comfort while riding on different terrains.
The first benefit of proper handlebar setup is improved handling. By adjusting the width and angle of the bars to suit your riding style, you can achieve a more stable and responsive feel when maneuvering through tight corners or rough trails.
Another advantage is increased comfort. Adjusting the height and reach of the bars helps alleviate strain on your wrists, shoulders, and back by promoting a natural riding position. This reduces fatigue during long rides and allows you to stay in control for extended periods.
Proper handlebar setup also enhances power transfer. By positioning the bars at the right height, you can optimize your pedaling efficiency and maximize power output. This means that every pedal stroke counts and translates into forward motion more effectively.
Additionally, optimized gravel bike handlebars improve overall safety. With precise adjustments, you can maintain better balance and stability on challenging surfaces, minimizing the risk of accidents or unexpected falls.
In conclusion, taking the time to optimize your gravel bike handlebars brings numerous benefits such as improved handling, increased comfort, enhanced power transfer, and overall safety. So make sure to adjust your bars properly before hitting those adventurous gravel roads!
Frequently Asked Questions
How do I determine the correct handlebar width for my gravel bike?
To determine the correct handlebar width for your gravel bike, consider handlebar sizing and ergonomics. The ideal width should provide stability, control, and comfort during your rides.
Start by measuring your shoulder width and add a few centimeters to each side for optimal leverage. Additionally, take into account personal preferences and riding style.
Consider consulting with a professional or visiting a local bike shop to ensure you select the right handlebar width for an optimal riding experience.
What are the different handlebar shapes and drops available for gravel bikes?
When it comes to handlebar shapes and drops for gravel bikes, there are a few options to consider.
Aero handlebars offer several benefits, including improved aerodynamics and increased speed.
On the other hand, flat handlebars provide a more upright riding position, offering better control and stability on rough terrain.
Drop handlebars, commonly seen on road bikes, offer multiple hand positions and better aerodynamics when riding on smooth surfaces.
Choosing between flat and drop handlebars ultimately depends on your personal preferences and the type of terrain you’ll be riding on.
How should I position the brake levers and shifters on my gravel bike handlebars?
For optimal control and comfort on gravel bike handlebars, proper hand placement is crucial. To achieve this, start by positioning the brake levers so they’re within easy reach of your fingers when your hands are in a relaxed grip on the bars.
Adjust the shifter positions according to your individual rider preferences. Some riders prefer them closer to the stem, while others prefer them farther out. Experiment with different positions until you find what works best for you.
How do I adjust the handlebar height on my gravel bike?
To adjust the handlebar height on my gravel bike, I start by loosening the stem bolts with an Allen wrench. Then, I raise or lower the stem to find the desired height and tighten the bolts securely.
It’s crucial to ensure that the handlebars are at a comfortable angle for riding and that they don’t strain my wrists or neck.
Additionally, finding the right stem length is important for optimal handling and control while riding.
What are some popular accessories that can be added to gravel bike bars?
Popular accessories that can be added to gravel bike bars include bikepacking gear and handlebar bags. These accessories are designed to enhance the functionality and versatility of your gravel bike.
Bikepacking gear, such as frame bags, seat packs, and top tube bags, allow you to carry essential items for longer rides or multi-day adventures. Handlebar bags provide additional storage space for smaller items like snacks or a smartphone, keeping them easily accessible during your ride.
Conclusion
In conclusion, setting up gravel bike bars may seem daunting, but with the right knowledge and techniques, it can be rewarding. By understanding handlebar options, determining width and shape, you can optimize performance. Positioning brake levers and shifters, adjusting handlebar height, and considering accessories enhance riding experience. Remember to test ride and make adjustments. If unsure, seek professional help. Now go enjoy your perfectly set up gravel bike bars!