As someone who rides bicycles, it’s crucial to regularly carry out maintenance on your bike, with one of the key tasks being the adjustment of the chain’s length. There are instances where you might discover the chain is excessively lengthy, leading to gear skipping or the chain coming off during a ride. Under these circumstances, it becomes necessary to shorten the chain so it properly aligns with the gearing system of your bike.
In this article, I’ll be sharing with you a step-by-step guide on how to shorten a bicycle chain.
Before we dive into the process of shortening a bike chain, it’s essential to gather all the necessary tools and materials. You’ll need a chain tool, which is a small handheld device used to push out the pins that hold the chain links together. You’ll also need a ruler or tape measure to determine the correct chain length, and a pair of pliers to help you remove the excess links. Additionally, you’ll need a new quick link or a chain pin to reconnect the chain after shortening it.
With these tools and materials in hand, let’s get started on shortening your bike chain.
Key Takeaways
- Proper tools and workspace are required for shortening a bicycle chain.
- Accurate measurements and accounting for changes in chainring/cassette size and chain stretch are crucial.
- Excess links should be marked and the chain should be inspected for wear, damage, or dirt buildup before reconnecting.
- Regular lubrication and maintenance of the chain is important for a smooth and safe ride.
Gather the Necessary Tools and Materials
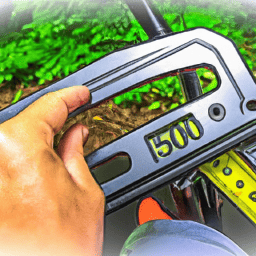
You’ll need to grab some tools and materials if you want to cut down that bike chain and ride with ease! Choosing the right tool is crucial to ensure that you don’t damage the chain or any other bike parts in the process. A chain tool, also known as a chain breaker, is the best option. It’s a small device that allows you to push out the pins in the chain, enabling you to remove links quickly and easily.
Before starting the process, it’s important to prepare the workspace. Find a clean, well-lit area where you can comfortably work on your bike. It’s best to place your bike in a bike stand or on a workbench to prevent it from moving around too much.
Additionally, make sure you have a clean rag or towel and some lubricant on hand to clean and oil the chain once you’ve shortened it. With the proper tools and workspace, you’ll be ready to determine the correct chain length for your bike.
Determine the Correct Chain Length
First, measure the length of your drivetrain from the center of your front chainring to the center of your rear cassette. This will give you the proper chain length needed for your bike.
There are various measuring techniques you can use, but the most common is to wrap a string or chain around the largest chainring and the largest cassette cog, then measure the length of the string or chain. Another technique is to use a chain checker tool to determine the length of your current chain and adjust accordingly.
It’s important to avoid common mistakes when measuring for the correct chain length. One mistake is not taking into account any changes in chainring or cassette size. Another mistake is not accounting for chain stretch, which can occur over time and affect the length of the chain needed.
By taking these factors into consideration and measuring accurately, you can ensure that your chain is the proper length for optimal performance.
Once you have determined the correct chain length, you can move on to removing the excess links.
Remove the Excess Links
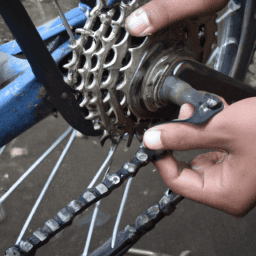
Now that you’ve determined the correct chain length, it’s time to trim off the excess links and get your bike running smoothly like a well-oiled machine. To remove the links, you’ll need a chain breaker tool, which you can purchase at a local bike shop or online.
Here are the steps to follow:
- Adjust chain tension: Before breaking the chain, adjust the chain tension by shifting the bike to the smallest front and rear chainrings. This will ensure that the chain isn’t too tight or loose when you reconnect it.
- Identify the excess links: Count the number of links you need to remove from the chain, based on the correct chain length you determined earlier. Mark the excess links with a marker or tape for easy identification.
- Use a chain breaker: Place the chain breaker tool on the chain where you marked the excess links. Turn the screw to push the pin out of the chain, separating the links. Repeat this process for each excess link.
- Recheck chain length: After removing the excess links, recheck the chain length to ensure it matches the correct length you determined earlier.
- Test chain tension: Shift the bike through the gears to test the chain tension. If the chain is too loose or tight, adjust the tension accordingly.
Now that you’ve removed the excess links, it’s time to reconnect the chain.
Reconnect the Chain
Once the excess links have been removed, it’s time to reattach the chain to your bike. Before doing so, it’s important to inspect the chain for any signs of wear, damage, or dirt buildup.
Proper chain maintenance is crucial for ensuring a smooth and safe ride. If the chain is excessively dirty or worn, it may need to be replaced entirely.
When reconnecting the chain, make sure to align the chain ends with the chain tool and push the connecting link pin through the chain. Use a pair of pliers to snap the connecting link into place and ensure that it is secure.
To prevent chain breakage in the future, it’s important to regularly lubricate the chain and keep it clean. Troubleshooting tips for chain breakage include checking for bent teeth on the chainring or cassette, as well as ensuring that the derailleur is properly adjusted.
Once the chain is reconnected, it’s time to test it and take a test ride to ensure that everything is functioning properly.
Test the Chain and Take a Test Ride
Before hitting the road, make sure to give the chain a quick test and take a spin around the block to ensure that it’s functioning smoothly and without any issues. Check that the chain is shifting smoothly between gears and that it’s not skipping or slipping. If you notice any problems, such as a noisy chain or difficulty shifting, it may be due to inadequate chain lubrication or other maintenance issues.
To keep your chain running smoothly, it’s important to perform regular maintenance. Chain lubrication is key to preventing wear and tear on the chain and ensuring that it functions properly. Apply a lubricant to the chain and wipe off any excess oil.
Additionally, make sure to keep your chain clean by removing any dirt or debris that may accumulate on it. With these maintenance tips, you can keep your chain in top shape and enjoy a smooth, comfortable ride.
Frequently Asked Questions
How often should I replace my bicycle chain?
I replace my bicycle chain every 2000-3000 miles to ensure optimal performance and prevent wear on other drivetrain components. Regular chain maintenance, including cleaning and lubrication, can prolong chain life.
Can I reuse the removed links for another chain?
Yes, it’s possible to reuse removed links for another chain, but it’s not recommended. It’s better to use alternative tools for chain shortening, such as a chain tool. This ensures proper chain length and reduces the risk of chain failure.
How do I know if my chain is stretched and needs to be replaced?
I can tell if my chain is stretched by using chain measurement techniques. If it’s stretched, I replace it. To prevent chain stretch, I lubricate regularly and avoid cross-chaining.
What lubricant should I use for my bicycle chain?
For my bicycle chain, I prefer using a wax-based lubricant. It offers benefits like reduced dirt and debris buildup, longer-lasting lubrication, and less noise. To properly apply it, I clean the chain first, heat the wax, and apply it evenly to each link.
Is it necessary to use a chain tool to remove excess links or can I use pliers?
Using pliers to remove excess links is like trying to cut a steak with a spoon. A chain tool is necessary for precise and safe shortening. However, some chains have a quick link that can be used to remove links without a tool.
Conclusion
So there you have it, folks – a step-by-step guide on how to shorten a bicycle chain. While it may seem daunting at first, with the right tools and a bit of patience, anyone can do it.
Just remember to measure twice and cut once! One interesting statistic to note is that having a properly sized and maintained chain can actually improve your cycling performance. According to a study by the University of Jyväskylä, a well-maintained chain can reduce energy loss by up to 5%.
So not only will you have a smoother and more efficient ride, but you’ll also be saving a bit of energy in the process.
In summary, by following these simple steps and ensuring your chain is properly adjusted, you’ll not only be extending the lifespan of your chain, but also improving your overall cycling experience.
Happy cycling!