Just like a shaky compass needle, a tilted seatpost on your electric bike can disrupt the balance and comfort of your ride. But don’t worry, my fellow cyclist, as I have compiled a collection of solutions to fix this frustrating problem.
In this article, we will explore various methods such as:
- Checking the seatpost clamp
- Tightening the seatpost bolt
- Considering a suspension seatpost
So bid farewell to the tilting seatpost, dear reader, and let us embark on this journey towards a smoother and more enjoyable ride.
Key Takeaways
- Seek professional help if the seatpost tilting issue persists
- Use a seatpost clamp with a quick release lever for easy adjustment
- Regularly inspect and tighten the seatpost clamp and bolts to prevent tilting
- Regular maintenance and cleaning of the seatpost is crucial for optimal performance and prevention of tilting issues
Check the Seatpost Clamp
To solve the electric bike seatpost tilting issue, you should check the seatpost clamp. The seatpost clamp is an essential component that holds the seatpost securely in place. It is crucial to ensure that the seatpost clamp is properly tightened to prevent any movement or tilting.
When checking the seatpost clamp, consider the material options available for the seatpost. Different materials, such as aluminum or carbon fiber, have varying levels of rigidity and durability.
Common causes of seatpost tilting can include loose or worn-out clamps, incorrect installation, or insufficient tightening. By examining the seatpost clamp and addressing any issues, you can avoid seatpost tilting problems.
Now, let’s move on to the next step: tightening the seatpost bolt.
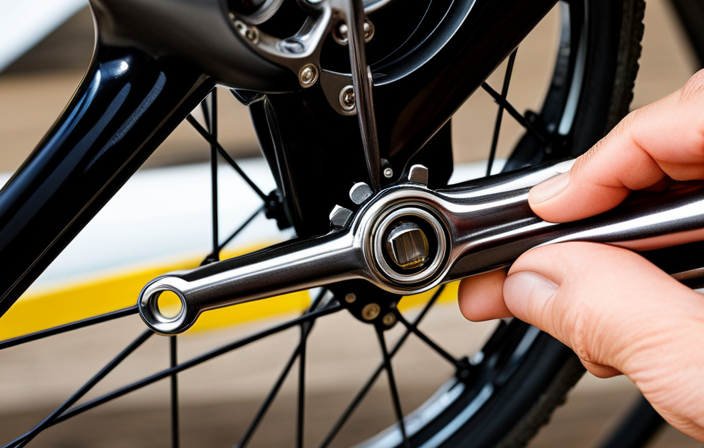
Tighten the Seatpost Bolt
First, make sure to tighten the seatpost bolt securely. This is essential to prevent any movement or tilting of the seatpost while riding. To ensure a secure fit, use a torque wrench to tighten the bolt to the manufacturer’s recommended specifications. Additionally, it is important to check the seatpost height to ensure it is set at the desired position. This can be easily adjusted by loosening the seatpost clamp and sliding the seatpost up or down as needed. Another helpful tip is to lubricate the seatpost bushing with a suitable lubricant. This will reduce friction and make it easier to adjust the seatpost height. Finally, to further prevent any seatpost tilting issues, consider using a carbon fiber grip paste. This specialized paste creates additional friction between the seatpost and seat tube, providing a more secure grip. Transitioning into the next section, using a carbon fiber grip paste can be an effective solution to eliminate any remaining seatpost tilting problems.
Use a Carbon Fiber Grip Paste
Using a carbon fiber grip paste can effectively address any remaining problems with seatpost tilting. This specialized paste is designed to enhance the friction between the seatpost and the frame, preventing it from slipping or rotating.
Here are five benefits of using a carbon fiber seatpost grip:
- Increased grip: The grip paste creates a stronger bond between the seatpost and the frame, ensuring stability during rides.
- Reduced vibrations: The paste acts as a cushion, absorbing shocks and vibrations, providing a smoother and more comfortable ride.
- Easy application: Applying the grip paste is a straightforward process, requiring only a small amount to be evenly spread on the seatpost.
- Long-lasting effect: The carbon fiber grip paste is durable and resistant to various weather conditions, ensuring a reliable grip over time.
- Lightweight solution: Unlike other methods, the grip paste adds minimal weight to the bike, allowing for optimal performance.
By using a carbon fiber grip paste, riders can eliminate seatpost tilting and enjoy a more secure and comfortable cycling experience.
To further enhance stability, the next step is to install a seatpost shim.
Install a Seatpost Shim
Once the carbon fiber grip paste has been applied, you can enhance stability even further by installing a seatpost shim.
A seatpost shim is a thin, cylindrical piece that can be inserted into the seat tube of your bike frame to adjust the diameter and ensure a snug fit for your seatpost. It is important to choose a shim that is compatible with your seatpost and frame.
To install the shim, first, remove the seatpost from the frame. Then, slide the shim onto the seatpost, making sure it is centered and aligned properly. Finally, reinsert the seatpost into the frame, ensuring a secure and stable fit.
Installing a seatpost shim can help prevent seatpost tilting and improve overall riding experience.
To replace the seatpost, continue to the next section.
Replace the Seatpost
To ensure a secure and stable fit, you can replace the seatpost on your bicycle. Before replacing the seatpost, it is important to check seatpost compatibility with your electric bike. Different bikes may require specific seatpost sizes, so make sure to measure the diameter of your current seatpost to ensure a proper fit. Once you have chosen a compatible seatpost, remove the old one by loosening the seatpost clamp and sliding it out of the seat tube. Install the new seatpost by inserting it into the seat tube and tightening the clamp securely. After replacing the seatpost, you can then adjust the seatpost height to your desired position. This will help eliminate any tilting issues and provide a comfortable riding experience. To further address seatpost tilting problems, the subsequent section will discuss how to use a seatpost collar with a built-in angle adjuster.
Use a Seatpost Collar with a Built-in Angle Adjuster
To address the issue of a tilting electric bike seatpost, another alternative to consider is using a seatpost collar with a built-in angle adjuster. This innovative accessory allows for precise adjustment of the seatpost angle, ensuring a comfortable and ergonomic riding position. By simply loosening the collar and rotating the adjuster, riders can easily fine-tune the tilt of their seatpost to their preference.
The benefits of using a seatpost collar with a built-in angle adjuster are numerous. Firstly, it eliminates the need to replace the entire seatpost, saving time and money. Additionally, it offers a wider range of adjustability compared to traditional seatposts, allowing riders to find their perfect riding position. Furthermore, it provides a secure and reliable solution, ensuring that the seatpost remains in place during rides.
For riders seeking further suspension and comfort, the subsequent section will explore the option of considering a suspension seatpost.
Consider a Suspension Seatpost
If you’re looking for a way to improve the comfort of your ride, consider investing in a suspension seatpost.
Suspension seatposts are designed to absorb shocks and vibrations, providing a smoother and more comfortable experience while riding your electric bike.
These seatposts utilize a suspension system that allows the seat to move up and down, absorbing the impact of bumps and uneven terrain. By doing so, they reduce the strain on your body and minimize the jolts that can cause discomfort.
Suspension seatposts come in various designs, including telescopic and parallelogram styles, each offering different levels of suspension and adjustability.
When considering a suspension seatpost, it is important to explore alternative seatpost designs to find the one that best suits your needs.
Transitioning into the subsequent section about using a seatpost clamp with a quick release lever, this option provides a convenient way to make adjustments to your seatpost position without the need for tools or complicated procedures.
Use a Seatpost Clamp with a Quick Release Lever
Consider using a seatpost clamp with a quick release lever for easy and tool-free adjustments to your seatpost position. This type of clamp allows you to quickly change the tilt of your electric bike seatpost without the need for any additional tools.
Proper seatpost height adjustment is crucial for a comfortable and efficient riding experience. It can help prevent discomfort and fatigue, as well as improve your overall performance. When adjusting the seatpost height, make sure it is high enough to allow for a slight bend in your knee when the pedal is at its lowest position.
Choosing the right saddle is equally important. A well-fitted saddle will provide the necessary support and comfort, reducing the risk of discomfort or pain during your rides. Consider factors such as your riding style, body shape, and personal preferences when selecting a saddle.
In order to ensure the best results and avoid any potential issues, seeking professional help is always recommended. They can provide expert guidance and assistance in solving any seatpost tilting problems you may encounter.
Seek Professional Help
To address the issue of seatpost tilting on an electric bike, using a seatpost clamp with a quick release lever can be a helpful solution. However, if this does not resolve the problem, seeking professional help is recommended. When facing persistent seatpost tilting, it is essential to consult with an expert who can provide specialized advice and troubleshooting tips. They can assess the specific issue and offer guidance on possible solutions. To further enhance your understanding, refer to the table below for a comprehensive overview of common causes and potential remedies for seatpost tilting issues.
| Common Causes | Potential Remedies |
|---|---|
| Loose seatpost clamp | Tighten the seatpost clamp securely |
| Worn or damaged seatpost | Replace the seatpost with a new one |
| Incorrect seatpost size | Ensure the seatpost matches the frame specifications |
Continuously maintaining and cleaning the seatpost is crucial for optimal performance.
Regularly Maintain and Clean the Seatpost
Make sure you regularly clean and maintain your seatpost to ensure its optimal performance. Seatpost maintenance is essential in preventing and troubleshooting seatpost tilting issues on your electric bike.
Here are some seatpost maintenance tips to help you keep your seatpost in top shape.
-
First, start by removing the seatpost from the bike frame. Clean the seatpost thoroughly using a mild detergent and water. Pay attention to any dirt or debris that may have accumulated on the surface. Inspect the seatpost for any signs of damage or wear, such as cracks or scratches.
-
Next, apply a thin layer of grease or lubricant to the seatpost before reinserting it into the bike frame. This will help prevent friction and ensure smooth adjustment and tightening of the seatpost.
-
Lastly, regularly check the seatpost clamp and bolts for tightness. Loose bolts can cause the seatpost to tilt, so make sure they are properly tightened using the recommended torque specifications.
By following these seatpost maintenance tips, you can prevent and troubleshoot seatpost tilting issues on your electric bike, ensuring a comfortable and secure ride.
Frequently Asked Questions
How do I know if my electric bike seatpost is tilting?
To determine if your electric bike seatpost is tilting, check for any noticeable changes in the angle or position of the seat. If it is not level or secure, you may need to adjust or fix it using the appropriate method for your electric bike model.
Can I use any type of grip paste on my carbon fiber seatpost?
Yes, you can use different types of grip paste on a carbon fiber seatpost. The advantages are that it helps prevent slippage and provides a secure grip. The disadvantages are that it can be messy and may require regular reapplication.
How does a seatpost shim help solve the tilting issue?
Using a seatpost shim during installation helps solve the tilting issue by providing a precise fit between the seatpost and frame. This prevents any unwanted movement and ensures a secure and stable seatpost position.
Are there any specific tools required to replace a seatpost?
When replacing a seatpost, you may need a few tools such as a hex key or wrench, grease, and a torque wrench. Seatpost replacement tips include ensuring proper alignment and torque, while common mistakes include over-tightening or using incorrect tools.
What are some signs that indicate the seatpost needs professional attention?
Some signs that indicate the seatpost needs professional attention include a loose seatpost, difficulty adjusting the height, and excessive wobbling. To fix a loose seatpost, tighten the clamp bolt using an Allen wrench.
Conclusion
So there you have it, a comprehensive guide on how to solve the electric bike seatpost tilting issue.
By following these steps and considering the various options available, you can ensure a stable and comfortable riding experience.
It may seem like a minor problem, but a tilted seatpost can make a huge difference in your overall comfort and performance.
So don’t let this issue go unnoticed, take action and fix it today.
Remember, a properly adjusted seatpost is the key to a smooth and enjoyable ride.