Connect with us

Electric Bike

How To Start A Schwinn Electric Bike Without A Key

Published

on

An image showcasing a person effortlessly starting a Schwinn electric bike without a key

I have experienced this situation previously, where I found myself in front of my Schwinn electric bike, attempting to turn it on without the key. It can be quite frustrating, especially when you are in a rush or have misplaced the key.

But fear not, because I’m here to share with you some ingenious ways to get your bike up and running, even without a key. In this article, I’ll guide you through a series of techniques, from checking for hidden key slots to hotwiring the bike, so you can get back on the road in no time.

Key Takeaways

  • Check for a hidden key slot or try the default key code to start the Schwinn electric bike without a key.
  • If the above methods fail, consider using a universal bike key or replacing the ignition switch.
  • Alternatively, consult the bike’s manual, contact Schwinn customer support, or seek professional assistance from a locksmith.
  • Exploring keyless ignition systems, keyless entry systems, remote start systems, or Bluetooth lock options can also provide solutions to starting the bike without a key.

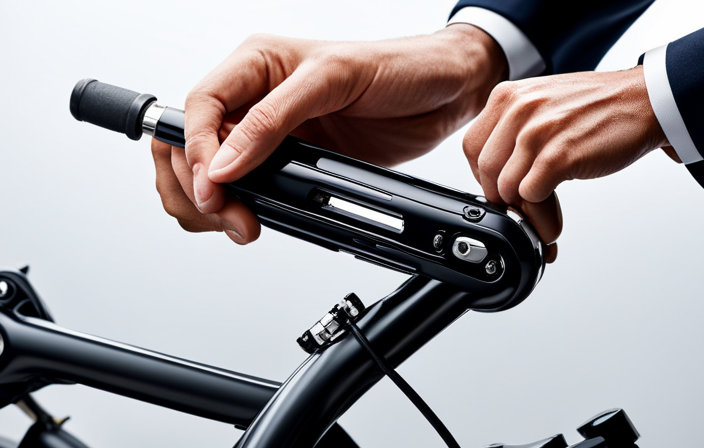
Check for a Hidden Key Slot

Check if there’s a hidden key slot on your Schwinn electric bike. Most electric bikes from Schwinn come with a traditional key slot, but some models may have a hidden key slot as an alternative method to start the bike. This hidden key slot can be located in different areas depending on the specific model. One common location is underneath the battery pack or near the charging port.

Carefully inspect your bike for any unusual or inconspicuous openings that might house a hidden key slot.

Advertisement

If you cannot find a hidden key slot, don’t worry. There are still alternative methods to start your Schwinn electric bike without a key. One method is to try the default key code. Schwinn electric bikes often come with a default key code that can be used to start the bike in case the key is misplaced or lost. This default key code is typically a combination of numbers that can be entered using the bike’s control panel or display.

Refer to your bike’s user manual or contact Schwinn’s customer support to obtain the default key code for your specific model.

Transitioning to the subsequent section, let’s explore how to try the default key code to start your Schwinn electric bike.

Try the Default Key Code

If you find yourself without a key for your Schwinn electric bike, don’t panic! There are alternative methods you can try to start your bike without a key. One of these methods is to use the default key code.

Many electric bikes, including Schwinn models, come with a default key code that can be used to start the bike in case the key is lost or misplaced. Here are some steps to follow:

Advertisement
  • Locate the default key code in the manual or on the manufacturer’s website.
  • Enter the default key code into the bike’s key code input panel.
  • Turn the bike on and see if it starts.

If the bike doesn’t start with the default key code, it’s time to seek professional help.

If the default key code doesn’t work, it’s best to consult a professional. They will have the necessary tools and expertise to help you start your Schwinn electric bike without a key. Don’t attempt to force the ignition or tamper with the bike’s electrical system, as this could cause further damage.

In the next section, we will explore another method to start your bike without a key – using a universal bike key.

Use a Universal Bike Key

If the default key code isn’t effective, it’s advisable to consult a professional for assistance with your Schwinn electric bike.

Advertisement

However, if you’re in a bind and don’t have access to a professional, another option you can try is using a universal bike key.

A universal bike key is a tool that can fit into the hidden key slot on your Schwinn electric bike’s ignition switch. This key slot is usually located near the handlebars or under the seat.

By inserting the universal bike key into this slot and turning it, you may be able to start your bike without the need for the original key.

It’s important to note that not all universal bike keys will work with every bike model, as there may be variations in the key slot designs.

If the universal bike key doesn’t work, it’s best to explore other alternatives, such as replacing the ignition switch.

Advertisement

This will ensure that you can start your Schwinn electric bike reliably and safely.

Replace the Ignition Switch

When replacing the ignition switch on your Schwinn electric bike, it’s important to consult a professional for assistance. The ignition switch is a crucial component that allows you to start your bike and control the electrical system. If you’re experiencing issues with your ignition switch, such as difficulty starting the bike or a complete failure, replacing it may be necessary.

To replace the ignition switch, begin by disconnecting the battery to ensure your safety. Then, remove the screws or bolts securing the switch in place. Carefully detach the wiring harness connected to the switch, taking note of the wire colors and their positions. Once the old switch is removed, install the new one by connecting the wiring harness in the correct order. Secure the switch back in place with the screws or bolts, ensuring it is tightly fastened.

If you’re still unable to start your Schwinn electric bike after replacing the ignition switch, there may be other underlying issues. It’s important to troubleshoot common problems, such as checking the battery’s charge, inspecting the wiring connections, and ensuring the key fob or remote is functioning properly. By addressing these potential issues, you can ensure a smooth and hassle-free ride.

Now, let’s explore another method to start your Schwinn electric bike without a key: hotwiring it.

Advertisement

Hotwire the Bike

To hotwire your Schwinn electric bike, simply bypass the ignition switch by connecting the necessary wires. However, before attempting to hotwire your bike, it is important to understand the precautions and legality involved in doing so.

Hotwiring a bike may be necessary in specific situations, such as when you have lost your key or the ignition switch is faulty. However, it should only be done as a last resort and with the understanding that it may void any warranties on the bike.

Before proceeding with hotwiring, ensure that you are in a safe and legal environment. It is important to note that hotwiring a bike without proper authorization may be illegal in many jurisdictions. Always consult local laws and regulations before attempting any hotwiring.

Now, to hotwire your Schwinn electric bike, you will need to use a screwdriver or paperclip to bypass the ignition switch. By carefully accessing the wiring harness, you can connect the necessary wires to start the bike. This method should only be used if you are unable to obtain a replacement key or if repairing the ignition switch is not an option.

Transition: Now that you understand the precautions and legality, let’s move on to how to use a screwdriver or paperclip to bypass the ignition switch.

Advertisement

Use a Screwdriver or Paperclip

Before attempting to use a screwdriver or paperclip to bypass the ignition switch, make sure you have a clear understanding of the necessary steps and safety precautions involved.

While hotwiring a bike may seem like a quick solution, it is important to proceed with caution to avoid damaging the electrical system or causing harm to yourself.

If you don’t have a screwdriver on hand, there is an alternative method that you can try using a paperclip. This technique involves locating the wires connected to the ignition switch and carefully manipulating them to start the bike. However, it is crucial to exercise extreme care and precision, as any wrong move can lead to irreversible damage.

It is always recommended to consult the bike’s manual for specific instructions tailored to your model. The manual provides valuable information about the wiring system and the correct way to start the bike without a key.

It is best to rely on the manual’s guidance to ensure a safe and successful ignition without causing any harm to yourself or the bike.

Advertisement

Consult the Bike’s Manual

For a safe and successful ignition, consult your bike’s manual to find specific instructions tailored to your model. The manual is a valuable resource that provides detailed information on how to start your Schwinn electric bike without a key. Here are four important steps to follow:

  1. Locate the hidden key slot: The manual will guide you to the hidden key slot, which is usually located near the battery compartment or under the seat. This slot allows you to manually start the bike without the key.

  2. Find the default key code: Once you’ve located the hidden key slot, the manual will provide you with the default key code. This code is a combination of numbers or letters that you need to enter into the key slot to start the bike.

  3. Enter the default key code: Using the manual’s instructions, enter the default key code into the hidden key slot. This will activate the bike’s ignition system and allow you to start the bike.

  4. Start the bike: After entering the default key code, turn the key slot or press the designated button as instructed in the manual to start the bike.

Contact Schwinn Customer Support

After thoroughly examining the bike’s manual and realizing that it didn’t provide a solution for starting a Schwinn electric bike without a key, I decided to reach out to Schwinn customer support for assistance. Contacting the manufacturer directly seemed like the most logical step in my quest to get my bike up and running again.

I visited the Schwinn website and easily found their customer support contact information. I dialed the provided phone number and was greeted by a friendly representative who was eager to help. I explained my situation and they assured me that they had encountered this issue before and could guide me through the process.

The customer support representative patiently walked me through a few troubleshooting steps, but unfortunately, none of their suggestions worked. They suggested that I find a professional locksmith who specializes in working with electric bikes. This was an unexpected turn of events, but it made sense. A locksmith with experience in electric bike systems would likely have the tools and knowledge needed to bypass the key ignition and start my Schwinn electric bike.

With this new information in mind, I eagerly set out to find a professional locksmith who could assist me in starting my bike without a key.

Advertisement

Find a Professional Locksmith

Finding a professional locksmith skilled in working with electric bike systems is crucial for resolving the issue of starting my Schwinn bike without a key. When faced with this problem, it is essential to find a local locksmith who has experience in dealing with electric bike systems.

Here are four emotions that might arise during the search for a locksmith:

  1. Frustration: The inability to start my bike without a key can be incredibly frustrating, especially when I need to get somewhere quickly.

  2. Anxiety: The fear of being stranded or unable to use my bike can cause anxiety, as I rely on it for transportation.

  3. Hope: The hope of finding a professional locksmith who can provide a solution and get my bike running again.

  4. Relief: The relief that comes with finding a skilled locksmith who can resolve the issue and restore the functionality of my electric bike.

To find a local locksmith, it is important to research alternative methods and explore recommendations from fellow bike owners. Once a locksmith is found, they can assess the bike’s system and provide the necessary assistance.

Transitioning into the next section, using a keyless ignition system can be a viable solution for avoiding the need for a physical key.

Use a Keyless Ignition System

Using a keyless ignition system can offer a convenient solution to avoid the hassle of needing a physical key for my Schwinn electric bike. Not only does it eliminate the need to carry around a key, but it also provides additional benefits.

Advertisement

With a keyless ignition system, I can start my bike with just a push of a button or a simple touch. This saves me time and effort, especially when I’m in a hurry.

The installation process for a keyless ignition system is relatively straightforward. First, I need to choose a compatible system that is specifically designed for my Schwinn electric bike. Then, I can follow the manufacturer’s instructions to install the system. Typically, it involves connecting the necessary wires to the bike’s ignition system and mounting the keyless ignition module in a secure location. Finally, I need to program the system to recognize my unique keyless entry code.

Considering a keyless entry system for my Schwinn electric bike is another option to enhance convenience and security. With a keyless entry system, I can unlock and lock my bike without the need for a physical key. This can be particularly useful when I have my hands full or when I need to quickly secure my bike in a crowded area. It provides peace of mind knowing that my bike is protected, even without a traditional key.

Consider a Keyless Entry System

Considering a keyless entry system for my Schwinn electric bike would provide added convenience and security.

Keyless entry benefits are numerous, especially in terms of ease of use and increased protection against theft. With keyless entry, I would no longer need to worry about carrying around a physical key or fumbling to find it when I want to start my bike. Instead, I could simply approach my bike, and the keyless entry system would automatically unlock and activate the bike.

Advertisement

This technology advancement not only saves time but also enhances security by making it more difficult for thieves to bypass traditional locks. With keyless entry, my bike would be protected by a unique code or a key fob that only I possess, ensuring that only authorized individuals can access and operate the bike. Moreover, keyless entry systems often come with additional features like alarm systems and GPS tracking, further enhancing the security of my Schwinn electric bike.

Installing a keyless entry system would be a significant upgrade, providing me with peace of mind and making my bike even more convenient to use.

This leads us to the next section where we discuss how to install a remote start system.

Install a Remote Start System

After considering a keyless entry system for my Schwinn electric bike, I started exploring other options to enhance its convenience and security. That’s when I learned about the advantages of installing a remote start system.

Not only would this allow me to start my bike without a key, but it would also provide additional features such as locking and unlocking the bike remotely.

Advertisement

The installation process for a remote start system is relatively straightforward. First, I gathered all the necessary components, including the remote start module, wiring harness, and installation instructions. Then, I carefully followed the step-by-step guide provided, ensuring that I connected the wires correctly and securely. It was essential to find the right location for the remote start module, preferably in a hidden and secure spot on the bike.

Once the installation was complete, I could enjoy the convenience of starting my Schwinn electric bike remotely. Whether I was approaching my bike from a distance or simply wanted to warm it up before riding, I could easily do so with the press of a button on the remote start key fob.

With the remote start system successfully installed, I decided to explore other innovative ways to enhance the security of my Schwinn electric bike. One option that caught my attention was trying a Bluetooth lock.

Transition: Now that my bike was equipped with a remote start system, I wanted to further enhance its security by trying a Bluetooth lock.

Try a Bluetooth Lock

Now that my bike is equipped with a remote start system, I’m eager to try out a Bluetooth lock to further enhance its security. A Bluetooth lock offers numerous benefits when it comes to bike security. Here are a few reasons why I believe it is a great addition to my electric bike:

Advertisement
  • Enhanced Convenience: With a Bluetooth lock, I can easily lock and unlock my bike using my smartphone. No more fumbling for keys or worrying about losing them.

  • Keyless Entry: Say goodbye to traditional keys and hello to keyless entry. A Bluetooth lock eliminates the need for physical keys, reducing the risk of them being lost or stolen.

  • Increased Security: Bluetooth locks provide a higher level of security compared to traditional locks. They use encryption technology to prevent unauthorized access, making it more difficult for thieves to tamper with or break the lock.

  • Remote Access: One of the greatest advantages of a Bluetooth lock is the ability to remotely control it. I can lock or unlock my bike from a distance, providing peace of mind even when I’m not near my bike.

By incorporating a Bluetooth lock into my bike’s security system, I can ensure that my electric bike remains safe and protected.

Now, let’s explore another aspect of enhancing bike security: using a smart lock app.

Use a Smart Lock App

With a smart lock app, you can easily monitor and control your bike’s security features right from your smartphone. The benefits of using a smart lock for your bike are numerous.

First and foremost, it provides an added layer of security, ensuring that only you have access to your bike. Additionally, smart locks often come with features such as tamper alerts and motion sensors, giving you peace of mind knowing that your bike is protected at all times.

Installing a smart lock on your bike is a straightforward process. Most smart locks can be easily attached to the frame of your bike using screws or straps. Once the lock is securely in place, you can proceed to pair it with your smartphone via Bluetooth. This connection allows you to control the lock’s settings, such as setting up a passcode or adjusting the sensitivity of the motion sensors.

Advertisement

Investing in a GPS tracker for your bike is another step you can take to enhance its security. By combining a smart lock with a GPS tracker, you can have real-time location tracking of your bike, ensuring that you can quickly recover it in case of theft. With these two technologies working together, you can have peace of mind knowing that your bike is secure and protected.

Invest in a GPS Tracker

Combining a smart lock with a GPS tracker allows me to have real-time location tracking of my bike. Not only does this provide a sense of security, but it also gives me peace of mind knowing that I can easily locate my bike if it ever gets stolen or misplaced.

The GPS tracker is a small device that can be discreetly installed on my bike. It uses satellite technology to accurately determine the bike’s location and sends this information to my smartphone or computer. With just a few taps on the screen, I can instantly see where my bike is on a map.

One of the great features of the GPS tracker is its hidden key slot. This means that I can use a unique key to unlock and lock my bike, just like a traditional lock. However, the key slot is cleverly concealed, making it difficult for potential thieves to find and tamper with.

In addition to location tracking, the GPS tracker also provides other useful features. I can set up geofencing, which notifies me if my bike leaves a designated area. This is particularly helpful if I park my bike in a public place or leave it unattended for an extended period of time.

Advertisement

Investing in a GPS tracker for my bike has been a game-changer. Not only do I have the peace of mind of knowing where my bike is at all times, but I also have an added layer of security against theft. It’s a worthwhile investment for any bike owner.

Frequently Asked Questions

Can I start a Schwinn electric bike without a key?

Starting a Schwinn electric bike without a key can be convenient, but it comes with security risks. The pros of a keyless start system include ease of use, while the cons involve potential theft and unauthorized access to the bike.

What should I do if I cannot find a hidden key slot on my Schwinn electric bike?

If you cannot find a hidden key slot on your Schwinn electric bike, there are alternative methods you can try. First, check the owner’s manual for troubleshooting steps or contact Schwinn customer support for assistance.

Is there a default key code that I can try to start my Schwinn electric bike?

Unfortunately, there is no default key code that can be used to start a Schwinn electric bike. However, if you cannot find the hidden key slot, I can guide you on starting the bike without a key.

How can I replace the ignition switch on my Schwinn electric bike?

To replace the ignition switch on a Schwinn electric bike, first, locate the ignition switch assembly. Then, disconnect the wires connected to the switch and remove it. Install the new switch, reconnect the wires, and test the functionality.

Advertisement

Are there any alternative methods to start a Schwinn electric bike without a key if all else fails?

If all else fails and you don’t have a key, there are alternative starting methods for a Schwinn electric bike. One option is bypassing the ignition system by directly connecting the battery to the motor.

Conclusion

In conclusion, starting a Schwinn electric bike without a key may seem daunting, but there are several options available.

One option is to check for hidden key slots. Sometimes, manufacturers include hidden key slots as a backup method for starting the bike. By carefully inspecting the bike, you may be able to locate a hidden key slot and start the bike without a key.

Another option is to hotwire the bike. This method requires some technical knowledge and should only be attempted if you are confident in your abilities. By bypassing the ignition system, you can start the bike without a key.

Just like a skilled locksmith who can open any door, with the right knowledge and tools, you can unlock the potential of your electric bike. So don’t let a missing key hold you back.

Advertisement

Explore these methods and ride on with freedom and excitement, like a bird soaring through the open sky.

Ralf is a devoted husband and father who loves spending time with his family. He enjoys riding his bicycle as much as possible, and takes every opportunity he can to get out on the open road. Ralf is a kind and gentle person who wants only the best for those around him.

Continue Reading
Advertisement

Electric Bike

How To Turn A Normal Bike Into An Electric Bike

Published

on

By

An image showing a person attaching a sleek, silver electric motor to the back wheel of a conventional bicycle

Upgrade your reliable bicycle into an exhilarating electric ride with this in-depth guide on converting a regular bike into an electric one.

From assessing your bike’s compatibility to choosing the right conversion kit, this article will equip you with the knowledge and tools needed to embark on this exhilarating journey.

We’ll delve into the step-by-step process, ensuring you have the necessary equipment and skills to successfully complete the conversion.

So, get ready to revamp your ride and experience the power and convenience of an electric bike.

Key Takeaways

  • Assess the bike’s frame and components for compatibility and condition before proceeding with a conversion kit
  • Gather the necessary tools and materials before starting the conversion process
  • Remove existing components such as the chain, derailleur system, pedals, crankset, brakes, and wheels
  • Install the conversion kit by securely attaching the electric motor to the bike frame, connecting it to the drivetrain, and mounting the battery and controller

Assess Your Bike’s Compatibility

Advertisement

Assess if your bike is compatible with an electric conversion kit. Before you can turn your normal bike into an electric one, it’s crucial to evaluate its compatibility.

Start by examining the frame and fork, ensuring they are sturdy and in good condition. The size of the frame should also be taken into consideration, as some conversion kits may not fit certain frame sizes.

Additionally, check the condition of your bike’s wheels, brakes, and gears, as these components may require necessary modifications for the conversion.

Assessing the compatibility of your bike is essential to ensure a successful electric conversion.

Once you have evaluated your bike’s compatibility, you can move on to the next step of choosing the right electric conversion kit, which will be discussed in the subsequent section.

Advertisement

Choose the Right Electric Conversion Kit

To choose the right electric conversion kit for your bicycle, you need to start by evaluating the specifications and features of different options. Research options and compare prices to find the best fit for your needs.

Here are three key factors to consider when selecting an electric conversion kit:

  • Motor Power: Determine the desired power output for your electric bike. Consider factors such as terrain and desired speed to choose an appropriate motor size.

  • Battery Capacity: Look for a battery with sufficient capacity to meet your riding distance requirements. Consider factors such as voltage, amp-hour rating, and battery chemistry.

  • Compatibility: Ensure that the conversion kit is compatible with your bike’s frame and wheel size. Check for any additional accessories or modifications needed.

Once you have chosen the right electric conversion kit, it’s time to gather the necessary tools and equipment to begin the conversion process seamlessly.

Gather the Necessary Tools and Equipment

Advertisement

Make sure you have all the tools and equipment you’ll need to complete the electric conversion of your bicycle seamlessly. Select the appropriate tools based on the type of bike you have and the electric conversion kit you’ve chosen. Common tools you may need include a wrench, screwdriver, pliers, and wire cutters.

Additionally, you’ll need to buy the necessary materials such as zip ties, electrical tape, and heat shrink tubing. These materials are essential for securing and insulating the electrical components of your electric bike.

Once you have all the tools and materials ready, you can move on to the next step and remove the existing components from your bike, making way for the installation of the electric conversion kit.

Remove the Existing Components

First, start by removing the existing components from your bicycle to prepare for the installation of the electric conversion kit. This step is crucial in the process of bike modification and performance enhancement. To ensure a smooth transition, consider the following:

  • Remove the chain and derailleur system.
  • Take off the pedals and crankset.
  • Disconnect the brake calipers and remove the brake levers.
  • Remove the front and rear wheel assemblies.
  • Disconnect the cables and wires connected to the existing components.

By removing these components, you create space for the new electric conversion kit. Once you have completed this step, you can proceed to the next section where you will install the electric conversion kit and begin the transformation of your normal bike into an electric bike.

Install the Electric Conversion Kit

Advertisement

Once you’ve removed the existing components, it’s time to install the electric conversion kit on your bicycle.

Begin by attaching the electric motor to the frame of the bike. Ensure that it is securely fastened and properly aligned.

Next, connect the motor to the drivetrain of the bike using a chain or belt, depending on the kit you have chosen. Make sure the connection is tight and the chain/belt is properly tensioned.

Then, mount the battery and controller onto the frame, ensuring they are securely fastened and well-protected.

Advertisement

Finally, connect the battery and controller to the electric motor using the provided wiring harness. Double-check that all connections are secure and properly insulated.

With the electric conversion kit installed, you are now ready to move on to the next step of connecting the battery and controller to complete the bike modification.

Connect the Battery and Controller

To connect the battery and controller, you’ll need to ensure a secure and tight connection between the two components. Start by identifying the wires coming from the battery and the controller. Typically, there will be a positive (red) and negative (black) wire from each component.

Connect the positive wire from the battery to the positive wire on the controller and the negative wire from the battery to the negative wire on the controller. Ensure that the connections are tight and properly insulated to avoid any loose connections or short circuits.

If you encounter any issues during the connection process, such as wires not fitting together or loose connections, carefully double-check the wiring diagram provided with your electric conversion kit. Additionally, troubleshoot common issues like loose or damaged wires, blown fuses, or faulty connections. It’s important to address these issues before proceeding to the next steps.

Advertisement

Now that the battery and controller are securely connected, you can move on to testing and fine-tuning your electric bike’s performance.

Test and Fine-Tune the Electric Bike

Now that you have connected the battery and controller, it’s time to test and fine-tune your electric bike. This step is crucial to ensure the efficiency of your bike and troubleshoot any potential issues. To do this, you will need to take your bike for a test ride and observe its performance. Pay attention to the speed, acceleration, and overall handling of the bike. If you notice any problems, such as a decrease in power or difficulty in controlling the bike, you may need to make adjustments to the battery or controller settings. By testing and fine-tuning your electric bike, you can optimize its performance and address any issues that may arise. Once you are satisfied with the results, you can proceed to the next section on how to upgrade your bike’s accessories.

Upgrade Your Bike’s Accessories

Upgrading the accessories on your bike can enhance its functionality and performance. When it comes to bike modification, choosing the right accessories can make a significant difference.

Start by upgrading your bike’s brakes. High-quality brakes will improve your bike’s stopping power and ensure a safe ride.

Next, consider upgrading your bike’s suspension system. A better suspension will provide a smoother and more comfortable ride, especially when tackling rough terrains.

Advertisement

Additionally, upgrading your bike’s tires to ones with better traction and durability will enhance its overall performance.

Finally, don’t forget to invest in a reliable bike lock to keep your newly upgraded electric bike secure.

Upgrading these accessories will not only improve your bike’s performance but also provide a more enjoyable riding experience.

Learn proper maintenance and care to ensure the longevity of your electric bike.

Learn Proper Maintenance and Care

Make sure you properly maintain and care for your electric bike to ensure its longevity and optimal performance. Proper cleaning is essential to keep your electric bike in good condition. Use a soft cloth and mild detergent to clean the frame, wheels, and other components. Avoid using high-pressure water as it can damage the electrical components. Regularly inspect the battery for any signs of damage or wear. Clean the battery terminals with a dry cloth to remove any dirt or debris. Additionally, keep the battery charged when not in use and avoid extreme temperatures that can affect its performance. Following these maintenance practices will help prolong the life of your electric bike and ensure that it continues to provide a smooth and enjoyable ride.

Advertisement

Now that you know how to properly maintain your electric bike, you can confidently enjoy your new electric bike experience.

Enjoy Your New Electric Bike Experience

Get ready to fully embrace and enjoy your exciting new ride on an electric bike. As you embark on this thrilling adventure, you’ll quickly realize the numerous benefits of owning an electric bike.

One of the key advantages is the added power and speed that an electric motor provides, allowing you to effortlessly conquer hills and cover longer distances without breaking a sweat. Additionally, electric bikes offer a more eco-friendly mode of transportation, reducing your carbon footprint while enjoying the great outdoors.

However, it’s important to prioritize safety when riding your electric bike. Always wear a helmet, follow traffic rules, and be aware of your surroundings. Take the time to familiarize yourself with the electric bike’s controls and features to ensure a smooth and safe riding experience.

So, hop on your electric bike and enjoy the ride of a lifetime!

Advertisement

Frequently Asked Questions

How much does it cost to convert a regular bike into an electric bike?

The cost of converting a regular bike into an electric bike varies depending on the type of electric bike conversion kit you choose. Factors to consider include the motor power, battery capacity, and additional features.

Can any type of bike be converted into an electric bike?

Yes, any type of bike can be converted into an electric bike. Converting a mountain bike offers the advantage of better off-road capability, while converting a road bike provides a more streamlined and efficient ride on paved surfaces. However, there are also disadvantages to consider, such as added weight and potential modifications needed for the conversion process.

Is it difficult to install the electric conversion kit?

Installing an electric conversion kit can be challenging. Pros include increased speed and range, while cons include added weight and potential damage to the bike. Common mistakes to avoid are improper wiring and incorrect installation of components.

How long does it take to complete the conversion process?

Converting a normal bike into an electric bike typically takes around 2-4 hours, depending on your experience and the complexity of the kit. Required tools include wrenches, screwdrivers, pliers, and possibly a drill.

Can the electric conversion kit be easily removed if I decide to go back to a regular bike?

Yes, the electric conversion kit can be easily removed if you decide to go back to a regular bike. However, it is important to consider the benefits of converting a bike into an electric bike and the pros and cons of using an electric conversion kit.

Advertisement

Conclusion

Congratulations on successfully converting your normal bike into an electric bike! By following the steps outlined in this guide, you have transformed your regular bicycle into an efficient and eco-friendly mode of transportation.

Did you know that electric bikes have been proven to increase the distance people are willing to travel by bike? A study conducted in the Netherlands found that e-bike riders were willing to cycle an average of 9.4 kilometers, compared to only 6.3 kilometers by regular bike riders.

So get out there and enjoy the benefits of your new electric bike!

Continue Reading

Electric Bike

How To Tighten Forward Break Ancher Electric Bike

Published

on

By

An image featuring a close-up shot of a gloved hand gripping a wrench, firmly tightening the bolt connecting the forward brake anchor to the frame of an electric bike

Were you aware that a loose anchor on the forward brake can impact the safety and efficiency of your electric bicycle? Recent studies reveal that defective brakes are a major contributing factor to cycling accidents.

But fear not! In this article, I will guide you through the step-by-step process of tightening your forward brake anchor. By following these simple instructions, you can ensure a secure and reliable braking system, allowing for safe and enjoyable rides on your electric bike.

So let’s get started!

Key Takeaways

  • Regular maintenance tasks are important for ensuring the optimal performance and safety of an electric bike.
  • Brake inspections should be conducted regularly to identify any issues and prevent brake failures.
  • Checking and inspecting brake components, such as brake pads and cables, is crucial for maintaining their functionality and responsiveness.
  • Proper adjustment of brake cables is necessary to maintain correct tension and ensure reliable brakes.

Gather the Necessary Tools

You’ll need to gather the necessary tools to tighten the forward brake anchor on your electric bike.

Advertisement

Choosing the right tools is crucial to ensure a successful and safe tightening process. Start by getting a set of metric Allen wrenches, as they are commonly used for bike repairs. Make sure to have a wrench that matches the size of the anchor bolt on your specific bike model.

Additionally, a torque wrench is recommended to ensure proper tightening without over-tightening. Common mistakes to avoid include using the wrong size wrench, which can damage the bolt or strip it, and not applying enough torque, which can cause the brake anchor to become loose again.

Once you have the tools ready, you can proceed to locate the forward brake anchor and begin the tightening process.

Locate the Forward Brake Anchor

First, find the anchor for the front brake on your e-bike. It is usually located near the front wheel, attached to the fork or the frame.

To inspect the forward brake anchor on your electric bike, follow these steps:

Advertisement
  1. Use a flashlight to get a clear view of the anchor and its components.
  2. Check for any signs of wear, such as rust or corrosion.
  3. Ensure that the anchor is securely fastened to the frame or fork.

Inspecting the forward brake anchor is crucial for maintaining and improving brake performance on electric bikes. By regularly checking and tightening the anchor, you can prevent any potential issues that may arise from loose or damaged components.

Once you have completed this inspection, you can move on to the next section about loosening the bolts or screws.

Loosen the Bolts or Screws

To begin, make sure the bolts or screws are properly loosened. This is a crucial step in the process of tightening the forward brake anchor on an electric bike. Loosening the bolts or screws allows for easier adjustment and ensures that the anchor can be properly tightened afterwards. When loosening the bolts or screws, it is important to use the correct technique to avoid causing any damage. One common mistake is using too much force, which can strip the threads or break the bolts. Another mistake is not loosening all the bolts or screws evenly, which can result in an uneven anchor and compromised braking performance. By following the correct loosening technique and avoiding common mistakes, you can ensure a successful tightening process. Now, let’s move on to the next step of adjusting the position of the brake anchor.

Adjust the Position of the Brake Anchor

Once the bolts or screws are properly loosened, you can adjust the position of the brake anchor.

Advertisement

To begin, locate the brake anchor and examine its current position. Use a wrench or pliers to loosen the anchor bolt, allowing for movement.

Adjust the position of the anchor to ensure proper brake cable tension. This adjustment will ensure that the brake pads engage with the wheel properly and provide optimal braking performance.

Once the anchor is in the desired position, tighten the anchor bolt securely.

Additionally, while adjusting the brake anchor, it is a good opportunity to inspect the brake pads. If they are worn or damaged, replace them with new ones to maintain effective braking.

With the brake anchor properly adjusted and the brake pads in good condition, you can now proceed to align the brake pads for optimal performance.

Advertisement

Align the Brake Pads

After adjusting the position of the brake anchor, the next step is to align the brake pads for optimal performance.

Proper brake alignment is crucial for ensuring efficient braking and preventing premature wear of the brake pads.

To adjust the brake tension and align the pads, start by loosening the bolts or screws that secure the brake pads in place.

Advertisement

With the bolts or screws slightly loose, squeeze the brake lever to bring the pads close to the rim or disc.

While holding the brake lever, carefully align the pads so that they make contact with the rim or disc evenly on both sides.

Once aligned, tighten the bolts or screws to secure the brake pads in their optimal position.

This will provide consistent and reliable braking power.

Moving on to the next step of tightening the bolts or screws…

Advertisement

Tighten the Bolts or Screws

First, make sure to securely fasten the bolts or screws. Proper bolt tightening techniques are essential to ensure the optimal performance and safety of your electric bike’s brake system. Loose bolts can lead to a variety of issues, such as decreased braking power, increased wear on brake pads, and potential accidents. To tighten the bolts or screws, use an appropriate-sized wrench or screwdriver and apply sufficient torque. Be careful not to overtighten, as this can damage the bolts or strip the threads. It is crucial to check all the bolts and screws related to the brake system, including those securing the brake calipers, brake levers, and brake pads. Once all the bolts and screws are properly tightened, you can proceed to test the brake functionality.

Test the Brake Functionality

To ensure your safety, try out the brakes to make sure they are functioning properly. Testing the brakes is an important step in tightening the forward brake anchor on an electric bike.

When testing the brake functionality, there are a few signs of brake functionality issues that you should look out for. These include a spongy or loose brake lever, excessive brake lever travel, or a lack of stopping power. If you experience any of these issues, it may indicate that the brakes need further adjustment or repair.

Once you have tested the brakes and identified any functionality issues, you can make additional adjustments if needed to ensure optimal brake performance. This will ensure that your electric bike stops smoothly and efficiently, providing you with a safe riding experience.

Make Additional Adjustments if Needed

You may need to make additional adjustments if necessary to ensure optimal brake performance. Here are some troubleshooting tips to help you with this task:

Advertisement
  1. Check the brake pads: Inspect the brake pads to ensure they are properly aligned and have sufficient thickness. If they are worn out or misaligned, replace or reposition them accordingly.

  2. Adjust the brake cable tension: If the brakes feel loose or sluggish, you may need to adjust the cable tension. Use the barrel adjuster on the brake lever or the cable anchor bolt to make the necessary adjustments.

  3. Align the brake caliper: A misaligned brake caliper can cause uneven braking. Loosen the mounting bolts, align the caliper with the brake rotor, and then tighten the bolts securely.

  4. Test and fine-tune: After making any adjustments, test the brakes to ensure they are working properly. If necessary, make further adjustments until the desired brake performance is achieved.

By following these additional adjustments and troubleshooting tips, you can improve the brake performance of your electric bike. Make sure to maintain regular brake inspections and maintenance for continued optimal performance.

Maintain Regular Brake Inspections and Maintenance

To ensure the optimal performance of your electric bike’s brakes, it is crucial to maintain regular brake inspections and maintenance. This will help identify any issues and prevent potential accidents. One important aspect of brake maintenance is brake pad replacement. Over time, brake pads can wear out and become less effective, compromising the braking power of your electric bike. By regularly inspecting and replacing worn brake pads, you can ensure that your bike’s braking system operates at its best. Additionally, brake cable adjustment is another vital maintenance task. Over time, brake cables can stretch or become loose, affecting the responsiveness of the brakes. By adjusting the brake cables as needed, you can maintain the correct tension and ensure a tight and reliable braking system. With these regular inspections and maintenance tasks, you can enjoy safe and smooth rides on your electric bike.

Enjoy Safe and Smooth Rides on Your Electric Bike

Ensure the optimal performance of your e-bike by regularly maintaining and inspecting its brakes.

Electric bike maintenance is crucial for the overall safety and functionality of your ride. One of the most important aspects of maintenance is ensuring the brakes are in proper working condition. Brake safety is of utmost importance, as it can prevent accidents and ensure smooth rides.

Regularly check the brake pads for wear and tear, and replace them if necessary. Additionally, inspect the brake cables for any fraying or damage, and adjust them if needed. It is also essential to maintain the proper tension in the brake system to ensure effective stopping power.

Advertisement

By prioritizing brake maintenance, you can enjoy safe and smooth rides on your electric bike, knowing that your brakes are in excellent condition.

Frequently Asked Questions

What are the necessary tools needed to tighten the forward brake anchor on an electric bike?

To tighten the forward brake anchor on an electric bike, the necessary tools include an adjustable wrench, a socket wrench, and a torque wrench. The tightening process involves loosening the bolts, aligning the anchor, and then tightening the bolts with the appropriate tool.

How do I locate the forward brake anchor on my electric bike?

To locate the forward brake anchor on your electric bike, start by identifying the brake caliper positioned near the front tire. The forward brake anchor is usually a metal bracket connecting the caliper to the bike frame.

What should I do if the bolts or screws are difficult to loosen?

If the bolts or screws are difficult to loosen, I recommend using alternative methods such as applying penetrating oil or heat to loosen them. If all else fails, seeking professional help may be necessary to prevent damage to the bike.

How do I adjust the position of the brake anchor once it is loosened?

To adjust the position of the brake anchor, first loosen the bolts or screws holding it in place. Then, carefully slide the anchor to the desired position. Once in position, tighten the bolts or screws securely. When troubleshooting brake anchor issues, follow these steps.

Advertisement

Is it necessary to regularly inspect and maintain the brake system on an electric bike?

Regular inspection and maintenance of the brake system on an electric bike is crucial. It ensures optimal performance and safety. Common issues include brake pad wear, loose cables, and misaligned calipers. Regularly check and adjust these components for a smooth and responsive braking experience.

Conclusion

Well, there you have it folks. You’ve now become a pro at tightening the forward brake anchor on your electric bike. Who needs a professional mechanic anyway?

With just a few simple steps, some basic tools, and a little know-how, you can ensure your brake system is in top-notch condition.

So go ahead, hit the road with confidence, and remember, nothing could possibly go wrong when you’re in control of your own bike maintenance.

Happy riding!

Advertisement

Continue Reading

Electric Bike

How To Turn A Bicycle Into An Electric Bike

Published

on

By

An image showcasing a step-by-step transformation of a bicycle into an electric bike

Want to give your bike an extra oomph? Ready to feel the excitement of riding an electric bike without spending a fortune? Your solution is here!

In this article, we will guide you through the process of turning your regular bicycle into an electric bike. With the help of electric bike conversion kits and some basic tools, you’ll be able to transform your two-wheeler into a high-performance, eco-friendly mode of transportation in no time.

So, grab your toolkit and let’s get started!

Key Takeaways

  • Adjust pedal assist levels and fine-tune motor power output to optimize bike performance.
  • Check electrical connections for damage and ensure proper battery installation and charge level for functionality and safety.
  • Experiment with different power levels and fine-tune pedal assist settings to adjust settings for performance.
  • Install additional features and accessories such as racks, phone mounts, fenders, lights, and comfortable seating or grips for customization and comfort.

Understanding Electric Bike Conversion Kits

Understanding electric bike conversion kits can be helpful when you want to turn your bicycle into an electric bike. These kits offer numerous benefits for bike enthusiasts looking to add an electric motor to their ride.

Advertisement

The first step is choosing the right motor for your needs. Consider factors such as power output, battery range, and compatibility with your bicycle. Higher power motors provide more speed and torque, while larger battery capacity allows for longer rides. Additionally, ensure that the motor is compatible with your bike’s frame and wheel size.

Once you have selected the right motor, you can move on to gathering the necessary tools and equipment. This will include items such as wrenches, screwdrivers, and a battery pack, which we will discuss in the next section.

Gathering the Necessary Tools and Equipment

To get started, you’ll need a few tools and equipment for the electric bike conversion process.

First, you’ll need a conversion kit, which typically includes a motor, battery, controller, and other necessary components. Make sure to choose a kit that is compatible with your bicycle’s frame and wheel size.

Additionally, you’ll need a set of wrenches and screwdrivers to remove the existing parts and install the new components. It’s also recommended to have a torque wrench to ensure proper tightening of bolts and nuts.

Advertisement

Other tools you may need include wire cutters, crimping tools, and electrical tape for wiring connections.

Lastly, don’t forget safety equipment such as gloves and safety glasses.

With these necessary tools and equipment, you can now move on to preparing your bicycle for the conversion by removing the pedals and other non-essential parts.

Preparing Your Bicycle for the Conversion

Advertisement

Once you have gathered the necessary tools and equipment, you can begin preparing your bicycle for the conversion by removing non-essential parts. This will make room for the electric components and ensure a smoother installation process. Start by taking off any accessories such as fenders, racks, and baskets. Next, remove the pedals and crankset using a pedal wrench and crank puller. Once these parts are off, detach the front and rear wheels by loosening the axle nuts or quick-release levers.

In terms of preparing tools, make sure you have a set of Allen wrenches, screwdrivers, and adjustable wrenches on hand. These will come in handy when disassembling and reassembling various components.

Now that your bicycle is stripped down to its essentials, you can move on to choosing the right battery for your electric bike conversion. Consider factors such as voltage, capacity, and size when making your selection. Keep in mind that a higher voltage battery will provide more power, but it may also be heavier and more expensive. Once you have chosen the battery, you can proceed to the next step of installing the electric motor.

Transitioning into the subsequent section about ‘installing the electric motor’, you can now move on to the exciting part of transforming your bicycle into an electric bike.

Installing the Electric Motor

Now that your bicycle is stripped down to its essentials, you can begin installing the electric motor.

Advertisement

Start by mounting the motor onto the frame using the appropriate brackets and screws. Ensure that the motor is securely attached and properly aligned.

Next, connect the motor controller to the motor and securely fasten it in place. Follow the manufacturer’s instructions to properly connect the wires and ensure that they are insulated and protected.

Once the motor and controller are installed, it’s important to test the system and troubleshoot any common motor installation issues. Check for proper wiring connections, ensure that the motor spins freely, and listen for any abnormal sounds.

If you encounter any issues, consult the manufacturer’s troubleshooting guide or seek professional assistance.

With the motor successfully installed, you can now move on to adding the battery and controller to complete your electric bike setup.

Advertisement

Adding the Battery and Controller

To add the battery and controller to your electric bike, you will need to carefully choose the right battery that suits your needs. Consider factors such as the battery’s capacity, voltage, and weight.

Once you have selected the battery, you can then proceed to install it along with the controller, ensuring proper wiring and connections are made for optimal performance.

Choosing the Right Battery for Your Needs

When choosing the right battery for your needs, you’ll want to consider factors such as capacity, voltage, and weight.

Advertisement

Battery capacity refers to the amount of energy a battery can hold and is measured in watt-hours (Wh). It determines how far you can go on a single charge. If you plan on longer rides or have hilly terrains, a higher battery capacity is recommended for better battery range.

Voltage, on the other hand, determines the power output of the battery. Higher voltage batteries provide more power, resulting in better acceleration and hill climbing ability.

Lastly, weight is an important consideration as it affects the overall weight of your electric bike. A lightweight battery will ensure better handling and maneuverability.

Now that you have chosen the right battery, let’s move on to installing the battery and controller.

Installing the Battery and Controller

Installing the battery and controller is the next step in the process of converting your regular bicycle into an electric bike. To ensure a successful installation, follow these steps:

Advertisement
  • Choose a suitable location on your bike to mount the battery, considering factors such as weight distribution and accessibility.

  • Securely attach the battery using mounting brackets or straps, ensuring it is well-protected from vibrations and impacts.

  • Connect the battery to the controller using the provided wiring harness, ensuring the connections are secure and insulated.

  • Program the controller according to your desired settings, such as maximum speed and battery capacity.

  • Test the system by turning on the controller and checking if the battery is properly supplying power to the electric components.

With the battery and controller successfully installed and programmed, you can now proceed to the next section about wiring and connecting the components, ensuring a well-functioning electric bike.

Wiring and Connecting the Components

After connecting the components, it’s important to ensure the wiring is secure. Start by carefully inspecting all the connections and making sure they are tight and properly connected. Double-check that all the wires are correctly routed and organized to prevent any potential issues.

It’s also essential to use zip ties or cable clips to secure the wires in place and avoid any loose or dangling cables. When it comes to wiring tips, make sure to follow the manufacturer’s instructions and color codes for each component. If you encounter any difficulties, consult the troubleshooting guide provided with the electric bike conversion kit.

Once the wiring is secure, you can proceed to the next step of testing and fine-tuning the electric bike’s performance and functionality.

Testing and Fine-Tuning the Electric Bike

To ensure proper functionality and safety of your electric bike, it’s crucial to perform thorough checks.

Advertisement

Start by inspecting the wiring connections, ensuring they’re secure and free from any damage.

Next, test the brakes, throttle, and motor to verify that they’re all working correctly.

Finally, make adjustments to the settings to optimize the bike’s performance. This could include adjusting the pedal assist levels or fine-tuning the motor power output.

Checking for Proper Functionality and Safety

Before you begin, make sure to properly check for functionality and safety of your electric bike conversion. Safety precautions are essential to ensure a smooth and secure ride.

Start by inspecting the electrical connections, ensuring they are secure and free from any damage. Check the battery’s charge level and make sure it is properly installed and secured.

Advertisement

Test the brakes to ensure they are responsive and functioning effectively. Additionally, check the throttle and motor to ensure they are working properly. If any issues arise, refer to troubleshooting tips provided in the conversion kit manual to diagnose and resolve the problem.

Once you have confirmed the functionality and safety of your electric bike, you can proceed to the next step of adjusting settings for performance optimization.

Adjusting Settings for Performance Optimization

Once you’ve ensured the functionality and safety of your electric bike conversion, you can adjust the settings for optimal performance.

To achieve performance upgrades, start by adjusting the power output of your electric motor. Most controllers have settings that allow you to increase or decrease the power level. Experiment with different levels to find the right balance between speed and battery consumption.

Additionally, you can fine-tune the pedal assist settings to suit your riding style.

Advertisement

Troubleshooting common issues is an essential part of optimizing performance. Check for any error codes or unusual behavior and consult the user manual for guidance. Common issues include motor overheating, poor battery performance, and inconsistent power delivery. Addressing these issues promptly will ensure a smooth and efficient ride.

Now that you’ve optimized your electric bike’s performance, it’s time to explore adding additional features and accessories to enhance your riding experience.

Adding Additional Features and Accessories

Adding additional features and accessories can greatly enhance the functionality and enjoyment of your electric bike. There are a variety of options available to customize your ride and make it more convenient and efficient.

One popular feature is the addition of a front or rear rack, which provides extra storage space for carrying groceries, a backpack, or other items. Another useful accessory is a phone mount, allowing you to easily navigate using GPS or listen to music while riding.

Additionally, fenders can be installed to protect you from mud and water splashes, especially when riding in wet conditions. Lights and reflectors are essential for visibility and safety, especially when riding at night. Finally, consider adding a comfortable saddle or ergonomic grips to improve comfort during long rides.

Advertisement

By incorporating these additional features and accessories, you can customize your electric bike to meet your specific needs and preferences.

When it comes to maintenance and care for your electric bike, there are a few key steps to keep it running smoothly.

Maintenance and Care for Your Electric Bike

To properly maintain and care for your electric bike, there are a few key points to keep in mind.

Regular cleaning and lubrication is essential to ensure the longevity and smooth operation of your bike. By keeping the chain, gears, and other moving parts clean and properly lubricated, you can prevent rust, corrosion, and unnecessary wear and tear.

Additionally, it is important to regularly check and replace any worn-out parts, such as brake pads or tires, to ensure optimal performance and safety.

Advertisement

By following these maintenance practices, you can enjoy a well-maintained and reliable electric bike for years to come.

Regular Cleaning and Lubrication

Regular cleaning and lubrication are essential for maintaining an electric bike. Neglecting regular maintenance can lead to premature wear and reduce the overall lifespan of your bike.

When it comes to cleaning, start by using a soft cloth or sponge soaked in soapy water to gently wipe down the frame, wheels, and components. Avoid using high-pressure water as it can damage sensitive electrical parts.

As for lubrication, choosing the right lubricant is crucial. Opt for a bicycle-specific lubricant that is designed for electric bikes and apply it to the chain, derailleur, and other moving parts. This will help reduce friction and keep your bike running smoothly. Remember to wipe off any excess lubricant to prevent attracting dirt and debris.

Regular cleaning and lubrication will ensure your electric bike performs at its best.

Advertisement

Now, let’s move on to checking and replacing worn-out parts.

Checking and Replacing Worn-Out Parts

First, you’ll want to regularly check and replace any worn-out parts on your electric bike. This is essential to ensure the optimal performance and longevity of your bike.

Start by inspecting the tires for any signs of wear or damage, such as cracks or bald spots. Replace them if necessary to maintain proper traction and safety.

Next, examine the brake pads to ensure they have enough thickness and aren’t worn down. Replace them if they are less than 1/8 inch thick.

Additionally, check the chain for any signs of rust, stretching, or tight spots. Lubricate it regularly and replace it if it’s excessively worn.

Advertisement

Troubleshooting common issues like loose bolts, loose spokes, or worn-out pedals is also crucial.

By regularly replacing worn-out parts and addressing common issues, you’ll enjoy a smooth and safe ride on your new electric bike.

Now, let’s move on to the next section about enjoying your new electric bike.

Enjoying Your New Electric Bike

When it comes to enjoying your new electric bike, there are two key points to consider:

  • Exploring new cycling routes and adventures: By taking your electric bike on new routes, you can discover scenic and challenging paths that you may not have considered before.

  • Sharing your electric bike experience with others: Additionally, sharing your electric bike experience with others can be a great way to introduce them to the benefits of electric biking and encourage them to try it out for themselves.

So, get out there and start exploring new routes while sharing your electric bike experience with others!

Advertisement

Exploring New Cycling Routes and Adventures

Exploring new cycling routes and adventures is a great way to spice up your biking routine. It allows you to discover new places, challenge yourself, and experience the thrill of riding your electric bike in different terrains.

To make the most out of your explorations, consider the following:

  • Invest in new cycling gear: Upgrade your helmet, gloves, and shoes to ensure maximum comfort and safety during your rides.

  • Finding the best cycling routes: Use apps like Strava or Komoot to discover popular trails and routes in your area. These apps provide detailed maps, elevation profiles, and user reviews to help you find the perfect route for your adventure.

  • Join a cycling group or club: Connecting with like-minded individuals who share your passion for biking can enhance your exploration experience. Not only can you learn from their expertise, but you can also discover new routes and share incredible adventures together.

By expanding your horizons and trying new cycling routes, you can create unforgettable memories and discover the full potential of your electric bike.

Next, let’s delve into how sharing your electric bike experience with others can amplify the joy of owning one.

Sharing Your Electric Bike Experience with Others

Sharing your electric bike experience with others can be a fantastic way to spread the joy and excitement of owning one. As an electric bike enthusiast, you can share tips and tricks with fellow electric bike owners to enhance their riding experience.

Advertisement

One way to do this is by organizing group rides and events specifically for electric bike owners. These events can be a great platform for exchanging knowledge, discussing modifications, and learning from each other’s experiences. Additionally, they offer an opportunity to explore new routes and adventures together, fostering a sense of community among electric bike enthusiasts.

By sharing your knowledge and organizing group rides, you not only contribute to the growth of the electric bike community but also create lasting connections with like-minded individuals who share your passion for this eco-friendly mode of transportation.

Frequently Asked Questions

Can I convert any type of bicycle into an electric bike?

Yes, you can convert most types of bicycles into electric bikes. However, bike compatibility is important, as some frames may not be suitable. To do this, you will need the necessary equipment such as a motor, battery, and controller.

How long does it typically take to complete the conversion process?

The conversion process typically takes around 4-6 hours, depending on your familiarity with the necessary tools. To complete the conversion, you’ll need tools such as a wrench, screwdriver, and wire cutters.

Can I still use my bike as a regular bicycle after the conversion?

Yes, you can still use your bike as a regular bicycle after the conversion. Converting your bike into an electric bike allows you the option of using it for exercise or enjoying the benefits of electric assistance.

Advertisement

How far can an electric bike travel on a single charge?

The electric bike range depends on various factors such as battery capacity, terrain, rider weight, and level of pedal assistance. On average, electric bikes can travel 20-50 miles on a single charge.

Are there any legal restrictions or regulations for riding an electric bike?

Riding an electric bike has numerous benefits, like gliding effortlessly through traffic. However, there are legal restrictions and regulations to ensure electric bike safety. Familiarize yourself with local laws to ride confidently and responsibly.

Conclusion

Congratulations! You’ve successfully transformed your ordinary bicycle into a marvelous electric bike. Just like a caterpillar metamorphosing into a beautiful butterfly, your two-wheeled companion has undergone a remarkable transformation.

With the help of an electric bike conversion kit, a few handy tools, and a dash of determination, you’ve unlocked a world of possibilities. Now, you can effortlessly conquer hills, soar through the streets, and experience the thrill of riding with a little extra oomph.

So, spread your wings, embrace the freedom, and enjoy the electric adventure that awaits you!

Advertisement

Continue Reading
Advertisement

Affiliate disclaimer

As an affiliate, we may earn a commission from qualifying purchases. We get commissions for purchases made through links on this website from Amazon and other third parties.

About us

We are a passionate team driven by the belief that cycling is a fantastic and accessible way to stay active while enjoying the beauty of the outdoors. Our mission is to share our love for cycling with as many people as possible. We provide a welcoming environment for individuals of all ages, abilities, and backgrounds to come together and ride bikes. With Ralf’s visionary leadership, Zane’s expertise in cycling adventures, and Olivia’s dedication to community building, we strive to create a vibrant space where everyone can experience the joy of cycling. Through group rides, workshops, and inclusive events, we inspire and empower individuals to embrace an active lifestyle. Join us in our quest to pedal together, embrace the joy of cycling, and foster connections that last a lifetime.

Advertisement

Trending