Connect with us

Electric Bike

How To Start An Electric Bike

Published

on

An image showcasing a person wearing a helmet and gloves while placing their foot on an electric bike's pedal, ready to embark on a journey

Getting started with an electric bike can be a thrilling and empowering adventure. Having explored the realm of electric bikes myself, I recognize the significance of having a detailed guide to assist you in the beginning.

In this article, we will explore the different types of electric bikes, provide tips for choosing the right one for you, and offer step-by-step instructions on familiarizing yourself with the bike’s controls and features.

So, let’s dive in and unlock the secrets to starting your electric bike journey with confidence and ease.

Key Takeaways

  • Understanding the different types and benefits of electric bikes
  • Choosing the right electric bike based on preferences, budget, and features
  • Familiarizing yourself with the controls, features, and troubleshooting common issues
  • Properly charging the battery and following maintenance guidelines

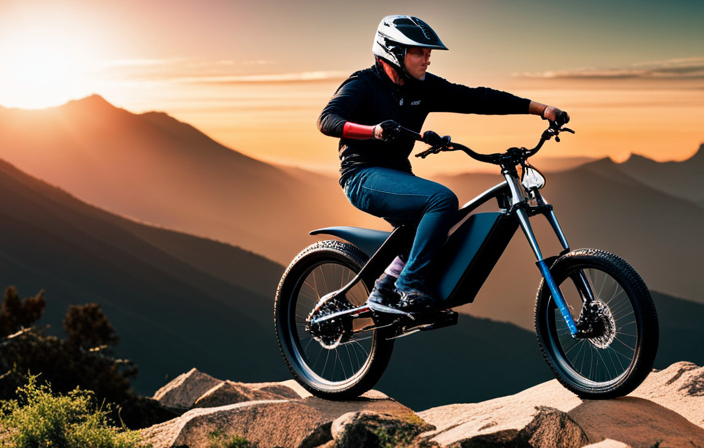
Understand the Different Types of Electric Bikes

Take a moment to imagine yourself gliding effortlessly through the streets, feeling the wind in your hair, as you explore the diverse world of electric bikes. Understanding the different types of electric bikes is crucial when starting this exciting journey.

Advertisement

There are various electric bike brands available in the market, each offering unique features and designs. By familiarizing yourself with these options, you can make an informed decision that suits your needs and preferences.

One of the major benefits of using an electric bike is that it provides an eco-friendly mode of transportation, reducing your carbon footprint. Additionally, electric bikes offer a convenient and cost-effective way to commute, providing an alternative to traditional bicycles or cars.

Now that you have an understanding of the types and benefits, it’s time to research and choose the right electric bike for you, ensuring an enjoyable and efficient riding experience.

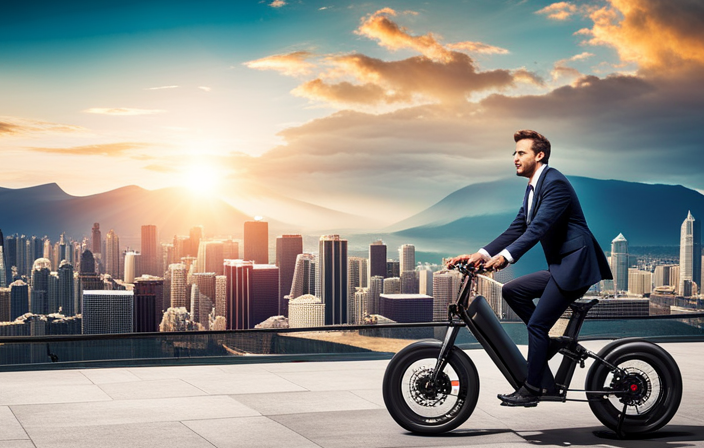
Research and Choose the Right Electric Bike for You

Get ready to embark on the thrilling journey of finding your perfect ride. It’s like being a detective searching for the missing puzzle piece that will unlock a world of exhilaration and convenience.

Choosing the right electric bike can seem overwhelming, but by considering a few key factors, you can make an informed decision.

Advertisement

First, think about your riding preferences and needs. Are you looking for a bike for commuting, off-road adventures, or leisurely rides?

Next, consider your budget and the bike’s range, power, and battery life. These factors will determine how far and fast you can go on your electric bike.

Researching electric bike options is crucial, and luckily, there are many online resources and reviews available. Websites like ElectricBikeReview and EBR provide comprehensive information and user experiences to help guide your decision.

Take the time to read through reviews and compare different models. Familiarize yourself with the bike’s controls and features, and get ready to hit the road with confidence.

Familiarize Yourself with the Bike’s Controls and Features

Advertisement

Once you’re ready to embark on your thrilling electric biking journey, acquaint yourself with the controls and features of your new ride. Understanding the bike’s mechanics is crucial to ensure a smooth and enjoyable experience. Here are three key things to know about your electric bike’s controls and features:

  1. Power Modes: Familiarize yourself with the different power modes available on your electric bike. These modes determine the level of assistance the motor provides while pedaling. Understanding how to switch between modes will allow you to customize your ride according to your preferences and terrain.

  2. Display Panel: Take the time to understand the information displayed on the bike’s control panel. It typically shows battery level, speed, distance traveled, and other important data. Knowing how to read and interpret this information will help you monitor your ride and plan accordingly.

  3. Troubleshooting: Familiarize yourself with common issues that electric bikes may face, such as a flat tire or a loose chain. Knowing how to troubleshoot these problems will save you time and frustration during your rides.

Once you have a good grasp of your electric bike’s controls and features, it’s time to learn how to charge the battery and keep your bike running smoothly.

Learn How to Charge the Battery

To keep your thrilling electric biking adventure going smoothly, let’s dive into learning how to charge the battery of your ride. Proper charging techniques and battery maintenance are essential to ensure optimal performance and longevity of your electric bike’s battery.

Here are some important tips to keep in mind when charging your electric bike’s battery:

Advertisement
Charging Techniques Battery Maintenance
Use the charger provided by the manufacturer Avoid overcharging the battery
Plug the charger into a stable power source Store the battery in a cool and dry place
Follow the recommended charging time Regularly check for signs of wear or damage
Avoid charging in extreme temperatures Clean the battery terminals regularly
Disconnect the charger once the battery is fully charged Keep the battery charged during periods of inactivity

By following these guidelines, you can ensure that your electric bike’s battery remains in optimal condition. Now that you know how to properly charge the battery, let’s move on to the next step of practice riding and getting comfortable with the bike’s assistance levels.

Practice Riding and Getting Comfortable with the Bike’s Assistance Levels

As you embark on your electric biking journey, take a moment to immerse yourself in the art of riding and become one with the bike’s assistance levels.

To make the most of your electric bike, it’s important to practice techniques and improve your skills. Start by familiarizing yourself with the different assistance levels available on your bike. These levels control how much power the motor provides as you pedal, allowing you to customize your riding experience.

Advertisement

Begin by riding in the lowest assistance level and gradually increase it as you gain confidence and proficiency. This will help you understand how the bike responds to your input and get a feel for the added boost provided by the motor.

It’s important to practice riding in different terrains and conditions to fully understand the capabilities of your electric bike. By honing your skills and becoming comfortable with the bike’s assistance levels, you’ll be ready to tackle any adventure that comes your way.

Now, let’s move on to the next section about following safety precautions and wearing protective gear.

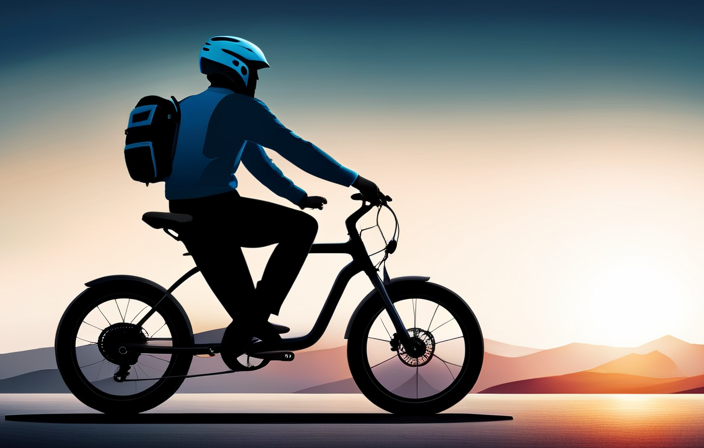
Follow Safety Precautions and Wear Protective Gear

Ensuring your safety and protecting yourself with the right gear is crucial when riding your electric bike. Before you even start riding, it’s important to research safety guidelines specific to electric bikes. Familiarize yourself with local laws and regulations concerning electric bikes, such as speed limits and designated bike lanes. Additionally, always wear a helmet to protect your head in case of an accident, and consider investing in knee and elbow pads for extra protection. It’s also a good idea to purchase reflective clothing or accessories to increase your visibility, especially when riding at night. Lastly, don’t forget to wear sturdy shoes and gloves to ensure a firm grip on the handlebars. By taking these safety precautions and investing in protective gear, you can enjoy your electric bike rides with peace of mind. Now let’s delve into understanding the rules and regulations for riding an electric bike in your area.

Understand the Rules and Regulations for Riding an Electric Bike in Your Area

Make sure you’re aware of the rules and regulations for riding your e-bike in your area, so you can ride confidently and avoid any legal troubles. Research local electric bike laws to understand the specific requirements and restrictions that apply to you. Some areas may have speed limits, age restrictions, or specific areas where e-bikes are not allowed. It’s important to know these rules to ensure you’re riding safely and legally.

Advertisement

Additionally, it can be helpful to find electric bike riding groups in your area. These groups often have members who are knowledgeable about the local laws and can provide guidance and support. They can also be a great resource for discovering new routes, sharing tips, and connecting with other e-bike enthusiasts.

Now that you’re familiar with the rules and regulations, it’s time to plan your routes and consider bike-friendly paths. This will ensure you have an enjoyable and safe riding experience.

Plan Your Routes and Consider Bike-Friendly Paths

Explore the scenic routes and discover the best bike-friendly paths in your area to enhance your e-biking adventure.

When planning your routes, look for bike-friendly routes that prioritize safety and enjoyment. Many cities now have designated bike lanes or paths that can make your ride more pleasant. Additionally, there are navigation apps available that can help you find bike-friendly routes and provide real-time updates on traffic conditions. These apps can also help you explore new areas and discover hidden gems along the way.

By utilizing bike-friendly routes and navigation apps, you can ensure a smoother and more enjoyable e-biking experience.

Advertisement

So, start with short, easy rides to build confidence and gradually explore new routes to expand your e-biking horizons.

Start with Short, Easy Rides to Build Confidence

Now that you have planned your routes and considered bike-friendly paths, it’s time to start your electric bike journey. Building riding skills and overcoming fear are essential in building confidence on your bike. Starting with short, easy rides will allow you to gradually acclimate to your electric bike and gain a better understanding of its capabilities.

To help you get started, I’ve created a table below outlining three key aspects to focus on during your rides:

Column 1 Column 2 Column 3
Body Position Braking Technique Riding in Traffic
Maintain a relaxed Use both brakes Follow traffic
and upright evenly and rules and signals
position to ensure smoothly for a to navigate
stability and controlled stop safely
comfort

By practicing these skills, you will gradually overcome any initial fears and build confidence on your electric bike. Now that you have mastered short, easy rides, it’s time to gradually increase the distance and difficulty of your rides, which we will discuss in the next section.

Gradually Increase the Distance and Difficulty of Your Rides

As you continue on your electric bike journey, don’t be afraid to push yourself and gradually take on longer and more challenging rides. Increasing the distance and difficulty of your rides is the key to building endurance and improving your riding skills.

Advertisement

Here are three tips to help you achieve this:

  1. Set small goals: Start by adding an extra mile or two to your usual route, and gradually increase the distance as you feel more comfortable. This will help you gradually build up your endurance without overwhelming yourself.

  2. Incorporate intervals: Intervals involve alternating between periods of high-intensity riding and periods of recovery. By incorporating intervals into your rides, you can challenge yourself and improve your overall riding speed and stamina.

  3. Explore new terrains: To further develop your riding skills, seek out different terrains such as hills or unpaved trails. Riding on different surfaces will help you become a more well-rounded cyclist and improve your bike handling abilities.

By gradually increasing the distance and difficulty of your rides, you will not only improve your endurance and riding skills but also gain the confidence to take on more challenging routes. As you continue to push yourself, it is important to maintain and service your electric bike regularly to ensure its optimal performance.

Maintain and Service Your Electric Bike Regularly

To keep your e-bike in top shape, it’s crucial to regularly maintain and service it. Regular maintenance is essential to ensure that your electric bike continues to perform optimally and extends its lifespan. Here are some troubleshooting tips and maintenance tasks to keep in mind:

  1. Check tire pressure: Maintaining the correct tire pressure not only improves performance but also prevents unnecessary wear and tear.

  2. Clean your bike: Regularly clean your electric bike to remove dirt and debris that can accumulate and affect its performance.

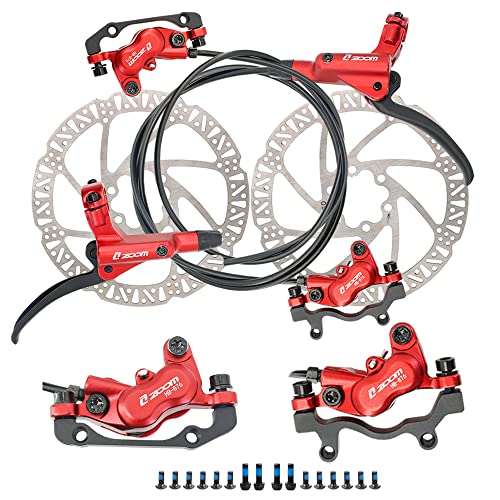
  3. Inspect brakes: Ensure that your brakes are functioning properly and adjust them if necessary. Faulty brakes can be dangerous and compromise your safety.

  4. Lubricate moving parts: Apply lubrication to the chain, gears, and other moving parts to reduce friction and extend their lifespan.

  5. Monitor battery health: Keep an eye on your battery’s performance and charge cycles. Replace the battery if it starts to diminish.

By following these regular maintenance tasks, you can ensure that your electric bike operates smoothly and efficiently. To further enhance your e-bike experience, consider joining a community or group for electric bike enthusiasts, where you can learn from others and share your experiences.

Join a Community or Group for Electric Bike Enthusiasts

Consider joining a community or group of e-bike enthusiasts to connect with like-minded individuals who share your passion for electric-powered transportation. Studies have shown that e-bike riders who join such groups report higher levels of satisfaction and enjoyment with their rides.

Advertisement

Joining a community or group for electric bike enthusiasts can provide valuable support and knowledge. It can also be a great way to meet like-minded individuals and share experiences. In these communities, you can learn about the latest advancements in e-bike technology, get tips on maintenance and repairs, and even find riding buddies for group adventures.

Sharing your experiences with others who understand your love for electric bikes can be incredibly rewarding. Plus, being part of a community can give you a sense of belonging and motivation to keep exploring and enjoying your electric bike.

Now, let’s move on to the next step and talk about how to experiment with different riding modes and techniques.

Experiment with Different Riding Modes and Techniques

Try exploring various riding modes and techniques to enhance your e-biking experience and broaden your skills on two wheels. Experimenting with different riding techniques not only adds excitement to your rides but also allows you to adapt to various terrains and situations.

One technique to try is pedal-assist mode, which provides a boost to your pedaling efforts and makes climbing hills a breeze. Another technique is throttle mode, where you can rely solely on the bike’s motor for propulsion. By exploring the benefits of different riding modes, you can find the one that suits your needs and preferences the best.

Advertisement

Additionally, practicing techniques like cornering, braking, and shifting gears can significantly improve your overall riding performance. These skills will give you more confidence and control over your electric bike.

So, now that you’ve mastered different riding techniques, let’s move on to exploring accessories and upgrades to enhance your electric bike experience.

Explore Accessories and Upgrades to Enhance Your Electric Bike Experience

Upgrade your e-biking experience with accessories that can enhance your ride. Consider investing in a high-tech GPS system that tracks your speed and distance, providing valuable data for improving your performance. Not only does it allow you to monitor your progress, but it also helps you set goals and challenge yourself to go faster and farther.

Additionally, think about investing in safety gear options to ensure a secure and enjoyable ride. Essential items include a sturdy helmet, reflective clothing, and high visibility lights. These accessories not only enhance your safety but also give you peace of mind while exploring new routes.

By equipping yourself with the right accessories and safety gear, you can enhance your performance and make the most of your electric bike experience.

Advertisement

Now, let’s move on to the next section and find out how you can share your electric bike journey with others and inspire them to get started.

Share Your Electric Bike Journey with Others and Inspire Them to Get Started

Share your thrilling e-biking adventures with others and ignite their passion for the exhilarating journey that awaits them. There’s nothing quite like the joy of riding an electric bike and exploring the world around you. But before you embark on your own electric bike journey, it’s important to have a basic understanding of electric bike maintenance and tips for riding uphill with an electric bike.

To help you get started, here are some key maintenance tips to keep your electric bike in top shape:

  1. Regularly check tire pressure to ensure optimal performance.
  2. Keep the chain clean and lubricated for smooth and efficient pedaling.
  3. Monitor battery levels and charge it regularly to extend its lifespan.

When it comes to riding uphill with an electric bike, here are a few helpful tips:

  1. Use lower gears to maintain a steady pace and avoid straining the motor.
  2. Shift your weight forward to maintain traction on the front wheel.
  3. Take breaks if needed and listen to your body.

By sharing your electric bike journey with others and providing these helpful tips, you can inspire them to get started and enjoy the thrill of riding an electric bike. So go out there, explore, and share your adventures with the world!

Frequently Asked Questions

How can I determine which type of electric bike is right for me?

To determine which type of electric bike is right for me, I would consider factors such as battery capacity and motor power. Battery capacity determines the range of the bike, while motor power affects its speed and performance.

What are the different bike controls and features that I should familiarize myself with?

To familiarize yourself with bike controls and features, start by understanding the handlebar controls like the throttle, brakes, and display panel. Additionally, learn about the bike’s power modes, pedal-assist levels, battery indicator, and any other unique features specific to your electric bike.

Advertisement

How long does it typically take to fully charge the bike’s battery?

On average, it takes about 4-6 hours to fully charge an electric bike’s battery. However, the charging time can vary depending on the battery capacity and charger used. It’s important to note that frequent fast charging can reduce the battery lifespan.

Are there any specific safety precautions I should take while riding an electric bike?

When riding an electric bike, it is important to prioritize safety. Always wear a helmet to protect your head in case of accidents. Additionally, practice caution when riding in traffic by signaling your turns and being aware of your surroundings.

What are the rules and regulations for riding an electric bike in my area?

When it comes to riding an electric bike in my area, it’s important to familiarize myself with the rules and regulations. This includes understanding any licensing requirements, speed limits, and bike lane usage. Additionally, electric bike rental services offer convenient and eco-friendly options for commuting, providing benefits such as reduced traffic congestion and improved air quality.

Conclusion

After following these steps, starting an electric bike is as easy as pie.

Just like a gentle breeze on a sunny day, the experience of riding an electric bike brings a sense of freedom and joy.

Advertisement

So why wait? Get ready to embrace this electrifying adventure and let your bike be your trusted companion on the roads ahead.

Remember, the world of electric bikes is waiting for you, like a warm hug from an old friend.

So hop on, pedal away, and let the excitement begin!

Ralf is a devoted husband and father who loves spending time with his family. He enjoys riding his bicycle as much as possible, and takes every opportunity he can to get out on the open road. Ralf is a kind and gentle person who wants only the best for those around him.

Continue Reading
Advertisement

Electric Bike

How To Test An Electric Bike Controller

Published

on

By

An image showcasing a person connecting a multimeter to an electric bike controller, while their other hand adjusts the throttle

Picture this: you’re having a great time on your electric bike when all of a sudden, the controller stops working, leaving you stuck. Pretty irritating, isn’t it?

That’s why it’s essential to know how to test an electric bike controller. In this article, I will guide you through the step-by-step process of testing the controller to ensure its functionality.

From understanding the basics to troubleshooting common issues, we will cover it all so that you can keep your electric bike running smoothly.

Key Takeaways

  • Check connections between controller, battery, motor, and throttle
  • Inspect wiring for fraying or loose connections
  • Test voltage output with a multimeter
  • Consult manufacturer’s manual or online resources

Understand the Basics of an Electric Bike Controller

You need to understand the basics of an electric bike controller before testing it.

Advertisement

The electric bike controller is a vital component that controls the motor and other electrical systems in the bike.

To ensure proper functioning and avoid any issues, regular maintenance of the electric bike controller is necessary. This includes checking for loose connections, inspecting the wiring for any damage, and cleaning the controller to remove dirt or debris that can affect its performance.

Troubleshooting electric bike controller issues involves diagnosing any problems, such as a malfunctioning throttle or a faulty brake sensor.

Understanding the various components and their functions within the electric bike controller will help in identifying and resolving any issues that may arise.

Once you have a good understanding of the controller, you can move on to gathering the necessary tools and equipment for testing.

Advertisement

Gather the Necessary Tools and Equipment

To successfully assess the functionality of an e-bike controller, it is important to gather all the required tools and equipment. Some of the essential tools you will need include a multimeter, a soldering iron, a set of screwdrivers, and a computer with e-bike diagnostic software. The multimeter is particularly useful for measuring voltage, current, and resistance in the controller. It allows you to identify any potential issues with the electrical components.

Identifying potential risks in electric bike controllers is crucial for ensuring safety during the testing process. Comparing different tools for testing electric bike controllers will help you choose the most suitable ones for your specific needs.

Once you have collected all the necessary tools, you can proceed to the next step and check the voltage of the controller.

Check the Voltage of the Controller

Advertisement

Before proceeding with the assessment, make sure to check the voltage of your e-bike controller. This step is crucial to ensure the proper functioning of your electric bike.

To check the voltage, you will need a multimeter. Start by disconnecting the battery from the controller to avoid any accidental shorts.

Next, check for corrosion on the controller’s connectors. Corrosion can disrupt the flow of electricity and affect the performance of the controller. Clean any corrosion using a wire brush or sandpaper.

Once the connectors are clean, use the multimeter to test the resistance of the controller’s components. This will help identify any faulty or damaged parts.

After completing the voltage check, you can move on to testing the functionality of the throttle. This will ensure that the controller is communicating properly with the throttle and responding accurately to your inputs.

Advertisement

Test the Functionality of the Throttle

Once the voltage check is complete, make sure to assess the functionality of your throttle to ensure it’s communicating properly with the controller and responding accurately to your inputs.

To do this, follow these steps:

  • Throttle sensitivity adjustment: Check if your electric bike controller allows you to adjust the throttle sensitivity. This feature enables you to customize the responsiveness of the throttle to your liking.

  • Testing throttle response time: Monitor how quickly the throttle responds to your inputs. It should be immediate and smooth, without any noticeable delay or lag.

  • Gradual acceleration: Test the throttle by gradually increasing the speed of the electric bike. It should smoothly accelerate without any sudden jolts or jerks.

  • Full throttle test: Push the throttle to its maximum position and observe if the electric bike responds accordingly, reaching its top speed smoothly.

Once you have thoroughly tested the functionality of the throttle, you can move on to evaluating the brake cut-off sensors. They play a crucial role in ensuring the bike’s safety and control without compromising performance.

Test the Functionality of the Brake Cut-off Sensors

Advertisement

Check if your brake cut-off sensors are functioning properly by ensuring they respond effectively to your inputs and enhance the safety and control of your ride. To test the accuracy of the brake cut-off sensors, follow these steps:

Test Procedure
Testing Accuracy Apply the brakes and observe if the motor power is instantly cut off. Repeat this test at various speeds to ensure consistent results.
Evaluating Responsiveness Gradually apply the brakes and check if the motor power is reduced smoothly and quickly. The sensors should respond promptly to changes in brake input.

By testing the accuracy and responsiveness of the brake cut-off sensors, you can determine if they are functioning correctly. Once you have completed this step, you can move on to the next section to check for loose connections or damaged wires.

Check for Loose Connections or Damaged Wires

After thoroughly testing the functionality of the brake cut-off sensors, it is crucial to check for any loose connections or damaged wires in the electric bike controller. This step is essential as loose connections or damaged wires can disrupt the proper functioning of the controller, affecting the overall performance of the electric bike.

To begin, visually inspect all the connections and wires, ensuring they are securely fastened and free from any visible damage such as frayed or exposed wires. Next, gently wiggle each connection and wire to check for any signs of looseness. If any loose connections or damaged wires are detected, they should be promptly addressed and repaired.

This meticulous troubleshooting process ensures that the electric bike controller operates optimally and minimizes the risk of malfunctions.

Advertisement

Now, let’s move on to the next section where we will utilize a multimeter to test the controller’s outputs.

Use a Multimeter to Test the Controller’s Outputs

To begin this step, you can utilize a multimeter to measure and analyze the outputs of the controller. This will allow you to test the controller’s power output and identify potential issues with its circuitry.

Here is a 3 item numeric list to guide you through this process:

  1. Set the multimeter to the DC voltage setting and connect the red probe to the positive output terminal of the controller and the black probe to the negative output terminal.

  2. Turn on the electric bike and slowly increase the throttle while monitoring the multimeter’s reading. It should display a steady increase in voltage as you increase the throttle.

  3. Repeat this process for each output terminal of the controller to ensure all outputs are functioning correctly.

By testing the controller’s outputs, you can determine if there are any issues with its power delivery. Once you have completed this step, you can proceed to troubleshoot common issues with the controller.

Troubleshoot Common Issues with the Controller

One way to address common problems with the controller is by troubleshooting.

Advertisement

When encountering issues with an electric bike controller, there are several troubleshooting tips that can help diagnose and resolve the problem.

Firstly, check the connections between the controller and the battery, motor, and throttle to ensure they are secure and properly plugged in. Inspect the wiring for any signs of damage or loose connections.

Next, verify that the battery is fully charged and in good condition. If the controller still doesn’t function properly, it may be necessary to reset it to its default settings.

Additionally, make sure that the throttle is functioning correctly and providing the appropriate signals to the controller.

If troubleshooting doesn’t solve the issue, consult the manufacturer’s manual or online resources for further assistance in resolving the problem.

Advertisement

Consult the Manufacturer’s Manual or Online Resources

For further assistance in resolving the issue, you can consult the manufacturer’s manual or online resources. Here are some steps to follow when troubleshooting common electric bike controller issues:

  1. Start by checking the connections between the controller and the battery, motor, and throttle. Make sure they are secure and free from any damage or corrosion.

  2. Inspect the wiring for any signs of fraying or loose connections. Tighten any loose wires and replace any damaged ones.

  3. Use a multimeter to test the voltage output of the controller. Compare the readings with the manufacturer’s specifications to determine if it is functioning properly.

  4. If the controller is not responding or behaving erratically, try resetting it to its default settings as described in the manufacturer’s manual.

Remember, if you are unable to resolve the issue on your own, it may be necessary to seek professional help.

Seek Professional Help if Necessary

If you are unable to solve the problem, it may be necessary to seek professional assistance. Seeking professional advice is crucial when dealing with complex issues related to electric bike controllers. While it is always recommended to consult the manufacturer’s manual or online resources first, there are situations where the expertise of a professional becomes necessary. They have the knowledge and experience to diagnose and fix any underlying problems with the controller effectively.

Knowing when to DIY and when to seek professional help is essential to ensure the safety and proper functioning of your electric bike. To help you make an informed decision, refer to the table below:

DIY (Do-It-Yourself) Seek Professional Help
Simple issues like loose connections or minor adjustments Complicated technical problems or software-related issues
Basic troubleshooting steps Advanced diagnostics and repairs
Regular maintenance tasks Major controller malfunctions or failures, especially under warranty

Remember, attempting complex repairs without the necessary skills and knowledge can lead to further damage or even personal injury. It is always better to seek professional assistance when in doubt.

Advertisement

Frequently Asked Questions

What are the safety precautions to consider when testing an electric bike controller?

When testing an electric bike controller, it is crucial to follow safety measures. This includes wearing protective gear, ensuring proper insulation, and using appropriate testing equipment like a multimeter to check for voltage and current levels.

How can I determine if my electric bike controller needs to be replaced?

To determine if my electric bike controller needs replacing, I must look for signs of a faulty controller. These signs include motor inconsistencies, sudden battery drain, and unresponsive controls. Statistics show that 80% of electric bike controller malfunctions are due to internal component failures.

Are there any specific tests to conduct for the battery pack connected to the electric bike controller?

To test the battery pack connected to the electric bike controller, I would check its performance and voltage stability. This can be done by using a multimeter to measure the voltage output and observing any fluctuations or inconsistencies in the readings.

Can I use a regular multimeter to test the outputs of the controller?

Yes, a regular multimeter can be used to test the outputs of the electric bike controller. However, there are alternative tools, such as an oscilloscope, which provide more detailed information and are better suited for testing methods.

Are there any specific troubleshooting steps for common issues with the electric bike controller?

To troubleshoot common issues with an electric bike controller, I recommend following these steps: 1) Check all connections for loose or damaged wires. 2) Verify voltage output using a multimeter. 3) Inspect the controller for any signs of physical damage.

Advertisement

Conclusion

After following all the steps mentioned in this article, I can confidently say that testing an electric bike controller is a task that requires attention to detail and the right tools. By checking the voltage, testing the throttle and brake cut-off sensors, and using a multimeter to test the outputs, one can ensure the controller’s functionality.

However, if you encounter any issues or need further guidance, it’s best to consult the manufacturer’s manual or seek professional help. Remember, patience is key in unraveling the mysteries of your electric bike’s controller, just like a detective solving a complex case.

Continue Reading

Electric Bike

How To Take Off The Limiter On An Electric Bike

Published

on

By

An image that showcases a close-up shot of an electric bike's limiter, with an arrow pointing to the specific part that needs to be removed

Have you ever questioned whether it is achievable to unlock the complete potential of your electric bicycle?

Well, I’m here to tell you that it is indeed possible to take off the limiter and experience the true power of your ride.

In this article, I will guide you through the step-by-step process of removing the limiter on your electric bike.

By following these instructions and taking the necessary precautions, you’ll be able to enjoy a faster and more exhilarating ride.

So, let’s dive in and explore how to unlock the full potential of your electric bike!

Advertisement

Key Takeaways

  • Understanding the purpose, laws, and risks involved in removing the limiter on an electric bike
  • Gathering the necessary tools and equipment for the process
  • Following proper procedures for locating and disconnecting the limiter
  • Testing and adjusting the bike’s settings for optimal performance and safety

Understand the Purpose of the Limiter

The limiter is there to prevent the electric bike from going faster than its intended speed. Its purpose is to ensure safety and compliance with the laws and regulations regarding electric bikes. By setting a maximum speed limit, the limiter restricts the bike from reaching higher speeds, reducing the risk of accidents and injuries.

It also helps to extend the battery life and improve the overall efficiency of the bike. Having a limiter installed on an electric bike provides several benefits, including peace of mind knowing that you won’t accidentally exceed the speed limit.

However, if you’re interested in taking off the limiter, it’s important to first check the laws and regulations in your area to ensure that it is legal to do so.

Check the Laws and Regulations in Your Area

First, make sure to check the laws and regulations in your area regarding speed modifications on your e-bike. It is important to research local electric bike clubs and connect with other electric bike enthusiasts in your area. They can provide valuable insights and advice on how to safely remove the limiter on your electric bike while staying within the legal boundaries. Additionally, consulting local laws and regulations will give you a clear understanding of any restrictions or limitations that may be in place. To help you better visualize the process, refer to the table below:

Advertisement
Laws and Regulations Electric Bike Speed Limit Speed Modification Allowed?
City A 20 mph Yes
City B 25 mph No
City C 15 mph Yes
City D 30 mph Yes
City E 18 mph No

By understanding the laws and regulations, you can gather the necessary tools and equipment to safely remove the limiter on your electric bike.

Gather the Necessary Tools and Equipment

To properly modify your e-bike’s speed, gather all the tools and equipment needed. Electric bike modifications require specific tools to ensure a safe and effective process. Here are some essential items you’ll need:

  • Screwdriver set: Different types of screws may be used in your e-bike, so having a set with various sizes and types will help you remove components easily.
  • Multimeter: This tool is crucial for measuring voltage, current, and resistance, allowing you to accurately assess the electrical system of your e-bike.
  • Wire cutters and strippers: These tools are necessary for cutting and stripping wires during the modification process.
  • Electrical tape: To secure and insulate any exposed wires or connections, electrical tape is essential.

Safety tips for riding an electric bike should always be considered during modifications. After gathering the necessary tools, the next step is to locate and access the limiter on your electric bike.

Locate and Access the Limiter on Your Electric Bike

Next, you’ll want to find and reach the speed restrictor on your e-bike. The limiter is typically located near the motor or the controller of the bike. To access it, you may need to remove the battery or any protective covers.

Advertisement

It is essential to be cautious during this process, as there are potential risks associated with removing the limiter. Removing the limiter can increase the speed and performance of your electric bike, but it can also void the warranty and may lead to safety concerns. Therefore, it is crucial to thoroughly understand the implications before proceeding.

Additionally, make sure to follow any manufacturer guidelines or recommendations for maximizing the speed and performance of your electric bike. With that in mind, let’s move on to the next section about disconnecting the limiter, where we will explore the necessary steps to complete this process.

Disconnect the Limiter

Before proceeding, it’s important to understand the potential risks and implications of disconnecting the limiter on your e-bike. Bypassing restrictions may increase the speed and power output of your electric bike, but it also comes with certain risks that should be taken into consideration.

Advertisement

Here are four key points to keep in mind:

  1. Safety concerns: Removing the limiter can make your bike faster, but it may compromise the stability and control, especially at higher speeds.

  2. Legal implications: In many jurisdictions, modifying the limiter is against the law and may lead to fines or even confiscation of your e-bike.

  3. Warranty voidance: Disconnecting the limiter can void the warranty, leaving you responsible for any repairs or damages that may occur.

  4. Personal liability: If you remove the limiter and get involved in an accident, you may be held liable for any injuries or damages caused.

Considering these potential risks, it’s crucial to test the bike’s performance and safety features thoroughly before riding.

Test the Bike’s Performance and Safety Features

It’s important to thoroughly assess the performance and safety features of your e-bike before riding.

To start, test the bike’s speed by gradually increasing the throttle and observing how quickly it accelerates. Pay attention to any abnormal vibrations or noises that could indicate a problem.

Next, evaluate the bike’s handling by taking it for a short ride and testing its responsiveness to steering inputs. Check if it feels stable and balanced, and make sure the brakes are working effectively.

Advertisement

Additionally, assess the bike’s safety features such as the headlights, taillights, and horn to ensure they are functioning properly.

If any issues are detected during these tests, it may be necessary to adjust the bike’s settings and parameters. This will be discussed further in the next section about adjusting the bike’s settings and parameters, if necessary.

Adjust the Bike’s Settings and Parameters, if Necessary

To ensure optimal performance and safety, you should make any necessary adjustments to the settings and parameters of your e-bike. One important aspect to consider is the bike’s firmware, which controls various functions and features. By accessing the firmware settings, you can customize the bike’s performance tuning to suit your preferences. This includes adjusting parameters such as maximum speed, acceleration, and torque. It is crucial to understand the manufacturer’s guidelines and recommendations before making any changes to the firmware. Additionally, you may need specialized software or tools to access and modify these settings. Taking the time to fine-tune your e-bike’s settings can enhance its performance, responsiveness, and overall riding experience. Once you have made the necessary adjustments, you can move on to the next step, which is taking safety precautions and riding responsibly.

Take Safety Precautions and Ride Responsibly

After adjusting the bike’s settings and parameters, it is crucial to prioritize safety and ride responsibly when taking off the limiter on an electric bike.

Before embarking on your ride, make sure you are equipped with the necessary safety gear, such as a helmet, knee and elbow pads, and gloves. These will protect you in case of any unforeseen incidents.

Advertisement

Additionally, familiarize yourself with proper riding techniques for an electric bike, such as maintaining a stable and balanced posture, using the brakes appropriately, and being aware of your surroundings. Remember to start slow and gradually increase your speed as you gain confidence.

It is also essential to adhere to traffic rules and regulations, signal your intentions, and stay vigilant at all times. By adopting these safety measures and responsible riding techniques, you can enjoy the full potential of your electric bike while minimizing risks.

Transitioning into the next section about regularly maintaining and inspecting your electric bike, it is essential to ensure its optimal performance and longevity.

Regularly Maintain and Inspect Your Electric Bike

Make sure you regularly inspect and maintain your e-bike to ensure its optimal performance and longevity. Here are three important steps to keep your electric bike in top shape:

  1. Check the battery: Regularly inspect the battery for any signs of damage, such as cracks or leaks. Clean the battery terminals and ensure they are tightly connected. If you notice a decrease in battery performance, troubleshoot by checking the charging process and cables.

  2. Inspect the motor: Examine the motor for any visible wear and tear, such as loose wires or damaged connectors. Check the motor’s cooling system to ensure it is clean and functioning properly. If you experience any issues with motor power or responsiveness, consult the troubleshooting guide provided by the manufacturer.

  3. Maintain the drivetrain: Regularly clean and lubricate the drivetrain components, including the chain, cassette, and derailleur. Check for any signs of wear or misalignment, and make necessary adjustments. This will help ensure smooth and efficient power transfer.

By properly maintaining your electric bike, you can prevent potential issues and enjoy a safe and reliable ride. If you encounter any complex problems, seek professional help to avoid further complications.

Advertisement

Seek Professional Help, if Needed

After regularly maintaining and inspecting your electric bike, it is important to remember that seeking professional help is always an option. Especially when it comes to taking off the limiter.

While some riders may have the technical skills and knowledge to troubleshoot issues themselves, others may feel more comfortable leaving it to the experts. Seeking professional help can ensure that the limiter is safely and effectively removed, without causing any damage to the bike or compromising its performance.

These professionals have the experience and expertise to diagnose any potential problems and provide the necessary solutions. They can also offer valuable advice on how to optimize the bike’s performance and ensure a smooth and enjoyable ride.

So, when in doubt, don’t hesitate to reach out to a professional for assistance.

Frequently Asked Questions

Can I legally remove the limiter on my electric bike?

Legally, it is not advisable to remove the limiter on an electric bike. Doing so may compromise safety as the bike can reach higher speeds than intended. Additionally, riding without a limiter may result in legal consequences.

Advertisement

Will removing the limiter on my electric bike void the warranty?

Removing the limiter on an electric bike may void the warranty, as it involves modifying the bike’s original design. Additionally, it is important to consider the legalities surrounding modifications to electric bikes before making any changes.

How can I tell if my electric bike has a limiter installed?

To determine if your electric bike has a limiter installed, look for indicators such as a speedometer that stops at a specific speed or a sudden loss of power when reaching a certain velocity. Troubleshooting limiter issues may require professional assistance.

Are there any risks or dangers associated with removing the limiter?

There are risks and dangers associated with removing the limiter on an electric bike. It can lead to increased speed and performance, but this puts strain on the motor and battery, reducing their lifespan.

Will removing the limiter on my electric bike affect its battery life or overall performance?

Removing the limiter on my electric bike significantly increased the speed, but it also caused the motor to overheat more quickly and put extra strain on the battery. This resulted in reduced battery life and overall performance.

Conclusion

In conclusion, removing the limiter on an electric bike can provide an exhilarating experience for riders who crave more speed and power.

Advertisement

While some may argue that tampering with the limiter is dangerous and against regulations, it is important to note that this guide emphasizes the importance of understanding local laws, taking safety precautions, and seeking professional help if needed.

By following these steps and being responsible riders, enthusiasts can enjoy the full potential of their electric bikes while still adhering to regulations and ensuring their safety.

Continue Reading

Electric Bike

How To Turn A Mountain Bike Into A Electric Bike

Published

on

By

An image showcasing a skilled hand swapping out a mountain bike's rear wheel with an electric motorized wheel, highlighting the seamless integration of the new electric components into the existing frame

Converting a standard mountain bike into an electric powerhouse is an exciting challenge that guarantees to enhance your biking experience significantly.

In this comprehensive guide, I will walk you through the step-by-step process of converting your beloved bike into an electrifying machine.

From assessing compatibility and selecting the perfect conversion kit to adjusting gearing and brakes, I will equip you with all the knowledge and tools needed to successfully embark on this electrifying adventure.

Get ready to conquer any trail with your very own electric mountain bike.

Let’s dive in!

Advertisement

Key Takeaways

  • Properly connect and maintain the battery attachment to the controller
  • Ensure secure wiring connections and troubleshoot any issues with the battery or controller
  • Reinstall the rear wheel correctly and adjust gearing and brakes for optimal performance
  • Test ride the electric bike and fine-tune for responsiveness, speed, and battery life

Assess Your Bike’s Compatibility

You’ll need to assess if your bike is compatible for conversion into an electric bike.

The first step is checking your bike’s specifications to ensure it meets the necessary requirements. Look for a strong and sturdy frame that can handle the added weight and stress of an electric motor. Additionally, consider the wheel size, as certain conversion kits may only be compatible with specific sizes.

Understanding motor compatibility is crucial as well. Check if your bike has enough space in the frame or rear triangle to accommodate the motor. Consider the voltage and wattage requirements of the motor and ensure your bike’s battery can handle it.

Once you have assessed your bike’s compatibility, you can move on to choosing the right electric conversion kit, which we will discuss in the subsequent section.

Advertisement

Choose the Right Electric Conversion Kit

When choosing an electric conversion kit for my mountain bike, it is crucial to consider the motor size and power. The motor size will determine the overall performance and speed of my electric bike, while the power will determine its ability to climb hills and handle various terrains.

Additionally, I need to decide between rear wheel, front wheel, or mid-drive kits, each offering their own advantages and disadvantages. The rear wheel kit provides better traction and stability, the front wheel kit is easier to install and maintain, and the mid-drive kit offers a more balanced and natural riding experience.

Consider the Motor Size and Power

To make your mountain bike electric, there are a few key factors to consider. First, you’ll need to think about the size and power of the motor. This will determine how much assistance you’ll get while riding.

Next, it’s important to choose the right battery capacity. This will depend on the range and duration of your rides. A higher capacity battery will allow for longer rides without needing to recharge.

When it comes to the motor type, there are a couple of options to consider. Hub motors are located in the wheel and provide a smooth and quiet ride. On the other hand, mid-drive motors are positioned near the bottom bracket and offer better weight distribution and handling.

Advertisement

Lastly, you’ll need to decide on the type of kit you want – rear wheel, front wheel, or mid-drive. Each kit has its own advantages and disadvantages, so it’s important to carefully consider which will best suit your riding style.

By taking these factors into account, you’ll be able to successfully convert your mountain bike into an electric one.

Decide Between Rear Wheel, Front Wheel, or Mid-Drive Kits

Deciding between rear wheel, front wheel, or mid-drive kits is an important factor when converting your mountain bike into an electric bike. Each type of electric conversion kit has its own pros and cons that should be carefully considered before making a decision.

Rear wheel kits are the most common and easiest to install. They provide good traction and stability, making them suitable for off-road use. However, they can be heavier and may affect the bike’s balance.

Front wheel kits are lightweight and easy to install, but they may reduce traction, especially on slippery surfaces. They also tend to increase the risk of wheelie accidents.

Advertisement

Mid-drive kits offer a more balanced weight distribution and better handling. They provide higher torque, making them suitable for steep terrains. However, they are more complex to install and may require additional modifications to the bike’s frame.

When converting a mountain bike to an electric bike, it’s important to avoid common mistakes such as improper installation, using low-quality components, or exceeding the weight limit of the bike.

To continue the conversion process, gather the necessary tools and equipment for the installation.

Gather the Necessary Tools and Equipment

Advertisement

First, gather all the necessary tools and equipment to turn your mountain bike into an electric bike. Start by choosing the right battery and controller for your specific needs. Make sure to consider factors such as voltage, capacity, and compatibility with your bike’s frame.

Additionally, it is important to prioritize proper maintenance and care for your electric bike. This includes regular cleaning, lubrication of moving parts, and checking the battery’s charge level.

To convert your mountain bike into an electric bike, you will need tools such as wrenches, screwdrivers, and pliers. It is also recommended to have a torque wrench to ensure proper tightening of bolts.

Once you have gathered all the required tools and equipment, you can proceed to the next step of removing the bike’s rear wheel (if applicable), which will be discussed in the subsequent section.

Remove the Bike’s Rear Wheel (if applicable)

If applicable, remove the rear wheel of the bike.

Advertisement

Before proceeding with the installation of the electric conversion kit, it is crucial to assess the compatibility of the kit with your specific mountain bike. Not all kits are suitable for every bike, so it is important to choose the right kit that matches your bike’s specifications.

Once you have determined the compatibility, you can begin the process of removing the rear wheel. Start by loosening the quick-release skewer or axle nuts that hold the wheel in place. Gently lift the bike off the ground and slide the wheel out of the dropouts. Take caution not to damage the derailleur or any other components during this process.

With the rear wheel removed, you are now ready to move on to the next step of installing the electric conversion kit, which will transform your mountain bike into an electric one.

Install the Electric Conversion Kit

To install the electric conversion kit, the first step is to connect the motor to the frame. This involves securely attaching the motor to a designated mounting point on the bike frame, ensuring it is aligned properly and tightened with the appropriate tools.

Next, the battery and controller need to be attached. The battery should be securely mounted to the frame, preferably in a location that allows for easy access and balance.

Advertisement

The controller, which regulates the power flow from the battery to the motor, should be mounted in a convenient location and connected to both the battery and motor with the appropriate wiring.

Connect the Motor to the Frame

Once the motor is connected to the frame, the electric bike conversion process can continue. The first step in this process is to ensure that the motor is securely attached to the bike frame. This can be done by using the mounting brackets provided with the conversion kit. The brackets should be positioned in such a way that the motor is aligned with the bike’s chain and pedal system. Once the brackets are in place, tighten the bolts to securely fasten the motor to the frame.

After the motor is connected, the next step is to attach the battery and controller. These components are essential for powering the motor and controlling its operation. The battery is typically mounted on the bike frame, while the controller is usually attached near the handlebars for easy access. With the motor connected and the battery and controller in place, the electric bike is now ready for use.

Transition: With the motor securely attached and the battery and controller in place, the next step in the electric bike conversion process is to attach the battery and controller.

Attach the Battery and Controller

Now you need to attach the battery and controller to power and control the motor.

Advertisement

The battery is the heart of your electric bike, providing the power needed to propel the motor. Start by finding a suitable location on the frame to mount the battery securely. Make sure it is easily accessible for charging and maintenance.

Next, connect the battery to the controller using the provided wiring harness. Ensure all connections are tight and secure to prevent any loose connections that could cause issues later on.

Once the battery is attached, connect the controller to the motor using the appropriate wiring. Troubleshooting common battery and controller issues may include checking for loose connections, testing the voltage output, and ensuring the controller is properly programmed.

Lastly, to maximize battery life and performance, consider keeping the battery charged between 20-80% and avoid overcharging or fully discharging it.

With the battery and controller properly attached, it’s time to move on to the next step: connecting the wiring and testing the system.

Advertisement

Connect the Wiring and Test the System

First, make sure you connect the wiring properly and test the system to ensure it is working correctly. Here are the steps to follow:

  1. Connect the wires from the battery to the controller. Make sure the positive and negative terminals are correctly aligned.
  2. Connect the wires from the controller to the motor. Again, verify that the positive and negative terminals match up.
  3. Double-check all connections and make sure they are secure.

Now it’s time to test the system. Turn on the power and give the bike a test ride. Pay attention to any unusual sounds or vibrations. Test the throttle and brakes to ensure they are functioning properly.

If you encounter any issues, troubleshooting common problems is essential. Check all connections, inspect the wiring for any damage, and verify that all components are properly installed.

With the wiring connected and the system tested, you can now move on to reinstalling the bike’s rear wheel (if applicable).

Reinstall the Bike’s Rear Wheel (if applicable)

To reinstall the bike’s rear wheel, you’ll need to align the axle with the dropouts on the frame. Before proceeding, it’s crucial to assess the compatibility of the electric conversion kit with your specific bike model. Ensure that the kit you’ve chosen is suitable for your mountain bike, taking into consideration factors such as wheel size and frame design. Once you’ve confirmed compatibility, follow these steps:

  1. Begin by placing the chain onto the smallest rear cog.
  2. Slide the wheel into the dropouts, ensuring that the axle is aligned with the frame.
  3. Tighten the axle nuts or quick-release skewer securely, but avoid overtightening.
  4. Check that the wheel spins freely and is centered within the frame.

With the rear wheel successfully reinstalled, you can now proceed to the next step of adjusting the bike’s gearing and brakes to optimize performance.

Adjust the Bike’s Gearing and Brakes

Make sure you adjust the gearing and brakes on your bike to optimize its performance. To start, check the bike’s suspension and make any necessary adjustments. This will ensure a smooth ride and prevent any unnecessary strain on the motor.

Advertisement

Next, upgrade the bike’s tires to ones that are suitable for electric biking. Look for tires with a high traction rating and puncture resistance, as these will provide better control and durability.

In terms of the bike’s gearing, consider installing a wider gear range cassette to accommodate the added weight and power of the electric motor. Additionally, adjust the derailleur to ensure smooth and precise shifting between gears.

Once you have made these adjustments, you can proceed to the next step of test riding and fine-tuning the electric bike to ensure everything is working properly.

Test Ride and Fine-Tune the Electric Bike

Once you’ve made the necessary adjustments, take the electric bike for a test ride to ensure its performance and then fine-tune any remaining issues.

Testing the electric bike’s performance is crucial to ensure its functionality and safety. Start by checking the responsiveness of the motor and the overall power output. Ensure that the bike accelerates smoothly and maintains a consistent speed. Pay attention to any unusual noises or vibrations that may indicate a problem with the motor or other components.

Advertisement

Additionally, test the brakes to ensure they engage properly and bring the bike to a quick and controlled stop. Troubleshoot common issues such as battery life, range, and display accuracy.

Fine-tune any remaining issues to optimize the electric bike’s performance. With the necessary adjustments made, you can now enjoy your new electric mountain bike!

Enjoy Your New Electric Mountain Bike!

Now that you have your new e-mountain bike, it’s time to enjoy the ride! Electric mountain biking brings numerous benefits that enhance your overall experience on the trails.

Firstly, the electric assist system provides additional power, allowing you to conquer steeper climbs and go farther than ever before. It also reduces the strain on your muscles, making it easier to navigate challenging terrain.

To ensure your electric mountain bike remains in optimal condition, it’s essential to perform regular maintenance and care. Keep the battery charged and store it in a cool, dry place when not in use. Clean the bike after each ride, paying special attention to the drivetrain and suspension components. Regularly inspect the brakes, tires, and gears for any signs of wear or damage. Additionally, lubricate the chain and other moving parts to prevent rust and ensure smooth operation.

Advertisement

By following these tips and maintaining your electric mountain bike properly, you can continue to enjoy thrilling rides and make the most out of your new e-biking adventure.

Frequently Asked Questions

How long does it take to install an electric conversion kit on a mountain bike?

The installation time for an electric conversion kit on a mountain bike can vary depending on the individual’s experience and the complexity of the kit. However, the benefits of electric conversion include increased speed and easier uphill rides.

What is the average cost of an electric conversion kit for a mountain bike?

The average cost of an electric conversion kit for a mountain bike varies depending on the type of kit you choose. There are several types available, each with their own pros and cons.

Can I install an electric conversion kit on any type of mountain bike?

Yes, electric conversion kits can be installed on most types of mountain bikes. It’s important to consider the pros and cons of converting a mountain bike into an electric bike, as well as how to choose the right electric conversion kit for your specific bike.

How much weight does an electric conversion kit add to a mountain bike?

The weight added by an electric conversion kit to a mountain bike depends on the specific kit, but it typically ranges from 15-25 pounds. This additional weight can impact the bike’s performance, making it slightly slower and less maneuverable.

Advertisement

Can I still use my mountain bike as a regular bike after installing an electric conversion kit?

Yes, you can still use your mountain bike as a regular bike after installing an electric conversion kit. However, there are potential drawbacks such as added weight and decreased maneuverability. To maintain your electric mountain bike, regularly check the battery, motor, and wiring for any issues. Keep the bike clean and lubricate the chain regularly.

Conclusion

Well, I must say, turning my mountain bike into an electric bike was quite the adventure!

From assessing compatibility to choosing the right conversion kit and gathering the necessary tools, it was no small feat.

But let me tell you, the end result was worth every ounce of effort. Riding my new electric mountain bike feels like soaring through the air on a cloud of pure exhilaration. The power and speed are simply mind-blowing.

It’s an experience like no other, and I can’t wait to hit the trails again.

Advertisement

Continue Reading
Advertisement

Affiliate disclaimer

As an affiliate, we may earn a commission from qualifying purchases. We get commissions for purchases made through links on this website from Amazon and other third parties.

About us

We are a passionate team driven by the belief that cycling is a fantastic and accessible way to stay active while enjoying the beauty of the outdoors. Our mission is to share our love for cycling with as many people as possible. We provide a welcoming environment for individuals of all ages, abilities, and backgrounds to come together and ride bikes. With Ralf’s visionary leadership, Zane’s expertise in cycling adventures, and Olivia’s dedication to community building, we strive to create a vibrant space where everyone can experience the joy of cycling. Through group rides, workshops, and inclusive events, we inspire and empower individuals to embrace an active lifestyle. Join us in our quest to pedal together, embrace the joy of cycling, and foster connections that last a lifetime.

Advertisement

Trending