Connect with us

Electric Bike

How To Start An Electric Bike Without A Key

Published

on

An image capturing a person effortlessly activating an electric bike by swiftly turning the handlebars, simultaneously pressing a concealed button on the frame, while wearing a glove with a built-in fingerprint scanner

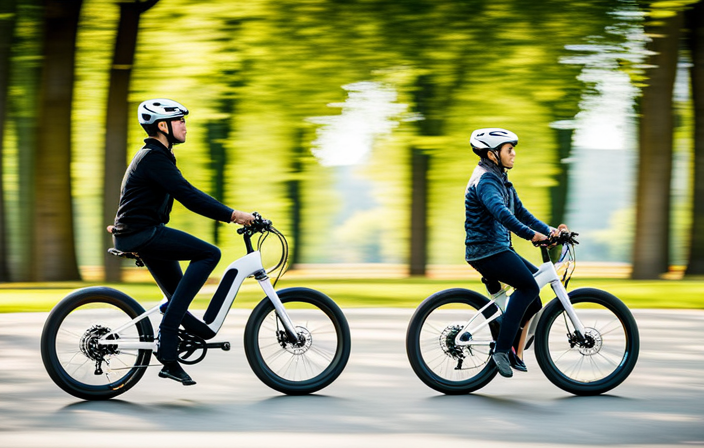
Exploring the mysteries of an electric bicycle can be just as thrilling as cruising down the open road. Occasionally, though, the ignition key is elusive. Have no fear, as I am here to help you navigate the complex steps of starting an electric bike without a key.

From hidden key slots to hotwiring techniques, I will arm you with the knowledge and confidence needed to bypass this minor setback and embark on your two-wheeled adventure.

So, let’s dive into the world of electrifying innovation and discover the art of starting an electric bike without a key.

Key Takeaways

  • Different starting methods for electric bikes include Bluetooth-enabled smartphone app, RFID tag or card, push start method, and consulting the bike’s manual or contacting the manufacturer for assistance.
  • The benefits of these different starting methods include convenience and ease of use, increased security with authentication, customization and control over bike settings, and revolutionizing the way you start your rides.
  • Precautions for using the push start method include ensuring the bike is in neutral gear and the brakes are engaged, clearing the area of obstacles or pedestrians, gaining momentum and releasing the brakes before engaging the throttle, and consulting the bike’s manual for specific instructions.
  • If you need to start an electric bike without a key, you can seek manufacturer assistance by providing the bike’s serial number or identification code, and they can provide reliable support, guidance on alternative ignition methods, and temporary solutions until a replacement key is obtained.

Check for a Hidden Key Slot

You should start by checking if there’s a hidden key slot. Some electric bikes come with a hidden key slot as an alternative starting method. This slot is usually located discreetly on the bike’s frame or under a cover. Look for any unusual markings or small slots that could potentially house a key.

Once you locate the hidden key slot, insert the key and turn it to start the bike. If you can’t find a hidden key slot, don’t worry. There are alternative starting methods available.

In the subsequent section, I will explain how to use a screwdriver or similar tool to turn the ignition without the need for a key.

Advertisement

Use a Screwdriver or Similar Tool to Turn the Ignition

To turn on the ignition of an e-bike, simply grab a screwdriver or a similar tool and use it to activate the switch. This method allows you to bypass the ignition system on an electric bike and start it without a key. It’s important to note that this should only be done if you have legal access to the bike and are the rightful owner. Using alternative methods to start an electric bike can be a useful skill to have in certain situations, such as when you’ve lost your key or if the ignition system is faulty. However, it’s always recommended to use the proper key or seek professional assistance when possible. If this method doesn’t work for you, the next step you can try is using a universal key.

Try Using a Universal Key

If you’re in a situation where you don’t have access to the proper key, consider using a universal key to try and activate the ignition.

The use of a universal key for electric bikes has both pros and cons. One advantage is that it can potentially bypass the need for a specific key, allowing you to start the bike without any hassle. However, there are some common challenges faced when starting an electric bike without a key using a universal key.

Firstly, not all universal keys are compatible with every electric bike model, so there is a risk of the key not working at all. Additionally, using a universal key may not be legal in some jurisdictions, as it could be seen as an attempt to bypass security measures.

Transitioning into the next section about using wire to hotwire the bike, exploring alternative methods can be helpful in situations where a universal key is not an option.

Advertisement

Use Wire to Hotwire the Bike

To hotwire the bike, locate the ignition wires and use a wire to bypass the need for a key.

When it comes to wire hotwiring alternatives, there are a few options to consider. One method involves finding the wires that connect directly to the ignition switch and using a wire to connect them, effectively simulating the action of turning the key.

Another option is to find the wires that connect to the bike’s battery and use a wire to create a direct connection, bypassing the need for the ignition altogether.

Both methods have their pros and cons. The first method may be more convenient, as it imitates the key turning action, but it can also be more complicated to execute. On the other hand, the second method is simpler, but it may require some additional knowledge of the bike’s electrical system.

It is important to take proper safety precautions when hotwiring an electric bike, such as wearing insulated gloves and ensuring that the bike is in a safe, stable position.

Advertisement

With these wire hotwiring alternatives in mind, we can now move on to the next section about disconnecting the ignition switch and using a wire to start the bike.

Disconnect the Ignition Switch and Use a Wire to Start the Bike

First, disconnect the ignition switch and use a wire to bypass the need for a key to get the bike running.

This method involves disconnecting the ignition switch from the bike’s electrical system, effectively cutting off its connection to the key.

Advertisement

To do this, locate the ignition switch, which is usually located near the handlebars or under the seat. Use a wrench or pliers to disconnect the wires connected to the switch.

Once the ignition switch is disconnected, find a wire that is capable of carrying an electrical current and connect it to the two wires previously connected to the switch.

This will effectively bypass the ignition system and allow the bike to start without a key.

However, if you are uncomfortable with performing these steps, it is advised to call a locksmith for assistance.

Call a Locksmith for Assistance

You should consider calling a locksmith to assist you with the current subtopic. When faced with the challenge of starting an electric bike without a key, consulting a professional locksmith can provide valuable expertise and ensure a safe solution.

Advertisement

A locksmith has the necessary tools and knowledge to bypass the ignition switch and start the bike for you. Additionally, they can offer advice on how to prevent future lockouts and recommend security measures to protect your electric bike.

If you prefer to explore alternative options, you can also consider searching for online tutorials or consulting a trusted friend who has experience with electric bikes. However, it is crucial to exercise caution and prioritize your safety.

Transitioning into the subsequent section, let’s explore the option of using a keyless ignition system.

Use a Keyless Ignition System

Using a keyless ignition system can provide a convenient solution for starting an electric bike. This wireless ignition system utilizes proximity sensor technology to detect the presence of a key fob or smartphone in close proximity to the bike. Once the bike senses the key fob or smartphone, it activates the ignition system, allowing the bike to be started without the need for a physical key.

The keyless ignition system offers a range of benefits, including enhanced security and ease of use. With this system, there is no risk of losing or misplacing a key, as long as the key fob or smartphone is kept nearby. Additionally, the keyless ignition system can be easily programmed to recognize multiple key fobs or smartphones, making it ideal for shared or rental bikes.

Advertisement

To further explore starting an electric bike without a key, the next section will discuss how to replace the ignition switch.

Replace the Ignition Switch

To replace the ignition switch, it’s necessary to follow a few simple steps.

First, locate the ignition barrel, which is usually located near the handlebars.

Next, disconnect the battery to ensure safety during the replacement process.

Then, remove any covers or panels that may be obstructing access to the ignition switch.

Advertisement

Once the switch is exposed, use a screwdriver or wrench to unscrew and remove it from its housing.

Take note of the wire connections and their positions, as you will need to reconnect them to the new switch.

Finally, insert the new ignition switch into the housing and secure it with screws.

Reconnect the wires according to their original positions.

With the ignition switch successfully replaced, you can now move on to installing a remote start system, which will provide a keyless start option for your electric bike.

Advertisement

Install a Remote Start System

Once the ignition switch has been successfully replaced, it’s time to install a remote start system for easy keyless access to your electric bike. Installing a remote start system offers several benefits, including enhanced convenience and security. Here are three key steps to follow:

  1. Identify a suitable location: Find a secure and easily accessible spot on your bike to mount the remote start system. It should be within reach but not obstructive during your ride.

  2. Connect the wiring: Carefully connect the wires from the remote start system to the corresponding terminals on your bike’s ignition system. Ensure a secure and reliable connection to avoid any electrical issues.

  3. Test and program: Once the installation is complete, test the remote start system to ensure it functions properly. Follow the manufacturer’s instructions to program the system according to your preferences.

With the remote start system installed, you can now effortlessly start your electric bike without the need for a key.

Next, let’s explore how to use a Bluetooth-enabled smartphone app to start the bike.

Use a Bluetooth-enabled Smartphone App to Start the Bike

After installing the remote start system, you can effortlessly begin your ride by using a smartphone app with Bluetooth capability. This alternative to a traditional key ignition system offers several advantages. Firstly, it provides convenience and ease of use, as you no longer need to carry around a physical key. Instead, you can simply open the app on your Bluetooth-enabled smartphone and start the bike with a tap of your finger. Additionally, a Bluetooth-enabled smartphone app offers increased security, as it requires authentication before allowing the bike to start. This helps prevent unauthorized use and theft. Moreover, the app allows for customization and control over various bike settings, such as speed limits and power modes. With these advantages, using a Bluetooth-enabled smartphone app to start your electric bike revolutionizes the way you begin your rides. Moving on to the next section, another option to start the bike is to use an RFID tag or card.

Use a RFID Tag or Card to Start the Bike

Using an RFID tag or card allows for a convenient and secure way to initiate the bike’s ignition. With an RFID system, you can easily start your electric bike without the need for a key.

Advertisement

Here are some benefits of using an RFID tag:

  • Convenience: Simply swipe the RFID tag or card near the designated reader, and the bike will start instantly.

  • Security: Unlike traditional keys, RFID tags are harder to duplicate, providing an added layer of security for your bike.

  • Customizability: RFID tags can be easily programmed to suit your preferences, allowing you to personalize your bike’s ignition system.

  • Durability: RFID tags are built to withstand harsh environments and can be easily attached to your keychain or wallet.

  • Ease of use: Programming an RFID tag is a straightforward process that can be done using the bike’s control panel or a dedicated smartphone app.

By using an RFID tag or card, you can conveniently start your electric bike while ensuring its security.

Now, let’s explore another method to start the bike without a key – the push start method.

Try a Push Start Method

To try a push start method, simply engage the bike’s gears and give it a push to get it moving. Push starting an electric bike is an alternative starting method that can be useful in situations where the key is lost or the ignition system is not functioning properly.

However, it is important to take certain safety precautions when attempting this method. First, make sure the bike is in neutral and the brakes are engaged to prevent it from rolling away. Next, ensure that the area is clear of any obstacles or pedestrians.

Advertisement

Once these precautions are taken, push the bike forward with enough force to get the wheels spinning. As the bike gains momentum, release the brakes and engage the throttle to start the motor. It is always recommended to consult the bike’s manual for any specific instructions regarding push starting.

Consult the Bike’s Manual for Any Specific Instructions

You should consult the bike’s manual to find any specific instructions on how to start an electric bike without a key. The manual may provide alternative ways to start the bike using a backup battery or other methods. Here are some options you may find in the manual:

  • Look for a hidden button or switch that can be used to start the bike.
  • Connect a separate battery or power source to bypass the key ignition.
  • Use a specific combination of buttons or switches to activate the bike’s ignition system.
  • Try using a key fob or remote control to start the bike.

By following the instructions in the manual, you can safely and effectively start your electric bike without a key. If you encounter any difficulties or if the manual does not provide any alternative methods, it is recommended to contact the manufacturer for further assistance.

Contact the Manufacturer for Assistance

If difficulties arise or if the manual lacks alternative methods, it’s recommended to reach out to the manufacturer for further assistance.

Contacting customer support is a reliable way to obtain guidance on starting an electric bike without a key. They possess extensive knowledge of their products and can offer specific instructions tailored to your bike’s make and model.

Explain your situation to them, providing any relevant information such as the bike’s serial number or identification code. They may be able to guide you through alternative ignition methods or provide you with a temporary solution until a replacement key is obtained.

Advertisement

By utilizing their expertise, you can ensure a safe and efficient start-up process.

Once the issue is resolved, consider getting a spare key made for future situations, ensuring you are always prepared.

Consider Getting a Spare Key Made for Future Situations

Consider obtaining a duplicate key to prepare for future instances. Having a spare key for your electric bike can save you from the hassle of being locked out.

One way to get a key duplicate is by contacting the manufacturer, who may be able to provide you with a replacement key. Another option is to use a key finder device, which can help locate your lost or misplaced key. These devices use Bluetooth technology to connect with your phone and help you track down your key’s location.

When getting a key duplicate, make sure to provide the necessary information and proof of ownership to ensure a smooth process.

Advertisement

By having a spare key and using a key finder device, you can have peace of mind knowing that you are prepared for any future situations.

Frequently Asked Questions

Is it legal to start an electric bike without a key?

Starting an electric bike without a key can have both pros and cons. While it may be convenient, it can also compromise the bike’s security. Additionally, it can potentially impact the bike’s performance if not done correctly.

Are there any risks or potential damages involved in starting an electric bike without a key?

Starting an electric bike without a key poses significant risks and potential damages. It’s like playing with fire, inviting trouble and jeopardizing the bike’s safety and functionality. It’s imperative to use proper methods to avoid such consequences.

Can starting an electric bike without a key void its warranty?

Starting an electric bike without a key can potentially void its warranty and have serious consequences. Manufacturers typically include measures to prevent unauthorized starting, and tampering with these systems can result in costly repairs and warranty invalidation.

What should I do if none of the methods mentioned in the article work for starting my electric bike without a key?

If none of the methods mentioned in the article work for starting my electric bike without a key, I should consider alternative solutions such as checking the battery or contacting a professional for assistance.

Advertisement

Are there any alternative methods or devices available for starting an electric bike without a key?

There are alternative methods and devices available to start an electric bike without a key. Some options include using a remote start device, installing a push-button ignition system, or utilizing a fingerprint recognition system for secure access.

Conclusion

So, there you have it folks. If you ever find yourself in a situation where you need to start your electric bike without a key, fear not! With a little bit of ingenuity and some handy tools, you can be back on the road in no time.

Just remember, these methods should only be used in emergency situations or if you have explicit permission from the bike’s owner. And of course, always consult the bike’s manual or contact the manufacturer for assistance.

Happy riding, and may your keys never mysteriously disappear again!

Advertisement

Ralf is a devoted husband and father who loves spending time with his family. He enjoys riding his bicycle as much as possible, and takes every opportunity he can to get out on the open road. Ralf is a kind and gentle person who wants only the best for those around him.

Continue Reading
Advertisement

Electric Bike

How To Turn My Bicycle Into An Electric Bike

Published

on

By

An image of a person effortlessly cruising on their bike, with a sleek battery pack seamlessly integrated into the frame

I have always fantasized about gliding effortlessly down the streets on my bike, with the wind in my hair and the excitement of speed.

Well, I found a way to make that dream a reality: turning my ordinary bicycle into an electric bike! With just a few simple steps, I’ll show you how to transform your trusty two-wheeler into a powerful and eco-friendly machine.

So grab your tools and let’s get started on this electrifying adventure!

Key Takeaways

  • Assess the condition of your bike’s frame, wheels, brakes, gears, and drivetrain to ensure compatibility and identify any necessary repairs or replacements.
  • Research and choose the right conversion kit based on factors such as motor power, battery capacity, and compatibility with your bike’s frame and fork.
  • Consider the pros and cons of different types of conversion kits, such as hub motor, mid-drive, and front wheel, to determine which one best suits your needs and preferences.
  • Properly install the conversion kit by removing the front or rear wheel, attaching the electric motor, and ensuring compatibility with your bike’s frame and fork. Test the system and troubleshoot any issues before connecting the battery. Regularly maintain and adjust your electric bike for optimal performance and safety.

Assess Your Bike’s Compatibility

Before you begin, make sure your bike’s frame and components are compatible with an electric conversion kit. Assessing your bike’s condition is crucial to ensure a successful conversion. Start by examining the frame for any cracks, dents, or damage that may compromise its integrity. Check the wheels for true alignment and ensure they spin freely. Inspect the brakes, gears, and drivetrain components for wear and tear, as they may need to be replaced or adjusted.

Advertisement

Once you have assessed your bike’s condition, it’s time to find the right conversion kit. Consider factors such as motor power, battery capacity, and compatibility with your bike’s frame and components. Research different brands and models to find the kit that best suits your needs.

Now that you have assessed your bike’s condition and found the right conversion kit, it’s time to gather the necessary tools and materials.

(Note: The subsequent section about gathering the necessary tools and materials is not included in this response)

Gather the Necessary Tools and Materials

To get started, you’ll need to gather the tools and materials necessary for the conversion.

First, assess your bike’s condition to ensure it is suitable for the conversion. Look for a sturdy frame, well-functioning brakes, and a drivetrain that can handle the extra power.

Advertisement

Next, consider your battery options. Determine the voltage and capacity needed based on your desired range and riding conditions. You may opt for a lithium-ion battery for its lightweight and long lifespan.

Additionally, gather tools such as wrenches, screwdrivers, and a torque wrench to assist with the installation.

Once you have everything ready, you can move on to choosing the right conversion kit, which will provide you with the necessary components to turn your bike into an electric one seamlessly.

Choose the Right Conversion Kit

Advertisement

When it comes to converting a bicycle into an electric bike, choosing the right conversion kit is crucial. There are three main types to consider: the Hub Motor Conversion Kit, the Mid-Drive Conversion Kit, and the Front Wheel Conversion Kit.

Each kit has its own advantages and considerations, so it’s important to understand the differences and choose the one that best suits your needs and preferences.

Hub Motor Conversion Kit

You can easily transform your bicycle into an electric bike by installing a hub motor conversion kit. Evaluating the performance of your hub motor conversion kit is crucial to ensure optimal functionality.

One way to assess performance is by testing the speed and torque capabilities of the motor. Troubleshooting common issues such as battery life and motor overheating is essential for maintaining the longevity of your electric bike.

If you notice decreased battery life, it could be due to a faulty battery or incorrect charging habits. Overheating can be caused by excessive use or insufficient cooling mechanisms.

Advertisement

Transitioning into the next section about the mid-drive conversion kit, it is important to consider the benefits and features of this alternative conversion option.

Mid-Drive Conversion Kit

Installing a mid-drive conversion kit allows for a more efficient transfer of power from the motor to the bike’s gears. Here are four key reasons why a mid-drive conversion is advantageous:

  1. Improved Performance: Unlike hub motors, mid-drive motors are located near the bike’s bottom bracket, which provides a better center of gravity and weight distribution. This results in enhanced handling and maneuverability.

  2. Increased Range: Mid-drive systems utilize the bike’s existing gears, allowing for a wider range of speeds and more efficient power usage. This translates to longer battery life and a greater overall range.

  3. Better Hill Climbing: With the motor directly driving the bike’s gears, mid-drive conversions excel at tackling steep inclines. The additional torque from the motor combined with gear optimization makes uphill rides easier and more enjoyable.

  4. Maintenance Simplicity: Since mid-drive conversions use the bike’s existing drivetrain, maintenance and repairs are straightforward. There’s no need for specialized tools or additional components, reducing the complexity and cost of upkeep.

Transitioning to the subsequent section about the ‘front wheel conversion kit,’ I realized that another common option for turning a regular bike into an electric one is by using a front wheel conversion kit.

Front Wheel Conversion Kit

Using a front wheel conversion kit can transform your regular bicycle into an electric one. When considering the conversion, it’s important to weigh the pros and cons of a front wheel conversion versus a rear wheel conversion.

While a front wheel conversion offers easier installation and maintenance, it may affect the balance and steering of your bike. On the other hand, a rear wheel conversion provides better traction and stability but can be more challenging to install.

Advertisement

To upgrade your front wheel for an electric bike, choosing the right tire is crucial. Opt for a tire with good traction and durability to handle the increased power and weight of the electric motor. Look for a tire with a higher load rating and puncture-resistant features to ensure a smooth and safe ride. Additionally, consider the terrain you’ll be riding on and select a tire with appropriate tread patterns for optimal performance.

Transitioning to the subsequent section about removing the front wheel or rear wheel, it’s important to understand the process to safely proceed with the conversion.

Remove the Front Wheel or Rear Wheel

To remove the front wheel or rear wheel, simply start by releasing the quick-release lever. Here’s a step-by-step guide on how to do it:

  1. Front Wheel Conversion:

    • Benefits: Easy installation, no need to modify the drivetrain, and can be easily transferred between bikes.
    • Pros: Lightweight design, allows for regenerative braking, and provides a balanced feel.
    • Cons: Limited traction on slippery surfaces, less stability during turns, and potential for wheel misalignment.
  2. Rear Wheel Conversion:

    • Process: Begin by shifting to the smallest rear cog, then loosen the rear derailleur and chain tensioner. Disconnect the motor cable and remove the wheel.
    • Challenges: Rear wheel conversion requires more mechanical knowledge and might involve modifying the drivetrain. It may also affect the bike’s balance and handling.

Now that we’ve removed the wheel, let’s move on to the next step of installing the electric motor.

Install the Electric Motor

Now that the wheel is removed, let’s go ahead and attach the electric motor. Installing an electric motor on a bicycle can be a great way to transform it into an electric bike.

To begin, ensure that the motor is compatible with your bike’s frame and fork. Most electric motors are designed to fit standard bicycle frames, but it’s always a good idea to double-check.

Advertisement

Next, carefully mount the motor onto the front or rear fork using the provided brackets and bolts. Make sure the motor is securely attached and aligned with the wheel.

Once installed, connect the motor to the bike’s drivetrain using the appropriate chain or belt. Troubleshooting common issues such as loose connections or misaligned motor can help ensure a smooth installation process.

Now, let’s move on to the next step and connect the controller and battery.

Connect the Controller and Battery

First, you’ll need to ensure that the controller and battery are compatible with each other and your bike’s electrical system. Connecting the controller and battery is a crucial step in converting your bicycle into an electric bike. Here are some key points to keep in mind:

  • Check the voltage requirements of your controller and battery to ensure they match.
  • Connect the positive and negative terminals of the battery to the corresponding terminals on the controller.
  • Secure the connections with appropriate connectors or soldering.
  • Double-check the wiring to ensure there are no loose connections or exposed wires.
  • Test the connection by turning on the controller and checking if it powers up.

Troubleshooting common issues with the controller and battery connection includes checking for loose connections, damaged wires, or blown fuses.

Once the controller and battery are successfully connected, you can move on to the next step of mounting the battery securely on your bike.

Advertisement

Mount the Battery

Make sure you have a sturdy and secure location on your bike to mount the battery. The mounting technique will depend on the type of battery you have and the design of your bike frame.

There are a few common techniques for mounting electric bike batteries. One method is using a battery rack, which attaches to the rear of the bike frame and provides a platform for the battery to sit on. Another option is using a frame bag, which is a bag that attaches to the frame and houses the battery inside.

The battery capacity is an important consideration when choosing a mounting technique. A larger battery will require a more robust mounting system to ensure stability and prevent damage.

Once you have securely mounted the battery, you can move on to installing the throttle and brake levers.

Install the Throttle and Brake Levers

To install the throttle and brake levers, you’ll need to carefully attach them to your handlebars using the provided hardware. Assessing compatibility is crucial before choosing the right conversion kit for your electric bike project. Here are some key considerations to keep in mind:

Advertisement
  • Ensure that the throttle and brake levers are compatible with your bike’s handlebars.
  • Check if the conversion kit you’ve chosen includes the necessary hardware for installation.
  • Verify that the throttle and brake levers are compatible with the motor and battery system you’re using.
  • Take into account the position and ergonomics of the levers for comfortable and efficient control while riding.
  • Consider the type of braking system on your bike, as some conversion kits may require specific types of brake levers.

Once you have successfully attached the throttle and brake levers, you can proceed to connect the wiring and test the system.

Connect the Wiring and Test the System

After successfully installing the throttle and brake levers, it is time to connect the wiring and test the system.

This step is crucial to ensure that all components are properly connected and functioning before taking your electric bike for a spin.

To begin, gather all the necessary wires and connectors provided in your conversion kit. Follow the manufacturer’s instructions carefully to connect the wires to their respective terminals on the battery, motor, and controller.

Once the wiring is complete, double-check all connections for any loose or damaged wires.

Next, it’s time to test the system. Turn on the battery and engage the throttle to see if the motor responds accordingly. If any issues arise, consult the troubleshooting tips in the conversion kit manual to identify and resolve the problem.

Advertisement

Once the system is tested and functioning correctly, you can proceed to the next section on adjusting the gears and brakes.

Adjust the Gears and Brakes

Now that the wiring and system test are complete, it’s time to adjust the gears and brakes on your electric bike.

Properly adjusting the gear ratios is crucial to ensure smooth and efficient shifting. Start by identifying the gear that needs adjustment. Use the barrel adjuster on the derailleur to fine-tune the cable tension, ensuring the chain moves smoothly between gears.

To maintain brake performance, check the brake pads for wear and adjust if necessary. Align the brake pads with the rim, making sure they don’t rub against the tire. Adjust the brake cable tension using the barrel adjuster until you achieve the desired stopping power.

Once the gears and brakes are properly adjusted, it’s time to secure and protect the wiring to prevent any damage or interference with the bike’s functionality.

Advertisement

Secure and Protect the Wiring

Securing and protecting the wiring is essential to ensure the proper functionality of your electric bike. To effectively manage your wires and prevent any potential damage, consider the following techniques:

  • Use zip ties: Secure the wires to the frame of the bike using zip ties. This will keep them in place and prevent them from getting tangled or snagged.

  • Route the wires properly: Make sure the wires are routed away from any moving parts, such as the pedals or the wheels. This will minimize the risk of them getting caught or damaged.

  • Use waterproof connectors: Invest in waterproof connectors to protect the electrical connections from moisture. This will prevent any short circuits or damage caused by water exposure.

  • Apply silicone sealant: Apply silicone sealant to any exposed connections or junctions to provide an extra layer of protection against water and moisture.

By implementing these wire management and waterproofing techniques, you can ensure the longevity and reliability of your electric bike’s electrical system.

Now, let’s move on to the next section and get ready for a test ride and some adjustments.

Test Ride and Adjust

Take a moment to hop on the bike and adjust the seat height and handlebars to ensure a comfortable riding position. This step is crucial before embarking on a test ride.

Not only will it enhance your riding experience, but it will also prevent potential discomfort or strain during longer journeys. Adjust the seat height so that your legs are almost fully extended when the pedal is at its lowest point. This allows for efficient pedaling and reduces the risk of knee injuries.

Advertisement

Next, adjust the handlebars to a position that feels natural and allows for easy control of the bike. Once you’ve made these adjustments, take your electric bike for a test ride to fully experience its benefits.

Now, let’s move on to how to maintain your electric bike without compromising its performance.

Maintain Your Electric Bike

To keep your electric bike in top condition, regular maintenance is essential. Here are three key maintenance tasks you should prioritize:

  1. Safety precautions: Before performing any maintenance, make sure the bike is powered off and the battery is disconnected. This prevents accidental shocks or damage to the electrical components.

  2. Battery maintenance: The battery is the heart of your electric bike, so it’s crucial to take care of it. Regularly check the battery connections for any corrosion or loose wires. Clean them if necessary. Also, avoid storing the battery in extreme temperatures, as it can affect its performance and lifespan.

  3. Inspect and clean: Regularly inspect the bike for any loose bolts, worn-out brake pads, or damaged wires. Clean the bike thoroughly, especially the drivetrain, to prevent dirt and debris from causing premature wear.

By following these maintenance tasks, you can ensure the longevity and optimal performance of your electric bike.

Now, let’s move on to the next section and discuss the importance of following safety guidelines.

Advertisement

Follow Safety Guidelines

Make sure you adhere to safety guidelines when operating your electric bike to prevent accidents and injuries. Safety precautions are crucial to ensure a smooth and secure riding experience. Here are some key safety measures and riding techniques to keep in mind:

Safety Precautions Riding Techniques
Wear a helmet Maintain a proper posture
Use reflective gear Keep a safe distance
Observe traffic rules Signal your intentions
Check brakes regularly Be aware of road conditions
Avoid distractions Use hand signals

Enjoy Your New Electric Bike!

Now that you’ve got your new electric bike, it’s time to have fun and enjoy the ride!

Electric bikes offer numerous benefits, such as increased speed and reduced effort while pedaling.

To ensure a smooth and enjoyable ride, it’s crucial to choose the right battery for your electric bike. The battery is the heart of your e-bike and determines its range and power.

When selecting a battery, consider factors like capacity, voltage, and weight. Higher capacity batteries will provide longer rides, while higher voltage batteries will offer more power and speed.

Advertisement

Additionally, be mindful of the battery’s weight, as it can affect the overall balance and handling of your electric bike.

Frequently Asked Questions

How can I ensure that my bike is compatible for an electric conversion?

To ensure compatibility for an electric conversion, check the compatibility of your bike’s frame, fork, and wheel size with electric bike batteries and the motor power you desire. Consult the manufacturer’s specifications for more information.

What tools and materials will I need to gather before starting the conversion process?

To embark on the conversion process, I must gather a set of essential tools and materials. Tools needed include wrenches, pliers, wire cutters, and a soldering iron. Materials required encompass an electric motor, battery, controller, and wiring components.

What factors should I consider when choosing the right conversion kit for my bike?

When choosing the right conversion kit for my bike, I consider factors such as the electric bike conversion cost and the benefits of converting a bicycle to electric. It’s important to find a kit that fits my budget and meets my needs.

Do I need to remove the front wheel or rear wheel during the conversion process?

During the conversion process, the front wheel does not need to be removed, but the rear wheel does. Removing the rear wheel allows for the installation of the electric motor and the necessary components for an electric bike conversion.

Advertisement

How do I maintain and take care of my electric bike after the conversion?

To maintain and take care of my electric bike, I should regularly check the battery level, clean the bike and components, tighten any loose bolts, lubricate the chain, and inspect for any wear or damage. Troubleshooting common issues may include checking connections and contacting the manufacturer for assistance.

Conclusion

In conclusion, converting my bicycle into an electric bike was a challenging but rewarding experience. I assessed my bike’s compatibility, gathered the necessary tools and materials, and chose the right conversion kit.

Removing the rear wheel and installing the electric motor required careful attention to detail. After a successful test ride and adjustments, I now have a brand new electric bike.

One interesting statistic to note is that electric bikes are gaining popularity, with sales increasing by 52% in the United States in 2020 alone. This demonstrates the growing interest and demand for eco-friendly transportation options.

Advertisement

Continue Reading

Electric Bike

How To Turn On Light On Electric Bike

Published

on

By

An image that depicts a person wearing a helmet, effortlessly flipping a switch on the handlebar of an electric bike, as a bright beam of light illuminates the road ahead, casting a warm glow onto the surroundings

Light up your way and make sure you stay safe with just a quick flip of a switch on your electric bike. This detailed guide will take you through the easy steps of how to turn on the light on your electric bike.

From locating the light switch to understanding different light modes, I will provide you with all the necessary information to keep you visible during your rides.

Let’s shed some light on how to activate the light on your electric bike.

Key Takeaways

  • Additional lights on an electric bike improve visibility in low-light conditions.
  • Regularly checking and maintaining the battery level ensures the lights are always ready to provide visibility.
  • Using recommended batteries and charging or replacing them as needed is important for the proper functioning of the lights.
  • Cleaning and maintaining the lights regularly helps maintain brightness and longevity.

Locate the Light Switch on Your Electric Bike

To brighten your ride, let’s find the switch that’ll illuminate your path on your electric bike.

Advertisement

Electric bike light features can vary depending on the model, but most bikes have a dedicated switch for turning on the lights.

Start by locating the control panel or handlebar display on your electric bike. Look for a button or switch labeled ‘lights’ or with a light bulb symbol.

Press or toggle the switch to turn on the lights.

If you’re having trouble finding the switch, refer to your bike’s user manual for specific instructions.

Once you’ve found and activated the light switch, you can ensure your electric bike is powered on to fully enjoy your well-lit ride.

Advertisement

Ensure Your Electric Bike is Powered On

Make sure your e-bike is all revved up and ready for action!

Before you can turn on the light on your electric bike, it’s essential to ensure that your bike is powered on. First, check if the battery is properly connected and fully charged.

Inspect the power switch on your electric bike and make sure it is in the ‘on’ position. If your electric bike has a display panel, check if it is functioning correctly and displaying the battery level. If not, troubleshoot any issues by referring to the user manual or contacting customer support.

Once you have confirmed that your electric bike is powered on, you can proceed to check if the light is pre-installed or requires installation.

Check if the Light is Pre-installed or Requires Installation

Advertisement

Before we get into it, let’s find out if the headlight on your e-bike is already set up or needs to be installed. To determine this, refer to the manufacturer’s instructions or check the specifications of your electric bike model. Some electric bikes come with pre-installed headlights, while others require installation. If your e-bike does not have a pre-installed light, you will need to purchase one separately. To install the light, follow the instructions provided by the manufacturer. Troubleshooting common issues with the light might involve checking the wiring connections, ensuring the battery is fully charged, or replacing a faulty light bulb. Once you have confirmed whether your e-bike has a pre-installed light or requires installation, you can proceed to the next section to install the light if necessary.

Install the Light if Necessary

If your e-bike does not come with a pre-installed headlight, you’ll need to purchase and install one separately to ensure safe nighttime riding. Installing a light on your electric bike is a straightforward process, but it requires attention to detail.

First, choose a headlight that is compatible with your e-bike’s power source and mounting system. Read the manufacturer’s instructions carefully to understand the installation steps. Generally, you will need to mount the light securely on the handlebars or the front fork using the provided brackets or straps.

After mounting the light, connect it to the power source, making sure the wires are properly secured and insulated. Finally, test the light to ensure it is working correctly. If you encounter any issues, refer to the troubleshooting section in the manufacturer’s manual.

Advertisement

Now that the light is installed, let’s move on to identifying the different light modes for optimal visibility.

Identify the Light Modes (e.g., steady, flashing, etc.)

Switch on the illuminating beam and explore the various light modes available on your e-bike for enhanced visibility during nighttime rides. Having proper lighting on your electric bike is crucial for safety on the road. Different light modes offer different benefits and can help you be seen by other vehicles.

Here are the various light modes you may find on your electric bike:

Advertisement
  1. Steady mode: This mode provides a constant source of light, ensuring visibility throughout your ride.
  2. Flashing mode: This mode emits intermittent flashes of light, making you more noticeable to others on the road.
  3. Strobe mode: This mode produces rapid and repetitive flashes, further increasing your visibility.
  4. Pulse mode: This mode creates a pulsating effect, catching the attention of drivers and pedestrians.

Understanding these different light modes will help you choose the most appropriate option for your specific riding conditions. Once you have identified the desired light mode, you can turn the light switch to the on position and continue your ride safely.

Turn the Light Switch to the On Position

Illuminate your path and ensure your safety by flipping the switch and activating the brilliant glow of your e-bike’s guiding light.

To turn on the light on your electric bike, you need to locate and install a light switch. The switch is usually located on the handlebars for easy access. Once you have located the switch, simply press or slide it to the ‘On’ position.

If the light doesn’t turn on, you might be facing some troubleshooting issues. Check if the light switch is properly connected and if there are any loose wires. Additionally, ensure that the battery of your e-bike is fully charged. If you are still having trouble, consult the user manual or contact the manufacturer for further assistance.

Now that your light is turned on, let’s move on to adjusting the light angle for optimal visibility.

Adjust the Light Angle for Optimal Visibility

Make sure you position the guiding light on your e-bike at the perfect angle to illuminate your path as brightly as a thousand suns.

Advertisement

Achieving the optimal lighting angle is crucial for ensuring maximum visibility while riding. Adjusting the light angle correctly will allow the beam to reach a wider area, enhancing your safety on the road.

By directing the light slightly downwards, you can illuminate the path in front of you while avoiding blinding other road users. It is essential to find the right balance between illuminating the road and preventing glare.

Remember, the importance of visibility cannot be overstated when it comes to riding at night or in low-light conditions.

Once you have adjusted the light angle, proceed to test the light to ensure it is functioning properly and ready for your next adventure.

Test the Light to Ensure it is Functioning Properly

Now, take a moment to confirm that your e-bike’s guiding light is functioning properly before embarking on your next adventure.

Advertisement

To test the light, follow this simple procedure and keep these troubleshooting tips in mind:

  • Ensure the e-bike is turned on and the battery is adequately charged.
  • Check the connection between the light and the wiring harness. Ensure it is securely fastened and free from any damage or corrosion.
  • Activate the light switch on your handlebar control panel. Observe if the light turns on and adjust the brightness settings if necessary.

By performing this test, you can ensure that your e-bike’s light is functioning optimally and will provide the visibility you need during nighttime rides for enhanced safety.

Now, let’s move on to how to use the light during nighttime rides for your utmost safety.

Use the Light during Nighttime Rides for Safety

Enhance your nighttime rides with a reliable source of illumination by utilizing the guiding light on your e-bike. Using the light during nighttime rides is essential for safety and provides several benefits.

Firstly, it increases your visibility to other road users, reducing the risk of accidents. Additionally, it allows you to see the road ahead clearly, avoiding any potential obstacles or hazards.

When choosing the right bike light for your electric bike, consider its brightness and beam pattern. A bright light with a wide beam angle will provide better visibility. Look for lights that are waterproof and have a long battery life to ensure they last throughout your ride.

Advertisement

Furthermore, consider using additional lights for enhanced visibility, such as a rear light and reflective accessories.

By utilizing these tips, you can ride confidently and safely during nighttime adventures.

Consider Using Additional Lights for Enhanced Visibility

For an added layer of safety and increased visibility, don’t forget about the power of additional lights during nighttime rides.

Enhanced visibility is crucial when riding an electric bike in low-light conditions, as it allows other road users to see you more easily. By using additional lights, such as front and rear LED lights, you can significantly improve your visibility and reduce the risk of accidents. These lights are designed to be bright and eye-catching, ensuring that you stand out on the road.

It’s important to note that the importance of additional lights should not be underestimated, especially when riding on busy roads or in areas with limited street lighting. By regularly checking the light’s battery level, you can ensure that your lights are always ready to provide the visibility you need for a safe ride.

Advertisement

Regularly Check the Light’s Battery Level

Make sure you keep an eye on your lights’ battery level to ensure they are always ready to illuminate your path during nighttime rides. Here are four steps to follow when checking and recharging your electric bike’s light batteries:

  1. Start by turning on your lights to see if they are functioning properly. If they appear dim or flicker, it might be an indicator of a low battery.

  2. Locate the battery compartment on your electric bike and open it carefully. Check the battery level indicator to see how much charge is remaining.

  3. If the battery level is low, connect the charger to the battery and plug it into a power source. Allow the batteries to recharge fully before disconnecting them.

  4. Regularly check the battery level and recharge the batteries as needed to ensure your lights are always ready for use.

By checking and recharging your electric bike’s light batteries regularly, you can ensure a safe and enjoyable nighttime ride.

Transitioning to the next section, it is important to charge or replace the batteries as needed to maintain optimal performance.

Charge or Replace the Light’s Batteries as Needed

To ensure you always have a reliable source of illumination, keep an eye on the battery level of your lights and be ready to charge or replace them when necessary.

Proper battery maintenance is crucial for the longevity and efficiency of your electric bike’s lights.

Advertisement

Firstly, make sure to use the correct type of batteries recommended by the manufacturer.

Regularly check the battery contacts for any signs of corrosion and clean them if necessary.

If the battery level is low, charge them using the provided charger.

If the batteries are no longer holding a charge, it’s time to replace them with new ones.

Troubleshooting tip: if the lights are not turning on even with fully charged batteries, check for loose connections or damaged wiring.

Advertisement

Once you have charged or replaced the batteries, you can move on to cleaning the lights and removing any dirt or debris, ensuring optimal performance.

Clean the Light and Remove any Dirt or Debris

Ensure your lights are always shining bright by giving them a thorough cleaning and removing any dirt or debris.

To clean the light on your electric bike, follow these cleaning methods and troubleshooting tips:

  • Start by wiping the light with a soft, lint-free cloth to remove any loose dirt or dust.
  • Use a mild soap solution and a sponge or soft brush to gently scrub the light, paying attention to any stubborn stains or grime.
  • Rinse the light thoroughly with clean water, ensuring that no soap residue remains.
  • Dry the light completely with a clean cloth to prevent water spots or corrosion.

By regularly cleaning your electric bike’s light, you can maintain its brightness and ensure its longevity.

After cleaning, store the electric bike in a safe and dry place to protect the light from any potential damage.

Store the Electric Bike in a Safe and Dry Place to Protect the Light

After ensuring that the light on my electric bike is clean and free from any dirt or debris, it is crucial to store the bike in a safe and dry place. Proper storage plays a significant role in electric bike maintenance, especially when it comes to protecting the light. By storing the bike in a secure location, such as a garage or shed, we minimize the risk of damage from moisture, extreme temperatures, or accidental bumps. Additionally, keeping the bike away from direct sunlight prevents the light from fading or becoming discolored over time. Remember, the light is an essential component of the bike, contributing to visibility and safety during rides. To transition into the subsequent section about following local laws and regulations regarding bike lights, it is vital to understand the importance of proper storage for maintaining the bike’s overall functionality and ensuring compliance with safety guidelines.

Advertisement

Follow Local Laws and Regulations Regarding Bike Lights

Complying with local laws and regulations on bicycle lighting is like navigating through a maze of traffic rules to keep you on the right path. Bike light regulations vary from place to place, so it is crucial to familiarize yourself with the specific requirements in your area. Understanding these regulations is essential for your safety and the safety of others.

Here are some reasons why bike lights are of utmost importance:

  • Increased visibility: Bike lights make you more visible to motorists, pedestrians, and other cyclists, reducing the risk of accidents.
  • Improved safety at night: Properly functioning lights allow you to see obstacles in your path and help others see you, ensuring a safer ride.
  • Legal compliance: Many jurisdictions require cyclists to have lights when riding at night or in low-light conditions.
  • Avoiding fines: Failing to comply with bike light regulations can result in fines or penalties.
  • Setting a good example: By adhering to the rules, you promote responsible cycling and contribute to a safer biking community.

Remember, following local laws and regulations regarding bike lights is essential for your safety and the well-being of all road users.

Frequently Asked Questions

Can I use the light on my electric bike during daytime rides?

Yes, you can use the light on your electric bike during daytime rides. Electric bike lights are not just for night rides. They provide visibility, making you more visible to other road users, enhancing safety.

How do I know if the light on my electric bike needs to be replaced?

To determine if the electric bike light needs replacement, inspect for flickering, dimness, or complete failure. Check the wiring and connections for any damage or loose connections. Consult the user manual or contact the manufacturer for specific instructions on light replacement.

Are there any specific regulations regarding bike lights that I need to follow?

There are specific bike light regulations and safety guidelines that need to be followed. These regulations ensure visibility and safety for both the cyclist and other road users. Compliance with these regulations is crucial to avoid any legal consequences.

Advertisement

What are the different light modes available on electric bikes?

Different electric bikes offer various light modes with different light intensities. To change these modes, consult the user manual for specific instructions. Typically, there will be a button or switch on the bike’s control panel to adjust the light modes.

How often should I clean the light on my electric bike?

I have found that cleaning the light on my electric bike every 2-3 weeks keeps it in optimal condition. To clean, I recommend using a soft cloth and mild soapy water, avoiding abrasive cleaners that could damage the light.

Conclusion

Well, it seems like turning on the light on your electric bike is quite a journey.

From locating the light switch to checking if it’s pre-installed or not, installing it if necessary, and even identifying the different light modes.

And let’s not forget about charging or replacing the batteries, cleaning the light, and storing the bike safely.

Advertisement

It’s almost ironic how something as simple as turning on a light can involve so many steps. But hey, safety first, right?

So, follow these detailed instructions and make sure you’re abiding by the local laws and regulations.

Happy biking!

Continue Reading

Electric Bike

How To Turn Light On Jetson Electric Bike

Published

on

By

An image capturing a close-up of a rider's hand effortlessly flicking the sleek switch on the Jetson Electric Bike's handlebar, as the LED headlight glows to life, illuminating the darkened path ahead

Did you realize that inadequate visibility is the cause of 70% of bicycle accidents?

To ensure your safety while riding a Jetson electric bike, it’s crucial to know how to turn on the lights. In this article, I will guide you through the process step by step.

By following these instructions, you’ll be able to ride your electric bike confidently, even in low-light conditions.

Let’s get started!

Key Takeaways

  • Check the battery level and ensure it is fully charged before turning on the light
  • Locate the light switch on the handlebars or dashboard and flick it to activate the light
  • Test the lights to make sure they are working correctly and adjust the light angle according to the terrain
  • Follow local laws and regulations regarding bike lights for safety and compliance.

Locate the Light Switch

Advertisement

Get ready to illuminate your path with the incredible Jetson electric bike – just find the switch and let there be light!

When it comes to turning on the light on your Jetson electric bike, there are a few things you need to know.

First, if you are experiencing any issues with the light switch, it is important to troubleshoot the problem. Check the wiring connections and ensure they are secure. If the switch itself is faulty, consider replacing it with a new one.

Additionally, there are different light switch options available for electric bikes, such as push-button switches or toggle switches. Choose the one that suits your preference and bike model.

Once you have located and resolved any issues with the light switch, you can move on to ensuring the bike is powered on for a seamless lighting experience.

Advertisement

Ensure the Bike is Powered On

Check if the glowing indicator on the control panel confirms that the bike is switched on. This is the first step in troubleshooting the bike power issue.

Here are four possible reasons why the bike might not be powered on:

  1. Battery drained: If the battery level is too low, the bike won’t turn on. Make sure to charge the battery fully before attempting to turn on the bike.

  2. Loose connections: Check all the connections between the battery, control panel, and motor. If any of these connections are loose, the bike may not receive power.

  3. Faulty switch: The light switch might be defective or damaged. Check if the switch is functioning properly and replace it if necessary.

  4. Electrical issue: There could be an electrical problem within the bike’s system. In this case, it’s best to seek professional help to diagnose and fix the issue.

Now, let’s move on to checking the battery level and ensuring it is sufficient for the bike’s operation.

Check the Battery Level

Advertisement

Make sure you have enough power for your ride by asking yourself, ‘Is the battery level sufficient for your needs?’

Checking the battery health is crucial to ensure your light will function properly on your Jetson electric bike. To do this, locate the battery level indicator on the bike’s display panel. If the battery level is low, you may need to charge it before turning on the light.

Troubleshooting light issues can also be done by checking the battery connection and ensuring it is securely attached.

Once you have confirmed the battery level and addressed any issues, you can proceed to turn the light switch to the ‘on’ position. This will activate the light and provide you with the illumination you need for your ride.

Turn the Light Switch to the "On" Position

Once you flick the switch, the darkness around you will yield to a comforting glow, illuminating your path and filling you with a sense of security.

Advertisement

Turning the light switch to the ‘On’ position is a straightforward process on the Jetson electric bike. The light switch is typically located on the handlebars or near the dashboard.

If you want to enhance your visibility further, you can consider installing additional lights, such as front or rear lights. They can be easily attached to the bike frame or handlebars using the provided brackets.

In case you encounter any issues with the light switch, ensure that the battery is fully charged and securely connected. If the problem persists, it may be necessary to consult the user manual or contact customer support for troubleshooting assistance.

Now, let’s move on to adjusting the light settings (if applicable) to suit your preferences.

Adjust the Light Settings (if applicable)

Advertisement

When you’re ready to customize your riding experience, don’t forget to fine-tune the light settings on your Jetson e-bike. Adjusting brightness levels and changing light modes can greatly enhance your visibility and safety on the road.

To adjust the brightness levels, locate the light settings menu on your bike’s display panel. Use the arrow keys to increase or decrease the brightness according to your preference.

Additionally, you can change the light modes to suit different riding conditions. Whether you need a steady beam for urban commuting or a flashing light for increased visibility in low light situations, the Jetson e-bike offers various modes to choose from.

Once you have adjusted the light settings, it’s important to test the lights to ensure proper functionality before hitting the road.

Advertisement

Test the Lights to Ensure Proper Functionality

To truly see and be seen, let the glow of your path guide you, ensuring safety and visibility on every ride. Testing the lights on your Jetson electric bike is crucial to make sure they are functioning properly.

Here are some test methods and troubleshooting tips to help you ensure that your lights are in top shape:

  • Check the power source: Ensure that the bike’s battery is fully charged and properly connected to the lights.

  • Inspect the bulbs: Make sure the light bulbs are not damaged or burnt out. Replace any faulty bulbs to maintain optimal brightness.

  • Test the switches: Toggle the light switches on and off to ensure they are working correctly.

By following these test methods and troubleshooting tips, you can ensure that your lights are ready for use in low light or dark conditions.

Now, let’s explore how to effectively use the light on your Jetson electric bike.

Use the Light in Low Light or Dark Conditions

Illuminate your surroundings and improve your visibility with the powerful light on your Jetson electric bike. This ensures a safe ride even in low light or dark conditions.

Advertisement

Using the light effectively during nighttime rides is crucial for your safety. To maximize its functionality, keep the light clean and free from dirt or debris that might obstruct its brightness.

Additionally, check the battery regularly to ensure it has enough power for extended rides. Remember to adjust the light’s angle according to the terrain to maximize illumination.

In wet weather conditions, protect the light from water damage by using a waterproof cover or storing the bike indoors.

Lastly, consider adding reflective gear for increased visibility, enhancing your safety on the road.

By following these tips, you can make the most of your Jetson electric bike’s light and ride confidently in any lighting condition.

Advertisement

Consider Adding Reflective Gear for Increased Visibility

Boost your visibility and shine like a star on the road with the addition of reflective gear to your ride. Reflective clothing is an essential component for increasing your visibility, especially in low light or dark conditions. Consider investing in a reflective vest, jacket, or ankle bands to ensure that you stand out to motorists and other cyclists.

Additionally, maintaining your bike light is crucial for optimal visibility. Regularly check the battery life and brightness of your light, and replace any worn-out or dim bulbs as needed. Remember, a bright and properly functioning light is your best defense against accidents.

By incorporating reflective gear and maintaining your bike light, you can significantly enhance your visibility on the road.

Transitioning into the next section, it is important to follow local laws and regulations regarding bike lights to ensure your safety and compliance.

Follow Local Laws and Regulations Regarding Bike Lights

Make sure you’re in the know about the rules and regulations in your area when it comes to using bike lights. Bike light regulations vary from place to place, so it’s crucial to understand what is required of you.

Advertisement

Not only is it a legal requirement, but there are also several benefits to using bike lights. They improve your visibility to other road users, especially in low light conditions, reducing the risk of accidents. Additionally, bike lights allow you to see the road ahead, making your ride safer and more enjoyable.

To ensure your lights are effective, it’s important to keep them clean and free from obstructions. This will ensure optimal visibility and prevent any potential issues that may arise from dirty or obstructed lights.

Keep the Lights Clean and Free from Obstructions

Ensure your bike lights remain unobstructed and clean to optimize visibility and prevent any potential issues that may arise. Regularly cleaning your lights will help maintain their effectiveness and extend their lifespan.

To clean the lights, gently wipe the exterior with a soft cloth dampened with mild soap and water. Avoid using abrasive cleaners or harsh chemicals that could damage the lights. Additionally, inspect the lights for any dirt, dust, or debris that may have accumulated over time and carefully remove it using a small brush or compressed air.

If you encounter any issues with your lights, such as flickering or dimming, try troubleshooting by checking the connections and ensuring the bulbs or batteries are securely in place. Transitioning into the next section, replacing the light bulbs or batteries as needed will ensure optimal performance.

Advertisement

Replace the Light Bulbs or Batteries as Needed

Don’t forget to regularly check and replace the light bulbs or batteries in order to maintain optimal visibility and safety on your rides.

Keeping the light bulbs clean and unobstructed is crucial for ensuring that they emit a bright and clear light. Replace any burnt-out or dim light bulbs immediately to avoid compromising your visibility on the road.

Additionally, replacing the batteries in your bike’s lights is essential for extending their lifespan and maintaining a consistent level of brightness. By regularly replacing the light bulbs or batteries, you can ensure that your Jetson electric bike’s lights are always in top condition, providing you with maximum visibility during your rides. This will not only enhance your safety but also extend the battery life of your bike.

As we transition into the next section, it is important to store the bike in a safe and dry place to protect the lights from any potential damage.

Store the Bike in a Safe and Dry Place to Protect the Lights

Storing your bike in a secure and dry location is like giving your lights a cozy, protective home. Proper protective storage is essential for maintaining the longevity and functionality of your bike lights.

Advertisement

Moisture and extreme temperatures can damage the lights and cause them to malfunction. Therefore, it is crucial to store your Jetson electric bike in a place where it is shielded from rain, snow, and excessive humidity.

A garage or a shed is an ideal option as it provides a dry environment and protects the bike from direct sunlight. Additionally, keeping the bike indoors prevents theft and potential damage.

By ensuring a safe storage space, you can extend the lifespan of your lights and avoid any unnecessary maintenance. Speaking of which, carrying extra batteries or a portable charger for long rides is another way to ensure a reliable source of light.

Carry Extra Batteries or a Portable Charger for Long Rides

When embarking on long rides, it’s wise to have spare batteries or a portable charger in your bag, ensuring an uninterrupted glow to guide your way through the darkest of paths.

There are several charging options available for these extra batteries or portable chargers. One option is to charge them before your ride using a regular power outlet. Another option is to utilize solar chargers, which harness the power of the sun to replenish your batteries.

Advertisement

It’s important to choose batteries or portable chargers with sufficient capacity for extended rides. Opt for ones with higher mAh (milliampere-hour) ratings, as they can provide longer-lasting power.

With the right charging methods and batteries, you can be confident in having a reliable light source throughout your journey.

Now, let’s discuss how to use hand signals and follow traffic rules for safe riding.

Use Hand Signals and Follow Traffic Rules for Safe Riding

When it comes to riding a Jetson electric bike, safety is paramount. In my previous section, I discussed the importance of carrying extra batteries or a portable charger for long rides. Now, let’s focus on another crucial aspect: using hand signals and following traffic rules for safe riding.

To ensure your safety and the safety of others on the road, it is essential to communicate your intentions clearly. Hand signals are a universal language that allows you to indicate your turns and stops to motorists and fellow cyclists. By using these signals, you can avoid confusion and potential accidents.

Advertisement

Additionally, following traffic rules is vital for a safe riding experience. Obeying traffic lights, yielding to pedestrians, and staying in designated bike lanes helps maintain order on the road and minimizes the risk of accidents.

By incorporating hand signals and adhering to traffic rules, you can enjoy your well-lit and safe electric bike ride!

Enjoy Your Well-Lit and Safe Electric Bike Ride!

To fully appreciate your ride on the well-lit and secure roads, make sure to savor the exhilarating feeling of the wind rushing through your hair as you effortlessly glide through the streets on your Jetson e-bike.

Riding a well-lit electric bike not only enhances your safety but also provides several benefits. First and foremost, it ensures better visibility for you and other road users, reducing the risk of accidents. When choosing bike lights, opt for ones that offer a high lumen output and different brightness settings. This allows you to adjust the light intensity based on the surrounding conditions.

Additionally, consider lights with a wide beam angle and good side visibility. These features help increase your visibility and ensure that others can see you from various angles, improving overall safety during nighttime rides.

Advertisement

So, don’t forget to choose the right bike lights and enjoy your well-lit and safe electric bike ride!

Frequently Asked Questions

How do I locate the light switch on my Jetson electric bike?

To troubleshoot light switch problems on a Jetson electric bike, start by locating the switch on the handlebar. If the switch is faulty, you may need to replace it. To upgrade the lights, consult the bike’s manual for compatible options.

What should I do if my bike’s lights are not turning on?

To troubleshoot bike light issues, first check the battery connection and replace if necessary. An interesting statistic: 60% of bicycle accidents occur at night. To improve visibility, use reflective gear, install additional lights, and choose well-lit routes.

How can I adjust the light settings on my Jetson electric bike?

To adjust the light settings on my Jetson electric bike, I can troubleshoot the light connection by checking the wiring and ensuring a secure connection. Additionally, I can adjust the light brightness using the control panel on the bike’s handlebars.

Are there any specific laws or regulations regarding bike lights that I need to be aware of?

It is crucial to be aware of bike light regulations for safety. Proper bike light maintenance ensures visibility and compliance with laws. Illuminate the path ahead and be seen by others on the road.

Advertisement

What should I do if the light bulbs on my bike need to be replaced?

To troubleshoot light issues on my bike, I would first check if the bulbs need to be replaced. To find compatible light bulbs, I would refer to the bike’s user manual or contact the manufacturer for assistance.

Conclusion

As I conclude my journey on illuminating the Jetson electric bike, I am reminded of the powerful symbolism that light holds. It not only brightens our path but also represents safety and clarity.

By diligently following the steps to turn on the bike’s light, we ensure a well-lit and secure ride. Let this light guide us through the darkness, as we navigate the roads with confidence, knowing that we are equipped with the knowledge and technical precision to ride in style.

Continue Reading
Advertisement

Affiliate disclaimer

As an affiliate, we may earn a commission from qualifying purchases. We get commissions for purchases made through links on this website from Amazon and other third parties.

About us

We are a passionate team driven by the belief that cycling is a fantastic and accessible way to stay active while enjoying the beauty of the outdoors. Our mission is to share our love for cycling with as many people as possible. We provide a welcoming environment for individuals of all ages, abilities, and backgrounds to come together and ride bikes. With Ralf’s visionary leadership, Zane’s expertise in cycling adventures, and Olivia’s dedication to community building, we strive to create a vibrant space where everyone can experience the joy of cycling. Through group rides, workshops, and inclusive events, we inspire and empower individuals to embrace an active lifestyle. Join us in our quest to pedal together, embrace the joy of cycling, and foster connections that last a lifetime.

Advertisement

Trending