Connect with us

Electric Bike

How To Startdiamondback Overdrive Exc Electric Bike

Published

on

An image showcasing a rider confidently mounting a sleek Diamondback Overdrive EXC electric bike, the sun casting a warm glow on the verdant trail ahead, inviting readers to discover how to embark on their electric biking journey

Riding an electric bike is akin to embarking on an exciting adventure, with each pedal powered by the energy of electricity. Similar to a proficient captain sailing through unknown territories, learning how to operate your Diamondback Overdrive EXC Electric Bike requires meticulous attention to detail.

In this article, I will guide you through the process of unboxing, familiarizing yourself with the bike’s components, charging the battery, and turning on the bike’s power.

Get ready to embark on an exhilarating journey with your Diamondback Overdrive EXC Electric Bike!

Key Takeaways

  • Perform regular maintenance to keep the Diamondback Overdrive EXC electric bike in excellent condition
  • Follow the maintenance tips provided in the user manual or seek professional assistance
  • Inspect brakes, gears, and tires regularly to ensure proper functioning
  • Lubricate the chain and moving parts to reduce friction and ensure smooth operation

Unboxing Your Diamondback Overdrive EXC Electric Bike

Start unboxing your Diamondback Overdrive EXC Electric Bike.

Advertisement

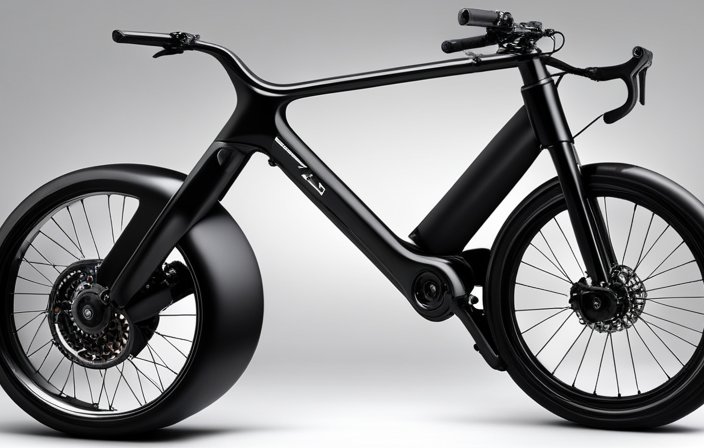
As you open the box, you’ll immediately notice the sleek design and sturdy construction of this electric bike.

The Overdrive EXC is packed with impressive electric bike features that make it a top choice for both casual riders and avid cyclists.

One of the main benefits of electric bikes is the added assistance they provide, allowing you to ride longer distances with less effort.

With the Overdrive EXC, you can easily switch between pedal-assist and full electric modes, giving you complete control over your ride.

The bike also features a powerful motor and long-lasting battery, ensuring a smooth and efficient ride every time.

Advertisement

Now, let’s move on to familiarizing yourself with the bike’s components and how to get started on your electric biking journey.

Familiarizing Yourself with the Bike’s Components

First, take a moment to get acquainted with all the different components of your new ride. It’s important to familiarize yourself with the various parts of your Diamondback Overdrive EXC Electric Bike to ensure smooth bike maintenance and troubleshooting common issues.

Let’s start with the basics. The frame is the backbone of your bike, providing stability and support.

Moving on, the drivetrain consists of the chain, cassette, and derailleur, responsible for shifting gears smoothly.

The brakes, located on the handlebars, help you control your speed and ensure your safety.

Advertisement

Don’t forget to check the tires, ensuring they have proper inflation and tread.

Now that you’re familiar with the bike’s components, let’s move on to charging the battery, which is crucial for powering the electric motor and enjoying a seamless ride.

Charging the Battery

To charge the battery, make sure you have the charger and plug it into a power source. It is essential to use the specific charger provided by Diamondback for the Overdrive EXC electric bike. This charger is designed to deliver the correct voltage and current to the battery, ensuring safe and efficient charging.

Advertisement

When connecting the charger to the power source, make sure the outlet is grounded and in good condition. Avoid using extension cords or power strips, as they may not provide a stable power supply. It is also recommended to charge the battery in a cool, well-ventilated area to prevent overheating.

Maximizing battery life can be achieved by avoiding overcharging and fully depleting the battery before recharging. Once the battery is fully charged, you can proceed to turn on the bike’s power and embark on your electrifying ride.

Turning on the Bike’s Power

Simply plug in the battery and press the power button to turn on your bike’s electric power. The power button is located on the handlebar near the display.

When you press the power button, the bike’s electric motor will engage, and you will be ready to ride. The power button functions as the main switch for the electric system, controlling the flow of power from the battery to the motor.

If you are experiencing any power issues, such as the bike not turning on, make sure that the battery is properly connected and fully charged. Additionally, check for any loose connections or damaged cables. Troubleshooting power issues may involve inspecting the battery and electrical components for any signs of damage or malfunction.

Advertisement

Once your bike is powered on, you can proceed to the next section about adjusting the bike’s settings.

Adjusting the Bike’s Settings

You can easily adjust the settings of your bike by accessing the display on the handlebar. Here’s a step-by-step guide to help you optimize your bike’s performance:

  1. Suspension Settings: Use the display to adjust your bike’s suspension according to your preferences. Fine-tune the suspension to ensure a smooth and comfortable ride, especially when tackling rough terrains.

  2. Battery Performance: Monitor and adjust the battery settings through the display. You can choose different power modes to optimize battery life and range. Lower power modes conserve energy, while higher modes provide more assistance for challenging rides.

  3. Speed Limit: Adjust the maximum speed of your bike through the display. This feature allows you to comply with local regulations or personalize your riding experience based on the terrain you’re navigating.

  4. Display Configuration: Customize the display to show essential information such as speed, distance, battery level, and more. Set it up in a way that suits your preference and makes it easy to monitor your ride.

By adjusting these settings, you can enhance your bike’s performance and tailor it to your specific needs.

Advertisement

Now, let’s move on to mounting and adjusting the seat for optimal comfort.

Mounting and Adjusting the Seat

Once you have familiarized yourself with adjusting the bike’s settings, it’s time to focus on mounting and adjusting the seat for optimal comfort.

Start by adjusting the seat height to ensure proper leg extension while pedaling. This can be done by loosening the seat clamp and raising or lowering the seat post to your desired height. Once the seat is at the right height, tighten the seat clamp securely.

Next, consider adjusting the seat angle. This is important for finding a comfortable riding position. To adjust the seat angle, loosen the bolt underneath the seat and tilt the seat forward or backward. Find a position that supports your sit bones and provides a comfortable angle for your back.

Once you have adjusted the seat height and angle, you can move on to testing the bike’s motor and pedal assist.

Advertisement

Testing the Bike’s Motor and Pedal Assist

To test the motor and pedal assist, try engaging the power and pedaling to feel the assistance provided by the bike. It is important to understand how the bike’s motor and pedal assist functions to optimize your riding experience. The table below displays some key information regarding the bike’s battery life and troubleshooting common motor issues:

Bike’s Battery Life Troubleshooting Common Motor Issues
Battery Range 30-40 miles Inspect wiring connections for loose or damaged cables
Charging Time 4-6 hours Check motor for debris or obstructions
Battery Type Lithium-ion Ensure proper tension on the motor belt
Motor Power 250W Monitor battery voltage for irregularities

By familiarizing yourself with this table, you can effectively maintain your bike’s motor and address any potential issues. Understanding the battery range and charging time will help you plan your rides accordingly, while troubleshooting tips can save you from common motor problems. Now, let’s move on to learning how to shift gears and enhance your riding experience.

Learning How to Shift Gears

Now let’s explore how to shift gears and improve your riding experience.

Shifting gears on the Diamondback Overdrive EXC electric bike is a crucial skill to master for a smooth and efficient ride. To shift gears, you need to understand the different gears available on your bike and the appropriate shifting techniques.

Start by familiarizing yourself with the gear indicators on your handlebars and the corresponding gears on your rear derailleur. When shifting, ease off the pedals and use the thumb shifter to move the chain onto the desired gear. Remember to shift one gear at a time and avoid cross-chaining.

Advertisement

Maintaining your gears is also important, so regularly clean and lubricate the chain, and check for any signs of wear or damage.

By mastering shifting techniques and keeping your gears in good condition, you’ll be ready to move on to practicing safe riding techniques for an enjoyable ride.

Practicing Safe Riding Techniques

Make sure you practice safe riding techniques to ensure a smooth and enjoyable experience on your Diamondback Overdrive EXC electric bike.

In addition to learning how to shift gears, it is important to pay attention to bike maintenance and proper braking techniques.

Regularly check your bike for any loose bolts or parts, and make sure the tires are properly inflated. This will help prevent any unexpected failures or accidents while riding.

Advertisement

When it comes to braking, use both your front and rear brakes simultaneously to evenly distribute the stopping power. Remember to start applying the brakes gently and gradually increase the pressure as needed. This will help you maintain control and prevent skidding.

Practicing safe riding techniques not only keeps you safe while riding, but also helps maintain and care for your Diamondback Overdrive EXC electric bike.

Maintaining and Caring for Your Diamondback Overdrive EXC Electric Bike

Ensure that you regularly perform maintenance and care for your Diamondback Overdrive EXC electric bike to keep it in optimal condition. Proper bike maintenance is crucial for ensuring the longevity and performance of your electric bike. Here are three key tips to help you maintain and care for your Diamondback Overdrive EXC:

  • Keep the bike clean: Regularly clean your bike to remove dirt, dust, and grime that can affect its performance. Use a mild detergent and water to clean the frame, wheels, and other components. Avoid using high-pressure water as it can damage sensitive parts.

  • Check the battery: The battery is an essential component of your electric bike. Ensure that it is properly charged and stored when not in use. Regularly inspect the battery for any signs of damage or wear. If you notice any issues, contact the manufacturer for troubleshooting.

  • Perform routine checks: Regularly inspect your bike for any loose or worn-out parts. Check the brakes, gears, and tires for proper functioning. Lubricate the chain and other moving parts to reduce friction and ensure smooth operation. If you encounter any issues, refer to the user manual or seek professional assistance.

By following these maintenance tips and troubleshooting common issues, you can ensure that your Diamondback Overdrive EXC electric bike remains in excellent condition and provides you with a smooth and enjoyable riding experience.

Frequently Asked Questions

What is the range of the Diamondback Overdrive EXC Electric Bike?

The range of the Diamondback Overdrive EXC electric bike is impressive, offering a maximum distance of [insert range] on a single charge. With a quick battery charging time, riders can enjoy extended rides without worrying about running out of power.

Advertisement

How long does it take to fully charge the battery?

The charging time of the Diamondback Overdrive EXC electric bike’s battery depends on its capacity. Typically, it takes around 4-6 hours to fully charge the battery, allowing for a long and enjoyable ride.

Can the bike be used without pedal assist?

Yes, the Diamondback Overdrive EXC electric bike can be used without pedal assist. However, using pedal assist on this bike while commuting has several benefits such as increased speed, reduced effort, and extended battery life.

What is the weight limit for the bike?

The weight capacity of the Diamondback Overdrive EXC electric bike is recommended for riders up to a certain weight. It is important to consider the recommended rider weight to ensure safe and optimal performance while riding.

How often should the bike’s brakes be checked and maintained?

Brake maintenance is crucial for optimal performance. Regular brake inspection should be done every 500 miles or every 6 months, whichever comes first. Don’t wait until it’s too late, as neglecting brake maintenance can lead to dangerous situations.

Conclusion

In conclusion, the Diamondback Overdrive EXC Electric Bike offers an exciting and efficient way to explore the outdoors.

Advertisement

By following the steps outlined in this guide, you can easily start enjoying the benefits of this electric bike.

For example, John, a busy commuter, found that the Overdrive EXC drastically reduced his travel time to work. With its powerful motor and pedal assist, he was able to effortlessly navigate through traffic and arrive at his destination feeling refreshed and energized.

With proper maintenance and care, your Diamondback Overdrive EXC Electric Bike will continue to provide a reliable and enjoyable riding experience for years to come.

Ralf is a devoted husband and father who loves spending time with his family. He enjoys riding his bicycle as much as possible, and takes every opportunity he can to get out on the open road. Ralf is a kind and gentle person who wants only the best for those around him.

Continue Reading
Advertisement

Electric Bike

How To Turn A Road Bike Into An Electric Bike

Published

on

By

An image showcasing a skilled cyclist replacing the rear wheel of a road bike with an electric motorized wheel, attaching a sleek battery pack, and connecting wires to transform it into an efficient electric bike

Picture the excitement of smoothly gliding along the road on your reliable road bike, powered by electricity. By having the proper knowledge and a few key tools, you can convert your beloved bike into a stylish, effective electric vehicle.

In this article, I will guide you through the step-by-step process of turning your road bike into an electric bike. Get ready to experience the joy of an upgraded ride like never before.

Key Takeaways

  • Assess the compatibility of the road bike for conversion, including frame material, fork strength, brakes, and wheelset strength.
  • Choose the right conversion kit, considering factors such as motor type (hub or mid-drive), battery capacity and range, controller compatibility, motor power and efficiency, and cost.
  • Consider battery capacity and range by selecting a lithium-ion battery with suitable voltage, Ah rating, and Wh capacity, while also considering the availability of charging infrastructure.
  • Gather the necessary tools and components for the conversion process, including wrenches, screwdrivers, Allen keys, torque wrench, cable cutters, spoke wrench, and a sturdy workbench or stand. Follow manufacturer’s instructions for proper installation and ensure secure attachment of the motor, battery, and other components. Test the electric bike for functionality and performance before enjoying the benefits of electric assist cycling.

Assess Your Road Bike’s Compatibility

You’ll need to assess if your road bike is compatible for conversion into an electric bike. Assessing compatibility involves evaluating the frame, components, and overall design of your road bike.

First, check if your bike has a steel or aluminum frame, as these materials are more suitable for the additional weight and forces of an electric motor.

Advertisement

Next, consider the fork, brakes, and wheelset, ensuring they are strong enough to handle the increased speed and torque.

Additionally, evaluate the drivetrain and gearing system to ensure they can accommodate the motor and battery.

Lastly, assess if there is enough space on the frame to mount the battery and motor.

Once you have assessed compatibility and identified any necessary modifications, you can move on to choosing the right conversion kit to transform your road bike into an electric bike.

Choose the Right Conversion Kit

When choosing a conversion kit for turning a road bike into an electric bike, there are three key points to consider.

Advertisement

First, decide whether to go for a hub motor or a mid-drive motor, depending on your specific needs and preferences.

Second, carefully consider the battery capacity and range, as this will determine how far and how long you can ride before needing to recharge.

Lastly, make sure to look for a compatible controller and display that will allow you to easily control and monitor the electric components of your bike.

Select a hub motor or mid-drive motor

To select a hub motor or mid-drive motor, you should first consider the terrain you’ll be riding on. This decision will impact the motor options available to you and the installation process. Here are some factors to consider:

  • Motor power: Determine the power output you need based on the terrain’s steepness and your desired speed.
  • Efficiency: Evaluate the motor’s efficiency to ensure it maximizes battery life and provides a smooth riding experience.
  • Weight distribution: Consider how the motor’s location affects the bike’s balance and handling.
  • Maintenance: Assess the maintenance requirements of each motor type to ensure you can properly care for it.
  • Cost: Compare the prices of hub motors and mid-drive motors to find the best option for your budget.

After selecting the appropriate motor, it’s crucial to consider battery capacity and range to ensure your electric bike meets your desired riding needs.

Consider battery capacity and range

Make sure you consider the battery capacity and range of your electric bike to ensure it meets your desired riding needs. Battery technology has advanced significantly in recent years, offering a wide range of options for electric bike conversions.

Advertisement

Lithium-ion batteries are commonly used due to their high energy density and long lifespan. When choosing a battery, consider factors such as voltage, ampere-hour (Ah) rating, and watt-hours (Wh) capacity. A higher capacity battery will provide a longer range, but it also adds weight to your bike.

Additionally, consider the availability of charging infrastructure in your area. Look for charging stations or outlets that can accommodate your electric bike’s battery charger.

In the next section about ‘look for a compatible controller and display,’ we will explore the next steps in converting your road bike into an electric bike.

Look for a compatible controller and display

Finding a controller and display that are compatible with your electric bike conversion is essential. When choosing a controller, it is important to find one that is compatible with the voltage and power requirements of your battery. Look for a controller that offers features such as regenerative braking and programmable settings.

Additionally, make sure the display is compatible with the controller and can provide you with important information such as battery level, speed, and distance traveled. Troubleshooting common issues with the controller and display, such as connectivity problems or error messages, is crucial to ensure smooth operation of your electric bike.

Advertisement

Once you have found the right controller and display, you can move on to the next step of gathering the necessary tools and components for your conversion process.

Gather the Necessary Tools and Components

Start by gathering all the necessary tools and components to turn your road bike into an electric bike. First, assess the compatibility of your bike with an electric conversion kit. Look for a conversion kit that is suitable for your road bike’s frame and wheel size. You will need a conversion kit that includes a motor, battery, controller, and display. Make sure to choose a kit that fits your specific needs and preferences.

To complete the conversion, you will need a range of tools such as wrenches, screwdrivers, and Allen keys. Additionally, you may need a torque wrench, cable cutters, and a spoke wrench. It is important to have a sturdy workbench or stand to securely hold your bike during the conversion process.

With all the necessary tools and components at hand, you can now move on to the next step of the conversion process, which involves removing and replacing the front wheel or bottom bracket.

Remove and Replace the Front Wheel or Bottom Bracket

After gathering all the necessary tools and components, it’s time to start the process of transforming my road bike into an electric bike. The first step in this process is to remove and replace either the front wheel or the bottom bracket, depending on the type of electric conversion kit I am using.

Advertisement

To replace the front wheel, I will loosen the quick-release lever or unscrew the axle nuts to remove the wheel. Then, I will attach the electric motor wheel by aligning the motor with the fork dropouts and securing it in place.

Alternatively, if I decide to upgrade the bottom bracket, I will start by removing the crankset and the bottom bracket itself. Then, I will install the new bottom bracket that is compatible with the electric motor kit.

Now that I have successfully replaced the front wheel or upgraded the bottom bracket, I can move on to the next step of installing the motor and battery, which will provide the power for my electric bike.

Install the Motor and Battery

To install the motor on the front wheel or bottom bracket, first, I’ll need to remove the existing wheel or bottom bracket. Then, I’ll attach the motor in its place, making sure it’s securely fastened and aligned properly.

Next, I’ll connect the necessary wires and cables to ensure the motor is properly integrated with the bike’s electrical system.

Advertisement

To attach the battery, I’ll need to choose between mounting it on the frame or the rear rack. I’ll carefully select a suitable location that provides both stability and accessibility. Once the location is determined, I’ll securely attach the battery using the appropriate mounting hardware.

Finally, I’ll connect the battery to the motor, following the manufacturer’s instructions to ensure a proper electrical connection.

Mount the motor on the front wheel or bottom bracket

First, you’ll want to decide whether to mount the motor on the front wheel or the bottom bracket.

There are different mounting options available, each with their own advantages and disadvantages.

Mounting the motor on the front wheel is a popular choice as it provides a simple and straightforward installation process. It also allows for easy maintenance and repair of the motor. However, this option may affect the balance and handling of the bike, especially at higher speeds.

Advertisement

On the other hand, mounting the motor on the bottom bracket can provide a more natural and balanced feel while riding. It also allows for better weight distribution and improved traction. However, this option may require more complex installation and may limit the type of bottom bracket that can be used.

Once you have decided on the mounting option, you can move on to attaching the battery to the frame or rear rack, ensuring a secure and stable connection.

Attach the battery to the frame or rear rack

To continue the process of transforming a road bike into an electric one, let’s move on to the current subtopic: attaching the battery to the frame or rear rack.

This step is crucial as it determines the power source for your electric bike. When attaching the battery, you have two options: you can either secure it to the frame or mount it onto a rear rack.

Each method has its pros and cons, so choose the one that suits your preferences and bike design. Attaching the battery to the frame provides better weight distribution and stability, while mounting it onto a rear rack offers convenience and easier access for charging.

Advertisement

Whichever option you choose, ensure that the battery is securely fastened to prevent any damage or loss while riding.

Now, let’s move on to the next step: connecting the wiring and controller, which will bring your electric bike to life.

Connect the Wiring and Controller

To connect the motor to the controller, begin by identifying the corresponding wiring connections on both components. Make sure to match the correct wires according to their color codes or labels. Securely fasten the connections using electrical tape or wire connectors to ensure a stable and reliable connection.

Once the motor and controller are connected, attach the controller to either the handlebars or frame of the bike. This can be done using mounting brackets or zip ties, ensuring that the controller is securely positioned and easily accessible for operation.

Connect the motor to the controller

Next, connect the motor to the controller. This step is crucial in turning your road bike into an electric bike. Begin by locating the motor wires and the corresponding connectors on the controller. Match the wires by color and connect them securely, ensuring a tight fit. It’s important to follow the manufacturer’s instructions for your specific motor and controller combination to ensure proper connections. Once connected, double-check all the connections to ensure they are secure and tight.

Advertisement

Troubleshooting common motor and controller issues is essential for a successful conversion. If you encounter any problems, such as the motor not running or the controller not responding, check the connections first. Ensure that all the wires are properly connected and that there are no loose or damaged wires. Additionally, refer to the troubleshooting guide provided by the manufacturer for specific issues and solutions.

Now, with the motor and controller properly connected, we can move on to the next step of attaching the controller to the handlebars or frame.

Attach the controller to the handlebars or frame

After successfully connecting the motor to the controller, it is now time to attach the controller to either the handlebars or the frame of your road bike.

There are various mounting options available depending on your preference and the design of your bike. One popular option is to attach the controller to the handlebars using a clamp. This allows for easy access and control while riding.

Another option is to mount the controller to the frame using zip ties or Velcro straps, ensuring it is securely fastened and protected from any potential damage.

Advertisement

Whichever method you choose, make sure the controller is positioned in a convenient and accessible location.

Once the controller is securely attached, we can move on to the next step: testing and adjusting the electric bike conversion.

Test and Adjust the Electric Bike Conversion

Now you’ll need to test and adjust your electric bike conversion. To ensure that your conversion is working properly, there are several testing methods you can use. First, check that all the electrical connections are secure and properly insulated. Next, turn on the electric system and test the throttle, brakes, and display to make sure they are all functioning correctly. Additionally, take your bike for a test ride to assess its performance and make any necessary adjustments. While testing, keep an eye out for any issues such as strange noises, excessive heat, or a lack of power. If you encounter any problems, refer to the troubleshooting tips in your conversion kit manual. Once you are satisfied with the performance of your electric bike, you can move on to the next section to ensure safety and compliance.

Ensure Safety and Compliance

To ensure your safety and comply with regulations, it is important to take the necessary steps to ensure that your electric bike conversion meets all the required standards. Here are some key considerations to keep in mind:

  • Safety regulations: Familiarize yourself with the safety regulations specific to electric bikes in your region. This may include requirements for lights, reflectors, and audible signaling devices.

  • Legal requirements: Check your local laws regarding electric bikes to ensure you are in compliance. This may include restrictions on speed, power output, and where you can ride.

  • Component compatibility: Ensure that all the components of your electric bike conversion are compatible and properly installed. This includes the motor, battery, and wiring.

By following these safety regulations and legal requirements, you can enjoy your upgraded electric road bike with peace of mind, knowing that you are riding safely and legally.

Advertisement

Enjoy Your Upgraded Electric Road Bike

I’m excited to discuss the benefits of electric assist cycling and how it can enhance your experience on your upgraded electric road bike.

With electric assist, you can easily conquer longer distances and enjoy tackling challenging terrains that were previously out of reach.

The added power and support from the electric motor allows for a more enjoyable and efficient ride, opening up a whole new world of cycling possibilities.

Experience the benefits of electric assist cycling

By adding an electric assist to your road bike, you can instantly experience the benefits of easier cycling. The right conversion kit can enhance your riding experience in several ways:

  • Increased speed: With electric assistance, you can effortlessly reach higher speeds, allowing you to cover more ground in less time.

  • Reduced effort: The electric motor provides assistance when pedaling, making it easier to tackle uphill climbs or ride against strong headwinds.

  • Extended range: Electric bikes have a longer range compared to traditional bikes, enabling you to explore new routes and go on longer rides without worrying about running out of energy.

  • Versatility: Electric conversion kits come in various types and power levels, allowing you to choose the one that best suits your needs and preferences.

With the benefits of electric assist cycling in mind, let’s explore how you can further enhance your riding experience by tackling challenging terrains and venturing into longer distances.

Advertisement

Explore longer distances and tackle challenging terrains

Experience the thrill of conquering challenging terrains and exploring longer distances with the added power and versatility of electric assist cycling. Electric bikes provide the perfect solution for those looking to venture beyond their usual routes and discover new scenic paths. With the assistance of an electric motor, you can effortlessly tackle steep inclines and rough terrains that would have been daunting on a regular road bike. This opens up a world of possibilities for adventure and exploration.

Not only does electric assist cycling allow you to take on more challenging routes, but it also helps improve your overall fitness. By pedaling with the support of the motor, you can push yourself further and engage in longer rides, gradually increasing your endurance and stamina. The electric assist function can be adjusted to suit your fitness level, allowing you to gradually build up your strength and capabilities.

Table:

Benefits of Electric Assist Cycling
Enhanced climbing ability
Extended range
Reduced fatigue
Increased enjoyment

As you continue to explore scenic routes and improve your fitness, it is important to maintain and service your electric bike regularly to ensure optimal performance.

Maintain and Service Your Electric Bike

When it comes to maintaining and servicing your electric bike, it’s crucial to regularly check and replace components as needed. This ensures optimal performance and prevents any potential issues from arising.

Advertisement

Additionally, for more complex issues, it’s recommended to schedule professional maintenance to guarantee that your electric bike is in top shape and running smoothly.

Regularly check and replace components as needed

To regularly maintain your electric bike, make sure you check and replace components as needed. This is crucial to ensure optimal performance and longevity of your bike.

One important aspect of maintenance is to regularly inspect and replace worn components. These can include brake pads, chain, cassette, and tires. Worn brake pads can compromise your ability to stop safely, while a worn chain and cassette can lead to poor shifting and decreased power transfer. Additionally, worn tires can negatively impact traction and increase the risk of flats.

By replacing these components as needed, you can maintain the efficiency and safety of your electric bike. However, for more complex issues or if you are unsure about any maintenance tasks, it’s advisable to schedule professional maintenance to ensure the proper functioning of your bike.

Schedule professional maintenance for complex issues

If you are unsure about any maintenance tasks, it’s advisable to schedule professional maintenance for complex issues. While regular check-ups and component replacements are important for keeping your electric road bike in good condition, there are some issues that require the expertise of a professional. These complex issues can range from electrical problems to motor malfunctions, and attempting to fix them yourself without the necessary knowledge and experience can lead to further damage. When you schedule professional maintenance, trained technicians will be able to diagnose and repair any complex issues with precision and efficiency, ensuring that your electric road bike continues to perform at its best. So, don’t hesitate to seek professional help when faced with complex maintenance problems to avoid any potential complications.

Advertisement
Professional Maintenance Benefits
1. Expert diagnosis and repair
2. Precision and efficiency
3. Avoidance of further damage
4. Enhanced performance
5. Peace of mind

Frequently Asked Questions

What are the potential risks or drawbacks of converting a road bike into an electric bike?

Converting a road bike into an electric bike can pose potential safety concerns, such as increased weight and altered balance. Additionally, it may impact the bike’s resale value, as some buyers prefer original, non-modified bikes.

Are there any specific weight limitations or restrictions for the conversion kit or battery?

There are weight limitations for conversion kits and batteries. Most conversion kits can handle a maximum weight of around 250 pounds, while battery restrictions vary depending on the specific model and capacity.

Can the conversion kit be easily removed in case I want to switch back to a regular road bike?

Yes, the conversion kit can be easily removed, allowing you to switch back to a regular road bike. It is compatible with different road bikes, ensuring a seamless transition between electric and non-electric modes.

Are there any legal requirements or regulations I should be aware of when riding an electric bike on public roads?

When riding an electric bike on public roads, it is important to be aware of the legal requirements and safety regulations. These include things like speed limits, helmet usage, and proper lighting for visibility.

How does converting a road bike into an electric bike affect the bike’s overall performance and handling?

Converting a road bike into an electric bike can significantly impact its overall performance and handling. The addition of an electric motor and battery alters the bike’s weight distribution, acceleration, and braking, which can affect its agility, stability, and responsiveness on the road.

Advertisement

Conclusion

So there you have it, folks! After diligently following all the steps and putting in some elbow grease, I successfully transformed my road bike into an electric powerhouse.

It was certainly a journey filled with challenges and triumphs, but the end result is truly worth it. Now, I can effortlessly cruise through the streets with the wind at my back, feeling like a modern-day knight riding a steed.

Remember, though, to always prioritize safety and adhere to the necessary regulations.

So hop on your upgraded electric road bike and enjoy the ride! And don’t forget to regularly maintain and service your new electric companion to keep it running smoothly for years to come.

Advertisement

Continue Reading

Electric Bike

How To Turn My Bicycle Into An Electric Bike

Published

on

By

An image of a person effortlessly cruising on their bike, with a sleek battery pack seamlessly integrated into the frame

I have always fantasized about gliding effortlessly down the streets on my bike, with the wind in my hair and the excitement of speed.

Well, I found a way to make that dream a reality: turning my ordinary bicycle into an electric bike! With just a few simple steps, I’ll show you how to transform your trusty two-wheeler into a powerful and eco-friendly machine.

So grab your tools and let’s get started on this electrifying adventure!

Key Takeaways

  • Assess the condition of your bike’s frame, wheels, brakes, gears, and drivetrain to ensure compatibility and identify any necessary repairs or replacements.
  • Research and choose the right conversion kit based on factors such as motor power, battery capacity, and compatibility with your bike’s frame and fork.
  • Consider the pros and cons of different types of conversion kits, such as hub motor, mid-drive, and front wheel, to determine which one best suits your needs and preferences.
  • Properly install the conversion kit by removing the front or rear wheel, attaching the electric motor, and ensuring compatibility with your bike’s frame and fork. Test the system and troubleshoot any issues before connecting the battery. Regularly maintain and adjust your electric bike for optimal performance and safety.

Assess Your Bike’s Compatibility

Before you begin, make sure your bike’s frame and components are compatible with an electric conversion kit. Assessing your bike’s condition is crucial to ensure a successful conversion. Start by examining the frame for any cracks, dents, or damage that may compromise its integrity. Check the wheels for true alignment and ensure they spin freely. Inspect the brakes, gears, and drivetrain components for wear and tear, as they may need to be replaced or adjusted.

Advertisement

Once you have assessed your bike’s condition, it’s time to find the right conversion kit. Consider factors such as motor power, battery capacity, and compatibility with your bike’s frame and components. Research different brands and models to find the kit that best suits your needs.

Now that you have assessed your bike’s condition and found the right conversion kit, it’s time to gather the necessary tools and materials.

(Note: The subsequent section about gathering the necessary tools and materials is not included in this response)

Gather the Necessary Tools and Materials

To get started, you’ll need to gather the tools and materials necessary for the conversion.

First, assess your bike’s condition to ensure it is suitable for the conversion. Look for a sturdy frame, well-functioning brakes, and a drivetrain that can handle the extra power.

Advertisement

Next, consider your battery options. Determine the voltage and capacity needed based on your desired range and riding conditions. You may opt for a lithium-ion battery for its lightweight and long lifespan.

Additionally, gather tools such as wrenches, screwdrivers, and a torque wrench to assist with the installation.

Once you have everything ready, you can move on to choosing the right conversion kit, which will provide you with the necessary components to turn your bike into an electric one seamlessly.

Choose the Right Conversion Kit

Advertisement

When it comes to converting a bicycle into an electric bike, choosing the right conversion kit is crucial. There are three main types to consider: the Hub Motor Conversion Kit, the Mid-Drive Conversion Kit, and the Front Wheel Conversion Kit.

Each kit has its own advantages and considerations, so it’s important to understand the differences and choose the one that best suits your needs and preferences.

Hub Motor Conversion Kit

You can easily transform your bicycle into an electric bike by installing a hub motor conversion kit. Evaluating the performance of your hub motor conversion kit is crucial to ensure optimal functionality.

One way to assess performance is by testing the speed and torque capabilities of the motor. Troubleshooting common issues such as battery life and motor overheating is essential for maintaining the longevity of your electric bike.

If you notice decreased battery life, it could be due to a faulty battery or incorrect charging habits. Overheating can be caused by excessive use or insufficient cooling mechanisms.

Advertisement

Transitioning into the next section about the mid-drive conversion kit, it is important to consider the benefits and features of this alternative conversion option.

Mid-Drive Conversion Kit

Installing a mid-drive conversion kit allows for a more efficient transfer of power from the motor to the bike’s gears. Here are four key reasons why a mid-drive conversion is advantageous:

  1. Improved Performance: Unlike hub motors, mid-drive motors are located near the bike’s bottom bracket, which provides a better center of gravity and weight distribution. This results in enhanced handling and maneuverability.

  2. Increased Range: Mid-drive systems utilize the bike’s existing gears, allowing for a wider range of speeds and more efficient power usage. This translates to longer battery life and a greater overall range.

  3. Better Hill Climbing: With the motor directly driving the bike’s gears, mid-drive conversions excel at tackling steep inclines. The additional torque from the motor combined with gear optimization makes uphill rides easier and more enjoyable.

  4. Maintenance Simplicity: Since mid-drive conversions use the bike’s existing drivetrain, maintenance and repairs are straightforward. There’s no need for specialized tools or additional components, reducing the complexity and cost of upkeep.

Transitioning to the subsequent section about the ‘front wheel conversion kit,’ I realized that another common option for turning a regular bike into an electric one is by using a front wheel conversion kit.

Front Wheel Conversion Kit

Using a front wheel conversion kit can transform your regular bicycle into an electric one. When considering the conversion, it’s important to weigh the pros and cons of a front wheel conversion versus a rear wheel conversion.

While a front wheel conversion offers easier installation and maintenance, it may affect the balance and steering of your bike. On the other hand, a rear wheel conversion provides better traction and stability but can be more challenging to install.

Advertisement

To upgrade your front wheel for an electric bike, choosing the right tire is crucial. Opt for a tire with good traction and durability to handle the increased power and weight of the electric motor. Look for a tire with a higher load rating and puncture-resistant features to ensure a smooth and safe ride. Additionally, consider the terrain you’ll be riding on and select a tire with appropriate tread patterns for optimal performance.

Transitioning to the subsequent section about removing the front wheel or rear wheel, it’s important to understand the process to safely proceed with the conversion.

Remove the Front Wheel or Rear Wheel

To remove the front wheel or rear wheel, simply start by releasing the quick-release lever. Here’s a step-by-step guide on how to do it:

  1. Front Wheel Conversion:

    • Benefits: Easy installation, no need to modify the drivetrain, and can be easily transferred between bikes.
    • Pros: Lightweight design, allows for regenerative braking, and provides a balanced feel.
    • Cons: Limited traction on slippery surfaces, less stability during turns, and potential for wheel misalignment.
  2. Rear Wheel Conversion:

    • Process: Begin by shifting to the smallest rear cog, then loosen the rear derailleur and chain tensioner. Disconnect the motor cable and remove the wheel.
    • Challenges: Rear wheel conversion requires more mechanical knowledge and might involve modifying the drivetrain. It may also affect the bike’s balance and handling.

Now that we’ve removed the wheel, let’s move on to the next step of installing the electric motor.

Install the Electric Motor

Now that the wheel is removed, let’s go ahead and attach the electric motor. Installing an electric motor on a bicycle can be a great way to transform it into an electric bike.

To begin, ensure that the motor is compatible with your bike’s frame and fork. Most electric motors are designed to fit standard bicycle frames, but it’s always a good idea to double-check.

Advertisement

Next, carefully mount the motor onto the front or rear fork using the provided brackets and bolts. Make sure the motor is securely attached and aligned with the wheel.

Once installed, connect the motor to the bike’s drivetrain using the appropriate chain or belt. Troubleshooting common issues such as loose connections or misaligned motor can help ensure a smooth installation process.

Now, let’s move on to the next step and connect the controller and battery.

Connect the Controller and Battery

First, you’ll need to ensure that the controller and battery are compatible with each other and your bike’s electrical system. Connecting the controller and battery is a crucial step in converting your bicycle into an electric bike. Here are some key points to keep in mind:

  • Check the voltage requirements of your controller and battery to ensure they match.
  • Connect the positive and negative terminals of the battery to the corresponding terminals on the controller.
  • Secure the connections with appropriate connectors or soldering.
  • Double-check the wiring to ensure there are no loose connections or exposed wires.
  • Test the connection by turning on the controller and checking if it powers up.

Troubleshooting common issues with the controller and battery connection includes checking for loose connections, damaged wires, or blown fuses.

Once the controller and battery are successfully connected, you can move on to the next step of mounting the battery securely on your bike.

Advertisement

Mount the Battery

Make sure you have a sturdy and secure location on your bike to mount the battery. The mounting technique will depend on the type of battery you have and the design of your bike frame.

There are a few common techniques for mounting electric bike batteries. One method is using a battery rack, which attaches to the rear of the bike frame and provides a platform for the battery to sit on. Another option is using a frame bag, which is a bag that attaches to the frame and houses the battery inside.

The battery capacity is an important consideration when choosing a mounting technique. A larger battery will require a more robust mounting system to ensure stability and prevent damage.

Once you have securely mounted the battery, you can move on to installing the throttle and brake levers.

Install the Throttle and Brake Levers

To install the throttle and brake levers, you’ll need to carefully attach them to your handlebars using the provided hardware. Assessing compatibility is crucial before choosing the right conversion kit for your electric bike project. Here are some key considerations to keep in mind:

Advertisement
  • Ensure that the throttle and brake levers are compatible with your bike’s handlebars.
  • Check if the conversion kit you’ve chosen includes the necessary hardware for installation.
  • Verify that the throttle and brake levers are compatible with the motor and battery system you’re using.
  • Take into account the position and ergonomics of the levers for comfortable and efficient control while riding.
  • Consider the type of braking system on your bike, as some conversion kits may require specific types of brake levers.

Once you have successfully attached the throttle and brake levers, you can proceed to connect the wiring and test the system.

Connect the Wiring and Test the System

After successfully installing the throttle and brake levers, it is time to connect the wiring and test the system.

This step is crucial to ensure that all components are properly connected and functioning before taking your electric bike for a spin.

To begin, gather all the necessary wires and connectors provided in your conversion kit. Follow the manufacturer’s instructions carefully to connect the wires to their respective terminals on the battery, motor, and controller.

Once the wiring is complete, double-check all connections for any loose or damaged wires.

Next, it’s time to test the system. Turn on the battery and engage the throttle to see if the motor responds accordingly. If any issues arise, consult the troubleshooting tips in the conversion kit manual to identify and resolve the problem.

Advertisement

Once the system is tested and functioning correctly, you can proceed to the next section on adjusting the gears and brakes.

Adjust the Gears and Brakes

Now that the wiring and system test are complete, it’s time to adjust the gears and brakes on your electric bike.

Properly adjusting the gear ratios is crucial to ensure smooth and efficient shifting. Start by identifying the gear that needs adjustment. Use the barrel adjuster on the derailleur to fine-tune the cable tension, ensuring the chain moves smoothly between gears.

To maintain brake performance, check the brake pads for wear and adjust if necessary. Align the brake pads with the rim, making sure they don’t rub against the tire. Adjust the brake cable tension using the barrel adjuster until you achieve the desired stopping power.

Once the gears and brakes are properly adjusted, it’s time to secure and protect the wiring to prevent any damage or interference with the bike’s functionality.

Advertisement

Secure and Protect the Wiring

Securing and protecting the wiring is essential to ensure the proper functionality of your electric bike. To effectively manage your wires and prevent any potential damage, consider the following techniques:

  • Use zip ties: Secure the wires to the frame of the bike using zip ties. This will keep them in place and prevent them from getting tangled or snagged.

  • Route the wires properly: Make sure the wires are routed away from any moving parts, such as the pedals or the wheels. This will minimize the risk of them getting caught or damaged.

  • Use waterproof connectors: Invest in waterproof connectors to protect the electrical connections from moisture. This will prevent any short circuits or damage caused by water exposure.

  • Apply silicone sealant: Apply silicone sealant to any exposed connections or junctions to provide an extra layer of protection against water and moisture.

By implementing these wire management and waterproofing techniques, you can ensure the longevity and reliability of your electric bike’s electrical system.

Now, let’s move on to the next section and get ready for a test ride and some adjustments.

Test Ride and Adjust

Take a moment to hop on the bike and adjust the seat height and handlebars to ensure a comfortable riding position. This step is crucial before embarking on a test ride.

Not only will it enhance your riding experience, but it will also prevent potential discomfort or strain during longer journeys. Adjust the seat height so that your legs are almost fully extended when the pedal is at its lowest point. This allows for efficient pedaling and reduces the risk of knee injuries.

Advertisement

Next, adjust the handlebars to a position that feels natural and allows for easy control of the bike. Once you’ve made these adjustments, take your electric bike for a test ride to fully experience its benefits.

Now, let’s move on to how to maintain your electric bike without compromising its performance.

Maintain Your Electric Bike

To keep your electric bike in top condition, regular maintenance is essential. Here are three key maintenance tasks you should prioritize:

  1. Safety precautions: Before performing any maintenance, make sure the bike is powered off and the battery is disconnected. This prevents accidental shocks or damage to the electrical components.

  2. Battery maintenance: The battery is the heart of your electric bike, so it’s crucial to take care of it. Regularly check the battery connections for any corrosion or loose wires. Clean them if necessary. Also, avoid storing the battery in extreme temperatures, as it can affect its performance and lifespan.

  3. Inspect and clean: Regularly inspect the bike for any loose bolts, worn-out brake pads, or damaged wires. Clean the bike thoroughly, especially the drivetrain, to prevent dirt and debris from causing premature wear.

By following these maintenance tasks, you can ensure the longevity and optimal performance of your electric bike.

Now, let’s move on to the next section and discuss the importance of following safety guidelines.

Advertisement

Follow Safety Guidelines

Make sure you adhere to safety guidelines when operating your electric bike to prevent accidents and injuries. Safety precautions are crucial to ensure a smooth and secure riding experience. Here are some key safety measures and riding techniques to keep in mind:

Safety Precautions Riding Techniques
Wear a helmet Maintain a proper posture
Use reflective gear Keep a safe distance
Observe traffic rules Signal your intentions
Check brakes regularly Be aware of road conditions
Avoid distractions Use hand signals

Enjoy Your New Electric Bike!

Now that you’ve got your new electric bike, it’s time to have fun and enjoy the ride!

Electric bikes offer numerous benefits, such as increased speed and reduced effort while pedaling.

To ensure a smooth and enjoyable ride, it’s crucial to choose the right battery for your electric bike. The battery is the heart of your e-bike and determines its range and power.

When selecting a battery, consider factors like capacity, voltage, and weight. Higher capacity batteries will provide longer rides, while higher voltage batteries will offer more power and speed.

Advertisement

Additionally, be mindful of the battery’s weight, as it can affect the overall balance and handling of your electric bike.

Frequently Asked Questions

How can I ensure that my bike is compatible for an electric conversion?

To ensure compatibility for an electric conversion, check the compatibility of your bike’s frame, fork, and wheel size with electric bike batteries and the motor power you desire. Consult the manufacturer’s specifications for more information.

What tools and materials will I need to gather before starting the conversion process?

To embark on the conversion process, I must gather a set of essential tools and materials. Tools needed include wrenches, pliers, wire cutters, and a soldering iron. Materials required encompass an electric motor, battery, controller, and wiring components.

What factors should I consider when choosing the right conversion kit for my bike?

When choosing the right conversion kit for my bike, I consider factors such as the electric bike conversion cost and the benefits of converting a bicycle to electric. It’s important to find a kit that fits my budget and meets my needs.

Do I need to remove the front wheel or rear wheel during the conversion process?

During the conversion process, the front wheel does not need to be removed, but the rear wheel does. Removing the rear wheel allows for the installation of the electric motor and the necessary components for an electric bike conversion.

Advertisement

How do I maintain and take care of my electric bike after the conversion?

To maintain and take care of my electric bike, I should regularly check the battery level, clean the bike and components, tighten any loose bolts, lubricate the chain, and inspect for any wear or damage. Troubleshooting common issues may include checking connections and contacting the manufacturer for assistance.

Conclusion

In conclusion, converting my bicycle into an electric bike was a challenging but rewarding experience. I assessed my bike’s compatibility, gathered the necessary tools and materials, and chose the right conversion kit.

Removing the rear wheel and installing the electric motor required careful attention to detail. After a successful test ride and adjustments, I now have a brand new electric bike.

One interesting statistic to note is that electric bikes are gaining popularity, with sales increasing by 52% in the United States in 2020 alone. This demonstrates the growing interest and demand for eco-friendly transportation options.

Advertisement

Continue Reading

Electric Bike

How To Turn On Light On Electric Bike

Published

on

By

An image that depicts a person wearing a helmet, effortlessly flipping a switch on the handlebar of an electric bike, as a bright beam of light illuminates the road ahead, casting a warm glow onto the surroundings

Light up your way and make sure you stay safe with just a quick flip of a switch on your electric bike. This detailed guide will take you through the easy steps of how to turn on the light on your electric bike.

From locating the light switch to understanding different light modes, I will provide you with all the necessary information to keep you visible during your rides.

Let’s shed some light on how to activate the light on your electric bike.

Key Takeaways

  • Additional lights on an electric bike improve visibility in low-light conditions.
  • Regularly checking and maintaining the battery level ensures the lights are always ready to provide visibility.
  • Using recommended batteries and charging or replacing them as needed is important for the proper functioning of the lights.
  • Cleaning and maintaining the lights regularly helps maintain brightness and longevity.

Locate the Light Switch on Your Electric Bike

To brighten your ride, let’s find the switch that’ll illuminate your path on your electric bike.

Advertisement

Electric bike light features can vary depending on the model, but most bikes have a dedicated switch for turning on the lights.

Start by locating the control panel or handlebar display on your electric bike. Look for a button or switch labeled ‘lights’ or with a light bulb symbol.

Press or toggle the switch to turn on the lights.

If you’re having trouble finding the switch, refer to your bike’s user manual for specific instructions.

Once you’ve found and activated the light switch, you can ensure your electric bike is powered on to fully enjoy your well-lit ride.

Advertisement

Ensure Your Electric Bike is Powered On

Make sure your e-bike is all revved up and ready for action!

Before you can turn on the light on your electric bike, it’s essential to ensure that your bike is powered on. First, check if the battery is properly connected and fully charged.

Inspect the power switch on your electric bike and make sure it is in the ‘on’ position. If your electric bike has a display panel, check if it is functioning correctly and displaying the battery level. If not, troubleshoot any issues by referring to the user manual or contacting customer support.

Once you have confirmed that your electric bike is powered on, you can proceed to check if the light is pre-installed or requires installation.

Check if the Light is Pre-installed or Requires Installation

Advertisement

Before we get into it, let’s find out if the headlight on your e-bike is already set up or needs to be installed. To determine this, refer to the manufacturer’s instructions or check the specifications of your electric bike model. Some electric bikes come with pre-installed headlights, while others require installation. If your e-bike does not have a pre-installed light, you will need to purchase one separately. To install the light, follow the instructions provided by the manufacturer. Troubleshooting common issues with the light might involve checking the wiring connections, ensuring the battery is fully charged, or replacing a faulty light bulb. Once you have confirmed whether your e-bike has a pre-installed light or requires installation, you can proceed to the next section to install the light if necessary.

Install the Light if Necessary

If your e-bike does not come with a pre-installed headlight, you’ll need to purchase and install one separately to ensure safe nighttime riding. Installing a light on your electric bike is a straightforward process, but it requires attention to detail.

First, choose a headlight that is compatible with your e-bike’s power source and mounting system. Read the manufacturer’s instructions carefully to understand the installation steps. Generally, you will need to mount the light securely on the handlebars or the front fork using the provided brackets or straps.

After mounting the light, connect it to the power source, making sure the wires are properly secured and insulated. Finally, test the light to ensure it is working correctly. If you encounter any issues, refer to the troubleshooting section in the manufacturer’s manual.

Advertisement

Now that the light is installed, let’s move on to identifying the different light modes for optimal visibility.

Identify the Light Modes (e.g., steady, flashing, etc.)

Switch on the illuminating beam and explore the various light modes available on your e-bike for enhanced visibility during nighttime rides. Having proper lighting on your electric bike is crucial for safety on the road. Different light modes offer different benefits and can help you be seen by other vehicles.

Here are the various light modes you may find on your electric bike:

Advertisement
  1. Steady mode: This mode provides a constant source of light, ensuring visibility throughout your ride.
  2. Flashing mode: This mode emits intermittent flashes of light, making you more noticeable to others on the road.
  3. Strobe mode: This mode produces rapid and repetitive flashes, further increasing your visibility.
  4. Pulse mode: This mode creates a pulsating effect, catching the attention of drivers and pedestrians.

Understanding these different light modes will help you choose the most appropriate option for your specific riding conditions. Once you have identified the desired light mode, you can turn the light switch to the on position and continue your ride safely.

Turn the Light Switch to the On Position

Illuminate your path and ensure your safety by flipping the switch and activating the brilliant glow of your e-bike’s guiding light.

To turn on the light on your electric bike, you need to locate and install a light switch. The switch is usually located on the handlebars for easy access. Once you have located the switch, simply press or slide it to the ‘On’ position.

If the light doesn’t turn on, you might be facing some troubleshooting issues. Check if the light switch is properly connected and if there are any loose wires. Additionally, ensure that the battery of your e-bike is fully charged. If you are still having trouble, consult the user manual or contact the manufacturer for further assistance.

Now that your light is turned on, let’s move on to adjusting the light angle for optimal visibility.

Adjust the Light Angle for Optimal Visibility

Make sure you position the guiding light on your e-bike at the perfect angle to illuminate your path as brightly as a thousand suns.

Advertisement

Achieving the optimal lighting angle is crucial for ensuring maximum visibility while riding. Adjusting the light angle correctly will allow the beam to reach a wider area, enhancing your safety on the road.

By directing the light slightly downwards, you can illuminate the path in front of you while avoiding blinding other road users. It is essential to find the right balance between illuminating the road and preventing glare.

Remember, the importance of visibility cannot be overstated when it comes to riding at night or in low-light conditions.

Once you have adjusted the light angle, proceed to test the light to ensure it is functioning properly and ready for your next adventure.

Test the Light to Ensure it is Functioning Properly

Now, take a moment to confirm that your e-bike’s guiding light is functioning properly before embarking on your next adventure.

Advertisement

To test the light, follow this simple procedure and keep these troubleshooting tips in mind:

  • Ensure the e-bike is turned on and the battery is adequately charged.
  • Check the connection between the light and the wiring harness. Ensure it is securely fastened and free from any damage or corrosion.
  • Activate the light switch on your handlebar control panel. Observe if the light turns on and adjust the brightness settings if necessary.

By performing this test, you can ensure that your e-bike’s light is functioning optimally and will provide the visibility you need during nighttime rides for enhanced safety.

Now, let’s move on to how to use the light during nighttime rides for your utmost safety.

Use the Light during Nighttime Rides for Safety

Enhance your nighttime rides with a reliable source of illumination by utilizing the guiding light on your e-bike. Using the light during nighttime rides is essential for safety and provides several benefits.

Firstly, it increases your visibility to other road users, reducing the risk of accidents. Additionally, it allows you to see the road ahead clearly, avoiding any potential obstacles or hazards.

When choosing the right bike light for your electric bike, consider its brightness and beam pattern. A bright light with a wide beam angle will provide better visibility. Look for lights that are waterproof and have a long battery life to ensure they last throughout your ride.

Advertisement

Furthermore, consider using additional lights for enhanced visibility, such as a rear light and reflective accessories.

By utilizing these tips, you can ride confidently and safely during nighttime adventures.

Consider Using Additional Lights for Enhanced Visibility

For an added layer of safety and increased visibility, don’t forget about the power of additional lights during nighttime rides.

Enhanced visibility is crucial when riding an electric bike in low-light conditions, as it allows other road users to see you more easily. By using additional lights, such as front and rear LED lights, you can significantly improve your visibility and reduce the risk of accidents. These lights are designed to be bright and eye-catching, ensuring that you stand out on the road.

It’s important to note that the importance of additional lights should not be underestimated, especially when riding on busy roads or in areas with limited street lighting. By regularly checking the light’s battery level, you can ensure that your lights are always ready to provide the visibility you need for a safe ride.

Advertisement

Regularly Check the Light’s Battery Level

Make sure you keep an eye on your lights’ battery level to ensure they are always ready to illuminate your path during nighttime rides. Here are four steps to follow when checking and recharging your electric bike’s light batteries:

  1. Start by turning on your lights to see if they are functioning properly. If they appear dim or flicker, it might be an indicator of a low battery.

  2. Locate the battery compartment on your electric bike and open it carefully. Check the battery level indicator to see how much charge is remaining.

  3. If the battery level is low, connect the charger to the battery and plug it into a power source. Allow the batteries to recharge fully before disconnecting them.

  4. Regularly check the battery level and recharge the batteries as needed to ensure your lights are always ready for use.

By checking and recharging your electric bike’s light batteries regularly, you can ensure a safe and enjoyable nighttime ride.

Transitioning to the next section, it is important to charge or replace the batteries as needed to maintain optimal performance.

Charge or Replace the Light’s Batteries as Needed

To ensure you always have a reliable source of illumination, keep an eye on the battery level of your lights and be ready to charge or replace them when necessary.

Proper battery maintenance is crucial for the longevity and efficiency of your electric bike’s lights.

Advertisement

Firstly, make sure to use the correct type of batteries recommended by the manufacturer.

Regularly check the battery contacts for any signs of corrosion and clean them if necessary.

If the battery level is low, charge them using the provided charger.

If the batteries are no longer holding a charge, it’s time to replace them with new ones.

Troubleshooting tip: if the lights are not turning on even with fully charged batteries, check for loose connections or damaged wiring.

Advertisement

Once you have charged or replaced the batteries, you can move on to cleaning the lights and removing any dirt or debris, ensuring optimal performance.

Clean the Light and Remove any Dirt or Debris

Ensure your lights are always shining bright by giving them a thorough cleaning and removing any dirt or debris.

To clean the light on your electric bike, follow these cleaning methods and troubleshooting tips:

  • Start by wiping the light with a soft, lint-free cloth to remove any loose dirt or dust.
  • Use a mild soap solution and a sponge or soft brush to gently scrub the light, paying attention to any stubborn stains or grime.
  • Rinse the light thoroughly with clean water, ensuring that no soap residue remains.
  • Dry the light completely with a clean cloth to prevent water spots or corrosion.

By regularly cleaning your electric bike’s light, you can maintain its brightness and ensure its longevity.

After cleaning, store the electric bike in a safe and dry place to protect the light from any potential damage.

Store the Electric Bike in a Safe and Dry Place to Protect the Light

After ensuring that the light on my electric bike is clean and free from any dirt or debris, it is crucial to store the bike in a safe and dry place. Proper storage plays a significant role in electric bike maintenance, especially when it comes to protecting the light. By storing the bike in a secure location, such as a garage or shed, we minimize the risk of damage from moisture, extreme temperatures, or accidental bumps. Additionally, keeping the bike away from direct sunlight prevents the light from fading or becoming discolored over time. Remember, the light is an essential component of the bike, contributing to visibility and safety during rides. To transition into the subsequent section about following local laws and regulations regarding bike lights, it is vital to understand the importance of proper storage for maintaining the bike’s overall functionality and ensuring compliance with safety guidelines.

Advertisement

Follow Local Laws and Regulations Regarding Bike Lights

Complying with local laws and regulations on bicycle lighting is like navigating through a maze of traffic rules to keep you on the right path. Bike light regulations vary from place to place, so it is crucial to familiarize yourself with the specific requirements in your area. Understanding these regulations is essential for your safety and the safety of others.

Here are some reasons why bike lights are of utmost importance:

  • Increased visibility: Bike lights make you more visible to motorists, pedestrians, and other cyclists, reducing the risk of accidents.
  • Improved safety at night: Properly functioning lights allow you to see obstacles in your path and help others see you, ensuring a safer ride.
  • Legal compliance: Many jurisdictions require cyclists to have lights when riding at night or in low-light conditions.
  • Avoiding fines: Failing to comply with bike light regulations can result in fines or penalties.
  • Setting a good example: By adhering to the rules, you promote responsible cycling and contribute to a safer biking community.

Remember, following local laws and regulations regarding bike lights is essential for your safety and the well-being of all road users.

Frequently Asked Questions

Can I use the light on my electric bike during daytime rides?

Yes, you can use the light on your electric bike during daytime rides. Electric bike lights are not just for night rides. They provide visibility, making you more visible to other road users, enhancing safety.

How do I know if the light on my electric bike needs to be replaced?

To determine if the electric bike light needs replacement, inspect for flickering, dimness, or complete failure. Check the wiring and connections for any damage or loose connections. Consult the user manual or contact the manufacturer for specific instructions on light replacement.

Are there any specific regulations regarding bike lights that I need to follow?

There are specific bike light regulations and safety guidelines that need to be followed. These regulations ensure visibility and safety for both the cyclist and other road users. Compliance with these regulations is crucial to avoid any legal consequences.

Advertisement

What are the different light modes available on electric bikes?

Different electric bikes offer various light modes with different light intensities. To change these modes, consult the user manual for specific instructions. Typically, there will be a button or switch on the bike’s control panel to adjust the light modes.

How often should I clean the light on my electric bike?

I have found that cleaning the light on my electric bike every 2-3 weeks keeps it in optimal condition. To clean, I recommend using a soft cloth and mild soapy water, avoiding abrasive cleaners that could damage the light.

Conclusion

Well, it seems like turning on the light on your electric bike is quite a journey.

From locating the light switch to checking if it’s pre-installed or not, installing it if necessary, and even identifying the different light modes.

And let’s not forget about charging or replacing the batteries, cleaning the light, and storing the bike safely.

Advertisement

It’s almost ironic how something as simple as turning on a light can involve so many steps. But hey, safety first, right?

So, follow these detailed instructions and make sure you’re abiding by the local laws and regulations.

Happy biking!

Continue Reading
Advertisement

Affiliate disclaimer

As an affiliate, we may earn a commission from qualifying purchases. We get commissions for purchases made through links on this website from Amazon and other third parties.

About us

We are a passionate team driven by the belief that cycling is a fantastic and accessible way to stay active while enjoying the beauty of the outdoors. Our mission is to share our love for cycling with as many people as possible. We provide a welcoming environment for individuals of all ages, abilities, and backgrounds to come together and ride bikes. With Ralf’s visionary leadership, Zane’s expertise in cycling adventures, and Olivia’s dedication to community building, we strive to create a vibrant space where everyone can experience the joy of cycling. Through group rides, workshops, and inclusive events, we inspire and empower individuals to embrace an active lifestyle. Join us in our quest to pedal together, embrace the joy of cycling, and foster connections that last a lifetime.

Advertisement

Trending