
As someone passionate about cycling, I understand the annoyance of dealing with a bent bike rim. It feels like you’re attempting to pedal with an unstable wheel – it’s not just uncomfortable but hazardous as well. Yet, there’s no need to worry! With some patience and the right tools, you can fix a warped bicycle rim and return to your enjoyable cycling experiences.
Picture a spinning wheel – it’s a beautiful thing, right? But when that wheel is bent, it’s like a piece of modern art gone wrong. The good news is that you can fix it yourself, without having to take it to a bike shop.
In this article, I’ll guide you through the steps to straighten out a bent bicycle rim, so you can get back on the road with a wheel that’s as straight as an arrow. So, let’s get started!
Key Takeaways
- Regularly inspect your bike to prevent damage and catch minor issues before they become severe.
- Use a spoke wrench to locate and fix a bend, and adjust spokes in small increments to ensure proper alignment.
- Loosen opposite spokes before adjusting the tension in the affected area to prevent wobbling.
- Use a truing stand or brake pads to check for remaining wobbles, and re-tension the wheel to ensure proper alignment.
Top picks for "straighten bent bicycle"
Open Amazon search results for this keyword.
As an affiliate, we earn on qualifying purchases.
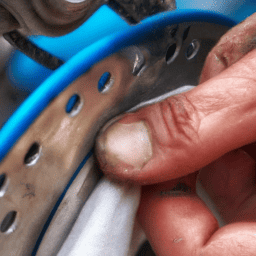
Assess the Damage
Now that I’ve taken a closer look at my bent bicycle rim, I’ve noticed that there are multiple points of damage on it. This is a common issue that many cyclists face, and it can be caused by a variety of factors such as hitting a pothole, jumping off a curb, or even just normal wear and tear.
To prevent this from happening in the future, it’s important to regularly inspect your bike and make sure that everything is in good working order. This includes checking the tension of your spokes and making sure that your tires are properly inflated.
If you do notice that your rim is bent, it’s important to take action right away. Depending on the severity of the damage, you may be able to straighten it yourself or you may need to seek professional help. In general, if the damage is minor and you have experience working on bikes, you may be able to straighten the rim yourself using some basic tools. However, if the damage is more severe or if you’re unsure about how to proceed, it’s always best to seek the help of a professional.
Now, let’s move on to the next step and remove the tire and inner tube.
Remove the Tire and Inner Tube
First, you’ll need to get that pesky rubber tire and inner tube off the wheel, which might feel like trying to wrangle an angry octopus out of a jar. But fear not, with proper tire removal techniques, this task can be accomplished smoothly and efficiently.
Start by using tire levers to pry the tire away from the rim, working your way around the circumference until the tire is loose enough to be removed by hand.
Once the tire is off, inspect the inner tube for any punctures or damage. It’s important to catch any issues now before going through the effort of straightening the rim, only to have the same problem occur again later. Check for any obvious signs of wear or tears, and also inflate the tube to check for any leaks that may not be visible to the naked eye.
With the inner tube inspected and the tire removed, we can move on to the next step of using a spoke wrench to straighten the rim.
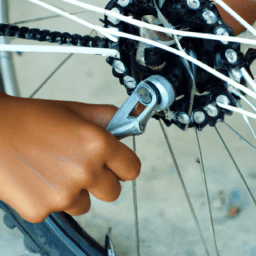
Use a Spoke Wrench
So now that I’ve removed the tire and inner tube, I can see that my bicycle rim is bent. To fix this, I need to use a spoke wrench to locate the area of the bend.
Once I’ve found it, I’ll need to loosen the opposite spokes, tighten the bent spokes, and re-tension the wheel. It’s important to be precise with my adjustments to ensure the wheel is straight and balanced.
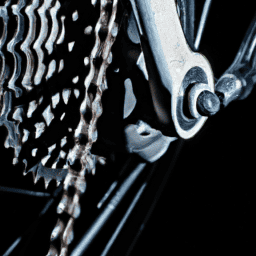
Locate the bent area
To find the bent area on your bike’s rim, start by spinning the wheel and looking for any wobbles or dips in the rotation. These are clear indicators of a bent rim.
It’s important to identify the exact location of the bend so that you can apply your straightening techniques effectively. Causes of bicycle rim bending can vary from hitting a pothole or curb to improper spoke tension.
To prevent rim bending, it’s important to ensure that your spokes are properly tensioned and that you avoid riding on rough or uneven surfaces. Once you’ve located the bent area of your bike’s rim, the first step in straightening it is to loosen the opposite spokes.
This will allow you to adjust the tension on the affected area without causing further damage. By loosening the opposite spokes, you’ll be able to redistribute the tension across the wheel and prevent any further warping.
Loosen opposite spokes
Before you start adjusting the tension on the affected area, make sure to loosen the opposite spokes to redistribute the tension and avoid further damage. This step is crucial in maintaining the alignment of the rim and preventing further damage to the wheel.
When the rim is bent, it causes uneven tension on the spokes. By loosening the opposite spokes, you’re redistributing the tension on the wheel, allowing it to maintain its balance.
To ensure the proper alignment of the rim, it’s important to use a spoke wrench and adjust the spokes in small increments. Start with the opposite spokes that you’ve loosened earlier and work your way towards the affected area.
Make sure to keep track of the number of turns you make on each spoke to ensure that the tension is evenly distributed. By following these steps, you can prevent further damage to the rim and straighten out the wheel.
With the opposite spokes now loose, you can proceed to the next step of tightening the bent spokes.
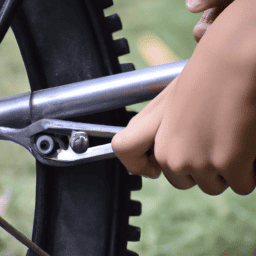
Tighten the bent spokes
Now it’s time to get those spokes tightened up and your wheel spinning like a dream again! Spoke maintenance is crucial to maintaining proper wheel alignment and preventing future damage. Using your spoke wrench, turn each spoke a bit at a time until they’re all snug as a bug in a rug. Remember to work in a pattern, tightening the spokes on one side of the rim before moving on to the other side. Don’t worry if it feels like you’re turning forever – you want to make sure each spoke is equally tight so your wheel won’t wobble like a jelly on a plate.
To ensure proper wheel alignment, use a truing stand or flip your bike upside down and use the brake pads as a guide. Check the rim for any remaining wobbles or hops and adjust the spokes as necessary. It may take a few rounds of tightening and adjusting, but with patience and attention to detail, you can get your wheel back in tip-top shape. Next, we’ll move on to the final step of re-tensioning the wheel.
Re-tension the wheel
Get ready to feel the smooth ride of your newly tightened wheel as we move on to the final step of re-tensioning! Adjusting spoke tension is crucial to ensure that the wheel is straight and aligned properly. This process involves bringing each spoke to the correct tension level. It may seem daunting, but with patience and a spoke wrench, you can easily accomplish this task.
Start by using a spoke wrench to adjust each spoke’s tension level until it’s the same as its neighboring spokes. Work your way around the wheel in a pattern, making small adjustments to each spoke until the tension is even.
Remember to check the wheel’s alignment throughout the process to ensure that it remains straight. The importance of proper wheel alignment can’t be overstated, as it can lead to uneven wear on your tire, create a wobbly ride, and even cause damage to your bike.
Once you’ve finished re-tensioning the wheel, you’re ready to move on to the next step of reinstalling the tire and inner tube.
Reinstall the Tire and Inner Tube
Once you’ve repositioned the wheel, it’s time to pop the tire and inner tube back on. Before doing so, make sure that you have the proper tire for your rim size and type. Also, check the recommended inflation level for your particular tire, as over or under inflating can cause further damage to your wheel.
Once you have the correct tire, carefully insert the inner tube into the tire and place the tire onto the rim, ensuring that the valve stem is aligned with the hole in the rim. Then, use your hands to push the tire onto the rim, starting at one side and working your way around until the tire is fully seated.
Finally, inflate the tire to the recommended pressure and give it a spin to ensure that it rolls smoothly. With the tire and inner tube reinstalled, it’s time to move on to testing and adjusting the wheel to ensure that it’s fully straightened.
Test and Adjust the Wheel
It’s important to ensure that your newly installed tire and inner tube are properly aligned, so take a moment to test and adjust the wheel for a smooth ride.
Start by spinning the wheel and observing its rotation. If the wheel wobbles or moves side to side, it may be a sign of misalignment.
To adjust the alignment, use a spoke wrench to adjust the tension of spokes on either side of the misaligned area. Start by turning the spoke wrench clockwise to tighten the spoke and pull the rim towards the center of the wheel. If the wheel is pulled too far to one side, use the spoke wrench to loosen the spokes on the opposite side of the misaligned area.
Once the wheel is properly aligned, test it again by spinning it and observing its rotation. If it still wobbles or moves side to side, continue adjusting the spoke tension until it spins smoothly.
Frequently Asked Questions
How can I prevent my bicycle rim from getting bent in the first place?
To prevent my bicycle rim from getting bent, I follow preventive measures and maintenance tips. I avoid hitting potholes or curbs, and regularly check tire pressure and spoke tension. Properly aligning the brakes also helps prevent damage.
Can a bent bicycle rim be fixed without using a spoke wrench?
Alternative solutions for fixing a bent bicycle rim without a spoke wrench include DIY techniques such as using pliers or a hammer. However, these methods may not be as effective and could potentially cause further damage.
Is it safe to ride a bicycle with a slightly bent rim?
Riding with a slightly bent rim is risky. It can cause instability, vibrations, and even a blowout. Repair options include replacing the rim or having a professional straighten it. Safety should always be the top priority.
How long does it typically take to straighten a bent bicycle rim?
Straightening a bent bicycle rim can take anywhere from 30 minutes to an hour depending on the severity of the bend. Tips for quick straightening include loosening spokes and using a spoke wrench. Common causes of bent rims include hitting potholes or curbs.
Are there any temporary fixes I can use if I don’t have access to tools or a bike shop?
If I don’t have access to tools or a bike shop, there are temporary solutions I can try to straighten a bent bicycle rim. Some DIY methods include using a spoke wrench, pliers, or even a hammer and block of wood.
Conclusion
Well folks, there you have it. Straightening a bent bicycle rim can be a daunting task, but with the right tools and some patience, it can be done.
Remember to always assess the damage before attempting any repairs and to remove the tire and inner tube before using a spoke wrench.
Once you have straightened the rim to your satisfaction, it’s important to reinstall the tire and inner tube correctly and to test and adjust the wheel as needed.
Don’t forget to give your bike a good once-over to ensure there are no other issues before hitting the road. And always remember, safety first!
In conclusion, fixing a bent bicycle rim is just one of the many skills that a bike enthusiast should have in their tool belt.
So, get out there, grab your spoke wrench, and get to work. Your trusty steed will thank you for it, and you’ll be back on the road in no time. And as they say, "smooth roads never make good drivers."