Do you feel exhausted from riding down the street with a bent bicycle wheel? Fixing a bicycle wheel might appear challenging, yet with the appropriate equipment and methods, you’re fully capable of correcting the issue on your own.
In this article, we will guide you through the process of straightening a bicycle rim step-by-step, so you can ride with ease and confidence. Before we dive in, its important to gather the necessary tools for the job. You will need a spoke wrench, a truing stand or a makeshift stand, and a rag or towel.
Its also helpful to have a marker or tape to mark the high and low spots on the rim. Once you have these tools ready, we can move on to identifying the problem and choosing the best method for straightening your rim.
With a little patience and attention to detail, youll be cruising down the road on a smooth, straight wheel in no time.
Key Takeaways
- The tools and materials needed for straightening a bicycle rim include a spoke wrench, truing stand, rag or towel, marker or tape, specialized tools for rim straightening, and a proper replacement rim.
- Identifying and preventing rim damage involves understanding common causes of bent or warped rims and implementing preventative measures, as well as regular maintenance to extend rim life.
- Straightening a bicycle rim involves identifying problem areas, adjusting spoke tension, using a rim straightening tool if necessary, and applying pressure evenly. Testing the work by spinning the wheel and checking the brakes is also important.
- Testing and troubleshooting is crucial after straightening a rim. This includes test riding for smoothness, watching for vibrations or shaking, and checking for loose or broken spokes. Regular maintenance and preventative measures can help prevent future damage to the rim.
Top picks for "straighten bicycle"
Open Amazon search results for this keyword.
As an affiliate, we earn on qualifying purchases.
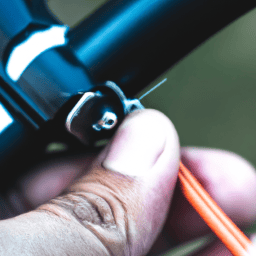
Gather Your Tools
Gather your tools.
You’ll wanna grab your tools before diving into straightening that bicycle rim! It’s crucial to have the proper tools to avoid causing further damage to the rim or spokes.
The importance of proper tool selection cannot be stressed enough. Some of the tools you’ll need include spoke wrenches, pliers, a truing stand or a zip tie, and a nipple driver.
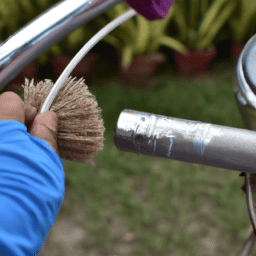
In addition to having the right tools, it’s also essential to maintain your bicycle rims regularly. You can do this by checking the tension of your spokes regularly and making sure your wheels are true.
It’s also a good idea to clean your rims with soap and water to remove any dirt or debris that may have collected on them. By taking care of your bicycle rims, you’ll extend their life and prevent the need for frequent repairs.
Now that you have your tools ready, let’s move on to identifying the problem with your bicycle rim.
Identify the Problem
Identifying the issue can be accomplished by examining the wheel’s overall performance and observing any irregularities in its movement. Some common causes of a bent or warped bicycle rim include hitting potholes or curbs, improper spoke tension, or a collision with another object.
Prevention tips include avoiding obstacles in the road, regularly checking and adjusting spoke tension, and being mindful of the weight capacity of the bike. If you notice any wobbling or rubbing while riding, it may be a sign that your bicycle rim is in need of straightening.
Before straightening your rim, it’s important to identify the issue and take preventative measures to avoid future damage. Once you have identified the problem and taken steps to prevent it from happening again, you can move on to choosing your method for straightening the rim.
Choose Your Method
When it comes to straightening your bicycle rim, there are different methods you can choose from.
One option is to adjust the tension of the spokes, which can help to realign the rim.
Alternatively, you can use a specialized tool designed specifically for straightening rims.
If the damage to your rim is severe, you may need to consider replacing the entire rim altogether.
It’s important to weigh the pros and cons of each method and choose the one that’s best suited for your particular situation.
Adjusting spoke tension
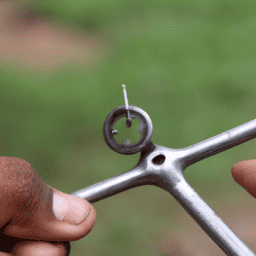
To properly adjust the spoke tension, start by loosening all the spokes on the affected side of the rim. This step is crucial to ensure that the tension is evenly distributed among all the spokes.
Once all the spokes are loosened, use a spoke wrench to tighten each spoke until the rim is straightened. Here are some tips to keep in mind while adjusting spoke tension:
- Be patient and take your time. Adjusting the spoke tension can take some time, but rushing through the process can result in an unevenly tensioned wheel.
- Use a spoke tension meter to ensure that each spoke is tightened to the appropriate tension. This will help you achieve a more accurate and consistent tension across all the spokes.
- Make small adjustments to the spoke tension. Avoid tightening or loosening the spokes too much at once, as this can lead to overcorrection and cause the rim to become even more out of true.
After adjusting the spoke tension, the next step in straightening a bicycle rim is using a rim straightening tool.
Using a rim straightening tool
Now that you’ve adjusted the spoke tension, it’s time to grab your rim straightening tool to fine-tune the alignment of your wheel. Using a rim straightening tool is an efficient way to ensure your wheel is perfectly straight, and it’s important to use the tool correctly to avoid common rim straightening errors.
When using a rim straightening tool, make sure to apply pressure evenly around the rim and not just in one spot. This will prevent the rim from becoming warped or bent in a different direction. It’s also important to pay attention to the depth of the tool’s hooks, as they shouldn’t be too deep or shallow. Using the tool correctly ensures that your wheel is perfectly aligned and ready to ride.
To avoid having to use a rim straightening tool too often, it’s important to properly maintain your bicycle and avoid rough terrain when possible. However, if you do find that your rim is beyond repair, replacing the rim may be necessary.
Replacing the rim
If you’re noticing that your wheel is damaged beyond repair, you’ll need to replace the rim. Choosing the right materials is crucial for the longevity and performance of your bike. You’ll want to select a rim that matches the specifications of your old one, such as its diameter, width, and spoke hole count. Additionally, consider the type of riding you’ll be doing and choose a rim that can handle the terrain and stresses you’ll encounter.
Once you have your new rim, you’ll need to find a professional to help with the installation process. This is especially important if you’re not experienced with bike repairs. A professional can ensure that your new rim is properly aligned and tensioned, preventing future issues with your wheel. With your new rim installed, you’ll be ready to move on to the next step of straightening the rim.
Straighten the Rim
First, don’t worry if you think you don’t have the right tools because a bent rim can often be fixed with just a few adjustments. Common causes of a bent rim include hitting a pothole or curb, or from an impact with another object. To prevent this from happening, it’s important to keep your eyes on the road ahead and avoid obstacles whenever possible. Additionally, make sure your tires are properly inflated and that your bike is properly maintained.
To straighten the rim, you’ll need a spoke wrench and a truing stand or a zip tie. First, identify the areas of the rim that are out of true by spinning the wheel and observing where the rim wobbles. Then, using the spoke wrench, tighten or loosen the spokes that correspond to the areas of the rim that are out of true.
Once you’ve made the necessary adjustments, spin the wheel again to check your work. If the rim is still out of true, make additional adjustments until it spins smoothly. Test your work by riding your bike and ensuring that the wheel spins smoothly and doesn’t rub against the brake pads.
Test Your Work
Once you’ve made the necessary adjustments, you’ll want to hop on your bike and take it for a spin to test your work and ensure a smooth ride. Here are three things you should keep in mind while testing your newly straightened rim:
-
Pay close attention to any wobbling or shuddering in the wheel. If you feel any vibrations or shaking, it could be a sign that the rim is still not straight, or that you missed a step in the straightening process.
-
Test your brakes. Make sure they engage smoothly and effectively. If you notice any issues, such as the brake pads rubbing against the rim, or difficulty stopping, this could be a sign that the rim is not properly aligned.
-
Lastly, check the spokes. Look for any loose or broken spokes, as these can cause instability in the wheel. If you notice any issues, you may need to tighten or replace the spokes.
By following these steps, you can ensure that your rim is straight and your bike is in top condition. If you do run into any common mistakes or issues while testing your work, refer back to the previous subtopic for troubleshooting tips.
Frequently Asked Questions
Can a bent bicycle rim be fixed without using any tools?
Straightening a bent bicycle rim without tools is like trying to dig a hole with your bare hands. Alternative solutions include taking it to a professional or using a spoke wrench. Prevention tips include avoiding rough terrain and maintaining proper tire pressure.
Is it possible to straighten a severely bent rim or is it better to replace it?
If your bicycle rim is severely bent, it is better to replace it than attempt to fix it. While professional repair options exist, the cost may not be worth it. Nonetheless, always consult a professional before making any decision.
How long does it take to straighten a bicycle rim?
You can straighten a bicycle rim in under an hour using a spoke wrench and a truing stand. Efficient techniques involve small adjustments and checking tension regularly. Prevent future damage by avoiding potholes and using proper tire pressure. Hyperbole: You’ll be a wheel wizard in no time.
Are there any precautions to take before attempting to straighten a rim?
Before attempting to straighten a rim, take precautions such as checking the spoke tension, removing the tire and tube, and inspecting the rim for cracks. Tools-free fixing may be possible by using your hands or a simple spoon.
Can a bent rim affect the performance of the bike in any other way besides causing wobbling or rubbing against the brakes?
A bent rim can cause a host of problems beyond wobbling or brake rubbing. It can impact tire wear, alter handling and balance, and even compromise overall safety. Regular maintenance can prevent these effects.
Conclusion
Congratulations! You’ve successfully straightened your bicycle rim. Not only have you saved yourself money by avoiding a trip to the bike shop, but you’ve also gained valuable knowledge about bike maintenance.
Did you know that a misaligned wheel can cause up to a 30% decrease in efficiency? That means if you’re riding with a bent rim, you’re using more energy to cover the same distance as someone with a straight rim.
It’s important to regularly check your rims for any signs of damage and address any issues promptly. Remember to always gather your tools, identify the problem, choose the appropriate method, and test your work.
With these steps, you can confidently handle any minor repairs your bike may need. Happy riding!