For someone who loves cycling, it’s incredibly irritating to discover that my bicycle wheel is misshapen or not perfectly aligned. This misalignment could be the result of traversing challenging landscapes, impacts from crashes, or simply the everyday deterioration. A deformed wheel leads to decreased efficiency, rides that are less than comfortable, and can even result in perilous situations.
However, with the right tools and techniques, it is possible to straighten a bicycle wheel at home. Straightening a bike wheel requires patience, precision, and attention to detail. It’s a delicate process that involves adjusting the tension of individual spokes until the wheel spins smoothly and evenly.
In this article, I will guide you through the step-by-step process of how to straighten a bicycle wheel, from assessing the damage to testing the final result. With some practice and a little bit of elbow grease, you’ll be able to fix your own bike wheel and get back to cruising down the road in no time.
Key Takeaways
- Straightening a bike wheel is crucial for optimal performance, comfort, and safety while riding.
- To straighten a bike wheel at home, one needs the appropriate tools such as a truing stand and spoke wrench, and should assess the damage to determine the extent of work needed.
- Working on one spoke at a time and keeping track of the number of turns is important for consistency, and opposite spokes should be tightened to achieve desired tension and ensure wheel stability.
- Regularly checking and maintaining spoke tension can prevent a wobbly wheel, and using wider tires and being aware of surroundings while riding can reduce the likelihood of damage.

Varstrom 48V 1000W 1500W Rear & Front Hub Motor Kit - Ebike Conversion Kit for 26"/27.5"/28"/29"/700C Front Rear Wheel,Electric Bike Conversion Set with Display & Ebike Battery (Optional)
【POWERFUL 48V 1000W Front Hub Motor Kit】: 48V 1000W front wheel motor kit is designed for a variety...
As an affiliate, we earn on qualifying purchases.
Assess the Damage
You need to take a close look at your wheel to see where the damage is and how severe it is. Determining the extent of the damage is important because it’ll determine the amount of work you need to do to straighten the wheel.
Check for any bends, dents, or cracks, and feel for any wobbles as you spin the wheel. If the wheel is only slightly out of true, then it may just need a few adjustments. However, if there are serious bends or cracks, then the wheel may need to be replaced altogether.
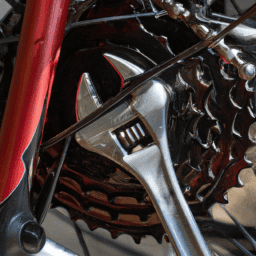
To assess the damage, you’ll need some necessary tools. A truing stand is ideal, but not everyone has access to one. You can still do the job without a truing stand, but it’ll take a bit more time and effort.
You’ll also need a spoke wrench, which is used to tighten or loosen the spokes. With these tools in hand, you can move on to the next step of loosening the spokes.

PEXMOR Electric Bike Conversion Kit, 20"/24" Front Wheel Ebike Conversion Kit, 36V 750W Electric Bike Hub Motor Kit w/3 Mode Controller/PAS/LCD Display/Twist Throttle Electric Bicycle Ebike Kit
【POWERFUL BRUSHLESS MOTOR】-The 36V 750W ebike front wheel conversion motor kit features a powerful brushless hub motor.It runs...
As an affiliate, we earn on qualifying purchases.
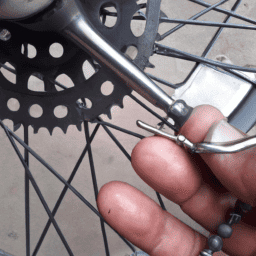
Loosen the Spokes
Gently turn the spoke wrench counterclockwise to gradually loosen the tension on the spokes. To adjust the tension properly, it’s important to work on one spoke at a time. Here are some tips to keep in mind when loosening the spokes:
- Use the appropriate spoke wrench size to avoid stripping the nipples.
- Loosen the spoke gradually and carefully to prevent damaging the wheel.
- Keep track of the number of turns on each spoke for consistency.
- Check the spoke alignment as you loosen them to ensure they’re not twisted.
- Work around the wheel evenly, starting at the valve stem and making your way around in a clockwise or counterclockwise direction.
Once you’ve loosened the spokes and achieved the desired spoke tension, it’s time to tighten the opposite spokes.

Ktaxon Electric Bike Conversion Kit, 48V 1000W Ebike Conversion Kit, 26" Front/Rear Wheel E-Bike Conversion Kits with PAS, LCD Display, Aluminum Alloy Frame and Gearless Hub Motor (Front Wheel)
【UNMATCHED MOTOR KIT】With 48V 1000W brushless and gearless hub motor, this ebike conversion kit creates efficient and noiseless...
As an affiliate, we earn on qualifying purchases.
Tighten the Opposite Spokes
After loosening the spokes, it’s important to tighten the opposite ones to achieve the desired spoke tension and ensure the wheel’s stability. To do this, I use a spoke wrench to turn the nipples on the opposite side of the wheel in a clockwise direction. I usually tighten them in small increments, about a quarter turn each time, while checking the spoke tension and wheel alignment frequently.
It’s important to note that tightening the opposite spokes will cause the wheel to move slightly in the opposite direction. Therefore, after tightening the opposite spokes, it’s necessary to re-check the wheel’s alignment and adjust as needed.
Once the spoke tension and wheel alignment are correct, I can move on to the next step of re-truing the wheel.

Wahoo Fitness KICKR CORE 1
CONTROLLED RESISTANCE - When connected to your smartphone, tablet, computer, or GPS bike computer, KICKR CORE indoor smart...
As an affiliate, we earn on qualifying purchases.
Re-True the Wheel
Now it’s time to bring the wobbly wheel back into shape by adjusting the spoke tension and realigning the rim.
To re-true the wheel, first, I locate the spot where the rim is the furthest off-center and mark it with a piece of tape. Then, I use a spoke wrench to tighten or loosen the spokes in small increments, starting with the ones opposite the marked spot. By doing so, I alleviate tension on the side that’s pulling too hard and increase the tension on the side that’s not pulling enough, bringing the wheel closer to true.
While tightening and loosening the spokes, I check the wheel alignment by spinning it and observing the gap between the rim and the brake pads. I repeat the process of tightening and loosening until the rim is perfectly centered and the gap is consistent.
Additionally, I check the spoke tension using a spoke tension meter. I aim for a uniform tension across all spokes, making sure not to overtighten them.
Once I’m satisfied with the alignment and spoke tension, I move on to the next step of testing the wheel without any wobbles or hops.
Test the Wheel
Let’s give the newly trued wheel a spin to see if it glides smoothly without any wobbles or bumps! This step is crucial in ensuring that the wheel is properly straightened and ready for use.
A common cause of a wheel that’s not straight is due to the spokes being unevenly tensioned. To prevent this, it’s important to regularly check the tension of the spokes and adjust them as needed.
Another common cause of a wobbly wheel is due to damage from hitting a curb or pothole. To prevent this, it’s important to be aware of your surroundings while riding and avoid potential hazards.
Additionally, using wider tires can help absorb some of the impact and reduce the likelihood of damage to the wheel. By regularly testing and maintaining the straightness of your bicycle wheel, you can ensure a smooth and safe riding experience.
Frequently Asked Questions
Can I use regular pliers to loosen the spokes or do I need a specific tool?
I can use regular pliers for spoke adjustment, but there are pros and cons to consider. Using a spoke wrench is more precise and less likely to damage the spoke or nipple, but pliers can work in a pinch.
How do I know if my wheel is irreparably damaged and needs to be replaced?
My heart sank when I saw the cracks on my bike wheel. Signs of irreparable damage include bent rims, broken spokes, and deep scratches. Replacement options include buying a new wheel or seeking professional repair vs DIY methods.
Is it necessary to lubricate the spoke nipples before tightening them?
When tightening spoke nipples, using lubrication can make the process easier and prevent damage to the threads. However, over-lubrication can attract dirt and cause nipples to come loose. Lubricate sparingly and only when necessary.
Can I straighten my wheel without removing it from the bike?
When it comes to Bicycle wheel maintenance and DIY bike repairs, it’s possible to straighten a wheel without removing it from the bike. However, it’s important to ensure the bike is stable and that the wheel spins freely before attempting any adjustments.
What is the maximum amount of tension I should apply to the spokes?
Proper spoke tension is crucial for wheel stability and longevity. When using spoke wrenches, I recommend gradually increasing tension until the spokes are tight but not overly strained. Avoid exceeding the maximum recommended tension for your specific wheel.
Conclusion
In conclusion, straightening a bicycle wheel isn’t a task for the faint of heart. It requires patience, precision, and a steady hand.
Assessing the damage is crucial as it helps determine the extent of the repairs needed. Loosening the spokes and tightening the opposite ones may seem counterintuitive, but it’s a necessary step in the process.
Re-truing the wheel takes time and attention to detail, but the end result is worth it. Like a surgeon operating on a patient, every move must be deliberate and calculated.
One wrong move could mean the difference between a smooth ride and a bumpy one. It’s important to remember that practice makes perfect, and it may take a few tries before you get the hang of it.
But with a little persistence and determination, you’ll be able to straighten a bicycle wheel like a pro. So grab your tools, get to work, and enjoy the satisfaction of a job well done.