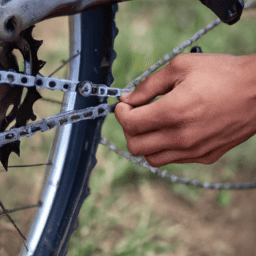
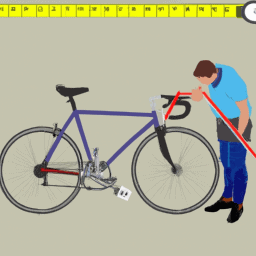
Removing a bicycle chain might appear challenging at first, yet it becomes straightforward with the correct tools and methods. For cyclists, mastering the art of chain removal is essential. It empowers you to clean or change the chain, or fix a damaged link, making it a skill worth acquiring.
In this article, I will guide you through the steps of taking a bicycle chain off with precision and ease.
Before we begin, make sure you have all the necessary tools on hand. You will need a chain tool, which is a small handheld device used for removing and installing chain pins. You may also need a pair of pliers to help with the process.
It’s important to note that not all chains are created equal, so make sure you have the correct chain tool for your specific chain type. Once you have your tools ready, we can proceed with the steps to take the chain off your bicycle.
Key Takeaways
- Position the bike properly using a stand and shifting gears before removing the chain.
- Use a chain tool to remove the master link and clean and inspect the chain before determining the correct length for reinstallation.
- Use the chain tool to reconnect the chain and lubricate it before testing the gears.
- Regular chain maintenance is important to prevent wear and tear on the bike and ensure proper functioning, with different lubricants available for different riding conditions.
Gather the Necessary Tools
Before you get started, make sure you’ve got the right tools – it’ll save you time and frustration later on.
To take a bicycle chain off, you’ll need a few things: a chain tool, a pair of pliers, and a rag. The chain tool is the most important tool you’ll need, as it’s specifically designed to remove and install bicycle chains. Pliers are useful for holding the chain in place while you work, and a rag will help keep your hands clean and prevent any dirt or grease from getting on your bike.
It’s also important to note that proper chain maintenance is key to keeping your bike running smoothly. Regularly cleaning and lubricating your chain can help prevent wear and tear, and extend the life of your bike.
There are many types of lubricants available, so be sure to choose one that’s appropriate for your bike and riding conditions. With the right tools and proper maintenance, taking your bicycle chain off will be a breeze.
Now, let’s move on to positioning your bike.
Position Your Bike
To position my bike properly for removing the chain, I need to shift the gears to the smallest chainring and rear cog. This ensures that the chain is at its loosest and easiest to remove.
Next, I’ll need to secure my bike in place using a bike stand or by propping it up against a stable surface. This’ll prevent any unnecessary movement while I work on the chain.
Shift Gears to Smallest Chainring and Rear Cog
First, make sure you shift the gears to the smallest chainring and rear cog before attempting to remove the bicycle chain. This will prevent any tension or resistance in the chain, making it easier to take off. To shift gears properly, use the gear shifters on the handlebars. The left shifter controls the front derailleur, which moves the chain between the chainrings. The right shifter controls the rear derailleur, which moves the chain between the rear cogs. Shift the left shifter to the smallest chainring and the right shifter to the smallest rear cog.
Using a bike stand while removing a chain can also be very beneficial. By elevating the bike off the ground, you can work more comfortably and get a better view of the chain. It also makes it easier to turn the pedals and shift gears while the chain is off. Once you have shifted the gears and positioned your bike on a stand, you are ready to remove the chain.
To secure your bike, you can either clamp it to the stand or use a strap to fasten the bike to the stand. This will prevent it from falling or moving while you work on it. With your bike secure, you can move on to the next step of removing the chain.
Secure Your Bike
Now that you’ve shifted gears and positioned your bike on a stand, it’s time to secure it to prevent any accidents while you work. This step is crucial, especially if you’re working on your bike outdoors or in a public area.
There are several locking mechanisms you can use to secure your bike, including cable locks and U-locks. Cable locks are flexible and lightweight, making them easy to transport. They’re ideal for short stops in low-risk areas. On the other hand, U-locks are more durable and difficult to cut than cable locks. They’re heavier and bulkier, but they offer better theft prevention.
Once you’ve chosen a locking mechanism, wrap it around the frame of your bike and a secure object, such as a bike rack or sturdy post. Make sure the lock is tight and cannot be easily removed. With your bike secured, you can now move on to removing the chain.
This step requires a bit more effort, but with the right tools and instructions, you can do it yourself.
Remove the Chain
Okay, time to get that chain off your bike! Let’s start by flipping your bike upside down so you can access the chain easily. Once your bike is safely inverted, locate the master link on your chain. This is the link that can be easily removed to take the chain off.
Now, let’s take a look at the table below for a step-by-step guide on how to remove the chain from your bike:
| Step | Action |
|---|---|
| 1. | Locate the master link on your chain. |
| 2. | Use a pair of pliers to remove the clip holding the master link in place. |
| 3. | Slide the master link out of the chain. |
| 4. | Carefully remove the chain from the bike. |
Chain maintenance is an important aspect of bike repair and this includes removing the chain for cleaning and inspection. Once the chain is off the bike, you can move on to the next step of the maintenance process: cleaning and inspecting the chain.
Clean and Inspect the Chain
After removing the clip with pliers, you can easily slide the master link out of the chain for inspection and cleaning, ensuring that your bike runs smoothly and efficiently.
Here are some techniques and tips to follow:
-
Use a degreaser: Start by applying a degreaser to the chain to break down any dirt or grime buildup. Let it sit for a few minutes before wiping it off with a clean rag.
-
Scrub with a brush: Use a chain cleaning brush to scrub the chain, making sure to get into all the nooks and crannies. This will help remove any remaining dirt or debris.
-
Rinse with water: Rinse the chain thoroughly with water to remove any remaining degreaser and dirt.
-
Dry thoroughly: Make sure to dry the chain completely with a clean rag before reinstalling it.
By following these techniques and tips, you can ensure that your bike’s chain runs smoothly and efficiently.
Now that the chain is clean, it’s time to reinstall it onto the bike for your next ride.
Reinstall the Chain
Now that I’ve cleaned and inspected my bicycle chain, it’s time to reinstall it.
The first step is to determine the correct chain length by counting the number of links needed for my specific bike.
Then, I’ll use a chain tool to reconnect the chain and make sure it’s properly tensioned.
Before taking my bike out for a ride, I’ll shift through all gears to ensure proper functioning and to avoid any potential issues while on the road.
Determine Correct Chain Length
To figure out the right length for your chain, you’re going to need to do a little bit of measuring. Chain sizing is important because if your chain is too long, it can cause shifting problems and if it’s too short, it can damage your bike’s drivetrain.
The first step is to determine the number of links your chain needs to have. This can be done by counting the number of teeth on your largest chainring and the number of teeth on your largest cassette cog.
Once you have these numbers, you can use a chain compatibility chart to determine the correct chain length. The chart will tell you how many links your chain needs to have based on the number of teeth on your largest chainring and cassette cog. It’s important to note that different brands of chains may have slightly different lengths, so make sure to check the compatibility chart for the specific brand of chain you plan to use.
With the correct chain length determined, you can now move on to using a chain tool to reconnect the chain. Using a chain tool to reconnect the chain allows you to remove or add links to the chain to get the correct length. In the next section, I’ll explain how to use a chain tool to reconnect the chain and get your bike back on the road.
Use Chain Tool to Reconnect Chain
Using a chain tool is a simple process and you’ll be able to reconnect your chain in no time. First, make sure to clean your chain thoroughly with a degreaser and a brush before reconnecting it. This will ensure that your chain stays in good condition and lasts longer. After cleaning, apply some chain lubrication to the chain to reduce friction and wear on the metal.
Next, follow these steps to reconnect the chain using a chain tool:
- Align the chain ends: Make sure the chain ends are aligned properly for a smooth reconnection.
- Adjust the chain tool: Insert the chain tool’s pin into the chain and adjust it to the correct length.
- Push the pin: Use the chain tool to push the pin into the chain until it’s flush with the outer plate.
With these steps, you should be able to easily reconnect your chain.
Remember to perform chain maintenance regularly to keep your bike running smoothly and shift gears to ensure proper functioning.
Shift Gears to Ensure Proper Functioning
Make sure you’re shifting gears smoothly and regularly while riding your bike to ensure it functions properly and you have a comfortable ride. This is especially important when you have just taken your bicycle chain off and reconnected it using a chain tool. The chain is now in a different position than it was before, so it’s important to shift gears and make sure everything is functioning properly before going on a long ride.
To shift gears properly, you need to make sure that you’re not putting too much pressure on the pedals while shifting. This can cause the chain to slip and make a grinding noise. Additionally, it’s important to lubricate your gears regularly to ensure smooth and easy shifting. Common mistakes to avoid when shifting gears include shifting while standing up, shifting too quickly, and shifting under load. By taking care to shift gears properly and maintain your bike’s gears, you can ensure a comfortable and efficient ride.
| EMOTION | DESCRIPTION | EXAMPLE | |
|---|---|---|---|
| Frustration | Feeling annoyed or upset | "I can’t seem to shift gears properly, even though I’ve been practicing for weeks." | |
| Satisfaction | Feeling pleased with oneself or with a job well done | "After lubricating my gears, I was able to shift smoothly and effortlessly." | |
| Confusion | Feeling uncertain or baffled | "I’m not sure why my gears are making a strange noise when I shift." | |
| Determination | Feeling motivated to overcome a challenge | "I’m going to keep practicing until I can shift gears like a pro." | ‘No matter how many times I stall or struggle, I will not give up until I master shifting gears.’ |
Frequently Asked Questions
How do I know if my bicycle chain needs to be replaced?
As a cyclist, I keep an eye out for signs of wear, like the chain stretching beyond 0.5% of its length. To prevent wear and tear, regular chain maintenance is key. When in doubt, it’s best to replace the chain.
Can I clean the chain without removing it from the bike?
I clean my bicycle chain without removing it using alternative cleaning methods. Chain maintenance is important to ensure its longevity and smooth operation. I use a chain cleaning tool and degreaser to remove dirt and grime, then lubricate the chain for optimal performance.
How often should I lubricate my bicycle chain?
As a cyclist, I prioritize proper lubrication techniques for my bike chain. I recommend using high-quality lubricants, such as chain-specific oils or wax-based products. Applying lubricant every 100-200 miles ensures optimal performance and extends the chain’s lifespan.
Is it safe to reuse a master link when reinstalling the chain?
It’s possible to reuse a master link when reinstalling a chain, but there are pros and cons. Alternatives include using a chain tool or quick link. Careful inspection and proper installation is crucial for safety.
What can I do if the chain is stuck or won’t come off during the removal process?
If the chain is stuck or won’t come off during removal, I apply lubricant to the pins and rollers. I then use techniques for loosening, such as gently twisting and pulling the chain or using pliers to wiggle it loose.
Conclusion
Well, folks, that’s how you take a bicycle chain off! It may seem like a daunting task at first, but with the right tools and a bit of patience, it’s actually quite simple.
Remember to position your bike properly before getting started and to take your time when removing and cleaning the chain. Trust me, it’ll be worth it in the long run.
As you work on your chain, you may find yourself getting into a rhythm, the movements becoming second nature. It’s a bit like a dance, the chain sliding off and back on again as you clean and inspect it.
And when you’re finished, you’ll have a well-oiled machine ready to take on any adventure you have in store. So go ahead and give it a try – your bike will thank you for it!


