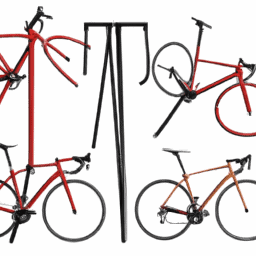
Removing a bicycle chain might appear challenging at first, yet it becomes a straightforward and effortless task when armed with the appropriate tools and some practical knowledge. As an experienced cyclist, I’ve encountered my share of situations involving the removal and installation of bike chains and am eager to pass on my knowledge to you.
Before we dive into the step-by-step process, it’s important to understand why you may need to remove your chain in the first place. Whether you’re replacing a worn-out chain, cleaning and maintaining your bike, or upgrading to a new chain, taking off your current chain is a necessary first step.
With that in mind, let’s gather our tools and get started.
Key Takeaways
- Taking off the chain is the first step in chain maintenance and replacement.
- Identifying the type of chain on the bike is crucial, as there are two types of chain tools available: specific and universal fit.
- The number of gears on the bike determines the type of chain, and checking chain compatibility and tensioning is necessary.
- Common chain issues include chain wear, stiff links, and chain breakage.
Gather the Necessary Tools
You’re gonna need some tools, so grab ’em and get ready to disassemble that bike chain like a pro. First off, you’ll need a chain tool. There are two types of chain tools: those that are specifically designed to work with certain types of chains and those that have a universal fit. Make sure you choose the right type of tool for your specific bike chain.
Common chain issues include chain wear, stiff links, and chain breakage. A chain that has been used for a long time can become stretched and may not fit on your gears properly. Stiff links occur when the chain links don’t move as they should, which can affect the smoothness of your ride. Chain breakage can happen if the chain is damaged or worn out.
Once you’ve gathered your tools, the first step is to identify the type of chain you have.
Identify the Type of Chain
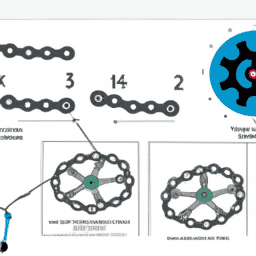
Determining the kind of chain on your bike can be as easy as a piece of cake. The first step is to look at the number of gears on your bike. A bike with a single gear will have a wider, thicker chain, while a bike with multiple gears will have a narrower, more flexible chain.
Once you have determined the number of gears on your bike, you can move on to checking the chain compatibility with your bike. Next, you need to check the chain tensioning of your bike. This refers to the amount of slack that the chain has when it is on your bike.
To check this, you should shift your bike into the highest gear and then lift the chain up from the teeth on the back wheel. If the chain lifts less than half an inch, then your chain is too tight, and if it lifts more than an inch, then your chain is too loose. Understanding the type of chain and its compatibility and tensioning will make it easier for you to remove the chain from your bike.
Now that you’ve identified the type of chain on your bike, it’s time to move on to the next step, which is removing the chain.
Remove the Chain
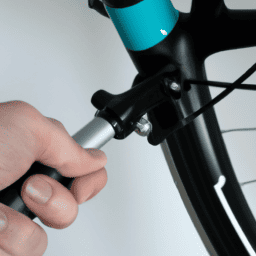
To remove the chain, start by shifting your gears to the smallest chainring and the smallest cog. This will loosen the tension on the chain, making it easier to remove. Then, use a chain tool to push out the pin that holds the chain together. Place the chain tool over the pin and turn the handle until the pin is pushed out far enough to remove the chain from the bike.
It’s important to note that removing the chain is a necessary step in both chain maintenance and chain replacement. Proper chain maintenance involves regularly cleaning and lubricating the chain to ensure it stays in good condition. If the chain is damaged or worn beyond repair, it will need to be replaced entirely. Once the chain is removed, it’s a good idea to clean and maintain it before reattaching it to the bike.
Clean and Maintain the Chain
Now that the pesky chain is out of the way, give it some TLC by pampering it with a thorough cleaning and regular maintenance to keep it running smoothly. Cleaning and maintaining the chain is crucial in ensuring that your bike runs smoothly and prevents damage to other components.
Here are some tips for cleaning and maintaining the chain:
- Use a degreaser to remove any dirt or grime on the chain.
- Scrub the chain with a brush to remove any remaining dirt or grime.
- Dry the chain with a clean cloth.
- Apply a chain lubricant of your choice to keep the chain running smoothly.
Regular chain maintenance has many benefits. It reduces wear and tear on the chain and other components, increases the lifespan of the chain, and improves the overall performance of the bike. By following these simple maintenance tips, you can save yourself from costly repairs and ensure a smooth ride.
To reinstall the chain, simply follow the steps in the previous subtopic.
Reinstall the Chain
When I reinstall my bicycle chain, I always make sure to determine the correct length first. Once I’ve figured that out, I thread the chain onto the gears, making sure to match the correct teeth with the right gear.
If my chain has a master link, I reconnect it at this point. Finally, I use my chain tool to secure the chain, ensuring that it’s tight and won’t slip off during my ride.
Determine the Correct Length
First, make sure the bicycle chain is in its most extended position, then measure the length needed and mark it with a pen or tape. Chain sizing techniques can vary depending on the bike’s frame and the number of gears it has. The most common method is to count the number of links in the old chain and match it with a new one. However, this method may not be accurate since the old chain may have stretched over time. Another technique is to use a chain measuring tool, which determines the correct length based on the bike’s specifications. Regardless of the method used, it is crucial to have the correct chain length to avoid premature wear and tear on the bike’s drivetrain.
To help determine the correct length, refer to the table below:
| Type of Bike | Number of Gears | Chain Length |
|---|---|---|
| Single-speed | 1 | 1/2"pitch |
| Road bike | 5-11 | 3/32"pitch |
| Mountain bike | 6-9 | 3/32"pitch |
| BMX bike | 1-9 | 1/8"pitch |
| Cruiser bike | 1-7 | 1/8"pitch |
Once the correct length has been determined, the next step is to thread the chain onto the gears.
Thread the Chain onto the Gears
After determining the correct length, it’s time to slip the chain onto the gears like a necklace being placed on a pendant, ensuring each link is properly seated. Proper gear selection is crucial to avoid chain slippage, which can not only damage the chain but also cause accidents.
To thread the chain onto the gears, follow these steps:
- Shift the bike to the smallest chainring in the front and the largest sprocket in the back.
- Hold the chain on the rear derailleur pulley and pedal the crank to thread the chain onto the chainring in the front.
- Use your hand to guide the chain onto the cassette cogs in the back, making sure it sits on each sprocket properly.
- Check the chain tension by lifting the chain at the middle of the chainstay. It should have about half an inch of movement.
- Double-check that the chain is properly seated on the teeth of the chainring and cassette cogs.
Common mistakes while threading the chain include forcing the chain onto the gears, which can bend or break the links, and routing the chain incorrectly, which can cause shifting problems. If you’re not confident in your ability to thread the chain, seek help from a bike mechanic or experienced rider.
With the chain properly threaded onto the gears, the next step is to reconnect the chain using a master link (if applicable).
Reconnect the Chain Using a Master Link (if applicable)
Now that we’ve threaded the chain onto the gears, it’s time to reconnect it using a master link (if possible).
A master link is a specialized link that allows for easy separation and reconnection of the chain. Note that not all chains are compatible with master links, so check the chain’s compatibility before attempting to install one.
If your chain is compatible with a master link, start by placing the two ends of the chain together and lining up the holes on each link. Next, insert the master link into the holes, making sure that the retaining clip is facing outward. Use pliers to snap the retaining clip into place, making sure it’s secure.
Congratulations! You’ve successfully reconnected your chain using a master link (if applicable).
Now it’s time to use the chain tool to secure the chain.
Use the Chain Tool to Secure the Chain
Ensuring the chain is properly secured is crucial for a smooth and safe ride, and using a chain tool is the key to achieving this. Chain tool techniques are essential in securing the chain to the right tightness and ensuring the chain is aligned properly.
Here are some tips on how to use a chain tool effectively:
- When using the chain tool, make sure the pin is aligned with the chain link. If it’s not aligned properly, it can cause damage to the chain link or break the tool.
- Turn the handle of the chain tool until the pin is pushed through the link. Don’t apply too much pressure, as this can cause the chain to break or become damaged.
- Check the tightness of the chain by lifting it up from the rear sprocket. The chain should have a small amount of slack, but not be too loose.
Troubleshooting common issues with chain tool usage can include ensuring the chain is the correct length, and that the tool is properly aligned with the chain link.
By following these chain tool techniques, you can ensure that your chain is secured properly, and your ride is smooth and safe. Remember to always check the tightness of the chain before riding and to troubleshoot any common issues with chain tool usage.
Frequently Asked Questions
How do I know if my bicycle chain needs to be taken off?
I listen for a grinding noise while pedaling and check for chain stretch. Signs of chain wear include skipping gears or unpredictable shifting. Proper lubrication is important for preventing wear and tear on the chain.
Can I use the same tools to remove different types of bicycle chains?
Yes, the same chain removal techniques can be used for different types of bicycle chains. However, tool compatibility is crucial, and it’s essential to use the appropriate tool for the specific chain type to prevent damage or injury.
Is it safe to remove the chain without professional help?
It is generally safe to remove a bicycle chain without professional help, but chain maintenance should be approached with caution. Potential hazards include pinched fingers, damaged equipment, and injury from the sharp edges of the chain.
How often should I clean and maintain my bicycle chain?
How often should I clean and maintain my bicycle chain? Regular chain maintenance ensures optimal performance and prolongs the chain’s lifespan. Avoid common mistakes like using harsh chemicals and not lubricating properly. Do it every 100-200 miles or when visibly dirty.
What is the best way to store my bicycle chain after removing it?
Proper storage of a bicycle chain is crucial for its longevity. I recommend wiping it down and storing it in a dry place, away from moisture and dirt. Maintenance frequency depends on usage and conditions, but I suggest cleaning and lubing every 100-200 miles.
Conclusion
Well, there you have it, folks. That’s how I take off a bicycle chain. It may seem like a daunting task at first, but with the right tools and a bit of patience, it’s actually quite easy to do.
As with any maintenance task, it’s important to take your time and be careful. Rushing through the process could cause damage to your bike or even result in injury.
Remember, a well-maintained chain is crucial to the overall performance and longevity of your bicycle. So, don’t neglect this important task and make sure to give your chain the TLC it deserves.
As they say, ‘a chain is only as strong as its weakest link.’ So, whether you’re a seasoned cyclist or a beginner, taking off and maintaining your bike’s chain is an essential skill to have in your toolbox.
With a little bit of practice and the right know-how, you’ll be able to tackle this task with confidence and keep your bike running smoothly for miles to come.