You’re prepared to tackle the demanding job of taking off your bike tire. It can appear overwhelming, akin to climbing a mountain or conducting open heart surgery, but don’t worry! Equipped with the proper tools and a little expertise, you’ll manage to remove that tire swiftly.
First things first, gather all the necessary equipment. You’ll need a set of tire levers, a wrench or pliers, and a replacement tire if necessary. Make sure you have a clear workspace and plenty of light.
This task requires a steady hand, so take a deep breath and let’s dive in.
Key Takeaways
- Before removing a bicycle tire, release brakes and loosen nuts, and inspect the tire for cuts, punctures, and wear.
- Choose a replacement tire that matches the size and tread pattern of the old one, and consider repairing minor damage with a patch kit or tire sealant.
- Proper installation of the tire and inner tube is crucial for a safe and smooth ride, and the wheel must be centered between the fork blades or seat stays.
- Regular tire maintenance, such as using durable tire levers and a compatible pump with gauge, properly inflating the tire, and inspecting the rim for damage, can prevent tire damage and ensure safe and effective braking.

Varstrom 48V 1000W 1500W Rear & Front Hub Motor Kit - Ebike Conversion Kit for 26"/27.5"/28"/29"/700C Front Rear Wheel,Electric Bike Conversion Set with Display & Ebike Battery (Optional)
【POWERFUL 48V 1000W Front Hub Motor Kit】: 48V 1000W front wheel motor kit is designed for a variety...
As an affiliate, we earn on qualifying purchases.
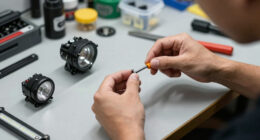
Gather the Necessary Tools and Equipment
To take off a bicycle tire, you’ll need some tools and equipment, so let’s gather ’em up!
First, you’ll need a set of appropriate tire levers. When choosing tire levers, make sure they’re durable and fit comfortably in your hands. You don’t want to use a cheap, flimsy set that could easily break or cause discomfort while working on your bike.
Next, you’ll need a pump to properly inflate the tire after reinstallation. Make sure the pump is compatible with your valve type and has a gauge to ensure you reach the correct tire pressure. It’s important to properly inflate your tire to prevent damage and ensure a smooth ride.
Now that you have the necessary tools and equipment, let’s move on to the next step: releasing the brakes and loosening the nuts.

RKJ Electric Bike for Adults, 2200W, 30/32MPH, 75 Miles, 48V 15.6AH Removable Battery, 7-Speed, 3 Modes, Full Suspension, Dual Disc Brakes, 20" All-Terrain Fat Tires, UL 2849 Certified Ebike
🔥 2200W PERFORMANCE: Powerful 750W motor (2200W Peak) delivers massive torque for 30° hills. Default 20MPH for city...
As an affiliate, we earn on qualifying purchases.
Release the Brakes and Loosen the Nuts
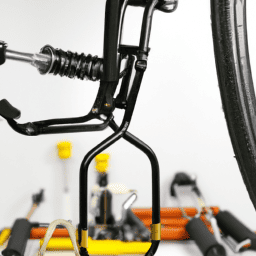
First, you’ll want to loosen the nuts and release the brakes before continuing with the tire removal process. To safely release the brakes, you should locate the brake release lever located on the brake caliper. Depress the lever to release the brake pads from the rim. You can also use a small tool, like a screwdriver or a wrench, to pry the brake pads apart and release the tension from the rim.
Loosening the nuts is a crucial step in removing the tire. Common mistakes when loosening the nuts include using the wrong size wrench or not loosening the nuts enough. Make sure to use the correct size wrench and loosen the nuts until they’re just finger tight. This will make it easier to remove the tire from the rim.
Once you have released the brakes and loosened the nuts, you can move on to the next step of removing the tire from the rim.
Now that you’ve released the brakes and loosened the nuts, it’s time to remove the tire from the rim.

Ktaxon Electric Bike Conversion Kit, 48V 1000W Ebike Conversion Kit, 26" Front/Rear Wheel E-Bike Conversion Kits with PAS, LCD Display, Aluminum Alloy Frame and Gearless Hub Motor (Front Wheel)
【UNMATCHED MOTOR KIT】With 48V 1000W brushless and gearless hub motor, this ebike conversion kit creates efficient and noiseless...
As an affiliate, we earn on qualifying purchases.
Remove the Tire from the Rim
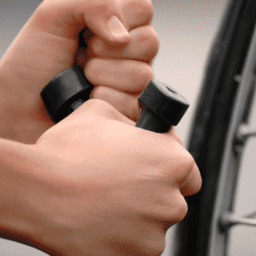
Now it’s time to extract the tire from its position on the wheel hub with gentle force, utilizing a tire lever to gradually work the tire bead over the rim’s edge.
It’s important to note that proper tire maintenance is crucial in preventing tire damage. Before removing the tire, make sure to inspect the tire for any cuts, punctures, or wear. If you notice any damage, it’s best to replace the tire instead of repairing it.
To remove the tire, first insert a tire lever under the bead of the tire and pry it away from the rim. Then, slide the lever around the rim to loosen the tire from the rim. Repeat this process on the opposite side of the tire until the entire tire is free from the rim.
Once the tire is removed, inspect the rim for any damage or debris. Now you can move on to either replacing or repairing the tire.

PEXMOR Electric Bike Conversion Kit, 20"/24" Front Wheel Ebike Conversion Kit, 36V 750W Electric Bike Hub Motor Kit w/3 Mode Controller/PAS/LCD Display/Twist Throttle Electric Bicycle Ebike Kit
【POWERFUL BRUSHLESS MOTOR】-The 36V 750W ebike front wheel conversion motor kit features a powerful brushless hub motor.It runs...
As an affiliate, we earn on qualifying purchases.
Replace or Repair the Tire
Now that you’ve successfully removed the tire from the rim, it’s time to inspect it for damage.
Look for cuts, tears, or punctures that may have caused the flat tire.
Once you’ve assessed the damage, you’ll need to determine whether to repair or replace the tire.
If the damage is extensive or the tire is worn, it’s best to replace it.
If the damage is minor, you can attempt a repair.
After making your decision, it’s time to reinstall the tire and inner tube to get your bike back on the road.
Inspect the Tire for Damage
Take a closer look at your tire to check for any cuts, punctures, or excessive wear and tear before removing it. Inspecting the tire for damage is crucial to determine if it needs to be replaced or repaired.
Here are some things to keep in mind while inspecting your tire:
-
Check inflation: Make sure your tire is properly inflated before inspecting it. A tire that’s underinflated or overinflated can hide damage and make it difficult to see any cuts or punctures.
-
Choose replacement: If you find any damage that’s too large to repair or if the tire has excessive wear and tear, it’s time to replace the tire. Make sure to choose a replacement tire that matches the size and tread pattern of the old one.
-
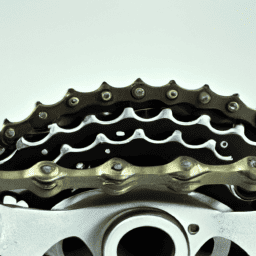
Inspect the tread: Check the tread on your tire for any wear patterns or damage. If the tread is worn down or has any cuts or punctures, it may be time to replace the tire.
Inspecting your tire for damage is an important step in the process of removing it. By checking for cuts, punctures, and excessive wear and tear, you can determine whether the tire needs to be repaired or replaced. In the next section, we’ll discuss how to determine whether to repair or replace the tire.
Determine Whether to Repair or Replace the Tire
Deciding whether to repair or replace your damaged tire is crucial to ensure your safety while riding. Before making any decision, you need to assess the extent of the damage.
If it’s just a minor puncture or cut, you can repair it using a patch kit or tire sealant. However, if the damage is too severe, you need to replace the tire altogether.
Repair vs. Replace is a cost analysis that you need to make. If you’re on a tight budget, repairing the tire may seem like a more economical option. But keep in mind that patched tires are not as reliable as new ones, and they can cause further damage or even a blowout.
When in doubt, it’s always better to replace the tire. If you’re not confident in your ability to assess the damage or perform the repair, it’s best to seek professional help.
After deciding whether to repair or replace the tire, you can move onto reinstalling the tire and inner tube.
Reinstall the Tire and Inner Tube
It’s important to remember that proper installation of the tire and inner tube is crucial for a safe and smooth ride, so don’t cut corners.
Begin by making sure the inside of the tire is clean and free of debris that could puncture the inner tube.
Next, insert the valve stem of the inner tube into the hole in the rim and tuck the rest of the tube into the tire.
Carefully work the tire back onto the rim, making sure the tube stays in place and doesn’t get pinched between the tire and rim.
Once the tire is completely back on the rim, inflate the inner tube to the recommended pressure, which is usually written on the sidewall of the tire.
Proper inflation techniques are important to prevent flats and ensure a comfortable ride.
Check the tire for any bulges or uneven spots, which could indicate common inner tube issues like a pinch flat or poor installation.
With the tire and inner tube properly installed, you’re ready to move on to reinstalling the wheel and adjusting the brakes.
Reinstall the Wheel and Adjust the Brakes
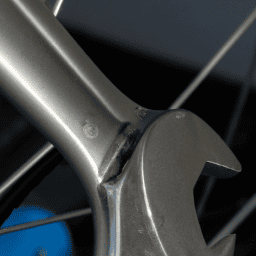
To properly reinstall the wheel and adjust the brakes, you’ll need to first ensure that the axle is aligned with the dropouts on the frame. This is crucial to ensure that the wheel spins freely and that the brakes work effectively.
Start by placing the wheel back into the dropouts and tightening the quick release or bolts evenly on both sides. Make sure the wheel is centered between the fork blades or seat stays.
Next, check the wheel alignment by spinning the wheel and observing the gap between the tire and the brake pads. If the gap is uneven, adjust the position of the wheel by loosening the bolts or quick release and shifting the wheel slightly.
Once the wheel is aligned, you can adjust the brakes. Proper brake adjustment is important for safe and effective braking. You can adjust the brake pads by loosening the brake pad bolts and positioning the pads so that they sit evenly on the rim.
Finally, adjust the brake cable tension using the barrel adjuster until the brakes engage smoothly and with enough force.
Frequently Asked Questions
What is the best way to store bicycle tires when they are not in use?
Proper storage of bicycle tires is crucial to their longevity. Keep them away from direct sunlight and extreme temperatures. Regularly inspect for wear and tear, and inflate to the recommended pressure before storing. Maintenance tips include cleaning and lubricating the tires.
Can I use dish soap to lubricate the tire and rim when removing or installing the tire?
Using dish soap for bike tire removal has pros and cons. It can make the process easier, but it may also damage the tire or rim if used excessively. After removal, properly clean and maintain the tires by wiping with a damp cloth and storing in a cool, dry place.
How do I know when it’s time to replace my bicycle tire?
Did you know that the average bicycle tire lasts between 1,000 and 3,000 miles? Signs of wear include cracks, cuts, and bald spots. Replacement intervals vary based on usage, but generally occur every 2-3 years.
Can I reuse the same inner tube when replacing a tire, or do I need to get a new one?
You can reuse an inner tube when replacing a tire, but it’s not recommended if the tube is old or has been patched multiple times. Inner tube longevity varies, but most last around 3-5 years. Patching is more cost effective than replacing if the puncture is small and in a non-stressed area.
Do different types of tires require different methods for removal and replacement?
Different types of tires do require different methods for removal and replacement. Tubeless tires maintenance involves checking for sealant and replacing it if needed. Tips for removing stubborn bicycle tires include using tire levers and lubrication.
Conclusion
Congratulations! You’ve successfully removed your bicycle tire! But wait, there’s more! Now it’s time to replace or repair the tire. This can be a bit tricky, but don’t worry, with the right tools and know-how, it’s a breeze.
First, inspect the tire to determine whether it needs to be replaced or if it can be repaired. If there are small punctures or cuts, a patch kit can be used to fix the problem. However, if the tire is severely worn or damaged, it’s best to replace it entirely.
Once the tire is repaired or replaced, it’s time to reinstall the wheel and adjust the brakes. Follow the same steps in reverse order to put the tire back on the bike.
Double-check that the tire is secure and the brakes are properly adjusted before taking your bike out for a spin.
Congratulations, you’ve now mastered the art of taking off and replacing your bicycle tire! Keep pedaling on!