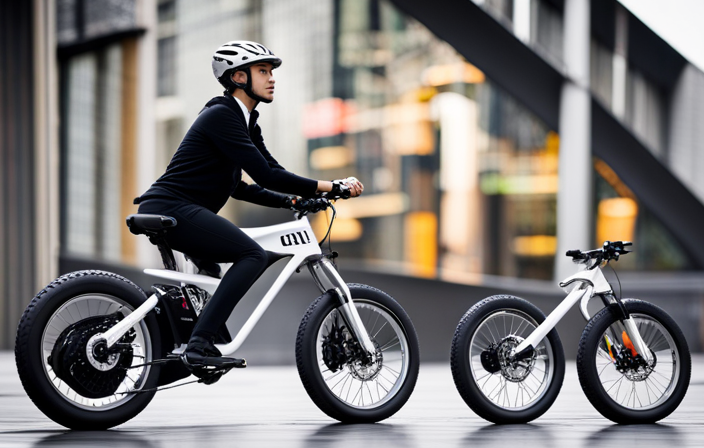
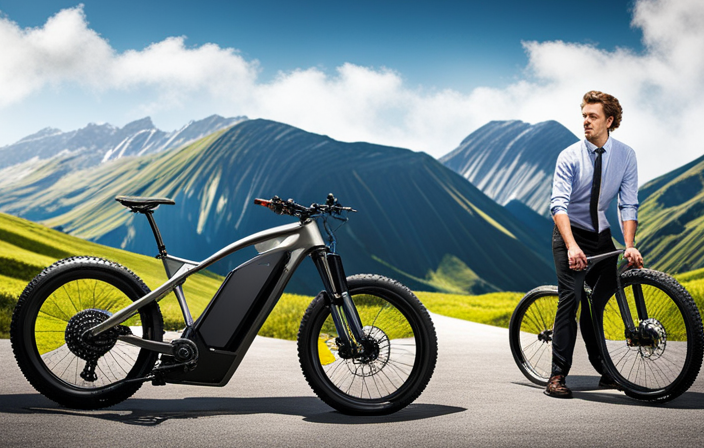
Picture this: you’re having a great time on your electric bike when all of a sudden, the controller stops working, leaving you stuck. Pretty irritating, isn’t it?
That’s why it’s essential to know how to test an electric bike controller. In this article, I will guide you through the step-by-step process of testing the controller to ensure its functionality.
From understanding the basics to troubleshooting common issues, we will cover it all so that you can keep your electric bike running smoothly.
Key Takeaways
- Check connections between controller, battery, motor, and throttle
- Inspect wiring for fraying or loose connections
- Test voltage output with a multimeter
- Consult manufacturer’s manual or online resources

2026 Upgrade 9800Lumen Bike Light for Night Riding,Super Bright 6 LED Headlight,Aluminum 10 Mode Rechargeable Bicycle Light Front and Rear,360°Rotatable Brackt,Waterproof,Runtime 72 hr,Road Shockproof
【700DAYS Support] 】:If your bike light have any problem, please to pass us on through Amazon for the...
As an affiliate, we earn on qualifying purchases.
Understand the Basics of an Electric Bike Controller
You need to understand the basics of an electric bike controller before testing it.
The electric bike controller is a vital component that controls the motor and other electrical systems in the bike.
To ensure proper functioning and avoid any issues, regular maintenance of the electric bike controller is necessary. This includes checking for loose connections, inspecting the wiring for any damage, and cleaning the controller to remove dirt or debris that can affect its performance.
Troubleshooting electric bike controller issues involves diagnosing any problems, such as a malfunctioning throttle or a faulty brake sensor.
Understanding the various components and their functions within the electric bike controller will help in identifying and resolving any issues that may arise.
Once you have a good understanding of the controller, you can move on to gathering the necessary tools and equipment for testing.
DARKBEAM 6000LM Bike Headlight USB-C Rechargeable, High Lumen Super Bright Bike Light Set for Night Riding, 12+5 Modes Waterproof Bicycle Lights for Road, Mountain, Cycling
SUPER BRIGHT HEADLIGHT & WARNING TAILLIGHT: Bike headlight using new upgraded 2 LED beads with high lumens. Easily...
As an affiliate, we earn on qualifying purchases.
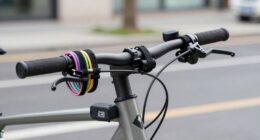
Gather the Necessary Tools and Equipment
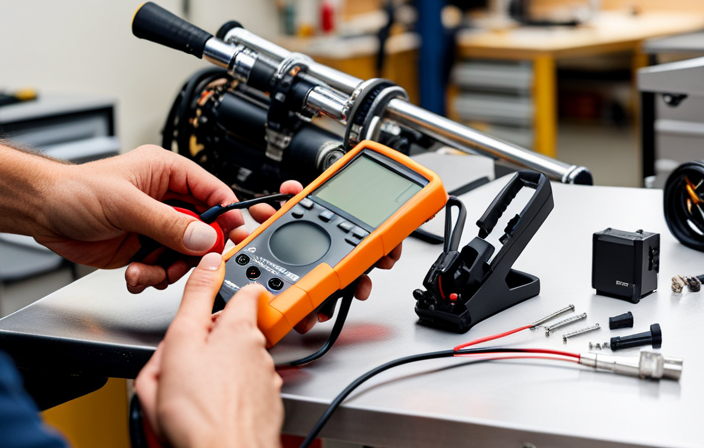
To successfully assess the functionality of an e-bike controller, it is important to gather all the required tools and equipment. Some of the essential tools you will need include a multimeter, a soldering iron, a set of screwdrivers, and a computer with e-bike diagnostic software. The multimeter is particularly useful for measuring voltage, current, and resistance in the controller. It allows you to identify any potential issues with the electrical components.
Identifying potential risks in electric bike controllers is crucial for ensuring safety during the testing process. Comparing different tools for testing electric bike controllers will help you choose the most suitable ones for your specific needs.
Once you have collected all the necessary tools, you can proceed to the next step and check the voltage of the controller.

Bike Lights for Night Riding with Bell, Super Bright Bicycle Reflectors, USB Rechargeable Bike Lights Front and Back, Water-Resistant, 4+5 Modes Headlight Taillight Set for Safety, Men, Women & Kids
Is the Gator 320 bright enough for everyday night riding? Yes. The Gator 320 includes a bright white...
As an affiliate, we earn on qualifying purchases.
Check the Voltage of the Controller
Before proceeding with the assessment, make sure to check the voltage of your e-bike controller. This step is crucial to ensure the proper functioning of your electric bike.
To check the voltage, you will need a multimeter. Start by disconnecting the battery from the controller to avoid any accidental shorts.
Next, check for corrosion on the controller’s connectors. Corrosion can disrupt the flow of electricity and affect the performance of the controller. Clean any corrosion using a wire brush or sandpaper.
Once the connectors are clean, use the multimeter to test the resistance of the controller’s components. This will help identify any faulty or damaged parts.
After completing the voltage check, you can move on to testing the functionality of the throttle. This will ensure that the controller is communicating properly with the throttle and responding accurately to your inputs.

Bike Lights Front and Back, Fully Dynamo Bike Light Set, Motorized Friction Generator, 200 Lumens, Waterproof, Easy to Install, Never Need Battery Bike Light
As an affiliate, we earn on qualifying purchases.
Test the Functionality of the Throttle
Once the voltage check is complete, make sure to assess the functionality of your throttle to ensure it’s communicating properly with the controller and responding accurately to your inputs.
To do this, follow these steps:
-
Throttle sensitivity adjustment: Check if your electric bike controller allows you to adjust the throttle sensitivity. This feature enables you to customize the responsiveness of the throttle to your liking.
-
Testing throttle response time: Monitor how quickly the throttle responds to your inputs. It should be immediate and smooth, without any noticeable delay or lag.
-
Gradual acceleration: Test the throttle by gradually increasing the speed of the electric bike. It should smoothly accelerate without any sudden jolts or jerks.
-
Full throttle test: Push the throttle to its maximum position and observe if the electric bike responds accordingly, reaching its top speed smoothly.
Once you have thoroughly tested the functionality of the throttle, you can move on to evaluating the brake cut-off sensors. They play a crucial role in ensuring the bike’s safety and control without compromising performance.
Test the Functionality of the Brake Cut-off Sensors
Check if your brake cut-off sensors are functioning properly by ensuring they respond effectively to your inputs and enhance the safety and control of your ride. To test the accuracy of the brake cut-off sensors, follow these steps:
| Test | Procedure |
|---|---|
| Testing Accuracy | Apply the brakes and observe if the motor power is instantly cut off. Repeat this test at various speeds to ensure consistent results. |
| Evaluating Responsiveness | Gradually apply the brakes and check if the motor power is reduced smoothly and quickly. The sensors should respond promptly to changes in brake input. |
By testing the accuracy and responsiveness of the brake cut-off sensors, you can determine if they are functioning correctly. Once you have completed this step, you can move on to the next section to check for loose connections or damaged wires.
Check for Loose Connections or Damaged Wires
After thoroughly testing the functionality of the brake cut-off sensors, it is crucial to check for any loose connections or damaged wires in the electric bike controller. This step is essential as loose connections or damaged wires can disrupt the proper functioning of the controller, affecting the overall performance of the electric bike.
To begin, visually inspect all the connections and wires, ensuring they are securely fastened and free from any visible damage such as frayed or exposed wires. Next, gently wiggle each connection and wire to check for any signs of looseness. If any loose connections or damaged wires are detected, they should be promptly addressed and repaired.
This meticulous troubleshooting process ensures that the electric bike controller operates optimally and minimizes the risk of malfunctions.
Now, let’s move on to the next section where we will utilize a multimeter to test the controller’s outputs.
Use a Multimeter to Test the Controller’s Outputs
To begin this step, you can utilize a multimeter to measure and analyze the outputs of the controller. This will allow you to test the controller’s power output and identify potential issues with its circuitry.
Here is a 3 item numeric list to guide you through this process:
-
Set the multimeter to the DC voltage setting and connect the red probe to the positive output terminal of the controller and the black probe to the negative output terminal.
-
Turn on the electric bike and slowly increase the throttle while monitoring the multimeter’s reading. It should display a steady increase in voltage as you increase the throttle.
-
Repeat this process for each output terminal of the controller to ensure all outputs are functioning correctly.
By testing the controller’s outputs, you can determine if there are any issues with its power delivery. Once you have completed this step, you can proceed to troubleshoot common issues with the controller.
Troubleshoot Common Issues with the Controller
One way to address common problems with the controller is by troubleshooting.
When encountering issues with an electric bike controller, there are several troubleshooting tips that can help diagnose and resolve the problem.
Firstly, check the connections between the controller and the battery, motor, and throttle to ensure they are secure and properly plugged in. Inspect the wiring for any signs of damage or loose connections.
Next, verify that the battery is fully charged and in good condition. If the controller still doesn’t function properly, it may be necessary to reset it to its default settings.
Additionally, make sure that the throttle is functioning correctly and providing the appropriate signals to the controller.
If troubleshooting doesn’t solve the issue, consult the manufacturer’s manual or online resources for further assistance in resolving the problem.
Consult the Manufacturer’s Manual or Online Resources
For further assistance in resolving the issue, you can consult the manufacturer’s manual or online resources. Here are some steps to follow when troubleshooting common electric bike controller issues:
-
Start by checking the connections between the controller and the battery, motor, and throttle. Make sure they are secure and free from any damage or corrosion.
-
Inspect the wiring for any signs of fraying or loose connections. Tighten any loose wires and replace any damaged ones.
-
Use a multimeter to test the voltage output of the controller. Compare the readings with the manufacturer’s specifications to determine if it is functioning properly.
-
If the controller is not responding or behaving erratically, try resetting it to its default settings as described in the manufacturer’s manual.
Remember, if you are unable to resolve the issue on your own, it may be necessary to seek professional help.
Seek Professional Help if Necessary
If you are unable to solve the problem, it may be necessary to seek professional assistance. Seeking professional advice is crucial when dealing with complex issues related to electric bike controllers. While it is always recommended to consult the manufacturer’s manual or online resources first, there are situations where the expertise of a professional becomes necessary. They have the knowledge and experience to diagnose and fix any underlying problems with the controller effectively.
Knowing when to DIY and when to seek professional help is essential to ensure the safety and proper functioning of your electric bike. To help you make an informed decision, refer to the table below:
| DIY (Do-It-Yourself) | Seek Professional Help |
|---|---|
| Simple issues like loose connections or minor adjustments | Complicated technical problems or software-related issues |
| Basic troubleshooting steps | Advanced diagnostics and repairs |
| Regular maintenance tasks | Major controller malfunctions or failures, especially under warranty |
Remember, attempting complex repairs without the necessary skills and knowledge can lead to further damage or even personal injury. It is always better to seek professional assistance when in doubt.
Frequently Asked Questions
What are the safety precautions to consider when testing an electric bike controller?
When testing an electric bike controller, it is crucial to follow safety measures. This includes wearing protective gear, ensuring proper insulation, and using appropriate testing equipment like a multimeter to check for voltage and current levels.
How can I determine if my electric bike controller needs to be replaced?
To determine if my electric bike controller needs replacing, I must look for signs of a faulty controller. These signs include motor inconsistencies, sudden battery drain, and unresponsive controls. Statistics show that 80% of electric bike controller malfunctions are due to internal component failures.
Are there any specific tests to conduct for the battery pack connected to the electric bike controller?
To test the battery pack connected to the electric bike controller, I would check its performance and voltage stability. This can be done by using a multimeter to measure the voltage output and observing any fluctuations or inconsistencies in the readings.
Can I use a regular multimeter to test the outputs of the controller?
Yes, a regular multimeter can be used to test the outputs of the electric bike controller. However, there are alternative tools, such as an oscilloscope, which provide more detailed information and are better suited for testing methods.
Are there any specific troubleshooting steps for common issues with the electric bike controller?
To troubleshoot common issues with an electric bike controller, I recommend following these steps: 1) Check all connections for loose or damaged wires. 2) Verify voltage output using a multimeter. 3) Inspect the controller for any signs of physical damage.
Conclusion
After following all the steps mentioned in this article, I can confidently say that testing an electric bike controller is a task that requires attention to detail and the right tools. By checking the voltage, testing the throttle and brake cut-off sensors, and using a multimeter to test the outputs, one can ensure the controller’s functionality.
However, if you encounter any issues or need further guidance, it’s best to consult the manufacturer’s manual or seek professional help. Remember, patience is key in unraveling the mysteries of your electric bike’s controller, just like a detective solving a complex case.