
While you’re riding your bike, taking in the leisurely pace, you start to notice a small wobble. Upon closer inspection, you discover that it’s your pedals that are loose and making noise.
Fear not, fellow cyclist, for I am here to guide you through the process of tightening those pesky pedals. With a few simple steps and the right tools, you’ll be back on the road with a secure and smooth ride in no time.
Let’s get those pedals tightened and get you back to enjoying the wind in your hair.
Key Takeaways
- Regular pedal maintenance is important to extend the lifespan of the pedals and ensure rider safety.
- When checking pedal tightness, use the correct size wrench, apply even pressure, and avoid over-tightening to prevent damage.
- Consider using thread locker for added security, but be aware of the potential for damage to pedal threads.
- It is important to replace worn or damaged pedals to maintain optimal functionality and ensure the safety of the rider.
Gather the necessary tools
Gather the necessary tools so you can tighten the bicycle pedals. Using the right tools is crucial to ensure proper alignment and prevent any accidents while riding.
To tighten the pedals, you will need a pedal wrench or a 15mm wrench, depending on the type of pedals your bicycle has. Make sure the wrench fits securely onto the pedal flats before applying force. This will prevent any slipping or stripping of the pedal threads.
Additionally, having a rag or towel handy is helpful to clean off any dirt or debris that may interfere with the tightening process.
Once you have gathered all the necessary tools, you can move on to determining which pedal is loose and needs tightening.
Determine which pedal is loose
To figure out which pedal is loose, you can give each pedal a gentle wiggle. This will help you determine the pedal that needs maintenance.
To fix loose pedals, follow these steps:
- Start by inspecting the left pedal. Hold the crank arm with one hand and try to move the pedal back and forth.
- Repeat the same process for the right pedal, ensuring you hold the appropriate crank arm.
- If either pedal feels loose or wobbly, it means that it needs to be tightened.
- Use a pedal wrench to tighten the pedal. Insert the wrench onto the pedal axle and turn it clockwise until it is snug.
Once you have determined which pedal is loose and tightened it, the next step is to position the bike securely. This will ensure stability and ease of access for the remaining steps.
Position the bike securely
Make sure you’ve got the bike in a secure position before moving on. This is crucial for performing any bike maintenance or repair tasks, including tightening bicycle pedals.
To position the bike securely, start by finding a stable surface to work on, such as a concrete floor or a bike repair stand. Make sure the bike is balanced and won’t tip over while you’re working on it. If you’re using a repair stand, adjust it to the appropriate height and secure the bike firmly in place. If you’re working on the floor, consider using a bike stand or propping the bike against a wall for stability.
Once the bike is securely positioned, you can move on to the next step of using a pedal wrench to loosen the pedal.
Use a pedal wrench to loosen the pedal
Once you have the bike securely positioned, you’ll need to use a pedal wrench to loosen the pedal. This tool is specifically designed to fit the pedal flats and provide the necessary leverage to apply or remove force.
Start by placing the wrench on the pedal flats and make sure it is securely attached. Apply a counterclockwise force to loosen the pedal from the crank arm. Be cautious not to apply too much force as it may damage the pedal or the crank arm.
To ensure the correct tension, use a torque wrench to tighten the pedal back onto the crank arm. This will prevent any issues such as the pedal coming loose during cycling.
Now that the pedal is loosened, we can move on to the next step, which is applying grease to the pedal threads.
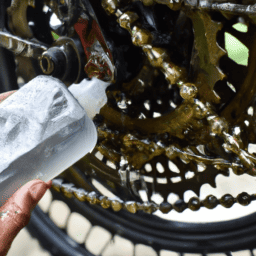
Apply grease to the pedal threads
Now that you’ve loosened the pedal, it’s time to apply grease to the pedal threads. This step is crucial for proper pedal maintenance and ensuring a secure connection.
Grease acts as a lubricant, reducing friction and preventing corrosion on the pedal threads. To begin, take a small amount of grease and evenly apply it to the threads of the pedal spindle. Make sure to cover all the threads thoroughly. This will create a protective barrier and promote smooth rotation.
Additionally, the grease will help prevent the pedal from seizing or becoming stuck in the future. Once you’ve applied the grease, you can proceed to align the pedal correctly for reinstallation.
Align the pedal correctly
To ensure a secure connection, it’s important to properly align the pedal before reinstallation. Proper pedal alignment is crucial for optimal performance and preventing damage to the pedal threads or crank arms.
Here are some common mistakes in pedal alignment that you should avoid:
-
Make sure the pedal is aligned with the correct side of the bike. The pedal axle should be parallel to the bike frame.
-
Check that the pedal is threaded correctly. The right pedal should be tightened clockwise, while the left pedal should be tightened counterclockwise.
-
Ensure that the pedal is fully threaded into the crank arm. It should be tightened until it is snug and there is no play or wobbling.
By following these steps, you can achieve proper pedal alignment and avoid common mistakes.
Once the pedal is aligned correctly, we can move on to the next step: using the pedal wrench to tighten the pedal securely.
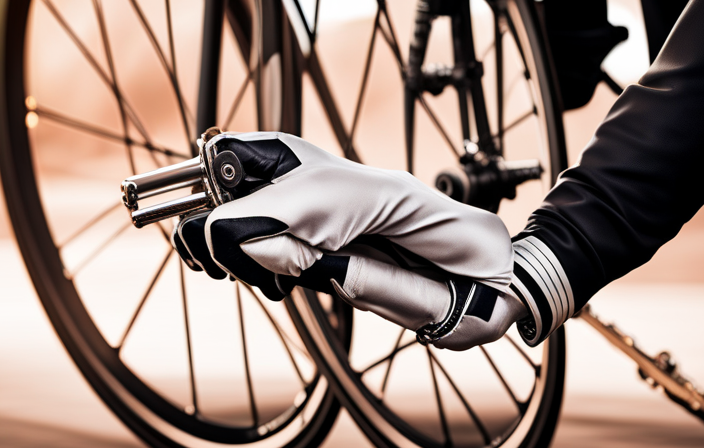
Use the pedal wrench to tighten the pedal
Make sure you’re using the pedal wrench correctly to secure the pedal in place. The pedal wrench is a specialized tool designed specifically for tightening and loosening bicycle pedals.
It has a long handle and a thin, open-ended wrench head that fits over the pedal axle. To tighten the pedal, position the wrench head over the flat sides of the axle and turn it clockwise. Apply firm pressure to ensure the pedal is securely tightened.
If you don’t have a pedal wrench, there are alternative methods you can use, such as a large adjustable wrench or a 15mm open-end wrench. However, these tools may not provide the same level of precision as a pedal wrench.
Once the pedal is tightened, it’s important to check the tightness by giving it a firm tug to ensure it doesn’t come loose. This will ensure your pedal is secure and ready for your next ride.
Check the tightness of the pedal
Don’t forget to give the pedal a firm tug to make sure it’s securely tightened. Checking the tightness of the pedal is an important step in ensuring safe and efficient cycling. To properly check the pedal’s tightness, start by placing your foot on the pedal and applying pressure. If you notice any wobbling or movement, it indicates that the pedal is not properly tightened. Additionally, check the alignment of the pedal. It should be parallel to the ground and aligned with the crank arm. Common pedal problems include loose pedals, stripped threads, and worn bearings. Addressing these issues promptly will prevent further damage and ensure smooth pedaling. Now, let’s move on to repeating the process for the other pedal.
Repeat the process for the other pedal
Now, go ahead and give the other pedal a firm tug to ensure it’s securely tightened as well.
It is essential to check the tightness of both pedals to avoid any common pedal issues that can arise during cycling. Pedals that are not properly tightened can become loose over time, leading to a loss of power transmission and potential accidents.
By repeating the process for the other pedal, you can ensure that both are securely fastened. Remember to use a pedal wrench or a 15mm open-end wrench to tighten the pedals clockwise. Pay close attention to the resistance and make sure the pedals are firmly attached to the crank arms.
Once both pedals are tightened, you can move on to the next step of testing the pedals before riding to ensure optimal performance and safety.
Test the pedals before riding
You should give the pedals a quick test before you start riding. This step is crucial to ensure the safety and proper functioning of your bicycle.
Begin by checking the alignment of the pedals. They should be parallel to the ground and positioned correctly. Misaligned pedals can cause discomfort and affect your pedaling efficiency.
Next, apply pressure to each pedal individually, simulating the force you would use while riding. Pay attention to any unusual noises or vibrations, as these may indicate loose or worn-out components.
It is also important to note that regular maintenance is essential for optimal pedal performance. By regularly checking the tightness of the pedals and addressing any issues promptly, you can prevent potential accidents and extend the lifespan of your bicycle.
Moving forward, let’s discuss the importance of regularly checking the tightness of the pedals.
Regularly check the tightness of the pedals
It’s important to regularly check how tight your pedals are to ensure optimal performance.
To maintain pedal longevity, there are a few tips to keep in mind.
First, make sure to use the correct size wrench for your pedals, as using the wrong size can damage the pedal and the crank arm.
When tightening the pedals, apply even pressure to both sides to prevent any imbalance.
Avoid over-tightening the pedals, as this can strip the threads or cause them to seize.
On the other hand, under-tightening can result in the pedals coming loose while riding.
Lastly, check for any play or movement in the pedals after tightening to ensure they are secure.
By following these tips and avoiding common mistakes, you can extend the lifespan of your pedals.
Consider using thread locker for added security in preventing the pedals from coming loose during rides.
Consider using thread locker for added security
Consider using thread locker for added security in ensuring that the pedals remain securely in place while riding. Thread locker is a type of adhesive that can be applied to the pedal threads before installation. It helps prevent the pedals from loosening due to vibrations and ensures a tight fit. Using thread locker has both pros and cons.
| Pros of using thread locker | Cons of using thread locker |
|---|---|
| Provides added security | More difficult to remove |
| Prevents pedals from loosening | Requires careful application |
| Reduces the risk of accidents | Can damage pedal threads |
While using thread locker can provide peace of mind and prevent the pedals from coming loose during rides, it can also make it harder to remove the pedals when needed. Additionally, if applied incorrectly, it can potentially damage the pedal threads. However, considering the added security it offers, using thread locker is a recommended option.
To ensure the optimal performance of your bicycle, it is important to regularly check the tightness of the pedals. If the pedals become worn or damaged, it is necessary to replace them to maintain a safe and enjoyable riding experience.
Replace worn or damaged pedals
After considering the use of thread locker for added security in tightening bicycle pedals, it is crucial to also address the issue of worn or damaged pedals.
Over time, pedals can become worn down or damaged due to constant use and exposure to various elements. This can lead to a decrease in performance and potentially compromise the safety of the rider. Therefore, it is essential to regularly inspect and replace damaged pedals to ensure optimal functionality and safety.
By doing so, you can maintain a smooth and efficient cycling experience. Remember, regular maintenance is key in prolonging the lifespan of your bicycle components and ensuring a safe ride.
Now, as we move on to the next section about seeking professional help if needed, it is important to keep in mind that some issues may require the expertise of a trained bicycle mechanic.
Seek professional help if needed
If you’re unsure about how to address the issue, don’t hesitate to seek professional help.
Seeking professional advice can be beneficial when troubleshooting common pedal issues. Here are five reasons why it’s a good idea:
- Expertise: Professionals have the knowledge and experience to accurately diagnose and fix pedal problems.
- Tools: They have specialized tools that may not be readily available to you, ensuring a proper repair.
- Efficiency: Professionals can quickly identify and resolve any underlying issues, saving you time and frustration.
- Safety: Pedal problems can affect your ride’s stability and control, so it’s crucial to have them fixed correctly to avoid accidents.
- Longevity: Professionals can provide recommendations on proper maintenance and care, helping extend the lifespan of your pedals.
By seeking professional help, you can ensure that your pedal issues are properly addressed, allowing you to enjoy your secure and smooth ride!
Enjoy your secure and smooth ride!
You can now relax and enjoy a safe and smooth ride! Securing your bicycle pedals is crucial for a hassle-free biking experience. Regular pedal maintenance is important to ensure they stay tightly in place and function properly. Loose pedals can cause discomfort, instability, and even accidents. To avoid these issues, follow these steps:
- Start by removing the pedals using a pedal wrench.
- Clean the pedal threads and the crank arms thoroughly.
- Apply a small amount of grease to the pedal threads to prevent corrosion.
- Carefully tighten the pedals back onto the crank arms, ensuring they are securely fastened.
By properly securing your pedals and conducting regular maintenance, you can enjoy a worry-free and enjoyable ride. Remember, a well-maintained bike is a safe bike. So, take the time to maintain your pedals and enjoy the benefits of a smooth and secure ride every time you hop on your bicycle.
| Benefits of Securing Pedals | Importance of Pedal Maintenance |
|---|---|
| Enhanced stability | Prevents pedal slippage |
| Improved power transfer | Reduces wear and tear |
| Minimizes discomfort | Ensures rider safety |
| Boosts overall performance | Extends pedal lifespan |
Frequently Asked Questions
How often should I check the tightness of my bicycle pedals?
I replace my bicycle pedals every 6-12 months to ensure optimal performance and safety. Regularly checking the tightness helps prevent them from loosening during rides. Clipless pedals provide increased power transfer and efficiency, enhancing overall cycling experience.
What are the signs that my bicycle pedals need to be tightened?
When your bicycle pedals become loose, you may experience a clicking or creaking sound, a wobbly feeling when pedaling, or even the pedals coming off. To properly tighten them, follow these steps.
Can I use a regular wrench instead of a pedal wrench to tighten my pedals?
Yes, you can use a regular wrench instead of a pedal wrench to tighten your bicycle pedals. However, it’s important to note that a pedal wrench is specifically designed for this task and provides better leverage. To prevent pedal loosening during rides, make sure to regularly check and tighten your pedals using the appropriate tools.
Can I use any type of grease on the pedal threads?
Using the wrong type of grease on pedal threads is a common mistake. Proper lubrication for bicycle pedals is crucial for preventing them from seizing or loosening. Remember to use a grease specifically designed for bicycle components.
Are there any specific safety precautions I should take when tightening my bicycle pedals?
When tightening bicycle pedals, it is important to follow proper technique to ensure safety. Avoid common mistakes such as over-tightening or cross-threading. Use a pedal wrench and apply even pressure, tightening clockwise on the right pedal and counterclockwise on the left.
Conclusion
Well, after going through all the steps and tightening those bicycle pedals, I can confidently say that my ride is going to be smooth and secure.
It’s amazing how such a small detail can make such a big difference in the overall performance of the bike.
I can already picture myself zooming down the road, feeling like I’m floating on air.
It’s funny how something as simple as tightening pedals can transform a regular ride into a truly exhilarating experience.
So, grab your tools and get ready for the ride of your life!