
Picture yourself effortlessly cruising through the city streets on your electric bicycle, with the wind in your hair and excitement running through your veins.
But suddenly, you notice that your chain is loose, causing a bumpy and inefficient ride. Don’t let this setback dampen your spirits!
In this article, we will guide you through the process of tightening the chain on your electric bike, ensuring a smooth and enjoyable ride every time. With our step-by-step instructions and expert tips, you’ll be back on the road in no time.
So let’s dive in and get that chain tightened!
Key Takeaways
- Proper chain tension is crucial for performance and preventing chain slippage.
- Regularly checking and adjusting chain tension is necessary for optimal performance.
- Loosening and adjusting the rear wheel axle nuts is essential for adjusting chain tension.
- Securing the rear wheel axle nuts properly ensures stability and safety.

Young Electric E-Bike Rack with Ramp, Hitch 2 Bike Rack, 200 lbs Capacity Electric Bike Carrier, Foldable Platform Mount for Cars, Trucks, SUVs, Minivans, Up to 5-Inch Fat Tire for 2'' Receiver
200LBS CAPACITY & V-GROOVE RAMP: The electric bike rack weighing 66 pounds is built with durable steel and...
As an affiliate, we earn on qualifying purchases.
Identify the Problem
The first step in tightening the chain on an electric bike is to identify the problem. Before proceeding with any adjustments, it’s essential to troubleshoot and determine the cause of the loose chain.
Common chain problems may include excessive wear, misalignment, or lack of tension. Start by inspecting the chain for any signs of damage or elongation. Look for any loose or missing links, as this can affect the overall tension of the chain. Additionally, check the alignment of the chain with the sprockets and gears. A misaligned chain can cause it to slip or jump.
By identifying the specific issue with the chain, you can better understand the steps needed to correct it.
Now, let’s move on to gathering the necessary tools for the tightening process.

WEIZE 700C Hybrid Bike for Adults, 14 Speed Road Bike, City Commuter Bicycle with Caliper Brakes, High-Carbon Steel Racing Adult Bike, Urban Adult Bicycle for Men and Women, White
Caliper brake system: The hybrid bike adopts a dual caliper brake design, making daily maintenance more convenient and...
As an affiliate, we earn on qualifying purchases.
Gather the Necessary Tools
First, make sure you have all the necessary tools before you start tightening the chain on your electric bike. You will need a 5mm Allen wrench, a 10mm wrench, and a chain tensioner tool.
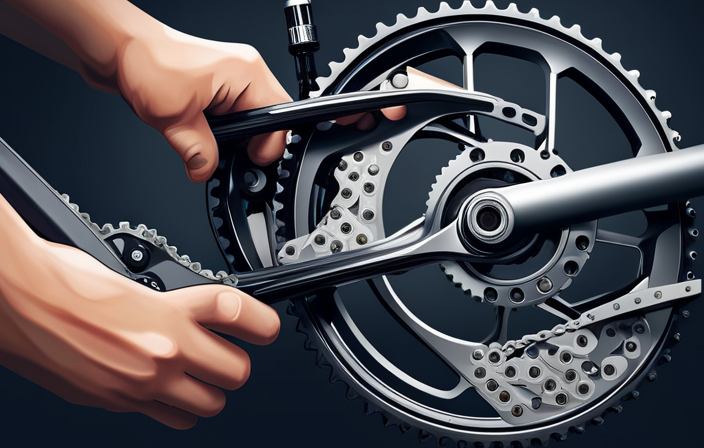
To begin the chain tightening process, start by locating the rear wheel of your electric bike. Use the 5mm Allen wrench to loosen the bolts on the axle nuts. Once the bolts are loose, you can use the 10mm wrench to turn the tensioner tool clockwise. This will push the rear wheel back and tighten the chain.
Make sure to check the chain tension after each adjustment by lifting the chain at the midpoint. It should have about half an inch of play. If the chain is too loose or too tight, make additional adjustments until it is properly tensioned.
Now that you have tightened the chain, you can move on to the next step of loosening the rear wheel to make further adjustments.

AVASTA 700C Road Adult Step-Over Hybrid Bike Bicycle for Men Woman Male Female,Lightweight Aluminum Alloy Frame with 21-Speed Gearing for City Commuting,Dual Disc Brakes,19 inch Frame,Chameleon Grey
🚴♂️【Durable Aluminum Alloy Frame】This lightweight yet strong frame is built to last, offering a perfect balance of durability...
As an affiliate, we earn on qualifying purchases.
Loosen the Rear Wheel
Next, use the 10mm wrench to loosen the bolts on the axle nuts of the rear wheel. This will allow you to adjust the position of the wheel and properly tighten the chain on your electric bike. Here are some key steps to follow: Once the wheel is in the desired position, securely tighten the axle nuts to hold it in place. After adjusting the chain tension, check the alignment of the wheel to ensure smooth operation. Finally, inspect and tighten electric bike brakes to ensure safe and responsive stopping power.
- Loosen the bolts on both sides of the axle nuts.
- Slide the rear wheel forward or backward to adjust the chain tension.
- Make sure the wheel is aligned properly in the frame.
- Tighten the bolts on the axle nuts securely.
By loosening the rear wheel, you can easily adjust the chain tension to ensure optimal performance and longevity of your electric bike.
Once you have completed this step, you can move on to the next section and learn how to adjust the chain tension for a smooth and efficient ride.

Schwinn Wayfarer Hybrid Bike, 700c Mens and Womens Bike, 7-Speed Hybrid Bicycle, Retro Steel Frame, Front and Rear Linear Pull Brakes, Fenders, Cargo Space, Adult Bicycle
HYBRID BICYCLE: Ride in comfort and vintage style with the Wayfarer by Schwinn. With 700c wheels, this mens...
As an affiliate, we earn on qualifying purchases.
Adjust the Chain Tension
To properly adjust the tension of the chain, slide the rear wheel forward or backward to find the desired position.
Chain maintenance is crucial for the smooth operation of your electric bike. Over time, the chain can stretch and wear out, affecting the bike’s performance. To avoid this, regular chain tension checks and adjustments are necessary.
Start by loosening the rear wheel and using a chain tensioner tool to measure the slack in the chain. Adjust the tension by moving the rear wheel until the chain has the right amount of play – not too loose or too tight. It’s important to find the right balance to ensure optimal performance and prevent premature wear.
Once you’ve adjusted the tension, you can move on to the next step of checking the alignment.
Check the Alignment
After adjusting the tension of the chain, it is important to check the alignment before moving on to the next step. Proper alignment ensures that the chain runs smoothly and efficiently, reducing wear and tear on the bike’s components.
To check the alignment, start by visually inspecting the chain as it runs along the rear sprocket. It should be running straight and centered. If you notice any misalignment, you may need to make adjustments.
Use a ruler or a straight edge to measure the distance between the chain and the edge of the rear sprocket on both sides. They should be equal. If not, you can adjust the alignment by loosening the rear wheel axle nuts and shifting the wheel slightly left or right.
Once you have checked and adjusted the alignment, you can move on to tightening the rear wheel.
Tighten the Rear Wheel
Make sure you properly secure the rear wheel by tightening the axle nuts. This is an important step in the process of tightening the chain on your electric bike.
Start by using a wrench to loosen the axle nuts slightly. Next, pull the wheel back until the chain is tight. Make sure the wheel is aligned with the frame by checking the alignment marks on the frame and the wheel.
Once you have ensured proper alignment, tighten the axle nuts securely. It is also a good idea to lubricate the chain after tightening the rear wheel. Apply a small amount of chain lubricant to each link and let it sit for a few minutes before wiping off any excess. This will help to reduce friction and extend the life of your chain.
With the rear wheel properly tightened and the chain lubricated, you are now ready to test the chain tension in the next step.
Test the Chain Tension
Now that the rear wheel is properly secured, it’s time to check the tension of the chain. To ensure the optimum performance and longevity of your electric bike, it’s important to regularly check the chain wear and adjust the tension accordingly.
Start by locating the midpoint of the chain between the front and rear sprockets. Apply light pressure on the chain with your thumb and index finger. Ideally, the chain should have about half an inch of vertical play. If it’s too loose or too tight, adjustments are needed.
Use a chain tensioner tool or a ruler to measure the chain tension accurately. Make sure to follow the manufacturer’s recommendations for the specific tension range.
Once you’ve measured the chain tension, you can proceed to the next step: lubricating the chain.
Lubricate the Chain
To ensure optimal performance and longevity, it’s important to regularly lubricate the chain of your e-bike. Here are four steps to follow:
-
Clean the chain: Before applying any lubricant, make sure the chain is clean and free from dirt and debris. This will prevent dirt from mixing with the lubricant and causing friction.
-
Choose the right lubricant: Use a lubricant specifically designed for bicycle chains. Apply the lubricant evenly along the entire length of the chain, making sure to cover each link.
-
Remove excess lubricant: After applying the lubricant, wipe off any excess with a clean rag. This will prevent the chain from attracting dirt and dust, which can lead to rust.
-
Repeat regularly: To prevent rust and increase the lifespan of your chain, lubricate it every 100-200 miles or whenever you notice it becoming dry or noisy.
Regularly maintaining and monitoring the chain will ensure smooth and efficient operation of your electric bike.
Regularly Maintain and Monitor the Chain
To keep your chain in good condition, it’s important to regularly maintain and monitor it. Chain maintenance tips are essential to ensure optimal performance and longevity of your electric bike.
One crucial aspect of chain maintenance is maintaining proper tension. The chain should be neither too tight nor too loose. Incorrect tension can lead to decreased efficiency and premature wear. Regularly check the tension of your chain using a chain tension tool or by hand. Adjust the tension as needed by loosening or tightening the rear wheel axle nuts or using an adjustable tensioner.
Ensure the chain has about half an inch of up and down play. Over time, chains may stretch, so regular monitoring is key.
By maintaining proper chain tension, you’ll enjoy a smooth and efficient ride!
Enjoy a Smooth and Efficient Ride!
Make sure you maintain the right tension in your chain to enjoy a smooth and efficient ride. To increase performance and prevent chain slippage, it is essential to tighten the chain on your electric bike regularly. Here’s a step-by-step guide to help you achieve optimal chain tension.
-
Start by checking the chain tension using a chain tensioner or by manually pulling the chain away from the rear sprocket. It should have a slight amount of play, about 1/4 to 1/2 inch.
-
If the chain is too loose, locate the rear wheel axle nuts and loosen them slightly. Then, adjust the tension by moving the wheel slightly forward or backward until the desired tension is achieved.
-
Once the desired tension is reached, tighten the rear wheel axle nuts securely and evenly on both sides to ensure the wheel stays in place.
-
Finally, double-check the chain tension and make any necessary adjustments.
By maintaining the right chain tension, you’ll experience improved performance and avoid chain slippage, ensuring a smoother and more efficient ride.
Frequently Asked Questions
How often should I tighten the chain on my electric bike?
To prevent chain slippage and maintain proper chain tension on your electric bike, it is recommended to tighten the chain every 100-200 miles or whenever you notice excessive slack. Follow these step-by-step instructions to ensure a smooth and efficient ride.
Can I use any type of lubricant on the chain?
For the best performance and longevity, it’s important to use the right chain lubricant for your electric bike. Avoid using any type of lubricant and opt for a high-quality chain lubricant specifically designed for electric bike chains.
Is it necessary to loosen the rear wheel before adjusting the chain tension?
To achieve proper chain tension for optimal performance and prevent damage to electric bike components, it is necessary to loosen the rear wheel before adjusting the chain tension. This allows for precise adjustments and avoids unnecessary strain on the chain.
What are the signs that indicate my chain tension needs adjustment?
To maintain proper chain tension, watch out for common chain problems like excessive noise, skipping gears, or chain slippage. Regularly check and adjust tension according to your bike’s specifications using the proper tools and techniques.
Can I use the same process to tighten the chain on a regular bike?
To tighten the chain on a regular bike, follow a similar process to that of an electric bike. However, keep in mind that the chain tension adjustment may vary between the two types of bikes. Properly align the wheel, adjust the tension using the appropriate tools, and ensure the chain is properly lubricated.
Conclusion
Congratulations on successfully tightening the chain on your electric bike! You are now ready to enjoy a smooth and efficient ride.
Remember to regularly maintain and monitor the chain to ensure its longevity and optimal performance. By following the step-by-step instructions provided, you have taken a crucial step in keeping your electric bike in top shape.
Keep up the great work and happy riding!