Do you find yourself fatigued from cycling uphill or battling strong headwinds? Have you ever thought about ways to increase the power and efficiency of your bike?
Well, look no further! In this article, I will guide you through the process of transforming your ordinary bike into an electric one. With the right knowledge and tools, you can enjoy the benefits of an electric bike without having to invest in a new one.
So, are you ready to take your cycling experience to the next level? Let’s get started!
Key Takeaways
- Assess the compatibility of your bike by checking its frame, wheel size, brakes, and bottom bracket.
- Choose the right conversion kit based on your bike type, desired speed, range, and budget.
- Gather the necessary tools and equipment including the conversion kit components and essential tools.
- Follow the conversion process of removing and replacing the front wheel, installing the electric motor and battery, connecting the motor to the bike’s drivetrain, and testing and adjusting the conversion while taking safety precautions.

TST Electric Bike for Adults, 1500W Peak Motor 60 Miles Fat Tire E Bike 48V 15Ah Removable Battery 20" Electric Bike with Full Suspension SGS UL 2849 Certification Black
【Excellent Motor Performance】This electric bike is equipped with a high-performance 750W motor(1500W peak power) with 2 to 3...
As an affiliate, we earn on qualifying purchases.
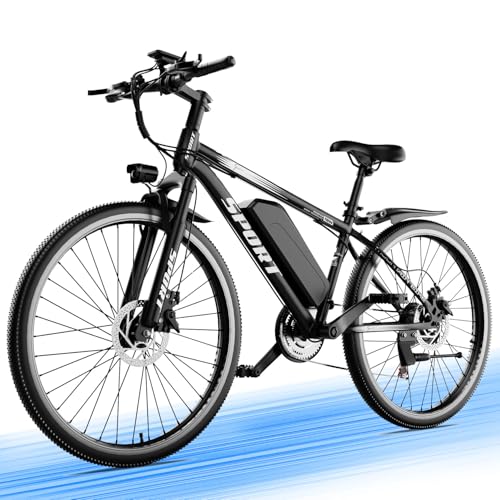
Understanding the Benefits of Electric Bikes
Understanding the benefits of electric bikes can be helpful when deciding whether to transform your bike. Electric bikes have a positive environmental impact as they produce zero emissions and reduce air pollution. They also help to decrease traffic congestion and contribute to a greener and healthier environment.
Exploring the different types of electric bike batteries is crucial in making an informed decision. Lithium-ion batteries are the most common type used in electric bikes due to their high energy density, long lifespan, and lightweight design. They provide a longer range and faster charging time compared to other battery types.
Another option is the lead-acid battery, which is less expensive but heavier and has a shorter lifespan. Understanding the environmental impact of electric bikes and the different types of electric bike batteries can assist in making an informed choice when transforming your bike.
Misodo Electric Bike for Adults, 1500W Peak Mountain Ebike, 26" All-Terrain Electric Bicycle, 25 MPH 65 Miles Long Range, 48V 10.4Ah Removable Battery High-Step Commute E-Bike
👍1500W Peak Powerful Motor👍65-Mile Range👍25Mph Fast Speed👍350+ Lbs Load👍Dual Disc Brake👍ALL Terrain Riding👍Safer Bright Light👍LCD Display❤️36-month warranty❤️
As an affiliate, we earn on qualifying purchases.
Assessing Your Bike’s Compatibility for Conversion
To determine if your bicycle is compatible for conversion, you’ll need to assess its components and specifications. Here are four key factors to consider when evaluating compatibility:
-
Frame: Ensure that the frame is sturdy and in good condition to handle the additional weight of the electric components. Look for a frame that allows for easy installation of a battery and motor.
-
Wheel Size: Check the size of your bike’s wheels as it can affect the fit of the electric conversion kit. Most conversion kits are designed for standard wheel sizes like 26 inches or 700c.
-
Brakes: Electric bikes require strong and reliable brakes to handle the increased speed and weight. Make sure your bike’s brakes are in good working condition or consider upgrading them if necessary.
-
Bottom Bracket: The bottom bracket, where the pedals and crankset are attached, should be compatible with the motor system. Check the specifications of the conversion kit to ensure compatibility.
By thoroughly checking these specifications and evaluating compatibility, you can determine if your bike is suitable for an electric conversion.

PUJH 6000W Dual Motor Ebike for Adults, 60V 20Ah Fast Electric Bike,Up to 110 Miles,24" Fat Tire Full Suspension Electric Bike for Snow Off-Road Commuter Mountain E-Bike for Men Women (Black)
🚲 【Powerful Brushless Motors】 Equipped with 6000W peak out dual motors, this electric bike delivers exceptional power and...
As an affiliate, we earn on qualifying purchases.
Choosing the Right Electric Bike Conversion Kit
When choosing the right conversion kit, it’s important to consider the specific needs and specifications of your bicycle. Factors to consider include the type of bike you have, your desired speed and range, and your budget. There are several different conversion kit options available on the market, each with its own features and benefits. To help you make an informed decision, here is a comparison table of four popular conversion kits:
| Conversion Kit | Motor Power | Battery Capacity | Top Speed | Range |
|---|---|---|---|---|
| Kit A | 250W | 36V 10Ah | 15 mph | 20 miles |
| Kit B | 500W | 48V 14Ah | 20 mph | 30 miles |
| Kit C | 750W | 52V 17.5Ah | 25 mph | 40 miles |
| Kit D | 1000W | 72V 20Ah | 30 mph | 50 miles |
Comparing these options will help you determine which conversion kit best suits your needs. Remember to also consider the installation process and customer reviews before making your final decision.

Misodo Electric Bike for Adults, 1500W Peak Mountain Ebike with 25 MPH, 65 Miles Range, 7 Speeds, 48V 10Ah Removable Battery 26" Ebike for Commute
Powerful 1500w Peak Electric Bike: Ebike for Adults features a 1500W peak brushless motor that pushes speeds up...
As an affiliate, we earn on qualifying purchases.
Gathering the Necessary Tools and Equipment
To gather all the necessary tools and equipment for the conversion, start by creating a checklist of items needed. This will ensure that you have everything at hand when you begin the step-by-step conversion process.
The first item on the checklist should be a conversion kit, which typically includes a motor, battery, controller, and wiring harness. Other essential tools include wrenches, screwdrivers, pliers, and a multimeter for testing electrical connections.
Additionally, you will need a torque wrench to properly tighten bolts, wire cutters, and wire strippers for electrical work. It is also important to have a set of Allen keys in various sizes for adjusting and assembling parts.
Finally, don’t forget safety equipment like gloves, safety glasses, and a helmet. Gathering these resources will ensure a smooth and successful bike to electric conversion.
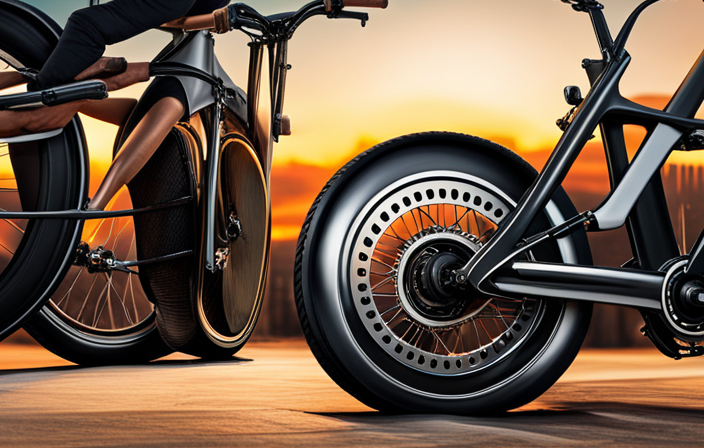
Removing and Replacing the Bike’s Front Wheel
First, remove and replace the front wheel of the bicycle.
To begin, loosen the quick release skewer by turning it counterclockwise. Once loose, press the brake lever to create enough space for the tire to pass through.
Carefully lift the front of the bike off the ground and pull the wheel out of the fork dropouts. Set the old wheel aside.
Now, take the electric bike conversion kit and attach the motorized wheel to the fork dropouts. Ensure that the axle is properly aligned with the fork and tighten the quick release skewer by turning it clockwise.
Test the wheel by spinning it to make sure it rotates smoothly.
Finally, check that the brake pads are aligned correctly with the rim and adjust if necessary.
Front wheel removal and replacement is a crucial step in converting your bike to electric.
Installing the Electric Motor and Battery
Now, you can easily install the electric motor and battery onto your bicycle. This step is crucial in transforming your bike into an electric one. To start, make sure you have all the necessary components: the electric motor, battery, battery charger, and motor controller.
First, locate a suitable position on your bike to mount the electric motor. This is typically near the rear wheel, as it provides better weight distribution. Secure the motor in place using the appropriate brackets or clamps.
Next, connect the motor controller to the electric motor. Refer to the manufacturer’s instructions for the correct wiring connections. Once connected, secure the motor controller in a safe and accessible location on your bike.
Finally, install the battery onto your bike. Find a secure location, such as the frame or a rear rack, and mount the battery using the provided brackets or straps. Don’t forget to connect the battery charger to the battery for convenient charging.
By following these steps, you’ll successfully install the electric motor and battery onto your bike, bringing it one step closer to becoming an electric-powered vehicle.
Connecting the Motor to the Bike’s Drivetrain
Once you have secured the motor and battery in place, you can connect the motor to your bike’s drivetrain. This step is crucial as it allows the motor to transfer power to the bike’s wheels, enabling the electric conversion.
To connect the motor to the drivetrain, follow these steps:
- Remove the existing pedals and chain from the bike.
- Attach a sprocket to the motor’s output shaft using a compatible chain.
- Install a corresponding sprocket on the rear wheel hub, ensuring proper alignment.
By connecting the motor to the drivetrain, you create a direct power transfer system. When the motor spins, it drives the chain, which in turn rotates the rear wheel, propelling the bike forward. This connection is essential for the successful operation of your electric bike conversion.
Now that the motor is securely connected to the drivetrain, you can move on to the next step: wiring the motor to the battery and controls.
Testing and Adjusting the Electric Bike Conversion
To ensure a successful electric bike conversion, it is important to test and make necessary adjustments.
Testing methods play a crucial role in determining the overall performance of the converted electric bike.
One common testing method is a performance analysis, which involves measuring and analyzing various aspects of the electric bike’s performance, such as speed, acceleration, and range.
This can be done by using a GPS tracker to record speed and distance traveled, as well as an ammeter to measure the current flowing through the motor.
Additionally, it is essential to test the electric bike under different conditions, such as uphill climbs and rough terrains, to assess its overall functionality and stability.
Based on the testing results, necessary adjustments can be made to optimize the electric bike’s performance and ensure a smooth and efficient ride.
Maintaining and Troubleshooting Your Electric Bike
Make sure you regularly inspect and maintain your electric bike to ensure its optimal performance and troubleshoot any potential issues. Here are some troubleshooting tips and common maintenance issues to keep in mind:
-
Check the battery connections: Loose or corroded connections can lead to power loss. Ensure all connections are secure and clean.
-
Monitor tire pressure: Improper tire pressure can affect your bike’s handling and efficiency. Check the recommended pressure and inflate or deflate as needed.
-
Clean the chain and gears: A dirty chain and gears can cause friction and affect the bike’s performance. Regularly clean them with a degreaser and lubricate with bike-specific oil.
-
Test the brakes: Regularly inspect your brake pads for wear and adjust them if necessary. Replace worn-out brake pads promptly for safety.
By following these maintenance tips and troubleshooting any issues promptly, you can keep your electric bike running smoothly for a longer period of time.
Enjoying the Ride: Tips for Riding an Electric Bike
Riding an electric bike can be a thrilling and effortless experience, allowing you to effortlessly cover long distances while enjoying the scenery. To ensure a safe and enjoyable ride, it’s important to practice proper riding techniques and take necessary safety precautions. Here are some tips to enhance your electric bike riding experience:
| Riding Technique | Safety Precautions |
|---|---|
| Maintain proper posture for balance and control | Always wear a helmet and other protective gear |
| Start and stop gradually to avoid sudden jerks | Observe traffic rules and signals |
| Use pedal-assist mode for a smoother ride | Be aware of your surroundings and anticipate potential hazards |
| Keep a relaxed grip on the handlebars for stability | Regularly check your brakes and tires for optimal performance |
| Lean into turns for better stability | Use lights and reflective gear for visibility, especially at night |
By following these riding techniques and safety precautions, you can confidently enjoy the ride on your electric bike while ensuring your safety and the safety of others.
Frequently Asked Questions
How much does it cost to convert a bike to electric?
Converting a bike to electric can cost anywhere from $500 to $2000, depending on the quality of components and desired features. The benefits include increased speed, ease of climbing hills, and reduced environmental impact compared to traditional bikes.
Are there any legal restrictions or regulations for riding an electric bike?
There are legal restrictions and regulations for riding an electric bike. For example, in some areas, electric bikes must be limited to a certain speed and have specific safety features. Electric bikes offer benefits like increased speed and range, but drawbacks include limited battery life and the need for regular maintenance.
Can any type of bike be converted to electric?
Yes, any type of bike can be converted to electric with the right kit. Electric bike conversion offers numerous benefits such as increased speed and range, reduced effort while riding, and the ability to tackle hilly terrains with ease.
How long does it take to install an electric bike conversion kit?
Installing an electric bike conversion kit typically takes around 2-3 hours, depending on the complexity of the kit and the skill level of the person performing the installation. The installation process involves attaching the motor, battery, and controller to the bike frame.
What is the average lifespan of an electric bike battery?
The average lifespan of an electric bike battery depends on various factors, such as usage and maintenance. However, by following best practices for extending battery life, such as proper charging and storage, you can maximize the average battery performance.
Conclusion
In conclusion, converting a regular bike into an electric bike can be a rewarding and cost-effective project for any cycling enthusiast. By understanding the benefits of electric bikes and assessing your bike’s compatibility for conversion, you can choose the right electric bike conversion kit and gather the necessary tools and equipment.
One interesting statistic to note is that electric bikes have been found to reduce carbon dioxide emissions by an average of 22 pounds per 500 miles traveled. This highlights the environmental impact and sustainability of electric bikes, making them a great choice for eco-conscious riders.