Have you ever encountered shaky or unstable rides on your bike? This may be caused by a wheel that is out of true.
In this article, I will guide you through the process of truing a bicycle wheel, ensuring that it spins straight and true. With the right tools and a systematic approach, you can easily correct any issues with your wheel, making your rides smoother and more enjoyable.
So let’s dive in and learn how to true a bicycle wheel like a pro.
Key Takeaways
- Regularly check for signs of misalignment and adjust spoke tension as needed.
- Reinstall the wheel securely and properly align it with the fork dropouts.
- Test ride the bike and make additional adjustments if necessary.
- Troubleshoot common issues such as wobbling, side-to-side movement, and hop or bounce.

PEXMOR Foldable Bike Cargo Trailer with Universal Bike Hitch, Bicycle Wagon Trailer with 16" Wheels & Reflectors, Large Loading Bike Trailer Storage Cart
【FOLDABLE & EASY TO INSTALL】- Comes with detailed instructions for easy installation and foldable design makes it easy...
As an affiliate, we earn on qualifying purchases.
Understanding the Importance of a True Bicycle Wheel
Understanding the importance of a true bicycle wheel is crucial for optimal performance. Wheel alignment plays a significant role in the overall functionality of a bike. When the wheel is true, it means that it spins perfectly straight without any wobbling or deviation. This alignment ensures proper weight distribution and reduces unnecessary friction between the tire and the road surface.
The benefits of a true wheel are numerous. Firstly, it enhances the bike’s stability, allowing for smoother rides and improved control. Secondly, it minimizes wear and tear on both the wheel and the tire, prolonging their lifespan. Lastly, a true wheel increases efficiency by reducing energy loss during pedaling.
Now, in order to true a bicycle wheel, it is essential to gather the necessary tools and equipment.

VEVOR Bike Cargo Trailer, 275 lbs Load Capacity, Foldable Compact Storage & Quick Release with Universal Hitch, 20" Wheels, Fits Most Bike Wheels, Carbon Steel Frame, Heavy-Duty Bicycle Wagon Cart
Professional Tire Design: Our bike trailer comes equipped with sporty 20" tires and iron hubs, providing excellent stability...
As an affiliate, we earn on qualifying purchases.
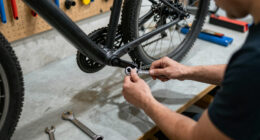
Gather the Necessary Tools and Equipment
First, you’ll need to gather all the tools and equipment required for the task. To ensure a successful truing process, you’ll need an adjustable wrench, spoke wrench, truing stand, and a nipple driver. Adjusting spoke tension is crucial for a true bicycle wheel. A truing stand is an essential tool that provides stability and accuracy during the wheel truing process. It allows you to identify any wobbles or deviations in the wheel’s alignment. The table below lists the necessary tools and equipment for truing a bicycle wheel:
| Tools and Equipment |
|---|
| Adjustable wrench |
| Spoke wrench |
| Truing stand |
| Nipple driver |
With these tools at hand, you can ensure precise adjustments to the spoke tension and achieve a true wheel. Now, let’s move on to the next section and learn how to remove the wheel from the bicycle.

VEVOR Bike Cargo Trailer, 160 lbs Load Capacity, Heavy-Duty Bicycle Wagon Cart, Foldable Compact Storage & Quick Release with Universal Hitch, 16" Wheels, Safe Reflectors, Fits 22"-28" Bike Wheels
160 lbs High Load Capacity: Our bike cargo trailer is your ultimate travel companion, providing a sturdy build...
As an affiliate, we earn on qualifying purchases.
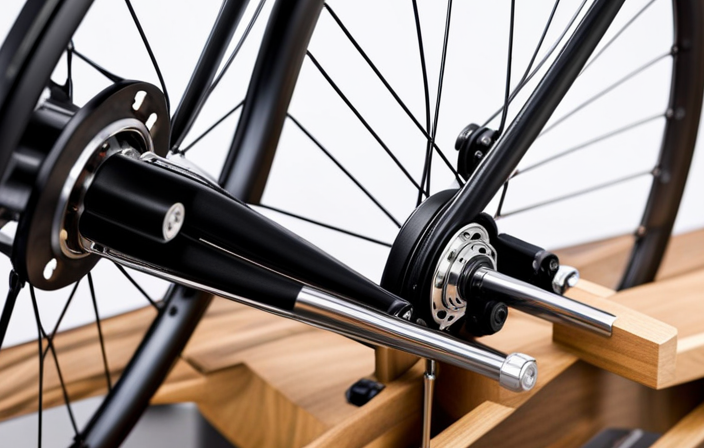
Remove the Wheel from the Bicycle
To start, you’ll need to detach the wheel from your bike. Begin by flipping your bike upside down and resting it on the handlebars and seat. Look for the quick release lever or axle nuts on either side of the wheel.
If your bike has a quick release lever, flip it open and loosen the tension. If it has axle nuts, use a wrench to loosen and remove them. Once the tension is released, gently pull the wheel out from the frame, being careful not to damage the brake pads or derailleur. Set the wheel aside for now, as we will come back to it later for wheel reinstallation.
With the wheel removed, we can now move on to inspecting the wheel for any damage or bent spokes.

Mongoose Men's Elroy Adventure Bike 700C Wheel Bicycle, Blue, 54cm frame size
Versatile adventure touring bike features capable adventure bike geometry, a sleek alloy frame and steel fork for the...
As an affiliate, we earn on qualifying purchases.
Inspect the Wheel for Damage or Bent Spokes
Check if there are any visible signs of damage or bent spokes on your bike’s wheel. Inspecting the wheel is crucial to ensure its integrity and prevent any potential accidents while riding.
Start by closely examining the rim for cracks or dents, as they can compromise the wheel’s stability. Pay attention to the spokes as well, looking for any signs of bending or loosening. Gently tug on each spoke to check for any excessive movement or play.
If you notice any damage or bent spokes, it’s important to address them before proceeding further. Once you have thoroughly inspected the wheel and made any necessary repairs, you can move on to the next step of loosening the spokes to true the wheel.
Loosen the Spokes
Next, start by loosening the spokes to ensure proper adjustment and alignment of the wheel. Loosening the spokes is an essential step in the spoke tension adjustment process. It allows for the necessary flexibility to make precise adjustments and achieve the desired alignment.
To loosen the spokes, you will need a spoke wrench. Begin by identifying the spoke nipples, which are the small threaded caps at the ends of the spokes. Insert the spoke wrench into the nipple and turn it counterclockwise to loosen the tension. Be sure to loosen all the spokes evenly to maintain balance.
Once the spokes are sufficiently loosened, you can proceed to identify the areas of the wheel that need adjustment. This will help you understand where to focus your efforts and achieve optimal wheel trueness.
Identify the Areas of the Wheel that Need Adjustment
First, identify the different sections of the wheel that require adjustment. Begin by spinning the wheel slowly and observing any wobbles or deviations from true. Pay close attention to the rim as it passes through the brake pads. Look for areas where the rim moves closer or further away from the brake pads. These are the areas that need adjustment.
Use a spoke wrench to loosen or tighten the spokes in these specific sections. Start by making small adjustments, about a quarter turn at a time, and then recheck the wheel for trueness. Continue this process until the wheel runs smoothly without any wobbles.
Once all the areas of adjustment have been identified and addressed, you can proceed to the next step of beginning the truing process.
Begin the Truing Process
To initiate the truing process, it’s important to carefully observe the wheel for any wobbles or deviations from alignment. Once identified, I begin the wheel straightening process by adjusting the spoke tension. Here are three key steps I follow:
-
Using a spoke wrench, I tighten or loosen the spokes as needed to correct the wobbling or deviation. This helps to bring the wheel back into alignment.
-
I focus on the areas where the wheel is out of true, making small adjustments to the spoke tension in those specific areas.
-
As I make adjustments, I check the wheel’s alignment using a truing stand or by spinning the wheel while observing it closely.
By following these steps, I can effectively straighten the wheel and improve its overall performance.
Now, let’s move on to adjusting the tension of the spokes to further fine-tune the wheel’s alignment.
Adjusting the Tension of the Spokes
Now, let’s jump into adjusting the tension of the spokes to further fine-tune the alignment of the wheel. This step is crucial in ensuring a stable and balanced wheel.
To begin, you’ll need to use a tensioning technique that involves tightening or loosening the spokes to achieve the desired tension. It’s recommended to use a spoke tension gauge to accurately measure the tension of each spoke.
Start by selecting a spoke and turning the spoke nipple clockwise to increase tension or counterclockwise to decrease tension. Repeat this process for each spoke, making small adjustments until the tension is evenly distributed.
By carefully adjusting the tension of the spokes, you can significantly improve the overall alignment and performance of the wheel. This will lay the foundation for fine-tuning the wheel alignment in the next section.
Fine-Tuning the Wheel Alignment
Once you have adjusted the tension of the spokes, you can further improve the alignment of your bike’s wheel by fine-tuning it.
To begin wheel straightening, identify any areas where the rim deviates from a perfectly straight line. Using a spoke wrench, you can adjust the tension of specific spokes to correct these deviations.
Start by loosening the spokes on the side towards which the wheel is leaning, and tighten the spokes on the opposite side. Make small adjustments, turning the spoke wrench incrementally to avoid over-tightening or damaging the spokes.
After each adjustment, spin the wheel and check for improvements in alignment. Continue this process until the wheel is true and the rim runs straight.
Once you have completed the fine-tuning process, you can proceed to the next step of checking the wheel for proper alignment without any further adjustments necessary.
Checking the Wheel for Proper Alignment
First, check the alignment of your bike’s wheel to ensure it is properly aligned. Start by checking if the wheel is centered between the fork blades or stays. Look for any signs of misalignment, such as the wheel being off-center or rubbing against the brake pads.
If the wheel is misaligned, it may need some adjustments. One way to adjust the alignment is by adjusting the spoke tension. Begin by inspecting the spoke tension on both sides of the wheel. Use a spoke wrench to tighten or loosen the spokes as needed, focusing on the side where the wheel needs to be shifted.
Gradually make adjustments, checking the alignment frequently until the wheel is properly centered. Once the alignment is corrected, you can proceed to reinstall the wheel on the bicycle, ensuring it is securely fastened.
Reinstall the Wheel on the Bicycle
To put the wheel back on the bike, make sure it is securely attached. Follow these steps to reinstall the wheel using proper techniques:
- Lift the bike frame and align the wheel with the fork dropouts.
- Slide the wheel axle into the dropouts, ensuring it sits evenly on both sides.
- Tighten the axle nuts or quick-release skewer, making sure they are snug but not overly tight.
- Check the wheel alignment by spinning it and observing the gap between the rim and brake pads. Make any necessary adjustments to ensure even spacing.
When reinstalling the wheel, common mistakes to avoid include not aligning the wheel properly, over-tightening the axle nuts, or failing to check the wheel alignment. By following these steps and avoiding these common mistakes, you can ensure a secure and properly aligned wheel.
Now, it’s time to test ride and make additional adjustments if needed.
Test Ride and Make Additional Adjustments if Needed
Now, you can hop on the bike and take it for a test ride to see if any additional adjustments are needed.
The test ride is crucial in ensuring that the wheel is true and functioning optimally. Start by riding on a flat, smooth surface to feel any wobbles or vibrations. Pay close attention to the wheel’s alignment and balance, as well as any unusual noises.
If you notice any issues, it may indicate that further adjustments are required. Common adjustments include tightening or loosening the spokes, checking the tire pressure, or realigning the wheel within the frame. Remember to make these adjustments gradually and incrementally to avoid overcorrection.
Once you have completed the test ride and made any necessary adjustments, you can move on to the next section about maintenance tips for keeping your wheel true.
Maintenance Tips for Keeping Your Wheel True
After completing the test ride and making any necessary adjustments, it’s essential to follow proper maintenance tips to keep your bicycle wheel true.
Wheel alignment and spoke tension are two critical factors to focus on. Maintaining proper wheel alignment ensures that the rim runs straight and true, preventing any wobbling or rubbing against the brakes.
Regularly checking and adjusting spoke tension is equally important, as loose or overly tight spokes can lead to an unbalanced wheel and affect its overall performance. To ensure optimal wheel alignment, inspect and adjust the spoke tension as needed, using a spoke wrench to tighten or loosen the spokes accordingly.
By maintaining proper wheel alignment and spoke tension, you’ll enjoy a smoother and more efficient ride.
Now, let’s move on to troubleshooting common issues that may arise in the wheel truing process.
Troubleshooting Common Issues
If you encounter any common issues while truing your bike’s wheel, troubleshooting them is important to ensure a smooth riding experience. Here are some tips for truing a wheel and troubleshooting common wheel issues:
| Common Issue | Possible Cause | Troubleshooting Steps |
|---|---|---|
| Wobbling | Loose spokes | – Tighten loose spokes – Check for broken spokes – Ensure even tension |
| Side-to-side movement | Bent rim | – Adjust spoke tension to straighten the rim – Use a spoke wrench to make small adjustments – Consider replacing a severely bent rim |
| Hop or bounce | Uneven spoke tension | – Adjust spoke tension to even out the wheel – Use a spoke tension meter for accuracy – Replace broken or damaged spokes |
Remember to check your wheel for any loose or broken spokes and ensure even tension. If you’re unable to troubleshoot the issue yourself, seek professional help to avoid further complications.
Seek Professional Help if Necessary
In case you’re unable to troubleshoot the issue yourself, it’s best to seek professional help to avoid any further complications.
When it comes to trueing a bicycle wheel, seeking assistance from a professional can provide you with the necessary expertise and guidance. Trueing a wheel requires a technical understanding of the wheel’s alignment and tension.
Professionals have the specialized tools and knowledge to assess and rectify any issues accurately. They can identify problems such as spoke tension imbalances, lateral or radial runouts, and improper alignment.
With their expertise, they can efficiently adjust the spokes and rim to bring the wheel back into alignment, ensuring a smooth and balanced ride.
So, don’t hesitate to reach out to a professional if you encounter difficulties in trueing your bicycle wheel.
Frequently Asked Questions
How often should I true my bicycle wheel?
I should true my bicycle wheel whenever it starts to wobble or rub against the brake pads. To maintain a true wheel, I can regularly check spoke tension, ensure proper hub adjustment, and avoid hitting curbs or potholes hard.
Can I true a bicycle wheel without removing it from the bike?
Sure, you can totally true a bicycle wheel without removing it from the bike. It’s a fantastic idea because removing the wheel gives you the advantage of accessing it easily and using various truing methods.
What tools do I need to true a bicycle wheel?
To true a bicycle wheel, you will need a spoke wrench, a truing stand or a zip tie, and a spoke tension meter. Step by step, you will adjust the spoke tension to align the rim with the brake pads for a true wheel.
Can I true a wheel that has bent or damaged spokes?
Yes, a wheel with bent or damaged spokes can be repaired. First, the damaged spokes should be replaced. If the wheel is severely damaged, alternatives to truing include replacing the entire wheel or seeking professional assistance.
How do I know if my wheel needs truing or if there is another issue?
To determine if your wheel needs truing, look for signs of misalignment such as wobbling or rubbing against the brake pads. Common causes of wheel truing issues include spoke tension imbalance and impact damage.
Conclusion
Well, there you have it folks, that’s how you true a bicycle wheel! It may seem like a daunting task at first, but with the right tools and a little bit of patience, anyone can do it.
Remember, a true wheel is key to a smooth and efficient ride. So don’t let those wobbles and bumps slow you down. Give your wheel some love and attention, and you’ll be cruising in no time.
And hey, if you’re really struggling, don’t be afraid to seek professional help. Sometimes, it’s just better to leave it to the experts.
Happy cycling!