Are you prepared to embark on an off-road adventure with your road bike? Converting your reliable road bike into a gravel machine may appear challenging, but do not worry!
In this comprehensive guide, I’ll show you how to turn your road bike into a gravel beast. From upgrading your tires for better traction to installing wider handlebars for improved stability, we’ll cover all the essential steps to ensure a smooth transition.
Get ready to conquer new terrains and explore the world beyond the pavement!
Key Takeaways
- Evaluate frame and fork for sturdiness and mounting points
- Upgrade tires to wider ones with aggressive tread patterns for better traction
- Consider adding a suspension fork or seatpost for comfort and control
- Upgrade brakes to disc brakes for better stopping power and reliability on rough terrains
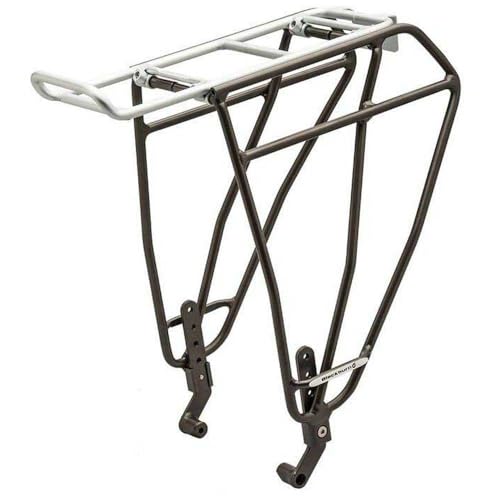
Blackburn Outpost Fat Front or Rear Bike Rack (Outpost Pewter, One Size)
FITS FAT AND MOST TIRE SIZES - Our patent-pending adjustable width design will work with most fat bike...
As an affiliate, we earn on qualifying purchases.
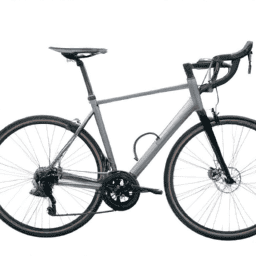
Assess Your Road Bike’s Compatibility
You’ll need to assess your road bike’s compatibility before you can turn it into a gravel bike. Assessing bike compatibility involves determining what upgrades are necessary to make your road bike suitable for off-road adventures.
Start by evaluating the frame and fork of your road bike. Gravel riding requires a more robust frame that can handle rough terrains, so if your current frame is too delicate, you may need to consider upgrading to a sturdier one. Additionally, check if there are mounting points for racks and fenders, as these accessories are often essential for gravel riding.
Next, examine the clearance between your tires and the frame. Gravel bikes typically have wider tire clearance compared to road bikes. If there isn’t enough space to fit wider tires on your current frame, you might need to replace the fork or consider purchasing a new gravel-specific frame.
Consider the drivetrain compatibility as well. Look at whether your road bike’s gearing is suitable for off-road riding. You may need lower gears for climbing steep gravel hills without straining yourself.
Once you’ve assessed your road bike’s compatibility and determined necessary upgrades, it’s time to upgrade your tires.

Blackburn Outpost Front and Rear World Touring Bike Rack (Grey, Front)
UNIVERSAL FIT SYSTEM - This rack offers more fitment flexibility than other systems, to fit more bikes. That's...
As an affiliate, we earn on qualifying purchases.
Upgrade Your Tires
To upgrade your tires, consider using ones that are better suited for off-road terrain. When converting a road bike into a gravel bike, the tires play a crucial role in providing traction and control. Opting for wider tires with aggressive tread patterns can greatly enhance your off-road riding experience. These types of tires offer increased grip on loose surfaces such as gravel or dirt, allowing you to navigate through challenging terrains more effectively.
When choosing new tires, it is important to consider two key factors: tire pressure and tire width. Lowering the tire pressure can improve comfort and traction by increasing the contact area between the tire and the ground. However, it’s essential to strike a balance because running too low of a tire pressure can lead to pinch flats or decreased efficiency on smoother surfaces.
In addition to adjusting the tire pressure, opting for wider tires will provide better stability and control when riding off-road. Wider tires distribute weight more evenly and allow for lower pressures without sacrificing performance. This combination of wider tires with appropriate air pressure will enhance your bike’s ability to tackle rougher terrains smoothly.
Now that we have upgraded our tires, let’s move on to installing wider handlebars for improved handling and control.

GPUTEK Mini Bike Tire Air Pump: Fast Inflate Portable Small Bicycle Electric Pump for Presta and Schrader Valves, 120 Psi High Pressure Pump with Digital Gauge for Road Bike, Mountain Bike, E-Bike
Portable and Lightweight Design: The GPUTEK bike electric pump measures a compact 2.81 x 1.77 x 1.25 inches...
As an affiliate, we earn on qualifying purchases.
Install Wider Handlebars
When converting your bike for off-road riding, consider installing wider handlebars for improved handling and control. Wider handlebars provide several benefits that can enhance your riding experience on gravel terrain. Here’s why you should make this upgrade:
-
Increased stability: Wider handlebars offer a broader base, allowing you to have better balance and stability when navigating rough and uneven surfaces.
-
Improved control: With wider handlebars, you have more leverage and control over your bike’s steering. This enables you to maneuver through challenging sections with ease, giving you the confidence to take on any gravel trail.
-
Enhanced bike fit: Installing wider handlebars can improve your overall bike fit by providing a more comfortable riding position. It helps to align your shoulders properly, reducing strain on your upper body during long rides.
-
Better leverage for climbing: When conquering steep inclines, wider handlebars give you increased leverage to power through tough climbs while maintaining balance.
By installing wider handlebars, you’ll be well-equipped to tackle the demands of off-road adventures with improved handling and control. But don’t stop there! In the next section, we’ll explore another essential upgrade: adding a suspension fork or seatpost for enhanced comfort off-road.

HOTO Mini Bike Tire Pump, 25s Fast Inflate Bicycle Pump with Guage, 150PSI Portable Electric Bike Air Pump with Presta and Schrader Valve for Road Bike, Motorcycle, Mountain Bike, BMX, Sports Ball
NOTICE: The Presta valve adapter is a separate accessory, always attach the Presta adapter securely to the tire...
As an affiliate, we earn on qualifying purchases.
Add a Suspension Fork or Seatpost
Consider adding a suspension fork or seatpost to enhance your off-road riding experience. A suspension fork can greatly improve the comfort and control of your bike when riding on rough gravel roads. It helps absorb impact from bumps and uneven terrain, allowing you to maintain better traction and stability. The benefits of a suspension fork include reducing fatigue on long rides, minimizing hand and arm discomfort, and providing smoother handling.
When choosing the right seatpost for your gravel bike, there are a few factors to consider. First, decide whether you prefer a rigid or adjustable seatpost. An adjustable seatpost, also known as a dropper seatpost, can be lowered or raised with the push of a button or lever. This feature is especially useful for technical descents where you need more maneuverability.
To help you make an informed decision about which suspension fork or seatpost to choose, below is a comparison table:
| Suspension Forks | Seatposts |
|---|---|
| Increased comfort | Adjustable options |
| Better control | Improved maneuverability |
| Enhanced traction | Reduced fatigue |
By adding a suspension fork or seatpost to your road bike turned gravel machine, you’ll open up new possibilities for off-road adventures. Consider a dropper seatpost for technical descents in the subsequent section about ‘considering a dropper seatpost for technical descents’.
Consider a Dropper Seatpost for Technical Descents
If you want to improve your control on technical descents, think about adding a dropper seatpost. A dropper seatpost is a game-changer when it comes to off-road riding, especially on gravel terrain. It allows you to lower your saddle height with just the flick of a lever, giving you more room to maneuver and shift your weight back during steep descents. This increased stability and control can make all the difference in navigating tricky sections of the trail.
One of the key benefits of a dropper seatpost is that it allows you to find the perfect balance between climbing efficiency and descending confidence. When climbing or riding on flat terrain, you can raise the saddle up for maximum pedaling power. But as soon as things get technical, simply lower it down for better bike handling.
When installing a dropper seatpost on your road bike turned gravel bike, there are a few tips to keep in mind. Make sure to choose a model that is compatible with your frame and seat tube diameter. Take note of the recommended insertion depth and cut the post accordingly if needed. Additionally, ensure that all bolts are tightened properly according to manufacturer’s specifications.
Now that we’ve covered how adding a dropper seatpost can enhance your downhill control, let’s move on to another important modification – installing a gravel-specific chainring.
Install a Gravel-Specific Chainring
To enhance your off-road riding experience, installing a gravel-specific chainring is a recommended modification. A gravel bike chainring is designed specifically for the demands of off-road riding and offers several benefits over a standard road bike chainring.
-
Gravel bike chainring compatibility: One of the main advantages of using a gravel-specific chainring is that it provides better compatibility with wider tires commonly found on gravel bikes. These chainrings are designed to accommodate larger tires without causing any interference or rubbing, ensuring smooth and efficient pedaling.
-
Improved Chain Retention: Gravel-specific chainrings often feature narrow-wide tooth profiles that provide better chain retention, reducing the risk of dropping the chain when riding through rough terrain. This added security allows you to focus on the trail ahead rather than worrying about your drivetrain.
-
Enhanced Durability: Gravel riding can be tough on components due to the challenging terrain and abrasive conditions. Gravel-specific chainrings are typically made from more durable materials such as aluminum or steel and have reinforced tooth profiles to withstand the rigors of off-road riding.
Upgrading your brakes for off-road performance is another crucial step in transforming your road bike into a capable gravel machine.
Upgrade Your Brakes for Off-Road Performance
Improve your off-road riding experience by upgrading your brakes for better performance on rough terrain. When riding on gravel or dirt, it’s crucial to have reliable stopping power. Upgrading your brakes can greatly enhance your control and confidence in challenging conditions.
One important aspect to consider when upgrading your brakes is brake pad selection. Opting for brake pads specifically designed for off-road riding will provide better grip and modulation, allowing you to confidently navigate loose surfaces. Look for pads that are made from durable materials and have a tread pattern that helps shed mud and debris.
Another factor to consider is brake lever compatibility. Not all road bike brake levers are suitable for off-road use, as they may not provide enough leverage or have the necessary clearance for wider tires. It’s worth investing in brake levers that are specifically designed for gravel riding, as they will offer improved braking performance and control.
By upgrading your brakes with the right brake pads and compatible levers, you’ll be able to tackle challenging terrain with ease and confidence.
Next, let’s explore how installing a lower gear ratio can further enhance your off-road capabilities without compromising climbing ability.
Install a Lower Gear Ratio for Climbing
Installing a lower gear ratio can enhance your climbing ability while off-roading. When tackling steep inclines and challenging terrains, having the right gear options is crucial. Here are three reasons why you should consider installing a lower gear ratio for better climbing performance:
-
Improved Power: Lower gears provide more torque, allowing you to generate greater power with each pedal stroke. This increased power translates into easier uphill climbs, especially when faced with loose gravel or uneven surfaces.
-
Increased Control: With lower gears, you’ll have finer control over your speed and cadence while climbing. This allows for smoother transitions between gears and better maneuverability on tricky sections of the trail.
-
Reduced Fatigue: Climbing can be physically demanding, but a lower gear ratio helps reduce strain on your muscles by allowing you to maintain a comfortable pedaling rhythm. By conserving energy and preventing excessive fatigue, you’ll be able to tackle longer ascents without feeling completely exhausted.
Now that we’ve discussed how installing a lower gear ratio can improve your climbing abilities, let’s move on to another important upgrade – adding a chainstay protector for extra protection against potential damage from rough terrain.
Add a Chainstay Protector for Extra Protection
Consider adding a chainstay protector to provide extra protection against potential damage from rough terrain and enhance your off-roading experience.
A chainstay protector is a simple accessory that can make a big difference in protecting your bike frame. It acts as a shield, preventing scratches, dings, and other forms of damage that can occur when riding on gravel roads or trails.
One of the main benefits of using a chainstay protector is that it helps to prolong the lifespan of your bike frame. As you ride over rough surfaces, rocks and debris can get kicked up by your tires and hit the underside of the chainstays. Without any protection, these impacts can cause dents or even cracks in the frame over time. By installing a chainstay protector, you create an additional layer of defense against this type of damage.
To install a chainstay protector, start by cleaning the area where it will be placed. This will ensure proper adhesion and prevent any dirt or debris from interfering with the installation process. Next, carefully peel off the backing from the adhesive side of the protector and align it with the chainstays. Press firmly to secure it in place.
In conclusion, adding a chainstay protector offers numerous benefits for gravel biking enthusiasts. It provides an extra layer of protection for your bike frame against potential damage caused by rough terrain. Now let’s move on to another important step: considering tubeless conversion for better traction and puncture resistance.
Consider Tubeless Conversion for Better Traction and Puncture Resistance
Switching to tubeless tires can enhance your off-roading experience by providing better traction and increased puncture resistance. Tubeless tires have become increasingly popular in the gravel biking community due to their numerous advantages over traditional clincher tires.
Here’s a step-by-step tubeless conversion guide to help you make the switch:
- Remove the old clincher tires from your road bike wheels.
- Clean the rims thoroughly to ensure proper adhesion of the tubeless tape.
- Apply tubeless rim tape, making sure to cover all spoke holes and overlapping the tape for added security.
- Install tubeless valves into the valve holes on your rims.
- Mount your new tubeless tires onto the rims, ensuring they are properly seated.
The main advantage of tubeless tires is that they eliminate the need for inner tubes, reducing the risk of pinch flats and increasing puncture resistance. Additionally, running lower tire pressures with tubeless setups provides better traction on loose surfaces like gravel. However, it’s essential to note that converting to tubeless does require some initial setup time and maintenance.
By switching to a tubeless setup, you’ll enjoy improved performance and reliability on your gravel adventures.
Now let’s explore how installing a gravel-specific saddle can further enhance your comfort on long rides.
Install a Gravel-Specific Saddle for Comfort on Long Rides
To enhance your comfort on long rides, try installing a saddle specifically designed for gravel riding. A gravel-specific saddle offers several benefits that can greatly improve your overall experience. These saddles are usually wider and have additional padding compared to traditional road bike saddles, providing better support and cushioning for rough terrain. They also often feature a shorter nose, which helps prevent chafing and discomfort during extended periods of pedaling.
When choosing the right saddle for your gravel bike, it’s important to consider factors such as width, shape, and material. Look for a saddle that matches the width of your sit bones to ensure proper support. The shape should complement your riding style – some prefer a more flat profile while others may benefit from a slight curve or cutout design. Additionally, consider the material used in the construction of the saddle as it can impact both durability and comfort.
By installing a gravel-specific saddle on your road bike turned gravel bike, you’ll be able to enjoy longer rides with improved comfort and reduced fatigue. With the added support and cushioning provided by these saddles, you can confidently tackle even the most challenging terrains without sacrificing comfort.
Transitioning into the subsequent section about adding frame bags or panniers for extra storage…
Add Frame Bags or Panniers for Extra Storage
One way to increase storage capacity on your bicycle is by adding frame bags or panniers. Frame bags are attached directly to the frame of the bike and provide a streamlined storage option. Panniers, on the other hand, are bags that hang off the sides of a rack attached to your bike’s rear wheel.
Frame bags come in various sizes and shapes, allowing you to choose one that fits your specific needs. They are great for carrying small items like tools, spare tubes, snacks, and even a lightweight jacket. Some frame bags also have compartments or pockets for better organization.
Panniers offer more storage space than frame bags and can be useful for longer rides or multi-day trips. They typically come in pairs and attach securely to a rear rack using hooks or straps. With panniers, you can carry larger items such as clothes, camping gear, groceries, or even a laptop.
Adding frame bags or panniers to your gravel bike not only increases its storage capacity but also enhances its versatility by allowing you to carry essential items with ease. This ensures that you’ll have everything you need while exploring gravel roads or embarking on long adventures.
When it comes to enhancing grip on gravel surfaces, installing gravel-specific pedals is the next step after increasing storage capacity with frame bags or panniers.
Install Gravel-Specific Pedals for Better Grip
Installing gravel-specific pedals can greatly improve your grip and control while riding on gravel surfaces. When it comes to choosing the right pedal for your gravel bike, there are several options available that offer unique benefits. Here are three gravel bike pedal options to consider:
-
Flat Pedals: These pedals provide a large platform for your feet, allowing you to have more stability and control over rough terrain. They are also great for riders who prefer not to be clipped in.
-
Clipless Pedals: These pedals feature a cleat system that attaches your shoes to the pedals, providing a secure connection and efficient power transfer. They give you the confidence to tackle challenging climbs and technical descents.
-
Dual-sided Pedals: These pedals combine the best of both worlds by offering a flat side for casual rides and a clipless side for more aggressive off-road adventures. They give you the flexibility to choose between different riding styles without having to switch out pedals.
Using gravel-specific pedals has numerous benefits. Firstly, they enhance your overall riding experience by improving grip on loose surfaces, reducing the chances of slipping or losing control. Secondly, they increase efficiency by allowing you to transfer power directly from your legs to the bike without any energy loss. Lastly, they provide better foot support during long rides, minimizing fatigue and discomfort.
Consider adding a bikepacking setup for multi-day adventures as you explore new terrains with confidence and comfort.
Consider Adding a Bikepacking Setup for Multi-Day Adventures
If you’re planning on going on multi-day adventures, consider adding a bikepacking setup for added convenience and storage. Bikepacking allows you to carry all the essentials you need for a long journey, including food, camping gear, and extra clothes. There are many options available when it comes to bikepacking bags, ranging from frame bags to handlebar rolls and seat packs. Choose the setup that works best for your needs and ensures stability while riding.
In addition to a bikepacking setup, another important aspect to consider when turning your road bike into a gravel bike is choosing the right gravel tires. Gravel-specific tires are designed with durability and grip in mind. Look for tires that have thicker tread patterns and wider widths compared to regular road tires. These features will provide better traction on loose surfaces and enhance your overall biking experience.
As you venture out on multi-day adventures with your newly transformed gravel bike, it’s crucial to regularly maintain and clean it. This will help prolong its lifespan and ensure optimal performance during your rides. Regularly inspecting the drivetrain components for wear, cleaning off dirt and grime from the frame, lubing the chain, and checking tire pressure are some of the key maintenance tasks you should focus on.
Transitioning into the next section about regularly maintaining and cleaning your gravel bike without explicitly stating ‘step’, remember that taking care of your equipment is essential for any cyclist who wants their gear to last longer.
Regularly Maintain and Clean Your Gravel Bike
To ensure optimal performance and longevity, it’s important to regularly maintain and clean your gravel bike.
Regular maintenance is key to keeping your bike in top shape and avoiding any potential issues on the road. Start by checking the tire pressure and inspecting for any signs of wear or damage.
It’s also crucial to keep the drivetrain clean and lubricated. Use a degreaser to remove dirt and grime, then apply a high-quality chain lube to keep everything running smoothly.
Cleaning techniques are equally important when it comes to maintaining your gravel bike. Begin by rinsing off any mud or debris using a hose or bucket of water. Avoid using high-pressure water as it can force water into sensitive components.
Next, use a soft brush or sponge with mild soap to gently scrub away dirt from the frame, wheels, and other parts. Pay special attention to hard-to-reach areas like the bottom bracket and headset.
Once you’ve finished cleaning, thoroughly dry your bike with a clean towel or allow it to air dry. Finally, give your bike a visual inspection to make sure everything looks good before storing it away or taking it out for another adventure.
By following these regular maintenance and cleaning techniques, you’ll be able to enjoy many miles of smooth riding on your gravel bike.
Frequently Asked Questions
Do I need to upgrade my brakes if I want to turn my road bike into a gravel bike?
Yes, upgrading your brakes is crucial if you want to convert your road bike into a gravel bike. Gravel riding involves rougher terrain and potentially faster descents, which can put more strain on your brakes.
Upgrading to disc brakes will provide better stopping power and heat dissipation compared to rim brakes, ensuring safer rides on uneven surfaces.
Don’t compromise on safety – invest in upgrading your brakes for optimal performance when gravel riding.
Is it necessary to install a suspension fork or seatpost for off-road riding?
Installing a suspension fork or seatpost for off-road riding on a gravel bike is not necessary. While they can provide some benefits, the impact on bike handling may outweigh them.
Suspension fork alternatives like wider tires and lower tire pressure can absorb shocks and improve comfort without compromising handling.
As for seatpost suspension, it can be heavy and negatively affect pedaling efficiency.
Therefore, it’s best to focus on other modifications that enhance the performance of a gravel bike.
What are the benefits of adding a dropper seatpost to a gravel bike?
Adding a dropper seatpost to a gravel bike can greatly enhance your off-road riding experience. The benefits of a dropper seatpost include increased maneuverability, improved control, and enhanced confidence on technical descents.
It allows you to quickly and easily adjust your saddle height while riding, optimizing your position for different terrains. When choosing a dropper seatpost for your gravel bike, consider factors such as travel length, compatibility with your frame, and ease of maintenance.
Can I convert my road bike to tubeless for better traction and puncture resistance?
Yes, you can convert your road bike to tubeless for better traction and puncture resistance.
By converting to tubeless tires, you eliminate the need for inner tubes, reducing the risk of pinch flats and allowing you to run lower tire pressures for improved traction.
Tubeless tires also offer increased puncture resistance due to the sealant inside that instantly seals small punctures.
This conversion provides a significant advantage in terms of both performance and durability on various terrains.
How often should I maintain and clean my gravel bike to ensure its longevity?
To ensure the longevity of my gravel bike, I maintain and clean it regularly. Maintenance frequency depends on usage, but a general rule is to perform a thorough check-up every few months or after any intense rides.
Cleaning techniques involve removing dirt and debris with a gentle brush or cloth, followed by washing with water and mild soap.
Pay attention to the drivetrain and brakes, ensuring they are properly lubricated for smooth operation.
Conclusion
Well, there you have it folks! We’ve reached the end of our journey on how to turn your road bike into a gravel bike.
I hope you’re feeling inspired and ready to tackle new terrains with confidence.
Remember, upgrading your tires and handlebars, adding suspension for those bumpy rides, and considering a dropper seatpost for some epic descents are just a few ways to level up your gravel game.
And don’t forget about the added bonus of extra storage with frame bags or panniers!
So go forth, my fellow adventure seekers, and keep those wheels spinning on that glorious gravel.
Happy riding!