Converting a standard mountain bike into an electric powerhouse is an exciting challenge that guarantees to enhance your biking experience significantly.
In this comprehensive guide, I will walk you through the step-by-step process of converting your beloved bike into an electrifying machine.
From assessing compatibility and selecting the perfect conversion kit to adjusting gearing and brakes, I will equip you with all the knowledge and tools needed to successfully embark on this electrifying adventure.
Get ready to conquer any trail with your very own electric mountain bike.
Let’s dive in!
Key Takeaways
- Properly connect and maintain the battery attachment to the controller
- Ensure secure wiring connections and troubleshoot any issues with the battery or controller
- Reinstall the rear wheel correctly and adjust gearing and brakes for optimal performance
- Test ride the electric bike and fine-tune for responsiveness, speed, and battery life
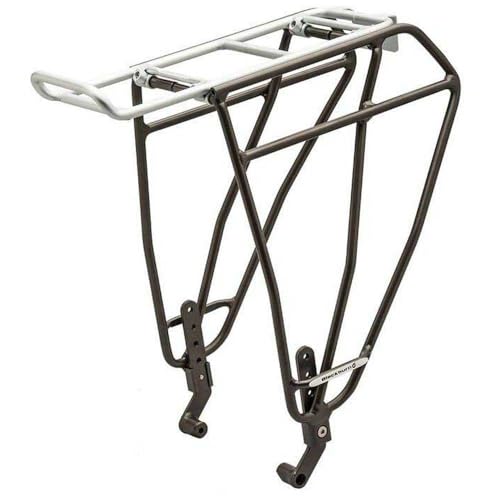
Blackburn Outpost Fat Front or Rear Bike Rack (Outpost Pewter, One Size)
FITS FAT AND MOST TIRE SIZES - Our patent-pending adjustable width design will work with most fat bike...
As an affiliate, we earn on qualifying purchases.
Assess Your Bike’s Compatibility
You’ll need to assess if your bike is compatible for conversion into an electric bike.
The first step is checking your bike’s specifications to ensure it meets the necessary requirements. Look for a strong and sturdy frame that can handle the added weight and stress of an electric motor. Additionally, consider the wheel size, as certain conversion kits may only be compatible with specific sizes.
Understanding motor compatibility is crucial as well. Check if your bike has enough space in the frame or rear triangle to accommodate the motor. Consider the voltage and wattage requirements of the motor and ensure your bike’s battery can handle it.
Once you have assessed your bike’s compatibility, you can move on to choosing the right electric conversion kit, which we will discuss in the subsequent section.

Blackburn Outpost Front and Rear World Touring Bike Rack (Grey, Front)
UNIVERSAL FIT SYSTEM - This rack offers more fitment flexibility than other systems, to fit more bikes. That's...
As an affiliate, we earn on qualifying purchases.
Choose the Right Electric Conversion Kit
When choosing an electric conversion kit for my mountain bike, it is crucial to consider the motor size and power. The motor size will determine the overall performance and speed of my electric bike, while the power will determine its ability to climb hills and handle various terrains.
Additionally, I need to decide between rear wheel, front wheel, or mid-drive kits, each offering their own advantages and disadvantages. The rear wheel kit provides better traction and stability, the front wheel kit is easier to install and maintain, and the mid-drive kit offers a more balanced and natural riding experience.
Consider the Motor Size and Power
To make your mountain bike electric, there are a few key factors to consider. First, you’ll need to think about the size and power of the motor. This will determine how much assistance you’ll get while riding.
Next, it’s important to choose the right battery capacity. This will depend on the range and duration of your rides. A higher capacity battery will allow for longer rides without needing to recharge.
When it comes to the motor type, there are a couple of options to consider. Hub motors are located in the wheel and provide a smooth and quiet ride. On the other hand, mid-drive motors are positioned near the bottom bracket and offer better weight distribution and handling.
Lastly, you’ll need to decide on the type of kit you want – rear wheel, front wheel, or mid-drive. Each kit has its own advantages and disadvantages, so it’s important to carefully consider which will best suit your riding style.
By taking these factors into account, you’ll be able to successfully convert your mountain bike into an electric one.
Decide Between Rear Wheel, Front Wheel, or Mid-Drive Kits
Deciding between rear wheel, front wheel, or mid-drive kits is an important factor when converting your mountain bike into an electric bike. Each type of electric conversion kit has its own pros and cons that should be carefully considered before making a decision.
Rear wheel kits are the most common and easiest to install. They provide good traction and stability, making them suitable for off-road use. However, they can be heavier and may affect the bike’s balance.
Front wheel kits are lightweight and easy to install, but they may reduce traction, especially on slippery surfaces. They also tend to increase the risk of wheelie accidents.
Mid-drive kits offer a more balanced weight distribution and better handling. They provide higher torque, making them suitable for steep terrains. However, they are more complex to install and may require additional modifications to the bike’s frame.
When converting a mountain bike to an electric bike, it’s important to avoid common mistakes such as improper installation, using low-quality components, or exceeding the weight limit of the bike.
To continue the conversion process, gather the necessary tools and equipment for the installation.
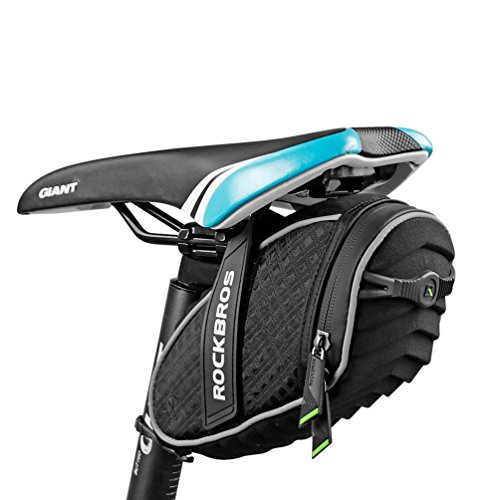
ROCKBROS Bike Seat Bag, Bicycle Saddle Bag Under Seat 3D Shell Cycling Seat Pack for Mountain Road Bikes Black
SPECIAL SHAPE and UPGRADE STRAPS:3D shell saddle bag with wave cushion provides inside shock resistant protection if fell...
As an affiliate, we earn on qualifying purchases.
Gather the Necessary Tools and Equipment
First, gather all the necessary tools and equipment to turn your mountain bike into an electric bike. Start by choosing the right battery and controller for your specific needs. Make sure to consider factors such as voltage, capacity, and compatibility with your bike’s frame.
Additionally, it is important to prioritize proper maintenance and care for your electric bike. This includes regular cleaning, lubrication of moving parts, and checking the battery’s charge level.
To convert your mountain bike into an electric bike, you will need tools such as wrenches, screwdrivers, and pliers. It is also recommended to have a torque wrench to ensure proper tightening of bolts.
Once you have gathered all the required tools and equipment, you can proceed to the next step of removing the bike’s rear wheel (if applicable), which will be discussed in the subsequent section.

Ascher Ultra Bright USB Rechargeable Bike Light Set, Powerful Bicycle Front Headlight and Back Taillight, 4 Light Modes, Easy to Install for Men Women Road Mountain Cycling Black
Bright Bike Lights for Night Riding: This bike light set includes both a bright headlight and taillight. Powerful...
As an affiliate, we earn on qualifying purchases.
Remove the Bike’s Rear Wheel (if applicable)
If applicable, remove the rear wheel of the bike.
Before proceeding with the installation of the electric conversion kit, it is crucial to assess the compatibility of the kit with your specific mountain bike. Not all kits are suitable for every bike, so it is important to choose the right kit that matches your bike’s specifications.
Once you have determined the compatibility, you can begin the process of removing the rear wheel. Start by loosening the quick-release skewer or axle nuts that hold the wheel in place. Gently lift the bike off the ground and slide the wheel out of the dropouts. Take caution not to damage the derailleur or any other components during this process.
With the rear wheel removed, you are now ready to move on to the next step of installing the electric conversion kit, which will transform your mountain bike into an electric one.
Install the Electric Conversion Kit
To install the electric conversion kit, the first step is to connect the motor to the frame. This involves securely attaching the motor to a designated mounting point on the bike frame, ensuring it is aligned properly and tightened with the appropriate tools.
Next, the battery and controller need to be attached. The battery should be securely mounted to the frame, preferably in a location that allows for easy access and balance.
The controller, which regulates the power flow from the battery to the motor, should be mounted in a convenient location and connected to both the battery and motor with the appropriate wiring.
Connect the Motor to the Frame
Once the motor is connected to the frame, the electric bike conversion process can continue. The first step in this process is to ensure that the motor is securely attached to the bike frame. This can be done by using the mounting brackets provided with the conversion kit. The brackets should be positioned in such a way that the motor is aligned with the bike’s chain and pedal system. Once the brackets are in place, tighten the bolts to securely fasten the motor to the frame.
After the motor is connected, the next step is to attach the battery and controller. These components are essential for powering the motor and controlling its operation. The battery is typically mounted on the bike frame, while the controller is usually attached near the handlebars for easy access. With the motor connected and the battery and controller in place, the electric bike is now ready for use.
Transition: With the motor securely attached and the battery and controller in place, the next step in the electric bike conversion process is to attach the battery and controller.
Attach the Battery and Controller
Now you need to attach the battery and controller to power and control the motor.
The battery is the heart of your electric bike, providing the power needed to propel the motor. Start by finding a suitable location on the frame to mount the battery securely. Make sure it is easily accessible for charging and maintenance.
Next, connect the battery to the controller using the provided wiring harness. Ensure all connections are tight and secure to prevent any loose connections that could cause issues later on.
Once the battery is attached, connect the controller to the motor using the appropriate wiring. Troubleshooting common battery and controller issues may include checking for loose connections, testing the voltage output, and ensuring the controller is properly programmed.
Lastly, to maximize battery life and performance, consider keeping the battery charged between 20-80% and avoid overcharging or fully discharging it.
With the battery and controller properly attached, it’s time to move on to the next step: connecting the wiring and testing the system.
Connect the Wiring and Test the System
First, make sure you connect the wiring properly and test the system to ensure it is working correctly. Here are the steps to follow:
- Connect the wires from the battery to the controller. Make sure the positive and negative terminals are correctly aligned.
- Connect the wires from the controller to the motor. Again, verify that the positive and negative terminals match up.
- Double-check all connections and make sure they are secure.
Now it’s time to test the system. Turn on the power and give the bike a test ride. Pay attention to any unusual sounds or vibrations. Test the throttle and brakes to ensure they are functioning properly.
If you encounter any issues, troubleshooting common problems is essential. Check all connections, inspect the wiring for any damage, and verify that all components are properly installed.
With the wiring connected and the system tested, you can now move on to reinstalling the bike’s rear wheel (if applicable).
Reinstall the Bike’s Rear Wheel (if applicable)
To reinstall the bike’s rear wheel, you’ll need to align the axle with the dropouts on the frame. Before proceeding, it’s crucial to assess the compatibility of the electric conversion kit with your specific bike model. Ensure that the kit you’ve chosen is suitable for your mountain bike, taking into consideration factors such as wheel size and frame design. Once you’ve confirmed compatibility, follow these steps:
- Begin by placing the chain onto the smallest rear cog.
- Slide the wheel into the dropouts, ensuring that the axle is aligned with the frame.
- Tighten the axle nuts or quick-release skewer securely, but avoid overtightening.
- Check that the wheel spins freely and is centered within the frame.
With the rear wheel successfully reinstalled, you can now proceed to the next step of adjusting the bike’s gearing and brakes to optimize performance.
Adjust the Bike’s Gearing and Brakes
Make sure you adjust the gearing and brakes on your bike to optimize its performance. To start, check the bike’s suspension and make any necessary adjustments. This will ensure a smooth ride and prevent any unnecessary strain on the motor.
Next, upgrade the bike’s tires to ones that are suitable for electric biking. Look for tires with a high traction rating and puncture resistance, as these will provide better control and durability.
In terms of the bike’s gearing, consider installing a wider gear range cassette to accommodate the added weight and power of the electric motor. Additionally, adjust the derailleur to ensure smooth and precise shifting between gears.
Once you have made these adjustments, you can proceed to the next step of test riding and fine-tuning the electric bike to ensure everything is working properly.
Test Ride and Fine-Tune the Electric Bike
Once you’ve made the necessary adjustments, take the electric bike for a test ride to ensure its performance and then fine-tune any remaining issues.
Testing the electric bike’s performance is crucial to ensure its functionality and safety. Start by checking the responsiveness of the motor and the overall power output. Ensure that the bike accelerates smoothly and maintains a consistent speed. Pay attention to any unusual noises or vibrations that may indicate a problem with the motor or other components.
Additionally, test the brakes to ensure they engage properly and bring the bike to a quick and controlled stop. Troubleshoot common issues such as battery life, range, and display accuracy.
Fine-tune any remaining issues to optimize the electric bike’s performance. With the necessary adjustments made, you can now enjoy your new electric mountain bike!
Enjoy Your New Electric Mountain Bike!
Now that you have your new e-mountain bike, it’s time to enjoy the ride! Electric mountain biking brings numerous benefits that enhance your overall experience on the trails.
Firstly, the electric assist system provides additional power, allowing you to conquer steeper climbs and go farther than ever before. It also reduces the strain on your muscles, making it easier to navigate challenging terrain.
To ensure your electric mountain bike remains in optimal condition, it’s essential to perform regular maintenance and care. Keep the battery charged and store it in a cool, dry place when not in use. Clean the bike after each ride, paying special attention to the drivetrain and suspension components. Regularly inspect the brakes, tires, and gears for any signs of wear or damage. Additionally, lubricate the chain and other moving parts to prevent rust and ensure smooth operation.
By following these tips and maintaining your electric mountain bike properly, you can continue to enjoy thrilling rides and make the most out of your new e-biking adventure.
Frequently Asked Questions
How long does it take to install an electric conversion kit on a mountain bike?
The installation time for an electric conversion kit on a mountain bike can vary depending on the individual’s experience and the complexity of the kit. However, the benefits of electric conversion include increased speed and easier uphill rides.
What is the average cost of an electric conversion kit for a mountain bike?
The average cost of an electric conversion kit for a mountain bike varies depending on the type of kit you choose. There are several types available, each with their own pros and cons.
Can I install an electric conversion kit on any type of mountain bike?
Yes, electric conversion kits can be installed on most types of mountain bikes. It’s important to consider the pros and cons of converting a mountain bike into an electric bike, as well as how to choose the right electric conversion kit for your specific bike.
How much weight does an electric conversion kit add to a mountain bike?
The weight added by an electric conversion kit to a mountain bike depends on the specific kit, but it typically ranges from 15-25 pounds. This additional weight can impact the bike’s performance, making it slightly slower and less maneuverable.
Can I still use my mountain bike as a regular bike after installing an electric conversion kit?
Yes, you can still use your mountain bike as a regular bike after installing an electric conversion kit. However, there are potential drawbacks such as added weight and decreased maneuverability. To maintain your electric mountain bike, regularly check the battery, motor, and wiring for any issues. Keep the bike clean and lubricate the chain regularly.
Conclusion
Well, I must say, turning my mountain bike into an electric bike was quite the adventure!
From assessing compatibility to choosing the right conversion kit and gathering the necessary tools, it was no small feat.
But let me tell you, the end result was worth every ounce of effort. Riding my new electric mountain bike feels like soaring through the air on a cloud of pure exhilaration. The power and speed are simply mind-blowing.
It’s an experience like no other, and I can’t wait to hit the trails again.