Upgrade your reliable bicycle into an exhilarating electric ride with this in-depth guide on converting a regular bike into an electric one.
From assessing your bike’s compatibility to choosing the right conversion kit, this article will equip you with the knowledge and tools needed to embark on this exhilarating journey.
We’ll delve into the step-by-step process, ensuring you have the necessary equipment and skills to successfully complete the conversion.
So, get ready to revamp your ride and experience the power and convenience of an electric bike.
Key Takeaways
- Assess the bike’s frame and components for compatibility and condition before proceeding with a conversion kit
- Gather the necessary tools and materials before starting the conversion process
- Remove existing components such as the chain, derailleur system, pedals, crankset, brakes, and wheels
- Install the conversion kit by securely attaching the electric motor to the bike frame, connecting it to the drivetrain, and mounting the battery and controller
Assess Your Bike’s Compatibility
Assess if your bike is compatible with an electric conversion kit. Before you can turn your normal bike into an electric one, it’s crucial to evaluate its compatibility.
Start by examining the frame and fork, ensuring they are sturdy and in good condition. The size of the frame should also be taken into consideration, as some conversion kits may not fit certain frame sizes.
Additionally, check the condition of your bike’s wheels, brakes, and gears, as these components may require necessary modifications for the conversion.
Assessing the compatibility of your bike is essential to ensure a successful electric conversion.
Once you have evaluated your bike’s compatibility, you can move on to the next step of choosing the right electric conversion kit, which will be discussed in the subsequent section.
Choose the Right Electric Conversion Kit
To choose the right electric conversion kit for your bicycle, you need to start by evaluating the specifications and features of different options. Research options and compare prices to find the best fit for your needs.
Here are three key factors to consider when selecting an electric conversion kit:
-
Motor Power: Determine the desired power output for your electric bike. Consider factors such as terrain and desired speed to choose an appropriate motor size.
-
Battery Capacity: Look for a battery with sufficient capacity to meet your riding distance requirements. Consider factors such as voltage, amp-hour rating, and battery chemistry.
-
Compatibility: Ensure that the conversion kit is compatible with your bike’s frame and wheel size. Check for any additional accessories or modifications needed.
Once you have chosen the right electric conversion kit, it’s time to gather the necessary tools and equipment to begin the conversion process seamlessly.
Gather the Necessary Tools and Equipment
Make sure you have all the tools and equipment you’ll need to complete the electric conversion of your bicycle seamlessly. Select the appropriate tools based on the type of bike you have and the electric conversion kit you’ve chosen. Common tools you may need include a wrench, screwdriver, pliers, and wire cutters.
Additionally, you’ll need to buy the necessary materials such as zip ties, electrical tape, and heat shrink tubing. These materials are essential for securing and insulating the electrical components of your electric bike.
Once you have all the tools and materials ready, you can move on to the next step and remove the existing components from your bike, making way for the installation of the electric conversion kit.
Remove the Existing Components
First, start by removing the existing components from your bicycle to prepare for the installation of the electric conversion kit. This step is crucial in the process of bike modification and performance enhancement. To ensure a smooth transition, consider the following:
- Remove the chain and derailleur system.
- Take off the pedals and crankset.
- Disconnect the brake calipers and remove the brake levers.
- Remove the front and rear wheel assemblies.
- Disconnect the cables and wires connected to the existing components.
By removing these components, you create space for the new electric conversion kit. Once you have completed this step, you can proceed to the next section where you will install the electric conversion kit and begin the transformation of your normal bike into an electric bike.
Install the Electric Conversion Kit
Once you’ve removed the existing components, it’s time to install the electric conversion kit on your bicycle.
Begin by attaching the electric motor to the frame of the bike. Ensure that it is securely fastened and properly aligned.
Next, connect the motor to the drivetrain of the bike using a chain or belt, depending on the kit you have chosen. Make sure the connection is tight and the chain/belt is properly tensioned.
Then, mount the battery and controller onto the frame, ensuring they are securely fastened and well-protected.
Finally, connect the battery and controller to the electric motor using the provided wiring harness. Double-check that all connections are secure and properly insulated.
With the electric conversion kit installed, you are now ready to move on to the next step of connecting the battery and controller to complete the bike modification.
Connect the Battery and Controller
To connect the battery and controller, you’ll need to ensure a secure and tight connection between the two components. Start by identifying the wires coming from the battery and the controller. Typically, there will be a positive (red) and negative (black) wire from each component.
Connect the positive wire from the battery to the positive wire on the controller and the negative wire from the battery to the negative wire on the controller. Ensure that the connections are tight and properly insulated to avoid any loose connections or short circuits.
If you encounter any issues during the connection process, such as wires not fitting together or loose connections, carefully double-check the wiring diagram provided with your electric conversion kit. Additionally, troubleshoot common issues like loose or damaged wires, blown fuses, or faulty connections. It’s important to address these issues before proceeding to the next steps.
Now that the battery and controller are securely connected, you can move on to testing and fine-tuning your electric bike’s performance.
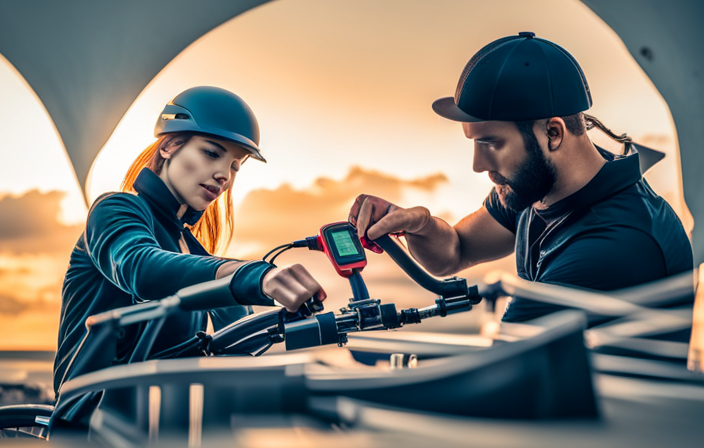
Test and Fine-Tune the Electric Bike
Now that you have connected the battery and controller, it’s time to test and fine-tune your electric bike. This step is crucial to ensure the efficiency of your bike and troubleshoot any potential issues. To do this, you will need to take your bike for a test ride and observe its performance. Pay attention to the speed, acceleration, and overall handling of the bike. If you notice any problems, such as a decrease in power or difficulty in controlling the bike, you may need to make adjustments to the battery or controller settings. By testing and fine-tuning your electric bike, you can optimize its performance and address any issues that may arise. Once you are satisfied with the results, you can proceed to the next section on how to upgrade your bike’s accessories.
Upgrade Your Bike’s Accessories
Upgrading the accessories on your bike can enhance its functionality and performance. When it comes to bike modification, choosing the right accessories can make a significant difference.
Start by upgrading your bike’s brakes. High-quality brakes will improve your bike’s stopping power and ensure a safe ride.
Next, consider upgrading your bike’s suspension system. A better suspension will provide a smoother and more comfortable ride, especially when tackling rough terrains.
Additionally, upgrading your bike’s tires to ones with better traction and durability will enhance its overall performance.
Finally, don’t forget to invest in a reliable bike lock to keep your newly upgraded electric bike secure.
Upgrading these accessories will not only improve your bike’s performance but also provide a more enjoyable riding experience.
Learn proper maintenance and care to ensure the longevity of your electric bike.
Learn Proper Maintenance and Care
Make sure you properly maintain and care for your electric bike to ensure its longevity and optimal performance. Proper cleaning is essential to keep your electric bike in good condition. Use a soft cloth and mild detergent to clean the frame, wheels, and other components. Avoid using high-pressure water as it can damage the electrical components. Regularly inspect the battery for any signs of damage or wear. Clean the battery terminals with a dry cloth to remove any dirt or debris. Additionally, keep the battery charged when not in use and avoid extreme temperatures that can affect its performance. Following these maintenance practices will help prolong the life of your electric bike and ensure that it continues to provide a smooth and enjoyable ride.
Now that you know how to properly maintain your electric bike, you can confidently enjoy your new electric bike experience.
Enjoy Your New Electric Bike Experience
Get ready to fully embrace and enjoy your exciting new ride on an electric bike. As you embark on this thrilling adventure, you’ll quickly realize the numerous benefits of owning an electric bike.
One of the key advantages is the added power and speed that an electric motor provides, allowing you to effortlessly conquer hills and cover longer distances without breaking a sweat. Additionally, electric bikes offer a more eco-friendly mode of transportation, reducing your carbon footprint while enjoying the great outdoors.
However, it’s important to prioritize safety when riding your electric bike. Always wear a helmet, follow traffic rules, and be aware of your surroundings. Take the time to familiarize yourself with the electric bike’s controls and features to ensure a smooth and safe riding experience.
So, hop on your electric bike and enjoy the ride of a lifetime!
Frequently Asked Questions
How much does it cost to convert a regular bike into an electric bike?
The cost of converting a regular bike into an electric bike varies depending on the type of electric bike conversion kit you choose. Factors to consider include the motor power, battery capacity, and additional features.
Can any type of bike be converted into an electric bike?
Yes, any type of bike can be converted into an electric bike. Converting a mountain bike offers the advantage of better off-road capability, while converting a road bike provides a more streamlined and efficient ride on paved surfaces. However, there are also disadvantages to consider, such as added weight and potential modifications needed for the conversion process.
Is it difficult to install the electric conversion kit?
Installing an electric conversion kit can be challenging. Pros include increased speed and range, while cons include added weight and potential damage to the bike. Common mistakes to avoid are improper wiring and incorrect installation of components.
How long does it take to complete the conversion process?
Converting a normal bike into an electric bike typically takes around 2-4 hours, depending on your experience and the complexity of the kit. Required tools include wrenches, screwdrivers, pliers, and possibly a drill.
Can the electric conversion kit be easily removed if I decide to go back to a regular bike?
Yes, the electric conversion kit can be easily removed if you decide to go back to a regular bike. However, it is important to consider the benefits of converting a bike into an electric bike and the pros and cons of using an electric conversion kit.
Conclusion
Congratulations on successfully converting your normal bike into an electric bike! By following the steps outlined in this guide, you have transformed your regular bicycle into an efficient and eco-friendly mode of transportation.
Did you know that electric bikes have been proven to increase the distance people are willing to travel by bike? A study conducted in the Netherlands found that e-bike riders were willing to cycle an average of 9.4 kilometers, compared to only 6.3 kilometers by regular bike riders.
So get out there and enjoy the benefits of your new electric bike!