
Imagine this: you’re sailing along a sleek, tarmac road on your dependable road bicycle, with the wind whipping through your hair and adrenaline surging in your bloodstream.
But suddenly, you spot a gravel path cutting through a picturesque countryside, beckoning you to explore its rugged terrain.
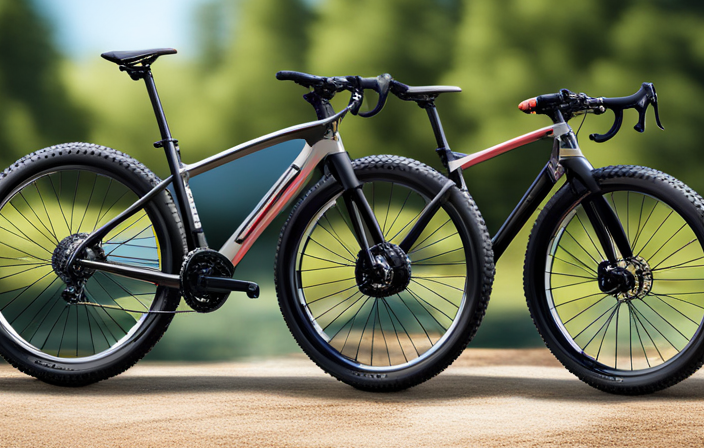
Fear not, fellow cyclist! With a few simple modifications, I’ll show you how to transform your sleek road bike into a versatile gravel machine that can conquer any off-road adventure.
Get ready to hit the trails like never before!
Key Takeaways
- Upgrade brakes, gearing system, and wheels for better performance on gravel terrain
- Choose wider tires and rims for increased stability and control
- Adjust bike’s geometry and suspension for a more comfortable gravel riding position
- Enhance visibility and regularly maintain the bike for safety and optimal performance

Under Armour Squeeze Water Bottles, 32 oz Water Bottles, Sideline Sports Water Bottle with Quick-Shot Lid, Quick & Easy Hydration, Gym Water Bottles, Squeeze Bottle, 1 32oz Bottle
- Easy Hydration: Quick-shot lid and one-way valve
- On-the-Go Use: One-hand operation for active hydration
- Measurement Markings: Ounces and milliliters for tracking
As an affiliate, we earn on qualifying purchases.
Assess Your Bike’s Compatibility
Now, you’ll want to assess whether your bike’s components are compatible for gravel riding. Start by evaluating your bike’s frame. Look for a sturdy and durable frame that can handle the rough terrain of gravel roads. A carbon or steel frame is ideal as they offer better shock absorption compared to aluminum frames. Check for any signs of damage or wear on the frame, such as cracks or dents, as this can compromise its strength.
Next, evaluate your bike’s components. Consider upgrading certain parts if necessary. Pay close attention to the brakes, gearing system, and wheels. Disc brakes are recommended for better stopping power on loose surfaces, while a wider gear range will help you tackle steep climbs and descents more effectively. Opt for stronger wheels with wider rims that can accommodate larger tires.
By assessing your bike’s frame and evaluating its components, you can determine if it is suitable for gravel riding or if modifications are needed.
Now that you have evaluated your bike’s compatibility for gravel riding, let’s move on to choosing the right tires for this type of terrain without compromising performance on paved roads.
Choose the Right Tires for Gravel Riding
First, you’ll need to make sure you have the right tires for gravel riding. Choosing the right tire pressure is crucial for a smooth and comfortable ride. Generally, a lower tire pressure works best on gravel surfaces as it provides better traction and absorbs shocks from uneven terrain. However, keep in mind that too low of a tire pressure can lead to pinch flats or rim damage, so find the sweet spot that balances comfort with durability.
Finding the best tire width is also essential when converting your road bike into a gravel machine. Wider tires offer more stability and control on loose surfaces. A tire width between 32mm and 40mm is commonly recommended for optimal gravel riding performance. This wider profile allows for greater grip and improved flotation over rough terrain.
To transition into the subsequent section about installing wider rims for optimal performance, consider upgrading your wheels to accommodate these wider tires seamlessly. By opting for wider rims, you can take full advantage of your chosen tire width, enhancing stability and allowing lower tire pressures without sacrificing overall performance.
By selecting the appropriate tire pressure and width, combined with installing wider rims if necessary, you’ll be well on your way to transforming your road bike into a capable gravel adventurer.
Install Wider Rims for Optimal Performance
To achieve optimal performance, you’ll want to consider installing wider rims. Wider rim benefits include improved stability, better traction, and increased comfort on rough terrain. When choosing the right rim width for your gravel bike, there are a few considerations to keep in mind.
-
Tire Compatibility: Wider rims allow you to run wider tires, which provide better grip and control when riding off-road. Make sure the rim width is suitable for the tire size you plan to use.
-
Aerodynamics: While wider rims may increase aerodynamic drag slightly compared to narrower ones, this trade-off is often worth it for the added benefits they bring to gravel riding.
-
Stability: A wider rim creates a broader base of support for your tires, enhancing overall stability during fast descents or sharp turns on loose surfaces.
-
Impact Resistance: The wider profile of these rims helps absorb impacts from rocks and other obstacles encountered on gravel roads, reducing the risk of damage or pinch flats.
By installing wider rims on your road bike, you can transform it into a capable gravel machine that excels in various terrains. Once you’ve optimized your wheelset with wider rims, the next step is adjusting your bike’s geometry for stability as you tackle challenging gravel adventures.
Adjust Your Bike’s Geometry for Stability
Adjusting your bike’s geometry can enhance stability as you tackle challenging gravel adventures. When converting a road bike into a gravel machine, it’s crucial to make adjustments to the bike fit and components to optimize performance on rough terrain.
One of the key aspects of adjusting your bike’s geometry is choosing the right saddle. A saddle designed specifically for gravel riding will provide more comfort and support during long rides over uneven surfaces. Look for a saddle with extra padding and a wider shape to distribute pressure evenly.
Additionally, adjusting your bike fit can greatly improve stability on gravel. Consider raising the handlebars slightly to achieve a more upright riding position, which helps in maintaining better control over loose surfaces. This adjustment shifts the weight distribution towards the rear wheel, providing increased traction and stability.
To transition smoothly into the subsequent section about upgrading your bike’s brakes for better control, it is essential to ensure that every aspect of your bike is ready for off-road adventures. Once you have adjusted your bike’s geometry for stability, upgrading your brakes becomes crucial in ensuring optimal control and stopping power when navigating challenging terrains like gravel paths or steep descents.
Upgrade Your Bike’s Brakes for Better Control
Upgrading your bike’s brakes enhances control and allows for better handling on challenging terrain. When transitioning from road to gravel riding, it is crucial to have reliable braking power. Here are four key aspects to focus on when upgrading your bike’s brakes:
-
Brake Caliper Upgrades: Consider replacing your stock brake calipers with ones specifically designed for off-road use. These upgrades provide increased clearance for wider tires and offer better modulation and stopping power.
-
Brake Lever Adjustments: Optimize the position of your brake levers to ensure comfortable reach and optimal grip. Adjusting lever reach can help prevent hand fatigue during long rides, while also allowing quick access to full braking power when needed.
-
Brake Pad Selection: Choose brake pads that are suitable for gravel riding conditions. Look for pads with a softer compound that offers enhanced stopping performance in wet or muddy environments.
-
Cable Routing and Housing: Proper cable routing and housing play a significant role in maintaining smooth and consistent braking performance. Ensure that cables are securely fastened, free from any kinks or sharp bends, and adequately lubricated.
Considering these aspects will significantly improve your bike’s braking performance on gravel surfaces, allowing you to confidently tackle challenging terrains.
Now let’s explore the next section about considering adding suspension for a smoother ride.
Consider Adding Suspension for a Smoother Ride
Consider adding suspension to your ride for a smoother experience on challenging terrain. Adding suspension to a gravel bike frame can greatly enhance its performance and comfort, allowing you to tackle rough roads and trails with ease. When riding on uneven surfaces, suspension helps absorb the impact and reduces the strain on your body, resulting in a more enjoyable ride.
There are various options available when it comes to adding suspension to your gravel bike. One option is a suspension fork, which replaces the rigid fork that comes standard on most road bikes. This allows the front wheel to move up and down, providing improved traction and control over bumps and obstacles.
Another option is a seatpost or seat tube suspension system, which adds vertical movement to the rear of the bike. This helps smooth out rough terrain by absorbing vibrations and impacts from below.
Regardless of which type of suspension you choose, make sure it is compatible with your gravel bike frame. Some frames may have specific requirements or limitations when it comes to adding suspension components.
Adding suspension to your gravel bike can significantly improve its performance on challenging terrain. However, before moving onto the next section about installing a gravel-specific drivetrain for reliable shifting, it’s important to consider other upgrades that may be necessary for optimal off-road performance.
Install a Gravel-Specific Drivetrain for Reliable Shifting
When it comes to converting a road bike into a gravel machine, there are several important upgrades to consider. In the previous section, we discussed the benefits of adding suspension for a smoother ride on rough terrain. Now, let’s delve into another crucial modification: installing a gravel-specific drivetrain.
A gravel-specific drivetrain is designed to handle the unique demands of off-road riding. It typically includes components such as wider-range cassettes and chainrings, which provide better gear ratios for tackling steep climbs and navigating loose surfaces. Additionally, these drivetrains often feature clutch mechanisms that minimize chain slap and improve chain retention over bumpy terrain.
To ensure reliable shifting on your newly converted gravel bike, it’s essential to master proper gravel bike shifting techniques. This involves anticipating gear changes in advance and applying smooth, steady pressure on the shifters to avoid any sudden shifts that could disrupt your balance or traction.
In summary, upgrading to a gravel-specific drivetrain will optimize your bike’s performance on unpaved roads by providing appropriate gearing options and enhanced chain stability. With this improved drivetrain setup in place, you’ll be ready to tackle all types of challenging terrain with confidence.
Now let’s move onto our next topic: adding a dropper seatpost for increased versatility…
Add a Dropper Seatpost for Increased Versatility
To increase the versatility of your ride, you’ll want to add a dropper seatpost. A dropper seatpost is a game-changer when it comes to off-road cycling. It allows you to quickly and easily adjust your saddle height while riding, giving you more control and confidence on technical descents or when tackling rough terrain.
Installing a dropper seatpost is relatively straightforward. You’ll need to remove your current seatpost and replace it with the dropper version. Make sure to choose a dropper seatpost that fits your bike’s specifications and has the correct amount of travel for your needs.
The benefits of a dropper seatpost are numerous. First and foremost, it allows you to lower your saddle with just the press of a button or flick of a lever, instantly giving you more room to maneuver on steep descents. This lowers your center of gravity, increasing stability and reducing the risk of going over the handlebars.
Secondly, having the ability to raise or lower your saddle on demand enhances your overall riding experience by allowing you to find an optimal position for climbing, descending, or navigating technical sections without compromising comfort or efficiency.
Incorporating a 3 column and 4 row table in markdown format into this section can provide further clarity:
| Benefit | Description |
|---|---|
| Enhanced Control | Ability to quickly adjust saddle height improves handling on different terrains. |
| Increased Stability | Lowering the saddle lowers center of gravity for better balance on steep descents. |
| Improved Efficiency | Optimal saddle position enhances power transfer during pedaling strokes. |
| Versatility | Easy adjustment between climbing and descending positions provides adaptability in various trail conditions. |
Adding a dropper seatpost will significantly enhance the versatility of your road bike-turned-gravel machine. Now that we’ve covered how to improve comfort in terms of seating position, let’s move on to upgrading our bike’s handlebars for better handling.
Upgrade Your Bike’s Handlebars for Better Handling
Upgrading your bike’s handlebars will greatly improve its handling capabilities. The right set of handlebars can make all the difference when it comes to control and comfort on the gravel. Here are three key upgrades you should consider:
-
Upgrade your bike’s stem for improved comfort: A shorter stem can provide a more upright riding position, reducing strain on your back and neck during long rides. It also enhances stability by bringing your weight closer to the center of the bike.
-
Upgrade your bike’s handlebar tape for better grip: Gravel riding can be demanding, with rough terrains and vibrations affecting your hands. Invest in high-quality handlebar tape that offers excellent grip and vibration dampening properties. This will ensure a secure hold even when things get bumpy.
-
Consider a wider handlebar for enhanced control: A wider bar provides greater leverage, allowing for more precise steering inputs and better overall control on loose surfaces. It also helps distribute weight evenly, improving stability during descents.
By upgrading these crucial components, you’ll notice a significant improvement in how your road bike handles off-road conditions.
Now let’s move on to installing a gravel-specific chainring for improved efficiency in our next section about turning your road bike into a gravel machine without compromising performance.
Install a Gravel-Specific Chainring for Improved Efficiency
Installing a gravel-specific chainring can improve the efficiency of your bike. A gravel specific chainring is designed specifically for off-road riding, with features that enhance performance on rough terrain. These chainrings typically have narrow/wide teeth profiles to improve chain retention and prevent drops, ensuring a smoother and more reliable ride. Additionally, gravel-specific chainrings often have a wider tooth profile to better accommodate wider chains commonly found on gravel bikes.
When installing a gravel-specific chainring, there are a few tips to keep in mind. First, make sure you choose the correct size for your bike’s crankset. Most gravel-specific chainrings are available in different sizes to fit various cranksets. Secondly, ensure that the chainring is properly aligned with the rest of your drivetrain to avoid any shifting issues or excessive wear on the components.
By installing a gravel-specific chainring, you’ll experience improved efficiency while riding off-road. The optimized tooth profile helps reduce friction and maximize power transfer, allowing you to maintain speed more efficiently on loose surfaces like gravel and dirt. This means less wasted energy and greater overall performance during your rides.
Consider adding fenders and mudguards for protection against debris kicked up by your tires without compromising the efficient setup you’ve created with your new gravel-specific chainring.
Consider Adding Fenders and Mudguards for Protection
Adding fenders and mudguards can protect your bike from debris and keep you clean while riding off-road. When venturing onto gravel trails, it’s important to consider the potential hazards that come with it. Loose rocks, dirt, and even puddles can quickly turn into a muddy mess without proper protection. That’s where fenders and mudguards come in handy.
By installing fenders and mudguards on your road bike, you create a shield against the elements. Not only do they prevent water, dirt, and stones from splashing up onto you while riding, but they also help preserve the longevity of your components. The table below illustrates some popular options for fenders and mudguards:
| Brand | Type | Material | Features |
|---|---|---|---|
| A | Clip-on | Plastic | Lightweight |
| B | Fixed | Aluminum | Adjustable height |
| C | Full | Carbon Fiber | Aerodynamic design |
| D | Removable | Stainless Steel | Quick-release mechanism |
Exploring different gravel riding techniques becomes more enjoyable when you have peace of mind knowing your bike is well-protected. So why stop at chainrings? Consider adding fenders and mudguards for protection as an essential step towards transforming your road bike into a capable gravel machine.
Next, we will dive into another crucial modification: installing tubeless tires for better puncture resistance…
Install Tubeless Tires for Better Puncture Resistance
One way to improve puncture resistance is by installing tubeless tires. Tubeless tire installation techniques vary depending on the specific make and model of your road bike, but the basic process involves removing the inner tubes and replacing them with a specially designed tubeless tire. This type of tire does not require a separate inner tube as it forms an airtight seal directly with the rim.
To install tubeless tires, you will need to clean the rim thoroughly, apply a layer of sealant around the inside of the tire, and then inflate it using a high-volume pump or an air compressor.
The benefits of tubeless tires for gravel riding are numerous. Firstly, they provide better puncture resistance compared to traditional clincher tires due to their ability to self-seal small punctures on-the-go. This means fewer interruptions during your ride and less time spent fixing flats. Additionally, tubeless tires allow for lower tire pressures without increasing the risk of pinch flats, resulting in improved traction and comfort on rough gravel surfaces.
As you move onto adjusting your bike’s gearing for gravel climbs, it’s important to consider how these modifications can enhance your overall off-road riding experience.
Adjust Your Bike’s Gearing for Gravel Climbs
To enhance your off-road riding experience, consider adjusting your bike’s gearing for tackling gravel climbs. When it comes to conquering steep inclines and loose terrain, having the right gear ratio is crucial. Here are a few key points to keep in mind as you adjust your bike’s gearing:
-
Choose the Right Tires: Opting for wider tires with a knobby tread pattern will provide better traction on gravel surfaces. Look for tires that offer puncture protection and lower rolling resistance to maximize efficiency.
-
Adjust Your Front Chainrings: Switching to smaller chainrings at the front will give you a lower gear ratio, making it easier to climb steep hills. This allows you to maintain a comfortable cadence without straining your legs too much.
-
Modify Your Rear Cassette: Installing a larger cassette with more teeth on the rear wheel will also contribute to achieving a lower gear ratio. This gives you additional options when navigating challenging uphill sections.
-
Experiment with Gear Ratios: Every rider has their own preferences when it comes to gearing. Play around with different combinations of chainrings and cassettes until you find what works best for your riding style and fitness level.
By adjusting your bike’s gearing and choosing the right tires, you’ll be well-equipped for those demanding gravel climbs ahead.
Next, let’s discuss how upgrading your bike’s pedals can improve power transfer without compromising comfort or efficiency.
Upgrade Your Bike’s Pedals for Better Power Transfer
Improve your power transfer on the bike by upgrading your pedals. When it comes to gravel riding, having efficient pedal stroke is crucial for maintaining momentum and conquering challenging terrain. Upgrading your pedals can significantly enhance your cycling experience by providing better power transfer from your legs to the bike.
To improve pedal efficiency, it is essential to choose the right pedal type that suits your riding style and preferences. There are three main types of pedals commonly used in gravel cycling: platform pedals, clipless pedals, and combination pedals.
| Pedal Type | Pros | Cons |
|---|---|---|
| Platform | Easy to use | Less efficient pedaling |
| Clipless | Efficient power transfer | Requires specific cycling shoes |
| Combination | Versatile | Slightly heavier |
By considering these factors, you can select the most suitable pedal type for your needs. Whether you prioritize ease of use or optimal power transfer, choosing the right pedals will greatly impact your performance on gravel rides.
As we delve into proper maintenance of a gravel bike, don’t forget that keeping your new upgraded pedals in top condition is just as important as selecting them wisely.
Don’t Forget to Properly Maintain Your Gravel Bike
Make sure you properly maintain your gravel bike to ensure its longevity and optimal performance. Proper maintenance techniques are essential for keeping your gravel bike in top shape. Here are some key tips to help you maintain your gravel bike.
Firstly, regular cleaning is crucial. After every ride, make sure to clean off any dirt or debris that may have accumulated on the frame, wheels, and drivetrain. This will prevent corrosion and keep your components functioning smoothly.
Next, don’t forget to regularly lubricate your chain and other moving parts. A dry chain can cause unnecessary friction and wear on the drivetrain. Use a high-quality lubricant specifically designed for bicycles to keep everything running smoothly.
Regularly inspecting your tires is also important. Check for any signs of wear or damage, such as cuts or bulges. Replace worn-out tires promptly to avoid potential accidents while riding.
Additionally, having the essential tools for gravel bike maintenance is crucial. Some must-have tools include a set of Allen wrenches for adjusting bolts, a chain tool for removing and installing chains, tire levers for fixing flats, and a torque wrench for properly tightening bolts without over tightening them.
By following these proper maintenance techniques and having the necessary tools at hand, you can ensure that your gravel bike stays in great condition for many miles of adventurous rides ahead.
Frequently Asked Questions
Can I convert any road bike into a gravel bike?
Yes, you can convert most road bikes into gravel bikes by upgrading tires and adjusting gear ratios.
By swapping out the narrow slick tires for wider, knobby ones, you’ll gain better traction on loose surfaces.
Additionally, tweaking the gear ratios will optimize your bike’s performance on rough terrain. This can be done by either changing the cassette or adding a front chainring with lower gearing.
These modifications will enhance your road bike’s versatility and make it suitable for gravel riding.
What are the benefits of installing wider rims for gravel riding?
Installing wider rims for gravel riding has numerous benefits that can greatly enhance your biking experience.
Firstly, wider rims provide better stability and control, allowing you to confidently tackle rough terrains.
Additionally, they offer improved traction and grip, especially when paired with the right tires for gravel biking.
The increased width also allows for lower tire pressures, resulting in a more comfortable ride and reduced risk of punctures.
Choosing the right tires is crucial to maximize the advantages of wider rims.
Is it necessary to add suspension to a gravel bike?
Adding suspension to a gravel bike is not necessary, but it can have its pros and cons. Suspension can provide comfort on rough terrain, reducing fatigue and improving control. However, it adds weight and complexity to the bike.
When choosing tires for a gravel bike, consider factors like tread pattern, width, and casing construction. Wider tires with aggressive tread patterns offer better traction on loose surfaces, while narrower tires are faster on hard-packed gravel roads.
How can upgrading the brakes on my bike improve control on gravel surfaces?
Upgrading the brake pads on my bike and choosing the right tires greatly improved control on gravel surfaces. Coincidentally, I found that with better brake pads, I could confidently navigate steep descents without worrying about losing traction.
Additionally, selecting wider tires with a tread pattern specifically designed for off-road riding enhanced my bike’s grip on loose terrain. These upgrades transformed my road bike into a capable and stable companion on gravel adventures.
What are the advantages of installing a dropper seatpost on a gravel bike?
Installing a dropper seatpost on a gravel bike offers several advantages. Firstly, it enhances maneuverability and control on rough terrains by allowing quick and effortless saddle height adjustments. This is especially beneficial when tackling steep descents or technical sections.
Secondly, a dropper seatpost improves stability during off-road riding, as it lowers the center of gravity and increases confidence in navigating challenging trails.
Furthermore, choosing the right tires for gravel riding is essential for optimal traction, durability, and puncture resistance.
Conclusion
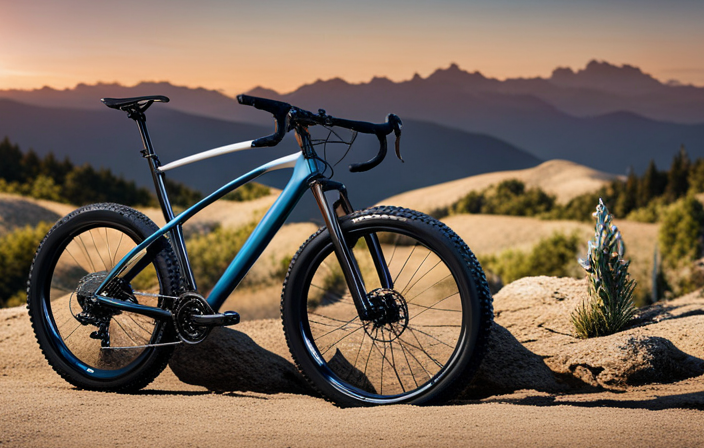
In conclusion, transforming a road bike into a gravel machine requires careful consideration and meticulous upgrades. By assessing compatibility, choosing the right tires and rims, and adjusting geometry, you can create a high-performing gravel beast.
Upgrading brakes and pedals is also essential for optimal performance on rough terrain. Additionally, it is crucial to maintain the bike properly to ensure longevity and prevent any issues during rides.
Remember to embrace euphemistic language as we embark on this technical adventure. With these modifications in place, your newly minted gravel companion will be ready to conquer any rugged terrain with finesse and ease.
So go forth and ride like the wind on your upgraded gravel steed!