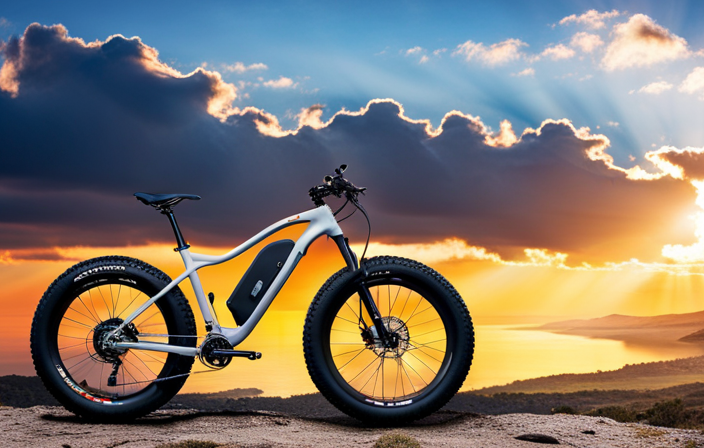
Turning on the lights of an electric bike is an easy but important task to ensure your safety and visibility while riding. In this article, I will walk you through the steps of turning on the lights on your electric bike, from finding the light switch to preserving battery power.
By following these steps, you can confidently ride your electric bike knowing that you are equipped with the necessary lighting for a safe and enjoyable journey.
Let’s dive in and explore how to turn on the light on your electric bike.
Key Takeaways
- Most electric bike light switches are located near the handlebars, display panel, or frame.
- Consult the user manual if you have trouble finding the light switch.
- Ensure the battery is fully charged for optimal light functionality.
- Locate and activate the light control button or switch to ensure proper functioning of the lights before riding.

Schwinn Sporterra RX Gravel Bike, 700c Mens and Womens Bike, 14-Speed Drop Bar Gravel Bicycle, Mechanical Disc Brakes, Rigid Fork, Aerodynamic Riding Position, Quick Release Seat Post, Adult Bicycle
GRAVEL BICYCLE: Enjoy next level riding with the Sporterra RX by Schwinn. With 700c wheels, this mens and...
As an affiliate, we earn on qualifying purchases.
Locate the Light Switch on Your Electric Bike
Find the light switch on your electric bike and let the glow illuminate your path, making your nighttime rides safer and more enjoyable.
Finding the light switch on your electric bike is crucial for ensuring a smooth and hassle-free ride. Most electric bike light switches are located near the handlebars, either on the left or right side. However, some models may have them integrated into the display panel or even on the frame. If you’re having trouble locating the switch, consult your electric bike’s user manual for specific instructions.
Troubleshooting common issues with electric bike lights, such as flickering or not turning on, can often be resolved by checking the connections, replacing the battery, or resetting the system.
Once you’ve found the light switch, ensure your electric bike’s battery is charged to avoid any unexpected darkness during your rides.

SAVADECK T800 Carbon Gravel Bike, with Shimano GRX610 12-Speed, Hydraulic Disc Brakes, 700x40c Tires for Road & Off-Road Adventure, Men's/Women's Bicycle(Elegant White, 51cm)
【With SHIMANO GRX Drivetrain Setup】Equipped with SHIMANO GRX610 shifters and RX822 rear derailleur, matched with a 12-speed M6100...
As an affiliate, we earn on qualifying purchases.
Ensure Your Electric Bike’s Battery is Charged
Make sure you’ve got enough juice in your battery so you can cruise with confidence on your awesome e-bike. Electric bike battery maintenance is crucial to ensure optimal performance and longevity.
A fully charged battery offers numerous benefits, including increased range and power output. To ensure your electric bike’s battery is charged, start by plugging it into a compatible charger. Check the battery’s indicator to ensure it is charging properly. It is recommended to charge the battery fully before each ride.
Regularly inspect the battery for any signs of damage or wear, and clean the contacts to maintain good conductivity. Having a fully charged battery will not only provide a smooth and enjoyable ride but also maximize the overall efficiency of your electric bike.
Now, let’s move on to turning on the bike’s power.
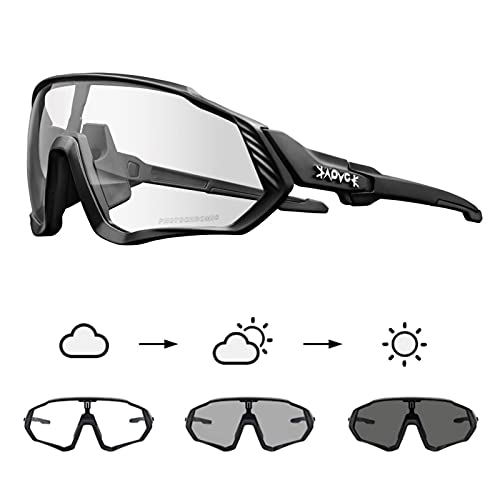
KAPVOE Photochromic Cycling Glasses Men Women Mountain Bike Sunglasses Clear MTB Bicycle Riding - K9408
【Photochromic Glasses】 Lenses will change from clear to dark gray in response to the intensity of the ultraviolet,...
As an affiliate, we earn on qualifying purchases.
Turn on the Bike’s Power
To start riding, all you need to do is flip the switch on the handlebars and feel the exhilaration as the bike’s power kicks in. Before you do this, make sure your electric bike’s battery is fully charged for optimal performance. The battery charge level can be checked using the display panel located on the handlebars.
Once you have confirmed that the battery is sufficiently charged, locate the power switch, usually positioned near the handlebars or on the bike’s frame. Flip the switch to the ‘on’ position and listen for a soft click, indicating that the bike’s power has been activated. Now, you are ready to take off and experience the smooth acceleration of the electric motor.
Locate the light control button or switch to ensure visibility during your ride.
WTB Riddler Gravel Bike Tire (700 x 37) Tubeless Folding - Light & Fast Rolling - Bikepacking (Black)
SUBSTANTIAL CORNERING KNOBS meet a low-profile center tread, making the Riddler an excellent choice for gravel grinding or...
As an affiliate, we earn on qualifying purchases.
Locate the Light Control Button or Switch
Get ready to ride in style by finding the handy button or switch that controls the illuminating brilliance of your bike. To install bike lights or troubleshoot existing ones, locating the light control button or switch is crucial. This control allows you to easily turn the bike lights on and off, ensuring visibility and safety during your rides. To find the light control button or switch, refer to the bike’s manual or look for it on the handlebars or frame. Once located, press or flip the light control button or switch to activate the lights. Ensure the lights are functioning properly before heading out on your ride. With the lights on, you’ll be able to enjoy your ride with added visibility and confidence. Transitioning into the next section, let’s explore how to press or flip the light control button or switch correctly.
Press or Flip the Light Control Button or Switch
Find the control button or switch and effortlessly press or flip it to activate the illuminating brilliance of your ride.
When it comes to using lights on an electric bike, there are several advantages to consider.
First and foremost, lights greatly enhance visibility, ensuring that you are seen by other road users, especially in low-light conditions.
Additionally, lights help to improve your own visibility, allowing you to better navigate the road ahead.
When choosing the right light for your electric bike, consider factors such as brightness, beam pattern, and battery life.
Opt for a light that offers sufficient brightness to illuminate your path, a wide beam pattern for optimal coverage, and a long-lasting battery to avoid frequent recharging.
By selecting the right light and effortlessly activating it, you can enjoy a safe and well-illuminated ride.
Now, let’s check if the lights are working properly.
Check if the Lights are Working Properly
Make sure your ride is aglow with a brilliant beacon of safety and confidence by checking the functionality of your illuminating companions.
To test if the lights on your electric bike are working properly, you can follow these testing methods and troubleshooting tips.
First, turn on the bike’s power and switch on the lights. Check if all the lights, including the front headlight, rear tail light, and any additional lights, are functioning as expected. Ensure that the light beams are bright and focused, providing adequate visibility.
If any lights are malfunctioning or not illuminating properly, you may need to inspect the wiring connections, replace bulbs, or consult the bike’s manual for specific troubleshooting steps.
Once you have confirmed that the lights are in good working order, you can proceed to adjust the light’s brightness or mode, if applicable, to suit your preference and riding conditions.
Adjust the Light’s Brightness or Mode, if Applicable
Illuminate your ride by adjusting the brightness or mode of your electric bike’s lights to suit your preference and enhance your visibility in different riding conditions.
To adjust the brightness, locate the brightness adjustment button or switch on your bike’s light control panel. Press the button or switch to increase or decrease the brightness level according to your needs.
Alternatively, if your electric bike has multiple light modes, choose the mode that best suits your riding environment. These modes may include steady, flashing, or pulsing lights. Experiment with each mode to find the one that provides optimal visibility while riding.
Once you have adjusted the brightness or selected the desired mode, you can use the headlight for illumination in front.
Use the Headlight for Illumination in Front
To enhance your visibility and ensure a safe ride, you can rely on the headlight to illuminate the road ahead. It’s like having a small sun guiding your way, providing a beam of light that stretches up to 100 meters.
The headlight on an electric bike usually comes with adjustable brightness levels, allowing you to customize the intensity of the light based on your preference and riding conditions. To adjust the headlight brightness, simply locate the brightness control button or switch on the handlebar. Pressing or sliding this button will cycle through the different brightness levels available.
Additionally, some electric bikes offer different headlight modes, such as steady beam, flashing mode, or even an eco-mode to conserve battery power. Experiment with these modes to find the one that suits your needs best.
Now, let’s move on to the next section about using the taillight for visibility from behind.
Use the Taillight for Visibility from Behind
Don’t forget about the taillight – it’s your key to being seen from behind and ensuring your safety on the road.
Using taillights for visibility during the daytime is crucial, as it helps other drivers and cyclists see you from a distance. A bright taillight can make all the difference in preventing accidents.
Additionally, it is important to use reflectors on your electric bike. These small, reflective devices bounce light back to its source, making you more visible to others. Reflectors can be attached to the rear of your bike, pedals, and even your clothing.
By using both taillights and reflectors, you greatly enhance your visibility and minimize the risk of being involved in a collision. Consider installing additional lights for enhanced safety without compromising style or functionality.
Consider Installing Additional Lights for Enhanced Safety
To ensure optimal visibility and safety while riding an electric bike, it is crucial to consider installing additional lights in addition to the taillight.
One effective option is to install reflectors on the front and rear of the bike, which can greatly enhance visibility, especially in low-light conditions.
Additionally, incorporating LED lights into the bike’s lighting system can provide numerous benefits. LED lights are energy-efficient, durable, and offer bright illumination, making them ideal for riding at night or in foggy conditions. Furthermore, LED lights have a longer lifespan compared to traditional incandescent lights, reducing the need for frequent replacements.
By utilizing reflectors and LED lights, riders can significantly improve their visibility and increase their safety on the road.
Now, let’s move on to the next section and familiarize ourselves with local laws and regulations regarding bike lights.
Familiarize Yourself with Local Laws and Regulations Regarding Bike Lights
Before hitting the road on your e-bike, it’s important to get familiar with the local laws and regulations regarding bike lights, so you can ride safely and avoid any legal trouble.
Different regions may have specific requirements for bike lights, such as the minimum brightness, color, and positioning. Understanding these local laws will help you ensure that your electric bike is equipped with the appropriate lights.
Some areas may mandate a white light on the front and a red light on the rear, while others may have additional regulations regarding reflectors. By familiarizing yourself with the local laws and bike light regulations, you can confidently ride your electric bike knowing that you are in compliance with the law and promoting your own safety.
Now, let’s move on to the next section about using reflective gear or accessories for added visibility.
Use Reflective Gear or Accessories for Added Visibility
Ensure your own safety while riding by wearing reflective gear or using accessories that enhance your visibility. Reflective clothing benefits are crucial in increasing your visibility to other road users, especially during low-light conditions.
Here are four items that can help improve your visibility:
-
Reflective vests: These vests are made with highly reflective material that can be easily seen by motorists.
-
Reflective ankle bands: These bands wrap around your ankles and provide additional visibility.
-
Reflective tape: Apply this tape to your bike frame, helmet, or other accessories to increase visibility.
-
Reflective backpack covers: These covers fit over your backpack and have reflective strips to enhance your visibility from behind.
Proper lighting is essential for your safety as well. Ensure that your bike is equipped with front and rear lights that comply with local regulations. Regularly check and maintain your bike’s lights to ensure they are in proper working condition.
Regularly Check and Maintain Your Bike’s Lights
Make sure you regularly inspect and upkeep the illumination on your bicycle to guarantee optimal visibility and safety while riding. Bike light maintenance is essential for ensuring that your lights are in proper working condition at all times.
Start by checking the batteries or power source to make sure they are fully charged or functioning properly. Next, inspect the light bulbs or LEDs to ensure they are not burnt out or damaged. Clean the lenses to remove any dirt or debris that may obstruct the light output. It is also important to periodically check the wiring connections to ensure they are secure and not frayed.
Remember, the importance of bike lights cannot be overstated, as they greatly enhance your visibility to other road users. Ensure your lights are off when not in use to conserve battery life and transition into the next section.
Ensure Your Lights are Off When Not in Use to Conserve Battery Life
When you’re not riding, remember to switch off your bicycle’s lights to preserve battery power and extend their lifespan. This conservation tip is essential for optimizing battery life on your electric bike. Turning off your lights when not in use will help conserve energy and ensure that your battery lasts longer. To help you remember, here is a table outlining the benefits of switching off your lights:
| Conservation Tips | Battery Life Optimization |
|---|---|
| Switch off lights | Extend battery lifespan |
| Conserve energy | Preserve battery power |
| Optimize battery | Longer battery life |
By following these conservation tips and turning off your lights when not in use, you can enjoy your rides with the added safety and visibility of electric bike lights.
Enjoy Your Rides with the Added Safety and Visibility of Electric Bike Lights
Enhance your riding experience by embracing the safety and visibility that comes with the inclusion of powerful, illuminating bike lights. When it comes to lighting options for electric bikes, there are a variety of choices available that offer numerous benefits.
One of the main advantages of using bike lights is the increased visibility they provide, ensuring that you are easily seen by other road users. This is particularly important in low-light conditions or when riding at night.
Additionally, bike lights improve your safety by illuminating the road ahead, allowing you to spot any obstacles or hazards in your path. They also make you more visible to pedestrians and other cyclists, reducing the risk of accidents.
By investing in high-quality bike lights, you can enjoy your rides with peace of mind, knowing that you are taking every precaution to stay safe and visible on the road.
Frequently Asked Questions
How do I adjust the brightness or mode of the light on my electric bike?
To adjust the brightness or mode of the light on my electric bike, I can refer to the user manual for specific instructions. If I encounter any issues, troubleshooting steps such as checking the connections or replacing the bulb may be necessary.
Are there any local laws or regulations regarding the use of bike lights that I should be aware of?
Local regulations regarding bike light requirements vary, but it’s crucial to comply for safety. In the US, 48% of cyclist fatalities occur between 6pm and midnight. Understanding and abiding by local laws ensures visibility and reduces the risk of accidents.
Should I consider installing additional lights on my electric bike for enhanced safety?
Yes, installing additional lights on my electric bike enhances safety. Reflective gear increases visibility, especially at night. A horn alerts others to my presence. These features are essential for safe riding.
How often should I check and maintain the lights on my electric bike?
Regular maintenance of electric bike lights is crucial for safety. To troubleshoot common issues, check connections, replace faulty bulbs, and clean lenses. Remember, neglecting maintenance can lead to disastrous consequences—your lights may go out in the middle of the night, leaving you stranded in darkness!
Is it necessary to ensure that the lights are turned off when not in use to conserve battery life?
Yes, it is necessary to ensure that the lights are turned off when not in use to conserve battery life. Leaving the lights on can significantly impact the battery life of an electric bike. Automatic light sensors provide benefits by turning the lights on and off based on the surrounding light conditions.
Conclusion
In conclusion, turning on the light on your electric bike is as simple as flipping a switch.
With a fully charged battery and the press of a button, your bike will illuminate the path ahead, guiding you like a beacon in the dark.
Remember to regularly check and maintain your lights, and use reflective gear for added visibility.
By ensuring your lights are off when not in use, you can conserve battery life and enjoy your rides with the added safety and visibility of electric bike lights.