
Envision seamlessly cruising down the avenues, energized by a thrilling power that drives you ahead. In just a handful of easy steps, you’re able to turn your regular bicycle into an exceptional electric bicycle.
In this article, I will guide you through the process of converting your bike into an electric wonder, allowing you to experience the thrill of speed and the convenience of a motorized ride.
Get ready to embark on an electrifying journey as we uncover the secrets to turning your bike into an electric powerhouse.
Key Takeaways
- Understand the different power modes and terrain adaptability of electric bikes.
- Adjust to the increased speed and weight of an electric bike.
- Perform regular maintenance for smooth and safe rides.
- Follow proper charging and battery care guidelines.
Determine Your Needs and Budget
You’ll need to figure out your needs and budget before you can start turning your bike into an electric bike.
It’s important to consider what you want to use your electric bike for. Are you planning on using it for short commutes or longer rides? This will help determine the power and range you need.
Additionally, think about your budget. Electric bike conversion kits can vary in price, so it’s important to set a realistic budget that aligns with your needs.
Once you have determined your needs and budget, you can move on to choosing the right conversion kit. This step is crucial as it will determine the performance and compatibility of your electric bike.
Choose the Right Conversion Kit
To choose the right conversion kit, start by considering your budget and the type of terrain you’ll be riding on. Electric bike conversion kits come in various options, including front wheel, rear wheel, and mid-drive kits.
Front wheel kits are the most affordable and easiest to install, but they may not provide the best traction on steep or uneven terrain.
Rear wheel kits offer better traction and balance, but they are slightly more expensive and require some modifications to the bike frame.
Mid-drive kits are the most powerful and provide a more natural riding experience, but they are the most expensive option.
Consider your budget and the type of terrain you’ll be riding on to determine which conversion kit is right for you.
Once you have chosen the kit, it’s time to gather the necessary tools and equipment for the installation process.
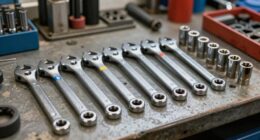
Gather the Necessary Tools and Equipment
Once you’ve chosen the right conversion kit, gather all the tools and equipment needed for the installation process. Here are the essential items you’ll need:
- Wrench set: To remove and install various bike components.
- Screwdriver set: For tightening screws and adjusting parts.
- Allen wrench set: To handle bolts and screws with hexagonal heads.
- Wire cutters/strippers: For handling electrical connections.
- Multimeter: To test and troubleshoot electrical circuits.
Having these tools on hand will make the conversion process much smoother and efficient. Once you’ve gathered everything, you’re ready to move on to the next step: preparing your bike for conversion.
This involves cleaning the bike, removing unnecessary parts, and ensuring that it is in good working condition before installing the electric components.
Prepare Your Bike for Conversion
Before moving forward, it’s important to prepare your bicycle for the conversion process.
First, remove any accessories such as baskets or racks that may interfere with the installation of the electric conversion kit.
Next, thoroughly clean your bike to ensure a smooth surface for attaching the kit components.
Inspect the frame for any damage or weaknesses, as the extra weight of the conversion kit may put additional stress on the bike.
It’s also a good idea to check the brakes, gears, and tires for any issues that may need to be addressed before the conversion.
Once you have prepared your bike, you can move on to the next section and install the electric conversion kit, transforming your regular bike into an electric one seamlessly.
Install the Electric Conversion Kit
First, I attach the motor and battery to my bike frame using the provided mounting brackets. This ensures a secure and stable attachment for the electric conversion kit.
Next, I carefully connect the wiring and controller, following the manufacturer’s instructions to ensure correct connections.
Finally, I test and adjust the system by turning on the power and checking that the motor and battery are functioning properly. I make any necessary adjustments to the controller settings to achieve the desired performance.
Attach the Motor and Battery
To attach the motor and battery, you’ll need a few basic tools. First, make sure you have a wrench, screwdriver, and some zip ties handy.
Begin by mounting the motor onto the bike frame using the provided brackets. Make sure it is securely fastened and aligned with the bike’s chain.
Next, attach the battery pack to the frame using zip ties or a mounting bracket. Find a spot that is both secure and easily accessible for charging.
Once the motor and battery are in place, double-check all the connections and tighten any loose bolts or screws.
Now, we can move on to connecting the wiring and controller, which will bring the whole system to life.
Connect the Wiring and Controller
Now that the motor and battery are securely attached, it’s time to connect the wiring and controller to turn my bike into an electric bike.
I start by carefully routing the wires along the frame, making sure they are tucked away neatly and won’t interfere with any moving parts.
Then, I connect the wires from the motor to the corresponding ports on the controller, ensuring a tight and secure connection.
Next, I connect the battery to the controller, double-checking the polarity to avoid any electrical mishaps.
Finally, I secure all the connections with zip ties and electrical tape to keep everything in place and protected from the elements.
With the wiring and controller successfully connected, it’s time to move on to the next step of testing and adjusting the system.
Test and Adjust the System
After connecting the wiring and controller, it’s time to test and adjust the system.
I start by turning on the battery and checking if the motor engages properly.
If it does, I take the bike for a short test ride to ensure everything is functioning correctly.
While riding, I pay attention to any strange noises or vibrations that might indicate a problem.
If necessary, I make adjustments to the motor’s position or the tension of the chain.
Additionally, I test the brakes to make sure they still work effectively with the added weight of the electric components.
Once I’m satisfied with the system’s performance, I can move on to the next section about upgrading my bike’s components (optional), such as adding a suspension fork or upgrading the gears.
Upgrade Your Bike’s Components (Optional)
Although it’s optional, I decided to upgrade my bike’s components to enhance its performance. Here are four reasons why you should consider doing the same:
-
Increased Speed: Upgrading to a better drivetrain and lighter wheels can give your electric bike a significant speed boost, making your commute or recreational rides more thrilling.
-
Improved Range: By investing in a higher capacity battery, you can extend the distance your electric bike can travel on a single charge, allowing you to explore new routes and go on longer adventures.
-
Enhanced Comfort: Swapping out the stock saddle for a more ergonomic one and adding suspension forks can greatly improve your overall comfort, making every ride a smooth and enjoyable experience.
-
Better Handling: Upgrading your bike’s brakes and tires can greatly enhance its ability to handle different terrains, ensuring a safer and more controlled ride.
Now that I’ve upgraded my bike’s components, it’s time to test and fine-tune my electric bike to ensure everything is in perfect working order.
Test and Fine-tune Your Electric Bike
To ensure your electric bike is in optimal condition, it’s important to thoroughly test and fine-tune its performance. This will not only ensure your safety but also enhance your riding experience. Start by testing the battery life and range to determine if any adjustments need to be made. Next, check the motor’s power and responsiveness, making sure it accelerates smoothly and operates without any unusual noises. Additionally, test the brakes and suspension to ensure they provide the necessary control and comfort. A helpful way to keep track of these tests is by using the following table:
| Test | Result |
|---|---|
| Battery Life | |
| Motor Power | |
| Brakes | |
| Suspension |
Once you have thoroughly tested and fine-tuned your electric bike, you can confidently move on to the next step of learning and practicing safe riding techniques.
Learn and Practice Safe Riding Techniques
When it comes to riding an electric bike, it’s important to understand the different power modes available. This allows me to choose the level of assistance I need, whether it’s for a leisurely ride or a more challenging terrain.
Another key point is adjusting to the increased speed and weight of the electric bike. It takes some practice to get used to the faster speeds and the added weight of the battery and motor.
Lastly, proper maintenance is crucial to keep my electric bike running smoothly. Regularly checking the tires, brakes, and electrical components ensures a safe and enjoyable riding experience.
Understanding the Different Power Modes
Understanding the different power modes is essential when turning your bike into an electric bike. Here are the four power modes that can help you control your bike’s speed and range:
-
Eco Mode: This mode provides a balanced power output, extending your battery life and giving you a comfortable riding experience.
-
Normal Mode: In this mode, you get a moderate power output, suitable for everyday commuting and leisure rides.
-
Sport Mode: If you want a boost in speed and acceleration, sport mode delivers a higher power output, perfect for tackling hills or enjoying a more thrilling ride.
-
Turbo Mode: This mode offers maximum power output, giving you the ultimate speed and performance, but be mindful of your battery consumption.
Understanding these power modes will help you choose the right setting for your needs and adjust to the increased speed and weight of your electric bike seamlessly.
Adjusting to the Increased Speed and Weight
After understanding the different power modes, I was excited to experience the increased speed and power of my newly converted electric bike. However, I quickly realized that adjusting to the increased speed and weight required some practice.
The first time I took off, I was caught off guard by the sudden acceleration and had to quickly readjust my balance. The added weight of the battery also made the bike feel a bit heavier, especially when going uphill. But with some time and practice, I learned to anticipate the power and adjust my riding style accordingly. I became more comfortable and confident, smoothly maneuvering through traffic and effortlessly conquering those challenging uphill climbs.
Transitioning to the next section, it’s essential to properly maintain your electric bike to ensure its longevity and optimal performance.
Properly Maintaining Your Electric Bike
To ensure your electric bike lasts and performs its best, it’s important to properly maintain it. Regular maintenance will not only extend the lifespan of your bike but also enhance its performance.
One crucial aspect of maintenance is keeping the battery in good condition. Make sure to charge it properly, following the manufacturer’s recommendations, and avoid overcharging or letting it completely drain.
Additionally, regularly clean and lubricate the chain to prevent rust and ensure smooth operation. Check the tire pressure frequently and adjust as needed for a comfortable and efficient ride.
Lastly, inspect all the components, such as brakes and gears, for any signs of wear or damage.
By maintaining your electric bike, you’ll be able to enjoy your new electric bike to the fullest, worry-free, and with optimal performance.
Enjoy Your New Electric Bike
You’ll love riding your new electric bike! It’s an incredible feeling to effortlessly zip through the streets, feeling the wind in your hair and the thrill of the electric power beneath you.
With a simple twist of the throttle, you’ll be gliding along with ease, conquering hills and enjoying longer rides than ever before. Plus, the added pedal-assist feature makes it a breeze to keep up with friends or tackle longer commutes.
As you embark on this new adventure, be sure to share your experience and spread the word about the joy of electric biking. Whether it’s through social media, word of mouth, or joining local biking groups, let others know about the incredible freedom and fun that an electric bike can bring.
Share Your Experience and Spread the Word
Don’t hesitate to share your electrifying biking experience and let others in on the excitement! Riding my newly converted electric bike has been an incredible experience that I can’t help but share with everyone.
Here are five reasons why you should spread the word about your own e-bike adventure:
-
Join the e-bike community: Connect with other electric bike enthusiasts and exchange tips and tricks.
-
Help the environment: By promoting electric biking, you’re encouraging a greener mode of transportation and reducing carbon emissions.
-
Save money: Share how converting your bike into an electric one has saved you on fuel costs and maintenance expenses.
-
Improve health and fitness: Explain how an electric bike can make biking more accessible to people of all fitness levels, encouraging a healthier lifestyle.
-
Inspire others to convert: Share the joy of transforming a regular bike into an electric one and inspire others to do the same.
So go ahead, spread the word and let others experience the thrill of electric biking!
Frequently Asked Questions
Can I convert any type of bike into an electric bike?
Yes, any type of bike can be converted into an electric bike. It involves adding an electric motor, battery, and controller. The process may vary depending on the bike, but it’s possible with the right tools and instructions.
How long does it typically take to install an electric conversion kit?
It usually takes around 2-4 hours to install an electric conversion kit. However, like the saying goes, "Rome wasn’t built in a day," this process may vary depending on your bike’s complexity and your mechanical skills.
Are there any legal requirements or restrictions for riding an electric bike?
There are legal requirements and restrictions for riding an electric bike. These vary by country and region, but commonly include age restrictions, speed limits, and the need for lights and reflectors.
How much maintenance is required for an electric bike?
Maintaining an electric bike is relatively easy. Regularly check the battery, clean the chain, and ensure the brakes are in good condition. Like any bike, it requires some TLC, but the benefits far outweigh the maintenance.
Can I still pedal my electric bike if the battery runs out of charge?
Yes, you can still pedal your electric bike if the battery runs out of charge. It will function just like a regular bike, allowing you to pedal and continue riding without the assistance of the motor.
Conclusion
In conclusion, converting my bike into an electric bike has been a game-changer for me. It was a cost-effective and fun project that allowed me to customize my ride to fit my needs and budget.
While some may argue that the conversion process is complicated, I found it to be surprisingly simple with the right conversion kit and tools. So don’t let any doubts hold you back!
Embrace the electric bike revolution and experience the thrill of effortless rides while reducing your carbon footprint. Let’s revolutionize our commutes together!