Do you enjoy cycling in the early morning or late into the evening? If that’s the case, you understand the significance of ensuring your bicycle lights are functioning properly.
Not only do they help you see where you’re going, but they also help drivers see you on the road. In this article, we’ll show you how to turn on your bicycle lights so you can stay safe while riding at night.
Before we get started, it’s important to note that many countries require cyclists to have lights on their bikes when riding in low-light conditions. Check your local laws to ensure that you are complying with the regulations.
Now, let’s check your lights and get started!
Key Takeaways
- Locate light switch/button on your bicycle lights
- Turn on both front and rear lights before riding at night
- Adjust brightness according to riding conditions
- Regularly check batteries and bulbs to ensure optimal performance
Check Your Lights
You gotta make sure your lights are working, so check ’em before you ride. Start by inspecting batteries. Check if they’re charged or if they need to be replaced.
A dead battery can leave you in the dark, so make sure they’re fully charged or swap them out for new ones.
Next, check the bulbs. If they’re burnt out, you won’t be able to see or be seen, which is dangerous. Check both the front and rear lights to ensure they’re working.
If a bulb needs to be replaced, do so before you go out for a ride. Safety is key, and having working lights will ensure you’re visible to others on the road.
Now, let’s move on to the front lights.
Front Lights
When riding at night, it’s crucial to make sure that what’s ahead of you is clear as day. That’s why, before hitting the road, make sure those illuminating beacons are good to go.
For the front light, there are a variety of mounting options available, such as handlebar or helmet mounts. Choose the one that works best for you and provides the most secure attachment.
When it comes to choosing the brightness of your front light, make sure it complies with local regulations. In general, a light with at least 200 lumens is recommended for riding in low light conditions. However, if you will be riding in areas with no street lighting, a higher brightness may be necessary.
Remember, safety should always be your top priority when choosing and using your front light. As you move on to the next section about rear lights, don’t forget to double-check that your front light is securely mounted and functioning properly.
Rear Lights
Make your nighttime rides safer and more visible with a bright and reliable rear light. Rear lights are just as important as front lights when cycling at night. They allow other road users to see you from behind and help prevent accidents. When choosing a rear light, consider the mounting options and battery life.
Mounting options vary between lights, with some attaching directly to the bike frame and others clipping onto a backpack or clothing. Choose a mounting option that is secure and easy to use. Battery life is also an important consideration. Some lights offer a longer battery life than others, and some can be rechargeable. Make sure to check the battery life before choosing a light and always carry spare batteries or a charger with you on long rides. With a reliable rear light, you can ride with confidence knowing that you are visible to other road users.
Transitioning into the subsequent section about ‘helmet lights’: For even more visibility, consider adding a helmet light to your set up.
Helmet Lights
To attach a helmet light, start by locating the light mounting system on your helmet. Once you’ve found it, secure the light to your helmet using the provided fasteners.
Finally, turn on the light and adjust it as needed to ensure maximum visibility and safety on your bike ride. Remember to always comply with regulations and prioritize safety when using helmet lights.
Locate the Light Mounting System
First, you’ll need to find where the light mounting system is located on your bicycle. Here are the steps to help you locate it:
-
Check the handlebars: Most bicycles have a light mounting system attached to the handlebars. Look for a bracket or clamp that can secure the light to the handlebars.
-
Check the frame: Some bicycles have a mounting system on the frame. Look for a small bracket or clip that can hold the light in place.
-
Check the seat post: A few bicycles have a light mounting system on the seat post. Look for a clamp or bracket that can hold the light in place.
Once you have located the light mounting system on your bicycle, it’s important to ensure that it’s properly maintained and repaired if necessary. This will ensure that the light is secure and functioning properly while you ride.
Now, let’s move on to how to secure the light to your helmet.
Secure the Light to Your Helmet
Now that you’ve found the light mounting system, it’s time to attach the light to your helmet for maximum visibility while riding. First, ensure that your helmet has ventilation holes or other openings to accommodate the light’s mount.
Then, position the light on the top or front of the helmet depending on your preference and the light’s design. It’s important to consider the fit of your helmet with the light attached. Make sure that the light does not impede your vision or comfort.
Additionally, check the battery life of the light before heading out on a ride. A fully charged battery will provide optimal brightness and visibility. With the light securely fastened to your helmet, you’re ready to turn it on and adjust as needed for your specific riding conditions.
As you turn on and adjust the light, keep in mind any regulations or safety guidelines in your area. Some areas require lights to be a certain brightness, while others may have restrictions on where the light can be positioned. By following these guidelines and taking the time to properly attach and maintain your light, you’ll have a safer and more enjoyable riding experience.
Turn On and Adjust as Needed
Igniting the brilliance of your headlamp and making the necessary tweaks will not only illuminate your path but also give you a sense of being in a sci-fi movie.
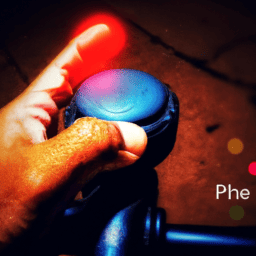
First, locate the power button on your bike light. Press it once to turn on the light at full brightness. If you want to adjust the brightness, press and hold the power button until the desired level is reached. Keep in mind that brighter lights may require more battery power and may need to be charged or have their batteries replaced more frequently.
Next, check the battery level of your bike light before every ride. If the light is dimmer than usual or does not turn on at all, it may be time to replace the batteries. Be sure to use the correct type of battery recommended by the manufacturer.
Adjusting the brightness and checking the battery level of your bike light are simple tasks that can greatly enhance your safety while cycling at night.
Now, let’s move on to some tips for safe and effective use.
Tips for Safe and Effective Use
To ensure safe and effective use, you should always properly position your bicycle lights and check their brightness before riding. Proper maintenance is also key to ensuring that your lights are working optimally.
Regularly clean the lenses of your lights and make sure the battery life is sufficient for your intended ride. It’s also important to comply with regulations regarding bicycle lighting.
For example, in many places it’s required to have a white light on the front of your bike and a red light on the back. Make sure your lights are visible from a distance and don’t blind other cyclists or drivers on the road.
By following these tips, you can ensure that your bicycle lights are not only effective but also safe for you and others on the road.
Frequently Asked Questions
What are the different types of bicycle lights available in the market?
Choosing the right bicycle light is crucial for your safety. LED lights are the most popular, with up to 80% more visibility than traditional lights. Install them properly to avoid accidents and comply with regulations.
How long do bicycle lights usually last?
Battery life of bicycle lights varies depending on factors such as usage, maintenance, and type of light. Replacing batteries can extend the lifespan. Ensure compliance with regulations and check regularly for optimal performance and safety.
Can I use my mobile phone flashlight instead of bicycle lights?
Before risking safety on the road, consider the pros and cons of using a mobile flashlight while cycling. Alternatives to using a mobile flashlight for bicycle lighting include investing in proper equipment to comply with regulations. Stay safe and visible while cycling.
Are there any laws or regulations regarding the use of bicycle lights?
It is important to use bicycle lights as they increase visibility and safety for you and other road users. Research and choose the right lights for your needs, ensuring they comply with local laws and regulations.
Can I use rechargeable batteries in my bicycle lights?
Yes, you can use rechargeable batteries in your bike lights. They are eco-friendly and save money in the long-term. However, ensure they are compatible with your lights and consider the brand’s reliability. Safety and compliance with regulations are crucial.
Conclusion
Congratulations! You now know how to turn on your bicycle lights.
Remember to always check your lights before heading out on a ride, and make sure they’re fully charged or have fresh batteries.
Front lights are essential for illuminating the path ahead, while rear lights increase your visibility to other road users.
But don’t forget about the importance of helmet lights. These small but powerful lights can make a big difference in your safety. They provide additional visibility from a higher vantage point and can alert others to your presence on the road.
Just like how a lighthouse guides ships safely to shore, your lights guide you on your journey. They help you navigate through the darkness and ensure that you’re seen by others on the road.
So, take the time to properly set up your lights and use them every time you ride. Stay safe and happy cycling!