
Fed up with endless hours at the gym, cycling on monotonous stationary bikes? Interested in getting fit from the convenience of your home? Fear not, for I’ve got the perfect solution for you!
With just a few simple steps, you can turn your ordinary bicycle into a stationary bike and start your indoor cycling journey today. Don’t let the thought of boring gym equipment discourage you from reaching your fitness goals. By converting your own bike, you can personalize your workout and make it more challenging and enjoyable.
Plus, it’s a great way to stay active during those cold winter months when outdoor cycling is not an option. So, let’s get started and turn your bike into a stationary powerhouse!
Key Takeaways
- Necessary equipment includes a bike trainer or stand, mat, fan, towel, and water bottle.
- Choose a suitable location with enough space, flat and stable flooring, good lighting and ventilation.
- Add comfortable padding to seat and handlebars for a more enjoyable and comfortable experience.
- Warm up properly with light cardio and dynamic stretches to prevent injuries and prepare for intense workout.

CYCPLUS GPS Bike Computer, Wireless Cycling Computer with Automatic Backlight, Bicycle Speedometer Odometer with Waterproof and Large Battery, Provide Professional Data Analysis(New Upgraded)
【Dynamic GPS Positioning】- This bike computer with higher sensitivity, higher accuracy, faster positioning. The GPS signal tracks your...
As an affiliate, we earn on qualifying purchases.
Gather the Necessary Equipment
You’ll need to gather all the necessary equipment before you can successfully turn your bicycle into a stationary bike, so make sure you have everything on hand before starting.
First, you’ll need a bike trainer or bike stand that can securely hold your bike in place and allow you to pedal without moving. You can find these online or at your local bike shop.
Next, you’ll need a mat to place under your bike to protect your floors and reduce noise. You’ll also need a fan to keep you cool during your workout and a towel to wipe away sweat. Don’t forget to have a water bottle nearby to stay hydrated.
Before you start, it’s important to understand the benefits of using a stationary bike and the common mistakes to avoid when setting up your indoor cycling space.
Transitioning into the next section, now that you have all the necessary equipment, it’s time to prepare your bike for the trainer or stand.

Huffy Stone Mountain Mens 26 Inch Mountain Bike, Matte Black Frame, 21-Speed Shimano Twist Shifting, Front Suspension, Comfort Saddle | 20"/24"/26" Sizes, 6-21 Speeds, Dual Suspension Available |
SLEEK MATTE BLACK FRAME: Combines rugged durability and a modern matte black design, making it the perfect choice...
As an affiliate, we earn on qualifying purchases.
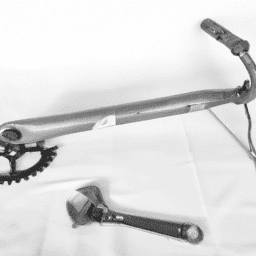
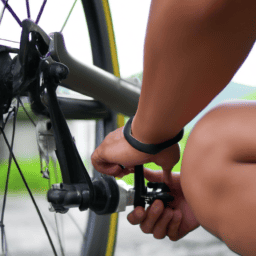
Prepare Your Bike
Before getting started, it’s important to ensure that the pedals and wheels are securely fastened to the frame, as loose parts can lead to accidents and injuries. According to a study by the National Highway Traffic Safety Administration, approximately 48,000 cyclists were injured in 2019 due to equipment-related accidents.
To check bike compatibility, make sure that your bike has a compatible quick-release skewer or thru-axle to hold it in place on the trainer. Also, ensure that your bike’s rear wheel is compatible with the resistance unit of the trainer.
Once you’ve checked bike compatibility, adjust the bike settings to prepare it for indoor cycling. First, raise the handlebars to make them level with the saddle or slightly higher for a more comfortable ride. Then, adjust the saddle height to match your hip height when standing next to the bike. This will ensure a comfortable and safe ride.
With your bike ready, it’s time to set up your indoor cycling space and start your workout.

WEIZE Mountain Bike, 26 27.5 inch Outdoor Hybrid Bike,18-Speed/High-Carbon Steel/Dual Full Suspension, Adjustable Ergonomic Seat for Men Women Adult, MTB Bicycle with Suspension Fork,Sleek Colors
【Frame】: Durable steel dual suspension Mountain Bike frame. Featured with Front suspension fork and rear coil shock to...
As an affiliate, we earn on qualifying purchases.
Set Up Your Indoor Cycling Space
Okay, now that I’ve got my bike ready to go, it’s time to set up my indoor cycling space.
First things first, I need to choose a suitable location. I want to find a spot with enough room to move around freely and with good ventilation.
Once I’ve found the perfect spot, I’ll install my equipment and add some comfortable padding to my seat to make sure I’m as comfortable as possible.
Let’s get started!
Choose a Suitable Location
Find a spot in your home that is flat and has enough space for your bike to stand stationary. Choosing the right location is crucial in creating a comfortable and enjoyable indoor cycling experience. A suitable location will not only ensure that you have enough space to move around during your workout but also reduce the risk of accidents. Here are some factors to consider when choosing the right location for your indoor cycling space:
| Factors to Consider | Tips |
|---|---|
| Space | Choose an area with enough room to move around during your workout. |
| Flooring | Opt for a flat and stable surface to avoid accidents. A rubber mat can also help protect your floors and reduce noise. |
| Lighting and Ventilation | Choose a well-lit area with proper ventilation to keep you cool and comfortable during your workout. |
Once you have chosen a suitable location, it’s time to install your equipment.
Install Your Equipment
Now that you’ve picked the perfect spot, it’s time to set up your indoor cycling equipment and transform your regular bike into a stationary one.
There are different equipment options available in the market that you can purchase to make your bike stationary, such as a bike trainer or rollers. A bike trainer is a stand that you attach your bike to, and it provides resistance to the rear wheel, making it stationary. Rollers, on the other hand, are a set of curved drums that you place your bike on top of, and you pedal on them, creating resistance and making your bike stationary.
If you want to save some money, you can also opt for DIY modifications. For example, you can create your own bike stand by using PVC pipes or wood. You can also use resistance bands to create resistance when pedaling. With a little creativity and resourcefulness, you can easily transform your bike into a stationary one without breaking the bank.
Once you’ve set up your indoor cycling equipment, the next step is to add comfortable padding to your seat and handlebars for a more enjoyable and comfortable experience.
Adding comfortable padding will help reduce discomfort and prevent soreness in your back, bum, and hands. You can use a gel seat cover or padded shorts to cushion your seat. You can also wrap your handlebars with foam or a padded cover to reduce pressure on your hands.
With these simple modifications, you’ll be able to enjoy a more comfortable ride and make the most out of your indoor cycling sessions.
Add Comfortable Padding
To make your indoor cycling experience more comfortable and enjoyable, don’t forget to add some padding to your seat and handlebars. Choosing the right padding is important to ensure you have a comfortable ride without any discomfort or pain.
When it comes to seat padding, you can choose between gel, foam, or a combination of both. Gel padding is great for long rides as it provides extra cushioning and reduces pressure points. Foam padding, on the other hand, is more affordable and provides a decent level of comfort.
For the handlebars, you can also choose between foam or gel padding. Gel padding is great for absorbing vibrations and reducing hand fatigue, making it ideal for longer rides. Foam padding is softer and more comfortable, but it doesn’t provide the same level of shock absorption as gel.
Whatever type of padding you choose, make sure it’s easy to install and fits your bike properly.
Adding padding to your bike is essential for a comfortable and safe indoor cycling experience. Not only does it reduce the risk of pain or injury, but it also helps you to focus on your workout and achieve your fitness goals.
Now that you have your equipment installed and padded, it’s time to warm up and start cycling.
RegalRider Hybrid Bike, 700C Men's Bike, 7-Speed Commuter Bicycle, Low Step-Through Frame, Adjustable Seat & Handlebar, Reflectors, 90% Pre-Assembled
Ride in Easiness - Hybrid bike for adults features lightweight 700C aluminum double-wall rims paired with high-grip tires....
As an affiliate, we earn on qualifying purchases.
Warm Up and Start Cycling
Alright, let’s get started with our indoor cycling workout! Before we jump into the main workout, it’s important to warm up properly.
I like to start with a few minutes of easy pedaling to get my muscles warmed up and my heart rate up. As I start to increase the intensity, I make sure to monitor my heart rate to ensure I’m staying within my target zone.
Finally, as I get into the main part of the workout, I gradually increase the resistance and intensity to really challenge myself and get the most out of my ride.
Remember, starting with a proper warm-up and monitoring your heart rate are key to a safe and effective workout. Let’s do this!
Start with a Warm-Up
Before you begin pedaling, make sure you warm up your muscles to prevent any injuries. It’s important to stretch your muscles before starting your cycling routine. Stretching helps improve your flexibility and range of motion, reduces muscle soreness, and improves blood flow to your muscles.
A proper warm-up routine can also help prepare your body for a more intense workout. To create a rhythm and flow in your warm-up routine, you can start with some light cardio exercises such as jumping jacks or jogging in place. This will help get your heart rate up and increase circulation to your muscles.
After a few minutes of cardio, move on to some dynamic stretches such as leg swings, arm circles, and lunges. These stretches help warm up your muscles and joints and improve your mobility. Remember to take it slow and listen to your body, and gradually increase the intensity of your warm-up routine over time.
Now that you have properly warmed up your muscles, it’s important to monitor your heart rate as you begin your cycling routine.
Monitor Your Heart Rate
It’s crucial to keep an eye on your heart rate throughout your cycling routine to ensure you’re getting the most out of your workout. Tracking your heart rate can help you determine the intensity of your workout and ensure that you’re in the optimal heart rate zone for your fitness goals.
There are many benefits of tracking your heart rate, including maximizing your workout efficiency, avoiding overtraining, and preventing injuries.
In addition to monitoring your heart rate, it’s also important to allow for recovery time during your cycling routine. This means taking breaks between sets or reducing the intensity of your workout when your heart rate is too high.
Recovery time helps prevent injuries and allows your muscles to repair and grow stronger. By tracking your heart rate and allowing for recovery time, you can ensure that your cycling routine is safe and effective.
In the next section, we’ll discuss how to increase resistance and intensity to further challenge your workout.
Increase Resistance and Intensity
To take your cycling routine to the next level, you can challenge yourself by increasing resistance and intensity, which will help you burn more calories and build more muscle. Resistance training is one way to add difficulty to your workout. This involves increasing the tension on your bike’s flywheel, making it harder to pedal. You can adjust the resistance manually on most stationary bike models, but some may come with preset programs that automatically adjust resistance levels throughout the workout.
Another way to increase intensity is by incorporating HIIT workouts into your routine. HIIT stands for High-Intensity Interval Training, which involves alternating periods of high-intensity exercise with periods of rest or low-intensity exercise. This type of workout has been shown to be very effective at burning calories and improving cardiovascular health. By increasing resistance and incorporating HIIT workouts into your routine, you can take your indoor cycling to the next level and achieve your fitness goals faster.
Now that you know how to increase resistance and intensity during your indoor cycling workouts, let’s move on to the next section and learn how to maintain your routine.
Maintain Your Indoor Cycling Routine
I’ve been enjoying my indoor cycling routine and have discovered some key points that have helped me maintain it.
First, it’s important to regularly clean and maintain your bike to ensure it operates smoothly and lasts longer.
Second, I find that staying motivated with music or videos helps me push through tough workouts and adds an element of fun.
Lastly, tracking my progress and setting achievable goals has been essential to seeing improvement and keeping me excited about my workouts.
Follow these tips to maintain your own indoor cycling routine and reach your fitness goals.
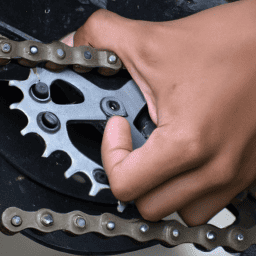
Clean and Maintain Your Bike
You’ll want to keep your bike clean and maintained to ensure it runs smoothly while you’re using it as a stationary bike. Effective cleaning techniques include wiping down the frame and components with a damp cloth after each use to remove sweat and debris. You can also use a spray bottle with a mixture of water and mild soap to clean more stubborn areas. Be sure to avoid spraying water directly onto the bike’s electronic components.
In addition to regular cleaning, preventative maintenance tips can help prolong the life of your bike. This includes checking the tire pressure, chain tension, and brake pads before each use. It’s also a good idea to have your bike professionally serviced every six months to a year to ensure it’s in top condition. By taking care of your bike, you can enjoy a smooth and hassle-free indoor cycling experience. Now, let’s talk about how to stay motivated with music or videos.
Stay Motivated with Music or Videos
Now that you’ve cleaned and maintained your bike, it’s time to start your stationary bike workout. But let’s face it, exercising on a stationary bike can get boring after a while. So how do you keep yourself motivated?
One way is to incorporate music or videos into your workout routine. Exercising with music has been shown to improve overall performance and motivation. It helps distract from the physical strain and can even make the workout feel easier. So, create a playlist of your favorite upbeat songs or find a pre-made one to keep you energized throughout your workout.
On the other hand, if you prefer visual stimulation, finding the right workout videos can make all the difference. There are many online videos available that can guide you through a variety of workouts and keep you engaged and motivated. By incorporating music or videos into your routine, you’ll not only stay motivated but also make your workout more enjoyable.
By incorporating music or videos into your stationary bike workout, you’ll be able to keep yourself motivated and engaged. So, start by creating a playlist or finding a workout video that suits your preferences.
In the next section, we’ll talk about how to track your progress and set goals to keep yourself accountable and on track.
Track Your Progress and Set Goals
To truly see progress in your workout routine, tracking your performance and setting achievable goals is essential. Don’t let all your hard work go to waste – make a plan and stick to it!
Setting achievable milestones is the key to success. When setting goals, it’s important to make sure they’re specific, measurable, and attainable. For example, if your ultimate goal is to lose weight, set a goal to lose a certain amount of weight each week or month. This way, you can measure your progress and adjust your plan accordingly.
Tracking your progress and setting goals is not only important for measuring success, but also for staying motivated. By seeing how far you’ve come and how much you’ve achieved, you’ll be more likely to stick to your routine and keep pushing yourself.
Use a journal or an app to log your workouts and progress, and be sure to celebrate your achievements along the way. Remember, it’s not just about the end goal, but also about the journey. Enjoy the process and keep striving towards your goals.
Frequently Asked Questions
Can any bike be turned into a stationary bike or do I need a specific type?
To convert your bike into a stationary one, you’ll need the right equipment. Any bike can be transformed, but it’s important to choose the right kit for your model. Indoor cycling has many fitness benefits, including improved cardiovascular health and lower body strength.
Is it necessary to have a heart rate monitor while indoor cycling?
Having a heart rate monitor during indoor cycling is beneficial for tracking intensity and progress. There are different types of monitors available, including wristbands and chest straps. It’s a great tool for staying motivated and achieving fitness goals.
How often should I clean my indoor cycling setup?
I clean my indoor cycling setup after every use. It helps prevent wear and tear on the bike and ensures a smooth ride. I also wipe down the handlebars, seat, and pedals with a damp cloth. Regular maintenance keeps my setup in top shape.
Are there any specific shoes or pedals I need to use while indoor cycling?
Wow, cycling shoes can make such a difference! Clip-in pedals provide a secure fit and better energy transfer. Check your bike’s compatibility with your shoes and pedals, and enjoy the ride!
Can indoor cycling help with weight loss?
Indoor cycling is great for weight loss. It boosts cardiovascular health, burns calories, and builds muscle. To maximize weight loss, vary intensity, incorporate intervals, and maintain a healthy diet.
Conclusion
After following the steps outlined in this article, I can confidently say that turning my bicycle into a stationary bike was a game changer for my indoor workouts. Not only did it save me money on purchasing a new piece of equipment, but it also allowed me to continue using a bike that I was already comfortable with.
One example of how this setup has improved my fitness routine is when I had to work from home for an extended period of time. Instead of sitting at my desk all day, I was able to easily transition to my indoor cycling setup during breaks or after work. This kept me active and energized throughout the day, and I even found myself burning more calories than I would have if I had just gone for a jog or a walk.
Overall, I highly recommend turning your bicycle into a stationary bike if you’re looking for a budget-friendly way to stay active indoors. With a little bit of effort and some basic equipment, you can create a customized workout space that fits your needs and preferences. Happy cycling!