Have you ever imagined smoothly ascending hills on your bike, with the wind blowing through your hair as you effortlessly conquer any type of terrain? If so, you can now turn that dream into reality!
In this article, I will show you how to turn your ordinary bicycle into an electrifying powerhouse. With the right conversion kit and a little know-how, you can transform your humble two-wheeler into a high-performance electric bike.
Get ready to embark on a thrilling journey of DIY ingenuity and experience the joy of riding like never before.
Key Takeaways
- Install the electric system by securely attaching throttle and brake levers and connecting electric system wires to handlebar components.
- Test and adjust the electric system by checking battery voltage, testing throttle and brakes, troubleshooting issues, and addressing problems before proceeding.
- Ensure safety and legal compliance by familiarizing yourself with local regulations, making necessary modifications, adhering to safety gear requirements, and avoiding fines or legal issues.
- Maintain and care for the electric bike by regularly checking and recharging the battery, keeping electric components clean and dry, storing the bike in a dry place, and maximizing battery lifespan by following proper charging tips.

SAVADECK Carbon Gravel Bike - T800 Carbon Frame & Fork | Shimano U6000 11-Speed Groupset | Hydraulic Disc Brakes | 700CX40mm All-Terrain Tires | Men & Women Road/Off-Road Bicycle (Gray, 53cm)
【Ultralight T800 Carbon Performance】: Featuring a premium T800 R21 carbon fiber frame and fork weighing just 10.4kg (22.92...
As an affiliate, we earn on qualifying purchases.
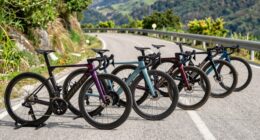
Assess Your Bicycle’s Suitability for Conversion
Assess if your bicycle is suitable for conversion into an electric bike. Choosing the right conversion kit is crucial to ensure compatibility with your bicycle.
First, consider the type of bicycle you have. Electric bike conversion kits are typically designed for standard bicycles, such as road bikes, mountain bikes, or hybrid bikes.
Assessing the bicycle’s compatibility involves checking the frame, fork, and wheel sizes. Additionally, consider the weight capacity of the kit and ensure that it can support your weight and any additional cargo you may carry.
Take into account the installation process and determine if you have the necessary tools and skills.
Once you have assessed your bicycle’s suitability, you can proceed to choose the right electric bike conversion kit, which will be discussed in the subsequent section about choosing the right electric bike conversion kit.

Schwinn Network 1 Hybrid Bike, 700c Mens and Womens Bike, 21-Speed Hybrid Bicycle, Aluminum Frame, Suspension Fork, Alloy Linear Pull Brakes, Adult Bicycle
HYBRID BICYCLE: Ride confidently on or off the pavement in the Network 1 by Schwinn. With 700c wheels,...
As an affiliate, we earn on qualifying purchases.
Choose the Right Electric Bike Conversion Kit
Selecting the appropriate electric bike conversion kit is crucial. Electric bike conversion kits offer a convenient way to transform your regular bicycle into an electric-powered one. There are various benefits to converting your bicycle, such as increased speed and reduced effort while riding. However, it is important to consider the drawbacks as well, such as the added weight and the need for regular maintenance.
When choosing a conversion kit, it is essential to consider the motor and battery combination that best suits your needs. The motor should provide enough power to support your desired speed and terrain, while the battery should offer sufficient range for your intended rides. By carefully selecting the right components, you can ensure a successful electric bike conversion.
Now, let’s move on to gathering the necessary tools and equipment for the conversion process.

Schwinn GTX 1 Hybrid Bike, 700c Mens and Womens Bike, 21-Speed Hybrid Bicycle, Aluminum Dual-Sport Frame, Suspension Fork, Front and Rear Linear Pull Brakes, Adult Bicycle
DUAL SPORT HYBRID BICYCLE: Ride confidently on or off the pavement in the GTX 1 by Schwinn. With...
As an affiliate, we earn on qualifying purchases.
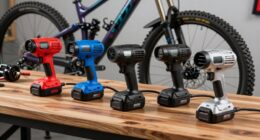
Gather the Necessary Tools and Equipment
To successfully convert your regular bicycle to an electric-powered one, you’ll need to gather the tools and equipment necessary for the process. Assessing compatibility is crucial to ensure that the conversion kit you choose will work seamlessly with your bicycle.
Common tools required for this conversion include a set of Allen wrenches, a socket wrench, pliers, and a screwdriver. Additionally, you will need a conversion kit that typically includes an electric motor, a battery pack, a controller, and a throttle. Troubleshooting common issues such as motor or battery malfunctions may require a multimeter to test electrical connections and diagnose any problems.
Once you have gathered all the necessary tools and equipment, you can move on to the next step of the conversion process: removing the bicycle’s front wheel and installing the electric motor.

WEIZE Road Bike, 700C Wheel City Commuter Bicycle, 14 Speed Drop Bar, Racing Adult Bike with Caliper Brakes, High-Carbon Steel Hybrid Bikes, Urban Adult Bicycle for Men and Women,White
Caliper brake system: The road bike adopts a dual caliper brake design, which is lighter in overall weight...
As an affiliate, we earn on qualifying purchases.
Remove the Bicycle’s Front Wheel and Install the Electric Motor
Start by removing the front wheel of your bicycle and then proceed to install the electric motor. To install the electric motor, follow these steps:
- Place the motor bracket on the front fork of the bicycle and align it with the mounting holes.
- Insert the bolts through the bracket and secure them tightly with a wrench.
- Attach the electric motor to the bracket using the provided screws and ensure it is securely fastened.
- Connect the motor wires to the controller following the manufacturer’s instructions. Make sure to match the color-coded wires correctly.
- Next, wire the battery pack to the controller using the provided connectors. Double-check the wiring to ensure proper connections.
- Test the motor by turning on the battery pack and gently applying throttle.
Now that the electric motor is installed and wired, you can move on to the next step of installing the battery pack and controller.
Install the Battery Pack and Controller
To ensure optimal weight distribution, I positioned the battery pack in the center of the bicycle frame. This allows for a balanced and stable ride.
Next, I connected the controller to both the motor and the battery pack, establishing the crucial link between the two. This enables efficient communication and control over the electric system, ensuring a smooth and responsive performance.
Position the Battery Pack for Optimal Weight Distribution
Place the battery pack in a central location on your bicycle for balanced weight distribution. This is crucial to ensure optimal handling and stability when riding your electric bike.
By positioning the battery pack in the middle of the frame, you distribute the weight evenly between the front and rear wheels, allowing for better control and maneuverability. Avoid placing the battery too far forward or backward, as it can negatively affect the bike’s balance and overall performance.
Additionally, make sure the battery is securely fastened to the frame to prevent any movement or vibrations during rides.
Once you have positioned the battery pack correctly, you can proceed to connect the controller to the motor and battery, which will enable the electric assistance and power delivery.
Connect the Controller to the Motor and Battery
Now that you’ve positioned the battery pack correctly, you can easily connect the controller to the motor and battery. This step is crucial in turning your bicycle into an electric bike. Here are the steps to follow:
- Start by identifying the wiring and connections on the controller. Refer to the manufacturer’s instructions for guidance.
- Connect the wires from the motor to the appropriate terminals on the controller. Make sure to match the colors correctly.
- Connect the wires from the battery to the corresponding terminals on the controller. Double-check the polarity to avoid any damage.
- Secure the connections using zip ties or electrical tape to prevent any loose wires.
- Finally, test the connections by turning on the system and checking if the motor responds accordingly.
In addition to connecting the controller, it’s important to consider the battery installation. Research different types of batteries and choose the one that suits your needs in terms of capacity and weight. Remember to regularly check the battery’s life and perform maintenance tasks to ensure optimal performance.
Now that the controller and battery are connected, let’s move on to the next step of connecting the electric system to the bicycle’s existing components.
Connect the Electric System to the Bicycle’s Existing Components
To connect the electric system to my bicycle’s existing components, I first attach the throttle and brake levers. This allows me to control the speed and apply the brakes effortlessly.
Next, I connect the electric system to the bicycle’s lighting and display, ensuring that I have clear visibility and can monitor the system’s performance.
These steps are crucial in transforming my bicycle into an electric bike and ensuring a seamless integration of the electric components with the existing ones.
Attach the Throttle and Brake Levers
Attach the throttle and brake levers by sliding them onto the handlebars.
To begin, install the throttle by locating the appropriate location on the handlebars and sliding it into place. Ensure that it is securely attached and aligned with your hand position for easy access while riding.
Next, attach the brake levers by removing the existing ones and replacing them with the electric brake levers. These levers will allow you to control both the electric motor and the brakes simultaneously. Make sure they are firmly in place and adjust them to your preferred position.
Once the throttle and brake levers are properly attached, you can move on to connecting the electric system to the bicycle’s lighting and display. This will provide you with a complete electric bike setup.
Connect the Electric System to the Bicycle’s Lighting and Display
Once the throttle and brake levers are securely attached, I can now connect the electric system to the bicycle’s lighting and display. This step involves connecting the wires from the electric system to the appropriate components on the handlebars. I will also need to choose the appropriate display type for my electric bike, which will allow me to monitor important information such as speed, battery level, and distance traveled.
To make it easier for you to understand, here is a table that shows the different wire connections and their corresponding components on the handlebars:
| Wire Connection | Component |
|---|---|
| Red | Headlight |
| Black | Taillight |
| Yellow | Display |
| Green | Brake |
| Blue | Horn |
Once the electric system is connected to the handlebars, I can move on to the next step of testing the electric system and making any necessary adjustments.
Test the Electric System and Make Adjustments
Now, it’s time to test the electric system and make any necessary adjustments.
Before hitting the road, it’s important to ensure that the installation is functioning properly. To begin, conduct a thorough testing procedure to confirm that all components are working as intended.
Start by checking the battery’s voltage and verifying that it is within the recommended range. Next, test the throttle and brakes to ensure they respond appropriately. If any issues arise, utilize troubleshooting techniques such as inspecting connections, checking for loose wires, or replacing faulty components. It’s crucial to address any problems before proceeding.
Once you’ve completed the necessary adjustments and are satisfied with the system’s functionality, you can move on to the next section, where you’ll ensure the safety and legal compliance of your electric bike.
Ensure the Safety and Legal Compliance of Your Electric Bike
To ensure the safety and legal compliance of your e-bike, it’s important to familiarize yourself with local regulations and make any necessary modifications.
Electric bike regulations vary from place to place, so it’s crucial to understand the specific requirements in your area. Some locations may have speed limits for electric bikes or restrict them from certain areas like sidewalks or bike paths. Additionally, there might be specific safety gear requirements such as helmets or reflective clothing. It is essential to adhere to these regulations to avoid fines or legal issues.
Once you have ensured that your electric bike meets all the necessary safety and legal requirements, you can move on to the next section about maintaining and caring for your electric bike.
Maintain and Care for Your Electric Bike
I need to regularly check and recharge the battery of my electric bike to ensure its optimal performance. This involves monitoring the battery level and charging it when necessary, following the manufacturer’s guidelines.
Additionally, I should keep the electric components of my bike clean and dry to prevent damage and ensure their longevity. This can be achieved by using a damp cloth to wipe away any dirt or debris and storing the bike in a dry place when not in use.
Regularly Check and Recharge the Battery
Make sure to regularly check and recharge the battery for your electric bike. Proper battery maintenance is crucial to ensure optimal performance and longevity. Here are some battery charging tips to keep in mind:
- Always use the charger provided by the manufacturer to avoid any compatibility issues.
- Charge the battery in a cool and well-ventilated area to prevent overheating.
- Avoid charging the battery immediately after a ride to allow it to cool down.
- Aim to keep the battery level between 20% and 80% for the best battery health.
- If you’re storing the bike for an extended period, charge the battery to around 50% and store it in a cool, dry place.
By following these battery charging tips, you can maximize the lifespan of your electric bike’s battery.
Additionally, it’s important to keep the electric components clean and dry to ensure their proper functioning. Transitioning into the subsequent section, maintaining a clean and dry environment is essential for the overall longevity of your electric bike.
Keep the Electric Components Clean and Dry
Ensure that you regularly clean and keep the electric components of your bike dry for optimal performance and longevity. Proper electric component maintenance is crucial to prevent water damage and ensure that your electric bike functions seamlessly. Water can cause corrosion and short circuits, leading to costly repairs or even permanent damage.
To keep your electric components clean, use a dry cloth to wipe them down, removing any dirt or debris. Avoid using water or liquid cleaners as they can seep into sensitive areas. Additionally, make sure to store your electric bike in a dry location to prevent moisture accumulation.
By taking these simple precautions, you can enjoy your new electric bike and explore the possibilities it offers without worrying about water damage.
Enjoy Your New Electric Bike and Explore the Possibilities
Explore all the possibilities and enjoy your new electric bike to the fullest.
With your upgraded ride, you can now venture into exciting new electric bike trails and experience the many benefits of electric bike commuting.
Electric bikes provide a convenient and eco-friendly alternative to traditional modes of transportation. They allow you to effortlessly navigate through traffic, saving you time and reducing your carbon footprint.
Additionally, electric bikes offer a great way to explore the outdoors and connect with nature. Whether you’re commuting to work or embarking on a weekend adventure, your new electric bike opens up a world of opportunities.
So, hop on your bike, embrace the freedom it offers, and start discovering all the amazing experiences waiting for you.
Enjoy the ride!
Frequently Asked Questions
How long does it take to convert a bicycle into an electric bike?
On average, converting a bicycle into an electric bike takes a few hours. The necessary tools include a conversion kit, wrenches, pliers, and a screwdriver. The process involves attaching a motor, battery, and controller to the bike.
What is the average cost of an electric bike conversion kit?
The average cost of an electric bike conversion kit is around $500. However, it’s important to choose a reliable brand like Bafang or Voilamart for better performance and durability.
Can any bicycle be converted into an electric bike?
Not all bicycles can be converted into electric bikes due to limitations. Converting a bicycle into an electric bike has pros like increased speed and distance, but cons include added weight and potential damage to the frame.
Are there any weight limitations for installing an electric motor on a bicycle?
Are there weight limitations for installing an electric motor on a bicycle? What safety considerations should be taken into account? It is crucial to consider weight limitations and safety measures when adding an electric motor to a bicycle.
Do I need any special skills or knowledge to convert my bicycle into an electric bike?
No special skills or knowledge are required to convert your bicycle into an electric bike. However, some special tools and necessary components, such as an electric motor kit, battery, and controller, will be needed.
Conclusion
Well, there you have it – your very own electric bike! It may have taken some effort and a bit of tinkering, but the end result is worth it.
Just like the feeling of freedom when you first learned how to ride a bike, this new electric bike opens up a whole world of possibilities.
It’s like having a gentle tailwind at your back, propelling you forward effortlessly.
So hop on, explore the world around you, and let your electric bike become your trusty companion on all your adventures.