Are you prepared to upgrade your bike with more power? Converting your ordinary bike into an electric one is simpler than you may believe. With the appropriate conversion kit and a few easy steps, you’ll be enjoying rides on an electric bike in no time.
In this article, we’ll guide you through the process, from assessing your bike’s compatibility to installing the electric components.
So, strap on your helmet and get ready to pedal into the future with your very own electric bike.
Key Takeaways
- Choose a motor and battery based on power output, size, weight, and compatibility with the bike.
- Consider the range, charging time, and capacity of different battery options for desired distance requirements.
- Select a motor type for optimal efficiency and battery range, such as lithium-ion batteries with high energy density and long lifespan.
- Ensure proper wiring installation and controller compatibility for safe and efficient conversion.
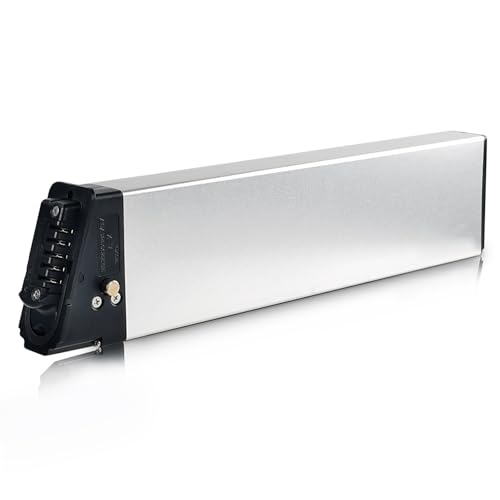
ShunTongDa 48V 10.4Ah 14Ah Folding Ebike Battery 48 Volt DCH-006 Built in Electric Bike Batteries with 30A BMS Totguard for 250W 500W 750W 1000W Motor Foldable E-Bike Battery (48V10.4Ah A Grade Cell)
①Battery Type: 18650 lithium ion batteries, Voltage: 48V, Capacity: 10.4Ah, Real High-Label Capacity. 30A BMS, Wattage at 500Wh,...
As an affiliate, we earn on qualifying purchases.
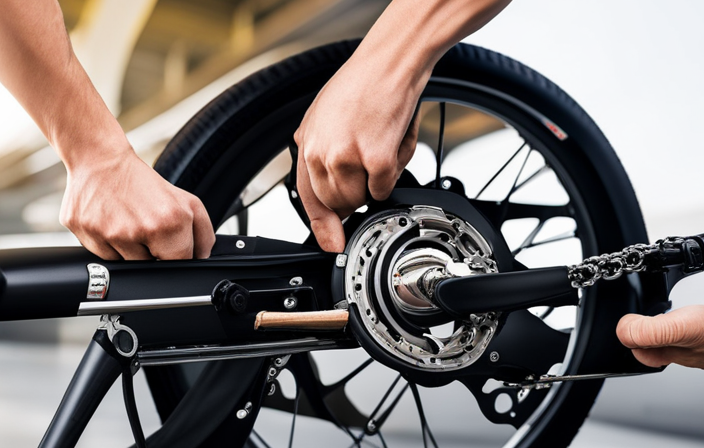
Assess Your Bike’s Compatibility
You’ll need to assess if your bike is compatible for an electric conversion. Start by choosing the right motor for your bike. Consider factors such as the power output, size, and weight of the motor.
Evaluate battery options based on their capacity, voltage, and weight. Determine if your bike has enough space to accommodate the battery and if it can handle the added weight. Additionally, consider the range and charging time of different battery options.
Once you have assessed your bike’s compatibility and chosen the right motor and battery, you can move on to the next section about choosing the right conversion kit. This will ensure that you have all the necessary components to successfully convert your bike to electric.
Amazon Product B0CYT6TBYX
As an affiliate, we earn on qualifying purchases.
Choose the Right Conversion Kit
When choosing the right conversion kit for your electric bike, there are three key points to consider.
First, you need to consider the motor type that’s compatible with your bike and your specific needs.
Second, evaluate the different battery options available. Take into account factors such as capacity, weight, and range.
Lastly, determine the controller requirements for your conversion kit. Ensure that it’s compatible with your bike’s existing components and provides the necessary functionality.
Consider Motor Type
To make your bike electric, you can choose from different motor types. When considering motor type, it is important to think about motor efficiency and battery range.
The motor efficiency refers to how effectively the motor converts electrical energy into mechanical energy. A higher motor efficiency means that your bike will be able to go further on a single charge.
The battery range, on the other hand, refers to how far your bike can travel on a full battery. This is influenced by both the motor efficiency and the capacity of the battery.
By selecting the right motor type, you can ensure that your bike will have optimal motor efficiency and battery range.
Now, let’s move on to evaluating battery options for your electric bike.
Evaluate Battery Options
Now, let’s take a look at the different battery options available for your e-bike. When converting your bike to electric, the battery is a crucial component to consider. Here are some battery options you can evaluate:
-
Lithium-ion batteries: These are the most common and widely used batteries for e-bikes due to their high energy density and long lifespan.
-
Lead-acid batteries: Although they are cheaper, lead-acid batteries are heavier and have a lower energy density than lithium-ion batteries.
-
Nickel-metal hydride (NiMH) batteries: These batteries are less common nowadays due to their lower energy density and shorter lifespan compared to lithium-ion batteries.
-
Lithium polymer (LiPo) batteries: These batteries have a higher energy density than lithium-ion batteries, but they are more expensive and require special care during charging.
When choosing a battery for your e-bike, consider the battery capacity, as it determines the range you can achieve. Also, evaluate the charging options available for the battery you choose. They can vary from plug-in charging to removable batteries with external chargers.
With the battery options covered, let’s now transition into determining the controller requirements for your electric bike conversion.
Determine Controller Requirements
Next, let’s explore the necessary controller requirements for your e-bike conversion.
Controller selection is a critical aspect of turning your bike electric. It serves as the brain of your electric system, controlling the power output to the motor and managing the flow of electricity from the battery.
When choosing a controller, consider factors such as voltage compatibility, current rating, and motor compatibility.
Wiring installation is another crucial step in the process. Ensure that you have the appropriate connectors, wires, and tools to connect the controller to the battery and motor. Proper wiring is essential for a safe and efficient electric bike conversion.
Once you have determined the controller requirements, you can move on to the next step of gathering the necessary tools for the installation process.

EVAPLUS UL Certified 54.6V 1.5A Fast Electric Bike Charger for 48V Ebike Battery - Replacement for Razor, Jetson, Voyage, Gotrax, Ninebot,Segway, Hiboy(DC Connector:5.5x2.5/2.1mm)
54.6V 1.5A Smart Charger: for 48V Electric bicycle electric scooter battery, Input Voltage 120VAC 50/60HZ,Over output Voltage Protection;Over...
As an affiliate, we earn on qualifying purchases.
Gather the Necessary Tools
First, gather all the necessary tools for the job. Here are three essential items you’ll need to get started:
-
A conversion kit: Choose the right conversion kit that suits your bike’s specifications and provides the power and speed you desire.
-
Compatible batteries: Find lithium-ion batteries specifically designed for electric bike conversions. Ensure the battery has enough capacity to meet your distance requirements.
-
Basic tools: Have a set of wrenches, screwdrivers, and pliers to remove and install components during the conversion process.
Once you have gathered all the necessary tools, you can move on to the next step, which is removing non-essential components from your bike.

54.6V 2A Electric Charger for 48V Ebike Lithium Battery (13S Li-ion Battery), Electric Bike Charger with 7 Charging Port Plugs
48V Ebike Lithium Battery Charger: Designed for 48V lithium batteries ONLY (13S Li-ion packs / battery voltage marked...
As an affiliate, we earn on qualifying purchases.
Remove Non-Essential Components
To begin the conversion process, start by removing any non-essential components from your bicycle. This step is crucial in making room for the electric components that you will be installing later on. Take off accessories such as fenders, racks, and bells that are not necessary for the functioning of the electric bike.
By doing this, you can reuse these components on another bicycle or sell them to recover some of the costs associated with the conversion. If you don’t plan on reusing these components, there are cost-effective alternatives available in the market. For example, instead of using a traditional rear rack, you can opt for a seat post rack that doesn’t require any additional mounting points.
Once you have removed these non-essential components, you can move on to the next step of installing the electric components, which will give your bike the power it needs.
Install Electric Components
To install electric components on your bike, you’ll need to follow a few key steps.
First, attach the motor to the bike frame securely using the provided brackets and screws.
Next, mount the battery and controller in a convenient and balanced location. Make sure they are easily accessible but won’t interfere with your riding.
Finally, connect the wiring and cables, making sure to follow the provided instructions to ensure proper functioning of the electric system.
Attach Motor to Bike Frame
After attaching the motor to the bike frame, you can move on to the next step in the bike motor installation process.
To ensure a secure attachment, begin by aligning the motor with the frame and making sure it is centered.
Use the appropriate mounting brackets and hardware to secure the motor in place.
Tighten all bolts and screws to ensure a stable connection.
It is important to double-check the alignment and tightness of the motor to prevent any issues during operation.
Once the motor is securely attached, you can now proceed to the next section about mounting the battery and controller.
This step is crucial in completing the electric bike conversion process and will provide power to the motor for a smooth and efficient ride.
Mount Battery and Controller
Once the motor is securely attached, you can now move on to mounting the battery and controller. Battery installation is a crucial step in converting your bike into an electric one. The battery provides the necessary power to run the motor and ensures a smooth ride. To mount the battery, follow these steps:
- Choose a suitable location on the bike frame, ensuring it is secure and easily accessible.
- Use straps or brackets to attach the battery securely to the frame, minimizing any movement or vibration during rides.
- Connect the battery to the controller using the provided wiring harness and connectors.
- Mount the controller near the battery, ensuring it is protected from any external elements.
- Use zip ties or clamps to secure the controller to the bike frame, keeping it stable and preventing damage.
Once the battery and controller are securely mounted, you can now proceed to connect the wiring and cables. This ensures proper communication and power flow between the motor, battery, and controller, allowing for a seamless electric biking experience.
Connect Wiring and Cables
First, connect the wiring and cables to ensure proper communication and power flow between the motor, battery, and controller. This step is crucial for the functioning of your electric bike. Here are some wire connection techniques and cable routing tips to help you with this process:
- Use proper wire connectors such as butt connectors or soldering for secure connections.
- Organize and route the cables in a way that avoids interference with other bike components.
- Secure the cables using zip ties or cable clamps to prevent them from getting caught in moving parts.
- Test the connections by gently tugging on the wires to ensure they are properly secured.
Once you have completed the wiring and cable connections, you can move on to the next step of reassembling and adjusting the components of your electric bike.
Reassemble and Adjust
To reassemble and adjust your bike, you’ll wanna start by attaching the electric motor to the frame. Ensure that it is securely fastened using the appropriate bolts and brackets.
Next, reconnect the wiring and cables, making sure to follow the correct color-coded scheme. Double-check that all connections are tight and free from any damage.
Once the motor is in place, adjust the tension of the drive belt or chain to ensure smooth operation. Use adjustment techniques such as loosening or tightening the tensioner bolts as needed.
If you encounter any issues during this process, troubleshoot by checking the wiring connections and making sure all components are properly aligned.
Finally, ensure safety measures are in place by testing the brakes and adjusting them if necessary. This will guarantee a safe and reliable electric bike experience.
Ensure Safety Measures
Now that you have reassembled and adjusted your electric bike, it’s time to focus on ensuring safety measures.
Safety precautions are of utmost importance when it comes to riding an electric bike. Before you hit the road, make sure to have the right protective gear. A helmet is essential to protect your head from potential injuries. Elbow and knee pads can protect your joints in case of a fall. Don’t forget to wear gloves to enhance your grip and protect your hands.
Additionally, reflective clothing or accessories can increase your visibility, especially when riding at night. Following these safety measures will greatly reduce the risk of accidents and injuries.
With your safety gear in place, you are ready to learn to ride electric and experience the thrill of your newly transformed bike.
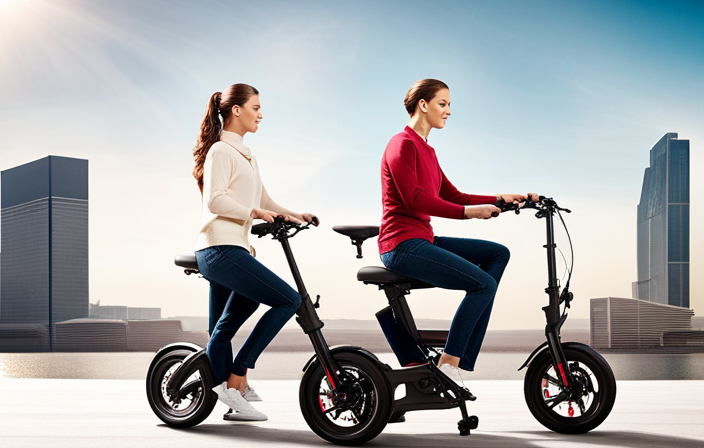
Learn to Ride Electric
Once you feel comfortable with the safety gear, it’s time to start experiencing the thrill of riding an electric bike.
Riding an electric bike offers numerous benefits that make it a popular choice among cycling enthusiasts. First and foremost, electric bikes provide assistance in pedaling, allowing you to cover longer distances with less effort. They also offer various levels of assistance, so you can choose the level that suits your fitness level and desired intensity of workout.
However, it’s important to take certain safety precautions when riding an electric bike. Always wear a helmet and other protective gear, obey traffic laws, and be mindful of your surroundings. Additionally, make sure to familiarize yourself with the controls and features of your electric bike before taking it for a spin.
Now, let’s move on to the next section and learn how to maintain your electric bike properly.
Maintain Your Electric Bike
Make sure you regularly check and maintain the various components of your e-bike to ensure its optimal performance. Electric bike maintenance is crucial to keep your bike running smoothly and avoid any unexpected issues. Here are some key tasks you should perform:
- Check the tire pressure regularly to ensure proper traction and efficiency.
- Clean and lubricate the chain to prevent excessive wear and ensure smooth operation.
- Inspect the brakes for any signs of wear or misalignment and adjust them if necessary.
Troubleshooting common issues is also an important part of maintaining your electric bike:
- If your battery doesn’t hold a charge, try resetting it or consider replacing it.
- If your motor is not functioning properly, check the connections and consult the user manual for troubleshooting steps.
By following these maintenance tips and promptly addressing any issues, you can enjoy your electric bike to the fullest without any interruptions.
Enjoy Your Electric Bike
Get ready to have a blast riding your e-bike and experience the thrill of effortless speed and freedom.
Electric bikes offer a range of benefits that enhance your riding experience. Firstly, they provide assistance with pedaling, making it easier to tackle hills and long distances. This means you can ride for longer periods without getting tired.
Additionally, electric bikes allow you to travel at higher speeds, reaching up to 20 mph, while still maintaining control and safety.
To make the most out of your electric bike, consider investing in some accessories. A helmet is essential for safety, while a bike lock ensures your e-bike stays secure. Other popular accessories include lights for visibility, fenders to protect against splashes, and a pannier or basket for carrying your belongings.
With these accessories, you can fully enjoy the convenience and pleasure of riding your electric bike.
Frequently Asked Questions
Can any type of bike be converted into an electric bike?
Yes, any type of bike can be converted into an electric bike. Converting a mountain bike has pros such as enhanced performance, but cons like increased weight. To choose the right battery, consider factors like capacity, voltage, and compatibility with your bike’s motor.
What factors should be considered when choosing a conversion kit?
Consider the electric bike conversion cost and opt for the best electric bike conversion kits. Keep in mind factors like motor power, battery capacity, ease of installation, and compatibility with your bike model. Remember, "You get what you pay for."
Are there any specific tools required for the conversion process?
To convert your bike into an electric one, you will need specific tools such as wrenches, pliers, wire cutters, and a soldering iron. The step-by-step conversion process involves removing the bike’s pedals, attaching the motor, and connecting the battery and controller.
Can the non-essential components be reinstalled after converting the bike?
Sure, you can reinstall non-essential components after converting your bike, but be cautious of compatibility issues. Ensure the components are compatible with the electric conversion and won’t interfere with the new system’s performance.
How long does it typically take to complete the conversion process?
The time it takes to complete the conversion process depends on various factors, such as your familiarity with bike mechanics, availability of tools, and the complexity of the conversion kit. Common challenges include wiring issues and compatibility problems with existing bike components.
Conclusion
In conclusion, by following these steps, you can successfully turn your bike into an electric one.
While some may argue that the process is complicated and time-consuming, it is worth the effort for the benefits it brings.
Not only will you be able to enjoy a faster and smoother ride, but you will also contribute to a greener environment.
Don’t let the initial challenges discourage you; with the right tools and instructions, you can easily transform your regular bike into an electric one and experience the joy of riding in a whole new way.