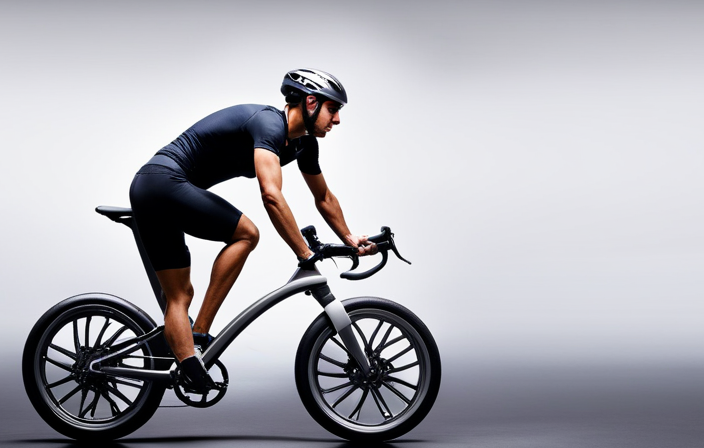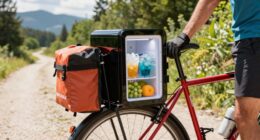

Do you ever dream of smoothly climbing up hills and effortlessly reaching your destination? Well, I have the perfect solution for you.
In this article, I’ll show you how to turn your regular bike into an electric bike. With the right conversion kit and a little know-how, you’ll be zipping around town in no time.
So, let’s get started and transform your two-wheeled companion into a powerful electric ride.
Key Takeaways
- Assess bike compatibility and choose the right conversion kit based on frame type, available space, and weight capacity.
- Consider the advantages and benefits of different conversion options such as front wheel, rear wheel, or mid-drive conversion.
- Pay attention to motor power and battery capacity for optimal performance evaluation.
- Follow the installation process, gather necessary tools, remove non-essential bike components, and connect electric components securely.

Under Armour Squeeze Water Bottles, 32 oz Water Bottles, Sideline Sports Water Bottle with Quick-Shot Lid, Quick & Easy Hydration, Gym Water Bottles, Squeeze Bottle, 1 32oz Bottle
- Easy Hydration: Quick-shot lid and one-way valve
- On-the-Go Use: One-hand operation for active hydration
- Measurement Markings: Ounces and milliliters for tracking
As an affiliate, we earn on qualifying purchases.
Assess Your Bike’s Compatibility
Before you begin, make sure to assess your bike’s compatibility for conversion.
Bike modification is an exciting process that can transform your regular bicycle into an electric-powered machine. However, not every bike is suitable for this conversion.
To determine compatibility, first, consider the frame type. Electric bike conversion kits are typically designed for standard bike frames, so make sure your frame is compatible.
Next, check the available space around the rear wheel. This is where the motor and battery will be installed, so ensure there is enough clearance for these components.
Additionally, assess the bike’s weight capacity to ensure it can handle the added weight of the conversion kit.
By evaluating these factors, you can determine if your bike is ready for the electric bike conversion process.
Now, let’s move on to choosing the right conversion kit.
Choose the Right Conversion Kit
When choosing a conversion kit for turning your bike into an electric one, there are a few key points to consider.
First, you need to decide between a front wheel, rear wheel, or mid-drive conversion. Each option has its own advantages and considerations, such as weight distribution and ease of installation.
Next, it’s crucial to think about the motor power and battery capacity that will suit your needs. Factors like terrain, desired speed, and range will determine the appropriate specifications for your kit.
Lastly, it’s important to compare different conversion kit brands to ensure you’re getting the best quality and value for your investment. Looking at factors like customer reviews, warranty, and included components can help you make an informed decision.
Decide Between Front Wheel, Rear Wheel, or Mid-drive Conversion
I’m not sure which type of conversion to choose: front wheel, rear wheel, or mid-drive. Each option has its own benefits and advantages that are worth considering. Here are some key points to help you make an informed decision:
-
Front Wheel Conversion Benefits:
-
Easier installation compared to other options.
-
Provides better traction and stability, especially on slippery surfaces.
-
Allows you to keep your existing drivetrain intact.
-
Provides a balanced weight distribution.
-
Mid Drive Conversion Advantages:
-
Utilizes the bike’s gears for better efficiency and performance.
-
Offers a more natural riding experience with a lower center of gravity.
-
Provides better torque and power, especially for off-road or hilly terrains.
-
Allows for a wider range of motor power and battery capacity options.
Considering the motor power and battery capacity is crucial for determining the overall performance and range of your electric bike.
Consider the Motor Power and Battery Capacity
The motor power and battery capacity are key factors to consider when determining the overall performance and range of your e-bike. The motor efficiency directly affects how much power is transferred from the battery to the wheels. A more efficient motor will provide better acceleration and top speed while using less energy. This will ultimately increase the battery life and allow for longer rides.
The battery capacity, on the other hand, determines how far you can travel on a single charge. A higher capacity battery will provide a longer range, but it will also increase the weight of your e-bike. It’s important to find the right balance between motor power and battery capacity to meet your specific needs.
When comparing different conversion kit brands, it’s crucial to consider these factors to ensure you make an informed decision.
Compare Different Conversion Kit Brands
To compare different conversion kit brands, it’s essential to consider factors such as motor power, battery capacity, and overall performance. When evaluating the various options, keep the following comparison criteria in mind:
-
Motor Power:
-
Look for a kit with a powerful motor that can provide sufficient torque and speed.
-
Consider the wattage and voltage ratings to determine the motor’s capability.
-
Battery Capacity:
-
Check the ampere-hour (Ah) rating of the battery to gauge its capacity.
-
Consider the range the battery can offer on a single charge.
Additionally, it’s important to take the price range into account when comparing conversion kit brands. By considering these factors, you can make an informed decision about which brand will best suit your needs.
Now, let’s move on to the next section, where we will gather the necessary tools and supplies for the conversion process.
Gather the Necessary Tools and Supplies
First, you’ll need a few tools and supplies to turn your bike into an electric bike. Before you begin, it’s important to assess the compatibility of your bike with an electric conversion kit. Look for a kit that matches the specifications of your bike, such as wheel size, frame type, and brake system.
Take the time to compare different conversion kits available in the market, considering factors like power output, battery capacity, and control options. You’ll also need some basic tools like a wrench, screwdriver, and pliers to complete the installation process.
Once you have gathered all the necessary tools and supplies, you can move on to the next step of removing the non-essential bike components to make room for the electric components.
Remove the Non-Essential Bike Components
First, we need to remove the pedals, chain, and derailleurs from the bike. This will involve using the appropriate tools to unscrew the pedals, break the chain, and detach the derailleurs from the frame.
Next, we can proceed to take off either the front or rear wheel, depending on the specific requirements of the electric conversion kit. This will require loosening the axle nuts or quick release mechanism and sliding the wheel out of the dropouts.
Remove the Pedals, Chain, and Derailleurs
Next, you’ll need to take off the pedals, chain, and derailleurs from your bike. This step is essential in preparing your bike for the electric motor installation. By removing these components, you create space and eliminate any interference with the motor and battery. Here’s a breakdown of how to remove each component:
| Component | Removal Steps |
|---|---|
| Pedals | Use a pedal wrench to loosen and remove the pedals from the crank arms. |
| Chain | Locate the quick link or chain pin and disconnect the chain from the drivetrain. |
| Derailleurs | Unscrew the derailleur hanger bolt and detach the derailleur from the bike frame. |
Once you have successfully removed the pedals, chain, and derailleurs, you can move on to the next step, which is to take off the front or rear wheel. This will further facilitate the installation of the electric motor.
Take Off the Front or Rear Wheel
After successfully removing the pedals, chain, and derailleurs, the next step in converting my bike into an electric bike is to take off the front or rear wheel. This is an important step as it allows for the installation of the electric motor.
Before proceeding, it is crucial to assess the compatibility between the electric motor and the wheel being used. In most cases, a mid drive conversion is preferred as it provides better weight distribution and overall performance.
To remove the wheel, I first release the quick-release lever or loosen the nuts securing the axle. Once loosened, I carefully lift the wheel off the frame, making sure not to damage any surrounding components.
With the wheel removed, I can now move on to the next section: disconnecting and removing the brake system.
Disconnect and Remove the Brake System
To disconnect and remove the brake system, start by squeezing the brake lever to release tension on the brake cable. Next, locate the brake cable where it attaches to the brake caliper or brake arm. Using a wrench or an Allen key, loosen the bolt holding the cable in place and slide the cable out of its housing. Now, you can remove the brake caliper or brake arm from the bike frame by unscrewing the mounting bolts. Once the brake system is detached, you can proceed with installing the motor for your electric bike.
To emphasize the steps involved in removing the brake system, refer to the following table:
| Step | Action |
|---|---|
| 1 | Squeeze brake lever to release tension on brake cable |
| 2 | Loosen bolt and slide brake cable out of housing |
| 3 | Unscrew mounting bolts to remove brake caliper or arm |
Now that the brake system is disconnected and removed, it’s time to move on to installing the electric components without skipping a beat.
Install the Electric Components
To convert my bike into an electric bike, I need to install the necessary electric components.
First, I’ll attach the electric motor to the wheel, ensuring it’s securely in place for optimal performance.
Next, I’ll connect the battery and controller, making sure all the wires are properly plugged in and the connections are tight.
Attach the Electric Motor to the Wheel
Once you’ve gathered all the necessary materials, it’s time to attach the electric motor to the wheel. Before proceeding, it’s important to assess the compatibility of the motor with your bike’s frame and wheel size. Comparing different conversion kits can help you find the best fit for your specific bike model.
To attach the motor, follow these steps:
-
Remove the wheel: Start by removing the wheel from your bike using a wrench or quick-release lever.
-
Attach the motor: Place the electric motor onto the bike frame near the wheel hub. Align the mounting holes and secure it using the provided bolts and washers.
-
Connect the motor to the wheel: Use the included motor bracket or adapter to attach the motor to the spokes or hub of the wheel.
-
Adjust the motor position: Ensure the motor is properly aligned with the wheel and doesn’t interfere with other bike components.
-
Test the motor: Give the wheel a spin to check if the motor engages smoothly and doesn’t produce any unusual noises.
With the electric motor securely attached to the wheel, the next step is to connect the battery and controller, which will be discussed in the following section.
Connect the Battery and Controller
Now that you have the electric motor securely attached to the wheel, it’s time to connect the battery and controller. This step is crucial in transforming your regular bike into an electric one.
Here’s how to do it:
-
First, locate the battery mount on your bike frame and attach the battery securely using the provided brackets or straps.
-
Next, identify the controller mount and fix the controller in place using screws or zip ties.
-
Now, connect the wiring between the battery and controller, ensuring the positive and negative terminals match. Use connectors or solder the wires for a secure connection.
By installing the battery and controller and connecting the wiring, you are now ready to power your electric bike.
The next section will guide you on how to install the throttle or pedal assist sensor, which will allow you to control the speed and assist level of your electric bike seamlessly.
Install the Throttle or Pedal Assist Sensor
By attaching the throttle or pedal assist sensor, you can easily control the speed and assistance level of your electric bike.
When deciding between a throttle or pedal assist, there are pros and cons to consider.
A throttle provides instant control over the bike’s speed, allowing you to accelerate without pedaling. However, it can be less efficient and may drain the battery faster.
On the other hand, pedal assist provides a more natural riding experience by giving you a boost as you pedal. It promotes exercise and extends the battery life, but may not offer the same level of control as a throttle.
One option is to install both the throttle and pedal assist, which combines the benefits of both systems. With both options available, you can choose the control method that suits your riding style or preference.
Now, let’s move on to reassembling and testing the bike, ensuring everything is in working order.
Reassemble and Test the Bike
To reassemble and test the bike, make sure all the parts are securely attached. Here are the steps to follow:
-
Double-check all the bolts and screws: Ensure that all the bolts and screws are tightened properly. Loose parts can lead to vibrations and potential safety hazards.
-
Inspect the wiring connections: Carefully examine all the wiring connections, ensuring they are securely connected and free from damage. Loose or damaged connections can cause electrical issues and affect the performance of your electric bike.
-
Test the functionality: Once everything is securely attached, it’s time to test the bike. Turn on the power and check if all the components, such as the throttle and pedal assist sensor, are working correctly.
By following these steps, you can ensure that your bike is reassembled properly and ready for use.
Now, let’s move on to the next section and learn how to operate your electric bike smoothly.
Transition: Now that we have reassembled and tested the bike, let’s delve into the important aspects of operating your electric bike effectively.
Learn How to Operate Your Electric Bike
Once you understand the controls and settings, operating an electric bike becomes a seamless and enjoyable experience.
To ensure that your electric bike functions properly, it is important to familiarize yourself with some basic maintenance and troubleshooting techniques.
Regular maintenance tasks include checking the tire pressure, inspecting the brakes, and lubricating the chain. Additionally, it is crucial to keep the battery charged and clean, as this will optimize its performance and lifespan.
In case you encounter any issues with your electric bike, common troubleshooting steps include checking the power connection, inspecting the motor, and resetting the system if necessary.
By following these maintenance and troubleshooting practices, you can keep your electric bike in top-notch condition and avoid any potential problems that may arise.
Now, let’s move on to how to maintain and care for your electric bike.
Maintain and Care for Your Electric Bike
When it comes to maintaining and caring for my electric bike, there are three key points that I always keep in mind.
First, I make sure to regularly inspect and clean the electric components to ensure optimal performance and prevent any potential issues.
Second, I check the tire pressure and brake pads to ensure they are in good condition and functioning properly for a safe and smooth ride.
Lastly, I always make sure to store and protect my electric bike properly, keeping it in a secure and dry location to prevent any damage or theft.
Regularly Inspect and Clean the Electric Components
Make sure you regularly inspect and clean the electric components of your bike to ensure proper functioning. Inspecting the equipment will help you identify any issues or wear and tear that may affect the performance of your electric bike. Cleaning the components is essential to remove dirt, debris, and any build-up that can hinder the electrical connections. Here is a visual representation of the steps you should take to inspect and clean your electric bike’s electric components:
| Step | Inspect | Clean |
|---|---|---|
| 1 | Battery connections | Wipe with a clean cloth |
| 2 | Wiring and cables | Use compressed air |
| 3 | Motor and controller | Brush off any debris |
| 4 | Throttle and brakes | Use contact cleaner |
| 5 | Display and controls | Clean with a damp cloth |
Check the Tire Pressure and Brake Pads
After ensuring that the electric components of my bike are in good condition, it is essential to check the tire pressure and brake pads regularly. Common tire pressure mistakes can lead to poor performance and increased risk of accidents. To avoid these issues, I use a reliable tire pressure gauge to measure the pressure and adjust it according to the manufacturer’s recommendations.
Additionally, I pay close attention to the brake pads as they play a crucial role in stopping power and safety. Choosing the right brake pads is vital to ensure optimal braking performance and longevity. I opt for high-quality pads that are compatible with my electric bike’s braking system.
By maintaining proper tire pressure and using the right brake pads, I can confidently ride my electric bike with enhanced safety and efficiency.
Now, let’s discuss how to store and protect your electric bike properly.
Store and Protect Your Electric Bike Properly
To properly store and protect my electric bike, I ensure that it is stored in a secure and sheltered location. This helps prevent any potential damage from weather conditions or theft. I have found that investing in a bike storage solution, such as a sturdy bike rack or a wall-mounted bike hanger, is essential for keeping my electric bike safe and organized.
Additionally, I make sure to cover my bike with a weatherproof cover to shield it from rain, snow, and UV rays. These covers are designed to fit snugly over the bike and provide extra protection against the elements.
By taking these precautions, I can ensure that my electric bike remains in optimal condition and ready for my next ride.
When it comes to upgrading and customizing your electric bike, there are several options available to enhance its performance and personalize its appearance.
Upgrade and Customize Your Electric Bike
When it comes to upgrading and customizing your electric bike, there are several key points to consider.
First, adding accessories like lights and fenders can greatly enhance your riding experience, providing safety and protection from the elements.
Second, exploring different handlebar and seat options can help you find the perfect fit and comfort for your individual needs.
Lastly, personalizing your electric bike’s appearance can be a fun way to make it truly unique and reflect your personal style.
Consider Adding Accessories like Lights and Fenders
Adding accessories like lights and fenders can enhance the functionality and safety of your electric bike.
Lights are essential for increasing visibility, especially when riding at night or in low light conditions. LED lights are energy-efficient and provide bright illumination. They can be mounted on the front and rear of the bike, ensuring that you can see and be seen by others on the road.
Fenders, on the other hand, serve to protect you from splashes and debris. They prevent water and mud from spraying onto you and your bike, keeping you clean and dry. Additionally, fenders help to extend the lifespan of your bike by reducing the amount of dirt and grime that can accumulate on the components.
Now, let’s explore different handlebar and seat options to further customize your electric bike.
Explore Different Handlebar and Seat Options
After considering accessories like lights and fenders, it’s time to explore different handlebar and seat options for your electric bike. These components play a crucial role in determining your comfort and riding experience. With a wide range of styles available, you can choose the one that suits your preferences and needs.
To help you visualize the options, here’s a table showcasing different handlebar and seat styles:
| Handlebar Style | Seat Style |
|---|---|
| Flat Handlebars | Comfort Seats |
| Drop Handlebars | Racing Seats |
| Riser Handlebars | Cruiser Seats |
| Bullhorn Handlebars | Mountain Bike Seats |
| Aero Handlebars | Gel Padded Seats |
Once you’ve selected the desired handlebar and seat styles, it’s important to adjust their height to ensure proper posture and comfort while riding. This can be done by loosening the appropriate bolts, adjusting the height, and tightening the bolts again.
Now that your handlebars and seat are customized to your liking, it’s time to move on to the next section about personalizing your electric bike’s appearance.
Personalize Your Electric Bike’s Appearance
To give your e-bike a unique look, consider customizing its appearance with accessories like colorful decals or a stylish paint job. Another way to personalize your electric bike is by customizing the handlebars. There are various options available, such as different shapes, sizes, and materials. You can choose handlebars that provide better grip and control, or ones that offer a more comfortable riding position.
Additionally, you can personalize the paint job of your e-bike to match your style and preferences. Whether you prefer a sleek and minimalist design or a bold and vibrant one, there are endless possibilities to make your electric bike stand out.
However, while customizing your e-bike, it is important to follow safety guidelines and regulations to ensure a safe and enjoyable riding experience.
Follow Safety Guidelines and Regulations
Make sure you’re familiar with the safety guidelines and regulations when converting your bike into an electric bike. It is crucial to prioritize your safety when riding an electric bike. Wearing protective gear such as a helmet, knee pads, and elbow pads is of utmost importance. These safety precautions can significantly reduce the risk of injuries in case of accidents. Additionally, joining a local electric bike community can provide you with valuable safety tips and support. These communities often organize group rides and share knowledge about electric bike maintenance and safe riding practices. Being part of a community allows you to learn from experienced riders and stay updated on the latest safety regulations. Remember, your safety should always be a top priority when riding an electric bike.
| Safety Gear | Benefits of Joining a Local Electric Bike Community |
|---|---|
| Helmet | Access to safety tips and support |
| Knee pads | Learning from experienced riders |
| Elbow pads | Staying updated on safety regulations |
| Protective gear | Organized group rides |
Frequently Asked Questions
Can I convert any type of bike into an electric bike?
Yes, any type of bike can be converted into an electric bike through an electric bike conversion kit. The benefits of electric bikes include increased speed, reduced effort in pedaling, and the ability to tackle hilly terrains with ease.
What are the factors to consider when choosing a conversion kit for my bike?
When choosing a conversion kit for my bike, I consider several factors and considerations. These include the motor power and type, battery capacity and range, compatibility with my bike, ease of installation, and overall cost.
Are there any specialized tools or skills required for the conversion process?
To convert a bike into an electric bike, necessary tools include wrenches, screwdrivers, and wire cutters. Required skills include basic mechanical knowledge, electrical wiring expertise, and the ability to follow instructions for the conversion process.
Can I reinstall the non-essential bike components after the conversion?
Sure, you can reinstall non-essential bike components after the conversion. However, be cautious of compatibility issues. It’s like fitting a square peg in a round hole, some parts may not work together seamlessly.
Are there any specific safety regulations or guidelines I need to follow when using an electric bike?
When using an electric bike, it is important to adhere to electric bike safety regulations. These guidelines ensure your safety and the safety of others on the road.
Conclusion
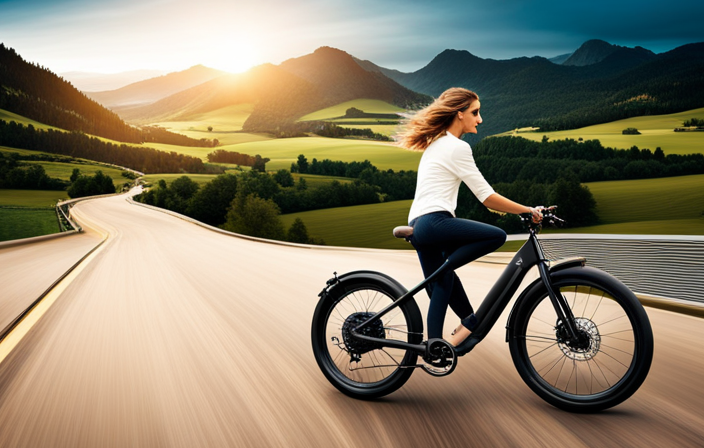
After successfully converting my bike into an electric bike, I can’t help but feel a surge of excitement every time I hit the road. The wind in my hair, the smooth gliding sensation, and the effortless speed make each ride a thrilling adventure.
With my newly upgraded electric bike, I have the freedom to explore new places and conquer challenging terrains. It’s like having my own personal superhero vehicle, ready to take me on incredible journeys.
So why wait? Take the leap and transform your bike into an electrifying companion that will revolutionize your riding experience.