Imagine this: smoothly gliding down the road, feeling the breeze in your hair, while your bicycle propels forward with an added electric kick. It may sound like a fantasy, but it can become a reality.
In this article, I’ll show you how to transform your regular bike into an electric powerhouse. From assessing your bike’s suitability for conversion to choosing the right kit and troubleshooting common issues, we’ll cover it all.
So, gear up and get ready to embark on an electrifying adventure with your very own electric bike.
Key Takeaways
- Electric bikes provide a convenient and effortless riding experience for daily commutes.
- Assessing the suitability of the bike for conversion is crucial, considering factors such as frame compatibility and weight capacity.
- Choosing the right conversion kit involves evaluating battery capacity and motor power to meet specific needs and preferences.
- Proper installation, preparation, maintenance, safety, and legal considerations are essential when turning a bike into an electric bike.

Under Armour Squeeze Water Bottles, 32 oz Water Bottles, Sideline Sports Water Bottle with Quick-Shot Lid, Quick & Easy Hydration, Gym Water Bottles, Squeeze Bottle, 1 32oz Bottle
- Easy Hydration: Quick-shot lid and one-way valve
- On-the-Go Use: One-hand operation for active hydration
- Measurement Markings: Ounces and milliliters for tracking
As an affiliate, we earn on qualifying purchases.
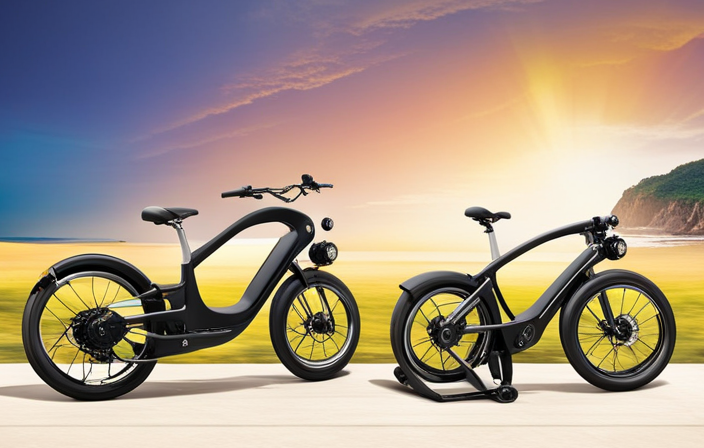
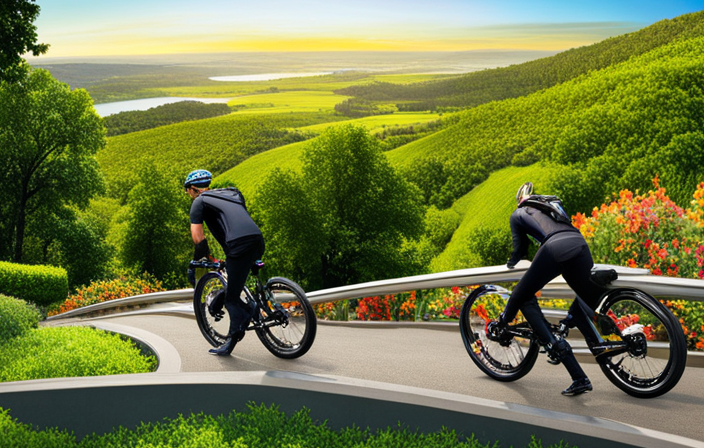
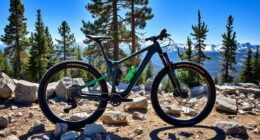
Benefits of Electric Bikes
You’ll be amazed at how electric bikes can transform your daily commute into a thrilling and effortless adventure. With an electric bike, you can say goodbye to the sweat-inducing uphill battles and long, tiring rides.
One of the biggest benefits of electric bikes is their charging time. Most electric bikes can be fully charged in just a few hours, allowing you to quickly get back on the road.
Not only do electric bikes save you time, but they also have a positive environmental impact. By opting for an electric bike instead of a car, you are reducing your carbon footprint and contributing to a cleaner and greener planet.
Now that we have discussed the benefits of electric bikes, let’s move on to assessing your bike’s suitability for conversion.
Assessing Your Bike’s Suitability for Conversion
When assessing the suitability of my bike for conversion, I need to consider three key points.
Firstly, I must ensure that my bike’s frame is compatible with the electric bike conversion kit I plan to use. This includes checking the frame’s dimensions, material, and structural integrity.
Secondly, I need to determine whether my bike’s wheel size and brakes are suitable for an electric conversion. The conversion kit should be compatible with my bike’s existing wheel size, and the brakes should be able to handle the increased speed and weight of an electric bike.
Lastly, I must consider my bike’s weight capacity and ensure that it can safely support the additional weight of the conversion kit, battery, and motor.
Frame Compatibility
Transform your bike into an electric version, and watch as the frame seamlessly embraces the powerful spirit of the new era, like a majestic eagle spreading its wings in the open sky. Assessing frame compatibility is crucial before choosing the right conversion kit. Not all bikes are suitable for electric conversion, as the frame needs to accommodate the added weight and components of an electric system. To help you determine if your bike is compatible, refer to the table below:
| Frame Material | Compatibility |
|---|---|
| Steel | Excellent |
| Aluminum | Good |
| Carbon Fiber | Not Recommended |
Steel frames are highly compatible due to their strength, while aluminum frames offer good compatibility but may require reinforcement in certain areas. Carbon fiber frames, however, are not recommended as they may not withstand the extra stress. Once you’ve assessed frame compatibility, you can move on to the next step, which is evaluating wheel size and brakes.
Wheel Size and Brakes
After assessing frame compatibility, the next step is to consider the wheel size and brakes of your bicycle.
Wheel size compatibility is crucial when converting your bike into an electric one, as it affects the overall performance and stability. It is important to ensure that the motor and battery system you choose are compatible with the wheel size of your bike.
Upgrading the brake system is also essential for safety reasons. Electric bikes tend to have higher speeds, so it is crucial to have reliable brakes that can handle the increased momentum. Consider upgrading to disc brakes, as they provide better stopping power and are less affected by wet conditions.
Moving forward to the next section on weight capacity, it is important to ensure that your bike can handle the additional weight of the electric components.
Weight Capacity
One important consideration is to ensure that your chosen bicycle can handle the additional weight of the electric components. The weight distribution of the bike becomes crucial when converting it into an electric bike.
The added weight of the battery and motor can affect the balance and stability of the bike. It is essential to choose a bike with a strong frame and sturdy construction to handle the increased load. Additionally, carefully consider the placement of the battery. It should be positioned in a way that does not disrupt the balance of the bike or hinder your ability to ride comfortably.
Once you have determined the weight capacity and battery placement, you can move on to choosing the right conversion kit, which will be discussed in the next section.
Choosing the Right Conversion Kit
To create an electrifying experience on your bike, envision yourself effortlessly zooming past traffic with the perfect conversion kit. When choosing the right conversion kit, it’s important to assess battery capacity and compare motor power. Here are two key factors to consider:
-
Assessing Battery Capacity:
- Look for a conversion kit that offers a high-capacity battery to ensure longer rides without frequent recharging.
- Consider the voltage and amp-hour rating of the battery to determine its overall capacity and power output.
-
Comparing Motor Power:
- Opt for a conversion kit with a motor that matches your desired speed and terrain requirements.
- Take note of the motor’s wattage, torque, and RPM to gauge its performance capabilities.
By carefully evaluating battery capacity and motor power, you can find the ideal conversion kit that meets your specific needs.
Once you’ve made your decision, it’s time to gather the tools and materials you’ll need to start the transformation.
Gathering the Tools and Materials You’ll Need
Now that you’ve chosen the perfect conversion kit, let’s dive into gathering all the tools and materials you’ll need for this electrifying transformation.
One of the first things to consider is evaluating the cost of the required tools and materials. Depending on your budget, you may opt for high-end tools or more affordable alternatives.
It’s also important to find tutorials or guides that provide step-by-step instructions on the conversion process, as they can be invaluable resources.
As for the tools themselves, you’ll typically need a set of wrenches, screwdrivers, pliers, wire cutters, and a multimeter for testing electrical connections.
Additionally, gathering materials such as the battery pack, motor, controller, wiring harness, and mounting brackets is crucial.
With all these tools and materials gathered, you can now move on to the next step of removing and preparing your bike’s components for the conversion process.
Removing and Preparing Your Bike’s Components
To prepare my bike for the electric conversion, I first need to remove the wheels. This involves loosening the bolts or quick-release levers that hold the wheels in place and carefully lifting them off the bike frame.
Next, I will detach the chain and pedals. This requires using a chain tool to break the chain and removing the pedals with a pedal wrench.
Finally, I will disconnect the brakes and shifters by loosening the bolts that hold them in place and carefully sliding them off the handlebars.
Removing the Wheels
When you’re ready to transform your bike into an electric powerhouse, the first step is getting those wheels off. Wheel removal is essential for various tasks like tire replacement or installing an electric motor.
To remove the wheels, start by flipping your bike upside down and placing it securely on a stand. Use a wrench to loosen the nuts or quick-release levers on both sides of the axle. Once loose, carefully lift the bike off the ground, holding onto the frame for stability, and slide the wheels out of the dropouts. Remember to release any remaining air pressure in the tires before removing them completely.
Proper wheel removal ensures a smooth transition into the subsequent section about detaching the chain and pedals, allowing you to continue the conversion process seamlessly.
Detaching the Chain and Pedals
Once you’ve successfully removed the wheels, it’s time to tackle the next step in the conversion process: detaching the chain and pedals.
To remove the pedals, you will need a pedal wrench. Start by positioning the wrench on the pedal axle and turn it counterclockwise to loosen the pedal. Once loose, unscrew the pedal by hand. It’s important to note that the left pedal is reverse threaded, so you will need to turn it clockwise to loosen it.
After removing the pedals, you can proceed to detach the chain. Use a chain tool to push out one of the chain pins and separate the chain into two sections. Ensure that the chain you choose for your electric bike conversion is compatible with your chainring and cassette.
Now that the chain and pedals are removed, we can move on to disconnecting the brakes and shifters, ensuring a smooth transition into the next step.
Disconnecting the Brakes and Shifters
Disconnecting the brakes and shifters is a breeze, allowing you to effortlessly transition to the next step of your conversion process.
Start by locating the brake and shifter cables on your bike. Using a 5mm Allen wrench, loosen the bolts that secure the brake and shifter cables to the handlebars.
Once the bolts are loosened, gently pull the cables out of the housing and detach them from the brakes and shifters. Make sure to keep track of which cable corresponds to which brake or shifter.
Now that the cables are disconnected, you can proceed to the next step of your electric bike conversion.
In the subsequent section about installing the electric bike conversion kit, we will explore the process of reconnecting the brakes and shifters, as well as adjusting the brake and shifter cables for optimal performance.
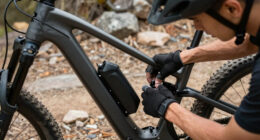
Installing the Electric Bike Conversion Kit
To install the Electric Bike Conversion Kit, all you need is a few basic tools and a willingness to transform your bike into an electric powerhouse. But have you ever wondered how difficult it actually is to complete this transformation? Let’s dive into the process.
First, you need to assess battery power. Choose a location on your bike to mount the battery pack, ensuring it is secure and won’t interfere with other components.
Next, installing the motor is crucial. Remove the bottom bracket from your bike and replace it with the motor assembly. Make sure to follow the manufacturer’s instructions for proper installation.
Once the motor is in place, connect it to the battery pack and secure all the connections.
With the motor and battery installed, you’re ready to move on to adjusting and testing your electric bike, ensuring everything is functioning correctly before hitting the road.
Adjusting and Testing Your Electric Bike
After successfully installing the electric bike conversion kit, it’s now time to adjust and test the effectiveness of your newly transformed electric bike.
One of the key aspects to consider is adjusting the performance of your electric bike to ensure optimal functionality. This can involve adjusting the throttle sensitivity, pedal assist levels, and brake settings to suit your preferences and riding style.
It’s also important to test the effectiveness of the electric motor and battery by taking your electric bike for a test ride. Evaluate how well the motor assists you while pedaling and how long the battery lasts before needing a recharge.
By fine-tuning and testing your electric bike, you can ensure that it meets your expectations and performs at its best.
Now, let’s move on to the next section where we’ll discuss adding additional accessories to further enhance your electric bike riding experience.
Adding Additional Accessories
When it comes to adding additional accessories to my electric bike, there are a few key points I always consider.
First, lights and reflectors are crucial for safety, especially when riding at night or in low visibility conditions.
Second, fenders and mudguards are essential to protect myself and the bike from water, mud, and debris kicked up by the wheels.
Lastly, a rear rack and panniers provide valuable storage space for carrying bags, groceries, or other items, making my electric bike even more versatile and convenient.
Lights and Reflectors
As I ride through the darkened streets, the shimmering lights and reflectors on my bike create a brilliant display, ensuring my safety and visibility to others. Installing reflectors is a crucial step in turning your bike into an electric bike. These small, reflective devices can be easily attached to the front, back, and sides of your bike, increasing your visibility from all angles.
When choosing headlights, it’s important to consider the brightness and beam pattern. LED headlights are a popular choice due to their energy efficiency and long lifespan. Look for headlights with a wide beam pattern to illuminate the road ahead and make you more visible to oncoming traffic.
Now, let’s move on to the next section about fenders and mudguards.
Fenders and Mudguards
Enhance your cycling experience with fenders and mudguards, keeping you dry and mud-free on those rainy rides. Installing fenders on your bike is a simple process that can be done in a few steps.
First, determine the type of fenders that are compatible with your bike’s frame. There are two main types: full fenders and clip-on fenders. Full fenders provide maximum coverage and protection, while clip-on fenders are easier to install and remove.
Once you have chosen the type of fenders, follow the manufacturer’s instructions to attach them securely to your bike. Mudguards, on the other hand, are designed to prevent mud and dirt from splashing up onto your bike and you. They usually attach to the down tube or seat tube of the frame.
Now that your bike is ready for any weather condition, let’s move on to the next section about rear rack and panniers.
Rear Rack and Panniers
Installing a rear rack and panniers on your bicycle can greatly increase its carrying capacity for all your essentials. This is especially important if you’re considering an electric bike conversion, as you may need extra space for batteries or other components.
Here are five key benefits of installing a rear rack and panniers:
-
Enhanced storage: With a rear rack and panniers, you can easily carry groceries, a change of clothes, or any other items you may need on your electric bike journeys.
-
Improved weight distribution: By placing the weight on the rear of the bike, you can maintain better balance and stability while riding.
-
Easy installation: Rear racks and panniers are designed to be easily attached to most bicycles, making the installation process straightforward.
-
Versatility: Rear racks and panniers come in various shapes and sizes, allowing you to choose the ones that best suit your needs.
-
Aesthetically pleasing: Apart from their functionality, rear racks and panniers can also add a sleek and stylish look to your electric bike.
With a rear rack and panniers installed, you can now focus on maintaining your electric bike’s optimal performance.
Maintaining Your Electric Bike
Keeping your electric bike in top condition is crucial to ensure a smooth and enjoyable ride. Proper electric bike maintenance is key to extending battery life and maximizing performance.
Firstly, it is important to regularly check and clean the battery contacts to ensure a good connection. Additionally, keeping the battery charged between 20% and 80% can help prolong its lifespan. It is also recommended to store the battery in a cool, dry place when not in use.
Regularly inspecting and lubricating the chain, gears, and brakes is essential for smooth operation. It is important to check tire pressure and tread wear regularly as well.
Finally, scheduling regular maintenance check-ups with a qualified technician can help identify and address any potential issues before they become major problems. Taking these steps to maintain your electric bike will ensure a safe and reliable ride.
Now let’s move on to some safety tips for riding an electric bike.
Safety Tips for Riding an Electric Bike
Stay safe while riding your e-bike by following these simple tips to ensure a smooth and enjoyable journey. It is important to prioritize your safety by wearing essential safety gear such as a helmet, gloves, and knee pads. Additionally, regular electric bike maintenance is crucial to ensure optimal performance and safety. Keep your brakes well-adjusted and check the tire pressure regularly. It is also important to inspect the battery connections and wiring to prevent any potential issues. To further enhance your safety, consider adding additional safety features such as lights, reflectors, and a horn to make yourself more visible to other road users. Remember to always follow traffic rules and be aware of your surroundings. By taking these precautions, you can have a safe and enjoyable ride. Moving on to legal considerations for electric bikes…
Legal Considerations for Electric Bikes
To ensure you are riding your electric bike in accordance with the law, it’s important to familiarize yourself with the legal requirements and restrictions in your area. Here are some key regulations to consider:
-
Age restrictions: Some jurisdictions have minimum age requirements for riding an electric bike. Make sure you meet the age criteria before hitting the road.
-
Speed limits: Different regions may have specific speed limits for electric bikes. It’s crucial to adhere to these limits to avoid legal consequences.
-
Equipment requirements: Many areas mandate certain equipment for electric bikes, such as lights, reflectors, and horns. Ensure your bike is equipped with the necessary items to comply with the law.
Additionally, it’s essential to consider insurance coverage for your electric bike. While regulations regarding insurance may vary, it’s wise to explore options to protect yourself and your bike in the event of an accident or theft. Understanding the legalities and insurance requirements will help you ride confidently and responsibly.
Transitioning into troubleshooting common issues, let’s now address some common problems that may arise with your electric bike.
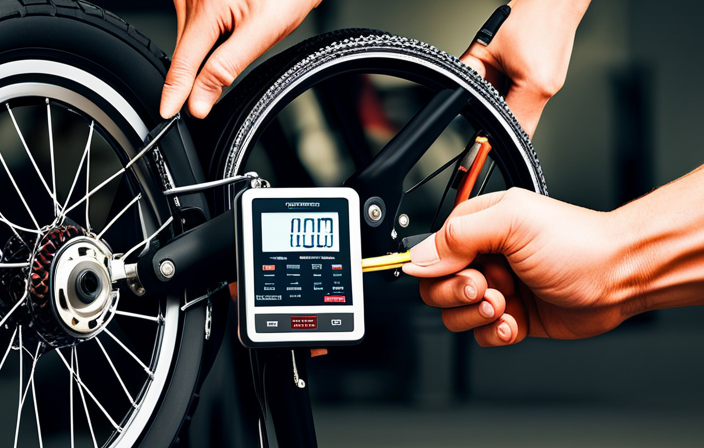
Troubleshooting Common Issues
Experiencing a sudden loss of power on your e-bike can feel like being stranded in the middle of a vast desert with no oasis in sight. To troubleshoot battery issues, start by checking the battery connections and ensuring they are secure. Next, test the battery voltage using a multimeter to see if it is within the recommended range. If the voltage is low, try charging the battery fully and then retesting. If the voltage is still low, it may be time to replace the battery. When diagnosing motor problems, check the motor connections and make sure they are tight. Inspect the motor for any visible damage or signs of wear. If the motor still isn’t functioning properly, it may need to be repaired or replaced. Transitioning into the next section about upgrading and customizing your electric bike, it’s important to troubleshoot and resolve any issues before making any modifications.
Upgrading and Customizing Your Electric Bike
When it comes to upgrading and customizing your electric bike, there are three key points to consider.
First, swapping components for higher performance can greatly enhance the overall functionality and efficiency of your bike.
Second, personalizing the aesthetics of your electric bike allows you to showcase your unique style and make it truly your own.
Lastly, adding accessories for convenience, such as racks, lights, and baskets, can greatly improve the practicality and usability of your electric bike.
By exploring these areas, you can create a customized electric bike that meets your specific needs and preferences.
Swapping Components for Higher Performance
Upgrading the components can significantly enhance the performance of your bike, allowing for a smoother and more efficient ride. By swapping out certain parts, you can increase the speed and overall power of your electric bike. One key component to consider upgrading is the motor. A more powerful motor can provide a higher top speed and better acceleration. Additionally, upgrading the battery can increase the range of your bike, allowing you to ride for longer distances without needing to recharge. Another important component to upgrade is the controller, which regulates the power output from the battery to the motor. A more advanced controller can improve the responsiveness and efficiency of your bike. By upgrading these components, you can transform your electric bike into a high-performance machine. With the increased speed and power, you’ll be able to take your rides to the next level. In the next section, we will explore how to personalize the aesthetics of your electric bike.
Personalizing the Aesthetics
Get ready to unleash your inner artist and give your two-wheeled canvas a unique and captivating visual identity that will make heads turn and hearts race.
When it comes to personalizing the aesthetics of your electric bike, there are a plethora of customization options and DIY modifications available. You can start by choosing a color scheme that reflects your personality and style, whether it’s a bold and vibrant design or a sleek and minimalist look.
Additionally, you can add decals, stickers, or even custom paint jobs to make your bike truly stand out. Don’t forget about the smaller details like handlebar grips, seat covers, and pedals, which can also be customized to match your preferences.
By adding your personal touch to the appearance of your electric bike, you’ll create a ride that is as visually stunning as it is exhilarating.
Now, let’s move on to the next section about adding accessories for convenience.
Adding Accessories for Convenience
Enhance your riding experience by equipping your two-wheeled companion with a range of convenient accessories that will make every journey a breeze.
As part of the converting process to turn your bike into an electric bike, it is important to consider the various charging options available. One popular accessory is a removable battery pack that can be charged separately, allowing for easy and convenient charging at home or on the go.
Additionally, installing a handlebar-mounted display that shows battery life and power output can help you monitor your bike’s performance. Other useful accessories include a built-in USB port for charging your devices while on the move, as well as a rear rack for carrying extra gear or groceries.
By adding these accessories, you can transform your bike into a versatile and convenient mode of transportation. Joining the electric bike community opens up a world of possibilities for eco-friendly commuting and exploration.
Joining the Electric Bike Community
Joining the electric bike community can be a great way to reduce your carbon footprint. Over 66% of electric bike owners report that they ride more frequently than they did with a regular bike.
To join this community, you can start by exploring electric bike conversion kits. These kits allow you to easily transform your existing bike into an electric one. They provide you with the benefits of an electric bike without the need to purchase a new one.
Additionally, finding local electric bike groups can help you connect with other enthusiasts. It can also provide valuable insights into maintaining and optimizing your electric bike. Joining these groups allows you to learn about new routes, share experiences, and even participate in group rides.
Being a part of the electric bike community not only enhances your riding experience but also fosters a sense of camaraderie among fellow electric bike enthusiasts. Ultimately, it allows you to enjoy the ride on your electric bike to the fullest.
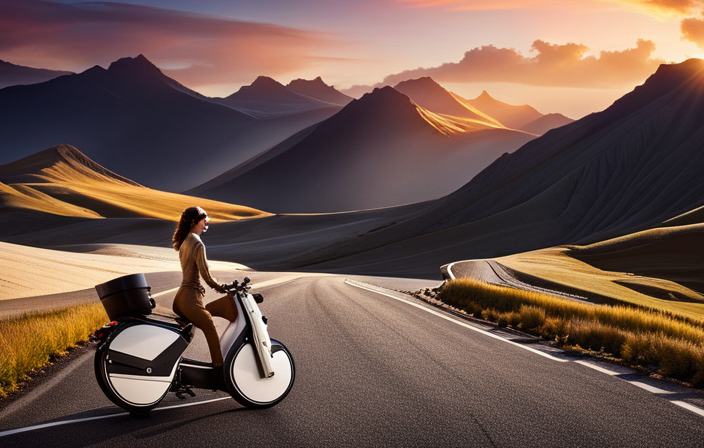
Conclusion: Enjoying the Ride on Your Electric Bike
Experience the thrill and freedom of riding on an electric bike, embracing the joy of the journey and the endless possibilities that await you.
Maintaining your electric bike and improving battery life are crucial for a smooth and enjoyable ride. Regular maintenance includes checking tire pressure, lubricating the chain, and inspecting the brakes.
Keeping your battery in optimal condition is essential for maximizing its lifespan. To improve battery life, avoid overcharging or fully depleting it and store it in a cool, dry place when not in use. It’s also important to clean the battery terminals regularly and avoid exposing it to extreme temperatures.
By following these maintenance tips and taking care of your battery, you can ensure a longer range and a more efficient ride on your electric bike.
So, get ready to hit the road and enjoy the exhilarating experience of riding your electric bike.
Frequently Asked Questions
Are there any specific safety precautions I should take when converting my bike into an electric bike?
When converting a bike to electric, it’s crucial to prioritize safety. Equip yourself with proper safety gear like a helmet, reflective clothing, and lights. Regularly check battery maintenance, ensuring it’s securely fastened and charged to avoid any mishaps.
Can I still use my bike as a regular bicycle after converting it into an electric bike?
Yes, after converting my bike into an electric bike, I can still use it as a regular bicycle. It offers the benefits of using an electric bike for commuting while retaining the option to pedal manually.
Will converting my bike into an electric bike affect its warranty?
Converting your bike to electric may void its warranty and impact insurance coverage. Altering the original design can be seen as a modification, making it important to check with the manufacturer and insurance provider beforehand.
How long does it typically take to install an electric bike conversion kit?
Typically, it takes around 2-4 hours to install an electric bike conversion kit. However, there can be common challenges like aligning components or adjusting the brakes that may increase the installation time.
Are there any restrictions or regulations regarding the use of electric bikes in my area?
In urban areas, electric bikes offer benefits like reduced emissions and increased speed. However, drawbacks include limited range and reliance on charging infrastructure. Regulations for electric bikes vary among cities and countries, so it’s important to research local laws before riding.
Conclusion
After going through the process of converting my bike into an electric bike, I must say, it’s been quite the ride!
Not only have I experienced the numerous benefits of electric bikes, such as increased speed and reduced effort, but I’ve also become a part of the vibrant electric bike community.
Troubleshooting common issues and upgrading my electric bike has allowed me to truly make it my own.
So, if you’re ready to take your biking experience to the next level, hop on the electric bike bandwagon and enjoy the electrifying journey ahead!