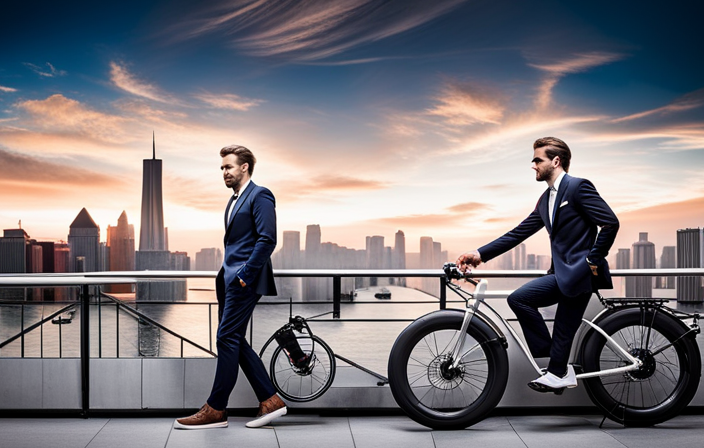
Are you prepared to upgrade your regular bike into an electrifying adventure? Prepare to enjoy the excitement of easy pedaling and increased range with an electric bike conversion.
In this comprehensive guide, I’ll walk you through the step-by-step process of turning your regular bicycle into a powerful, eco-friendly electric bike.
From choosing the right bike for conversion to installing the electric conversion kit and adding extra features, you’ll have all the information you need to embark on this exciting transformation.
Get ready to revolutionize your cycling experience.
Key Takeaways
- Lithium-ion batteries are commonly used for their high energy density and long lifespan in electric bike conversion kits.
- Hub motors provide direct power to the wheels and are simpler to install, while mid-drive motors offer better balance and performance by driving the crankshaft.
- When choosing a bike for conversion, consider factors such as frame size, weight capacity, and the bike’s weight and balance for a smooth and safe riding experience.
- Necessary tools and materials for the conversion include a motor kit, battery pack, and miscellaneous tools like wrenches and screwdrivers. Prioritize safety by ensuring components meet safety standards and sourcing them from reputable suppliers.

Under Armour Squeeze Water Bottles, 32 oz Water Bottles, Sideline Sports Water Bottle with Quick-Shot Lid, Quick & Easy Hydration, Gym Water Bottles, Squeeze Bottle, 1 32oz Bottle
- Easy Hydration: Quick-shot lid and one-way valve
- On-the-Go Use: One-hand operation for active hydration
- Measurement Markings: Ounces and milliliters for tracking
As an affiliate, we earn on qualifying purchases.
Understanding Electric Bike Conversion Kits
Understanding electric bike conversion kits can be a game-changer for transforming your regular bike into an electric one.
When it comes to understanding battery technology, it’s crucial to know that lithium-ion batteries are the most common choice due to their high energy density and long lifespan. They provide efficient power delivery while being lightweight and easy to recharge.
Comparing different motor options is equally important. There are two main types: hub motors and mid-drive motors. Hub motors are simpler to install and provide direct power to the wheels, while mid-drive motors offer better balance and performance by driving the crankshaft.
Ultimately, the choice between the two depends on your specific needs and preferences.
By understanding battery technology and comparing motor options, you can make an informed decision when converting your bike into an electric one.
Choosing the Right Bike for Conversion
When choosing the right bike for conversion, it’s important to consider factors like frame size and weight capacity. Choosing the right frame for your conversion is crucial in ensuring a successful electric bike transformation.
The frame should be sturdy enough to support the added weight of the electric components without compromising its integrity. Additionally, considering the weight and balance of the bike is essential for a smooth and safe riding experience.
A heavier bike may require more powerful motor and battery to maintain balance and provide adequate propulsion. On the other hand, a lighter bike may be more agile but may not have enough stability for the added weight.
Carefully evaluating the frame’s weight capacity and balance will help you select the right bike for your electric conversion project.
Gathering the Necessary Tools and Materials
To gather the necessary tools and materials, you’ll need to make a list of items required for the conversion process. Here are the essential components you’ll need:
-
Motor kit: This includes a motor, controller, and wiring harness. Make sure to choose a motor that is compatible with your bike’s frame and wheel size.
-
Battery pack: Select a lithium-ion battery with a suitable voltage and capacity for your desired range. Consider factors like weight and mounting options.
-
Miscellaneous tools: You will need a set of wrenches, screwdrivers, wire cutters, and crimping tools to install the components properly.
When sourcing components, it’s crucial to prioritize safety considerations. Ensure that the motor and battery meet safety standards and have built-in protection features. Additionally, choose a reputable supplier to guarantee the quality of the components.
Remember to wear protective gear when working with electrical components and follow all safety guidelines provided by the manufacturer.
Removing the Bicycle’s Existing Components
Start by removing the existing components of your bicycle. This is a crucial step in the process of turning your bike into an electric one. The first component to remove is the chain, which can be done by using a chain tool to break the chain and remove it from the bike. Next, remove the pedals by using a pedal wrench to unscrew them from the crank arms. Then, remove the front and rear derailleurs by loosening the bolts that hold them in place and sliding them off the bike. Finally, remove the brake calipers by loosening the bolts that attach them to the frame.
Removing these components allows for a clean slate to work with when installing the electric components. It is important to note that there are alternative methods of converting a bike into an electric one, such as using a conversion kit that can be attached to the existing components. However, removing the existing components provides a more seamless integration of the electric components and ensures optimal performance.
The following table showcases the components that need to be removed and the tools required for each:
| Component | Removal Method | Required Tool |
|---|---|---|
| Chain | Use chain tool | Chain tool |
| Pedals | Unscrew from crank arms | Pedal wrench |
| Front Derailleur | Loosen bolts and slide off | Allen wrench |
| Rear Derailleur | Loosen bolts and slide off | Allen wrench |
| Brake Calipers | Loosen bolts and remove | Allen wrench |
Removing the existing bike components may seem daunting, but with the right tools and a bit of patience, it can be accomplished smoothly. Once these components are removed, you will be ready to move on to the next step of the conversion process.
Installing the Electric Conversion Kit
First, you’ll need to install the electric conversion kit onto your bicycle. This kit includes a motor, battery, controller, and wiring. Here’s a step-by-step guide on how to install it:
-
Start by removing the bottom bracket of your bike using a wrench. This is where the motor will be installed.
-
Attach the motor onto the bottom bracket using the provided brackets and screws. Make sure it’s securely fastened.
-
Connect the motor to the controller using the wiring harness. Follow the color-coding instructions for proper connection.
-
Mount the battery onto the frame of your bike using the included battery mount. Ensure it’s in a secure and stable position.
-
Connect the battery to the controller using the wiring harness. Double-check the connections to avoid any issues.
-
Finally, test the electric conversion kit by turning on the battery and controller. Troubleshoot common issues like faulty wiring or loose connections if necessary.
By following these steps, you can successfully install the electric conversion kit onto your bike and enjoy the benefits of an electric bicycle.
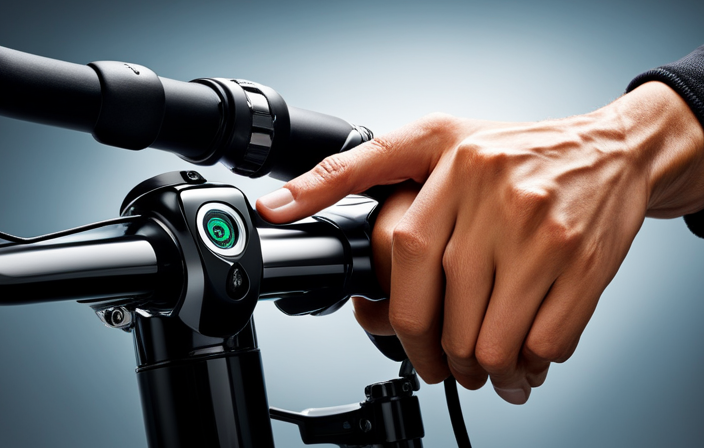
Connecting the Motor and Battery
Once you have securely attached the motor onto the bottom bracket, the next step is to connect it to the battery. Motor and battery compatibility is crucial to ensure optimal performance and safety. Before making any connections, it is essential to check the specifications provided by the manufacturer for both the motor and battery. This will ensure that they are compatible in terms of voltage, current, and power output.
To make the necessary connections, refer to the wiring diagram provided with the electric conversion kit. This diagram will guide you on how to connect the motor and battery correctly. It is important to follow the instructions carefully to avoid any damage or malfunction.
In order to keep the audience engaged, let’s take a look at a table that summarizes the wiring connections for a typical electric bike conversion:
| Motor Connections | Battery Connections |
|---|---|
| Motor "+" wire | Battery "+" wire |
| Motor "-" wire | Battery "-" wire |
| Motor control wire | Battery control wire |
By following this table and the provided wiring diagram, you can ensure a successful connection between the motor and battery, allowing your bike to run smoothly as an electric one.
Testing and Adjusting the Electric System
To test and adjust the electric system, I should begin by ensuring that all the connections between the motor and battery are secure and correctly wired according to the provided diagram. This step is crucial to ensure the proper functioning of the electric bike.
Once the connections are checked, I can move on to testing the system. One important testing technique is to use a multimeter to measure the voltage and current at different points in the system. This will help me identify any potential issues or weak spots.
Additionally, I can test the performance of the electric system by taking the bike for a ride and observing its speed, acceleration, and overall power. Based on the test results, I can make adjustments to optimize the performance of the electric system, such as adjusting the voltage or current levels.
By thoroughly testing and adjusting the electric system, I can ensure that my bike operates smoothly and efficiently.
Adding Additional Features and Accessories
Adding extra features and accessories can enhance the functionality and style of your electric bike.
When it comes to upgrading brakes, you have several options. One option is to replace the stock brake pads with high-performance ones that offer better stopping power and durability. Another option is to upgrade to hydraulic disc brakes, which provide even more stopping power and better modulation.
Upgrading the suspension is another way to improve the overall performance of your electric bike. Consider replacing the stock suspension fork with a high-quality one that offers better damping and adjustability. This will provide a smoother and more controlled ride, especially when tackling rough terrains.
Additionally, you can add accessories like a rack and panniers for increased carrying capacity, or a comfortable saddle for long rides. These upgrades will not only improve the functionality of your electric bike but also elevate its style and make it a more enjoyable ride.
Maintaining and Troubleshooting Your Electric Bike
Make sure you regularly check the battery level and keep it properly charged to maintain the optimal performance of your electric bike. Troubleshooting battery issues is crucial for ensuring a smooth ride.
If you notice a sudden decrease in battery life, first check for any loose connections or damaged wiring. Clean the battery terminals regularly to prevent corrosion, as this can affect the battery’s performance.
In case of battery failure, it’s important to replace it with a compatible and high-quality battery.
Maintaining the motor is equally important. Regularly inspect the motor for any signs of wear or damage. Keep it clean and lubricated to reduce friction and extend its lifespan.
If you encounter any issues with the motor, consult the manufacturer or a professional electric bike technician for assistance.
Enjoying the Benefits of Your Electric Bike
Get ready to experience the many benefits of riding an electric bike. With an electric bike, you can enjoy the convenience of commuting without the hassle of traffic or the struggle of pedaling up hills.
Here are some reasons why electric bike commuting is beneficial:
-
Increased Efficiency:
-
Electric bikes provide a boost of power when needed, allowing you to cover more distance with less effort.
-
The pedal-assist feature helps you maintain a consistent speed, reducing fatigue during long rides.
-
Health Benefits:
-
Electric biking still requires pedaling, which provides a good cardiovascular workout and helps improve endurance.
-
Regular electric bike commuting can contribute to weight loss and muscle toning.
By incorporating an electric bike into your daily routine, you can enjoy the convenience of commuting while reaping the health benefits of regular exercise.
So, get ready to pedal your way to a healthier and more efficient lifestyle.
Frequently Asked Questions
How much does it cost to convert a regular bike into an electric one?
Converting a regular bike into an electric one can cost anywhere from $500 to $2000, depending on the quality of components and battery. However, the benefits of electric bikes, such as increased speed and reduced effort, outweigh the cost comparison.
Can I convert any type of bike into an electric bike?
Yes, any type of bike can be converted into an electric bike. Electric bike advantages include faster speeds, longer distances, and easier uphill climbs. There are different types of electric bike motors, such as hub motors and mid-drive motors.
How long does it take to install an electric conversion kit?
The installation time for an electric conversion kit can vary depending on your experience and the complexity of the kit. On average, it takes about 2-4 hours. Common issues may include compatibility problems and troubleshooting electrical connections.
Is it possible to switch back to a regular bike after converting it into an electric one?
Yes, it is possible to switch back to a regular bike after converting it into an electric one. However, there are pros and cons to consider. Converting offers convenience and speed, but it may reduce the bike’s range and require additional maintenance.
Are there any legal restrictions or requirements for riding an electric bike?
There are legal restrictions and requirements for riding an electric bike. It is important to follow electric bike regulations and be aware of safety concerns, such as wearing a helmet and obeying traffic laws.
Conclusion
After going through the process of converting my bike into an electric one, I can confidently say that the theory of turning a regular bike into an electric one is indeed true.
By following the steps outlined in this article, I was able to successfully transform my bike and enjoy the benefits of an electric ride.
It was a technical and detailed process that required the right tools and materials, but the end result was well worth the effort.
So, if you’re considering converting your bike, don’t hesitate to give it a try – you won’t be disappointed.