Connect with us

Electric Bike

How To Turn Your Mountain Bike Into A Electric Bike

Published

on

An image showcasing a mountain bike being transformed into an electric bike

I’ve always loved the thrill of mountain biking, but lately, I’ve been wanting to take it up a notch. That’s when I discovered the incredible world of electric bikes.

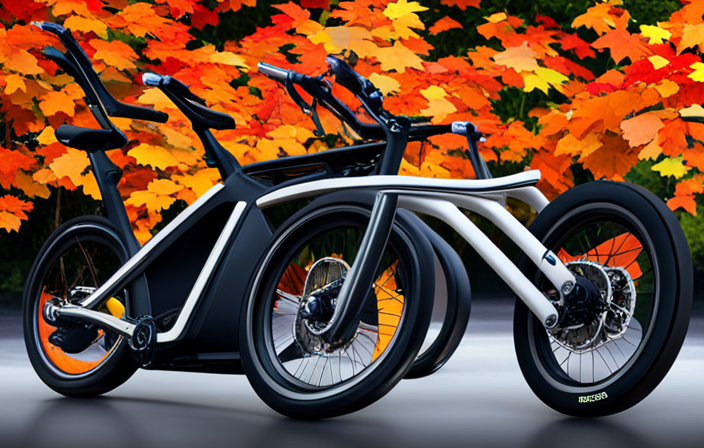
Imagine effortlessly gliding up those steep inclines and conquering challenging terrains with ease. In this article, I’ll guide you through the process of transforming your trusty mountain bike into an electric powerhouse.

We’ll cover everything from assessing compatibility to installing the conversion kit, so you can enjoy the exhilarating benefits of your very own electric mountain bike.

Let’s get started!

Key Takeaways

  • Increased power and speed
  • Easier uphill climbs
  • Switch between motor-assisted and manual modes
  • Enjoyable riding experience

Assess Your Bike’s Compatibility

Advertisement

Before you begin, make sure your bike’s frame and components are compatible with electric bike conversion. Evaluating compatibility is essential to determine the suitability of your mountain bike for the conversion process.

Start by checking the frame material; aluminum or steel frames are usually ideal for conversions due to their durability.

Next, examine the fork and rear dropouts to ensure they can accommodate the additional weight and torque of an electric motor.

Check the bottom bracket shell for clearance and compatibility with the motor and battery.

Assess the brake system to determine if it can handle the increased speed and weight of an electric bike.

Advertisement

Additionally, consider the wheel size and tire clearance, as electric bike components may require specific specifications.

Once you have evaluated compatibility, you can move on to gathering the necessary tools and equipment for the conversion process.

Gather the Necessary Tools and Equipment

Make sure you’ve got all the necessary tools and equipment before starting. Choosing the right battery is crucial for a successful electric bike conversion. You want a battery that is powerful enough to provide the desired range and performance. Look for a lithium-ion battery with a high capacity and voltage. Proper wiring and connection are essential to ensure the safe and efficient operation of your electric bike. Use the table below as a guide to help you gather the necessary tools and equipment for this project:

Tools Equipment Accessories
Wrench set Electric motor Battery charger
Screwdriver set Battery Wire connectors
Pliers Controller Cable ties
Wire cutter Throttle Heat shrink tubing
Electrical tape Pedal assist sensor Velcro straps
Multimeter

Choose the Right Electric Bike Conversion Kit

Advertisement

Now let’s find the perfect electric bike conversion kit for you.

When it comes to choosing the right electric bike conversion kit, there are a few key factors to consider. Here are some important points to keep in mind:

  • Motor Power: Compare the different electric bike conversion kits based on the power of the motor they offer. Higher power means more speed and better performance.

  • Battery Capacity: Look for conversion kits that come with batteries that have a sufficient capacity to meet your riding needs. Consider factors like range and charging time.

  • Compatibility: Ensure that the conversion kit you choose is compatible with your specific bike model and size.

By comparing different electric bike conversion kits based on these factors, you can make an informed decision and select the kit that best suits your needs.

Now, let’s move on to preparing your bike for the conversion by following a few simple steps.

Prepare Your Bike for the Conversion

Before starting the conversion process, it’s crucial to prepare the bike properly.

Advertisement

First, I clean and inspect the bike thoroughly to ensure there are no damages or issues that may affect the conversion.

Next, I remove any unnecessary parts, such as racks or additional accessories, to lighten the overall weight and create more space for the conversion kit components.

Clean and Inspect the Bike

First, it’s important to thoroughly clean and inspect your bike before beginning the conversion process. Cleaning techniques are essential to ensure a smooth and successful conversion.

Start by removing any dirt, mud, or grease using a mild detergent and water. Pay close attention to hard-to-reach areas like the chain, gears, and brakes. Use a brush or toothbrush to scrub away stubborn grime.

Once clean, inspect your bike using an inspection checklist. Check the frame for any cracks or damage, ensuring it is sturdy enough to handle the added weight of the electric components. Examine the brakes, tires, and suspension system for any wear or defects. Don’t forget to inspect the electrical connections and wiring.

Advertisement

Once your bike is clean and inspected, you can confidently move on to the next section and remove unnecessary parts.

Remove Unnecessary Parts

To begin, you’ll want to take off any unnecessary components from the bike. This step is crucial in order to make room for the new electric components. Here’s what you need to do:

  1. Remove the front derailleur: Since you’ll be using an electric motor, you won’t need the front derailleur anymore. Simply loosen the bolts and slide it off.

  2. Take off the chainrings: Upgrading the suspension on your electric bike requires removing the chainrings. Use a chainring tool to unscrew them from the crankset.

  3. Remove the rear derailleur: With the electric motor providing assistance, you won’t need the rear derailleur either. Unscrew the bolts and carefully detach it from the derailleur hanger.

By removing these unnecessary components, you’ll make space for the new electric components.

Now, let’s move on to checking the bike’s frame and components to ensure everything is in good condition.

Check the Bike’s Frame and Components

After removing unnecessary parts from my mountain bike, it was time to move on to the next step of the conversion process: checking the bike’s frame and components. This is an important step to ensure that the bike is compatible with the electric conversion kit and to inspect the overall condition of the bike.

Advertisement

To assess frame compatibility, I carefully examined the frame’s construction and geometry. I made sure that there was enough space to accommodate the conversion components without any interference or structural issues. Additionally, I checked for any signs of damage or cracks that could affect the bike’s performance and safety.

Next, I inspected the bike’s components, such as the brakes, gears, and wheels. I made sure that everything was in proper working condition and adjusted as necessary. This step is crucial to ensure a smooth and reliable electric biking experience.

With the frame and components assessed and inspected, it was time to proceed to the next section: installing the electric bike conversion kit.

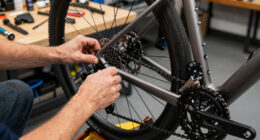
Install the Electric Bike Conversion Kit

Once you’ve gathered all the necessary tools and components, it’s time to start installing the electric bike conversion kit.

Here’s a step-by-step guide to help you through the electric bike conversion process:

Advertisement
  • Begin by removing the rear wheel of your mountain bike and attaching the electric motor to the frame. Make sure to align it properly and tighten the bolts securely.

  • Connect the motor to the battery pack using the provided wiring harness. Double-check the connections to ensure everything is properly attached.

  • The benefits of electric mountain biking are numerous. With the electric bike conversion, you’ll experience increased power and speed, making uphill climbs easier and more enjoyable. Plus, you can switch between motor-assisted and manual modes, giving you complete control over your ride.

With the electric bike kit installed, it’s time to test and adjust your new electric bike for optimal performance.

Test and Adjust the Electric Bike Conversion

Before taking your newly converted electric bike on a ride, it’s crucial to test and adjust various components to ensure optimal performance.

Firstly, check the motor and battery performance by assessing the power output and battery life.

Next, test the brakes and gears to ensure smooth and accurate functionality during rides.

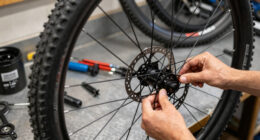
Check the Motor and Battery Performance

To ensure optimal performance, make sure to check the motor and battery of your mountain bike before converting it into an electric bike. Here are some important steps to follow for motor and battery maintenance and troubleshooting common issues:

Advertisement
  1. Inspect the motor: Check for any loose connections or damaged wires. Ensure that the motor is securely attached to the bike frame.

  2. Test the battery: Charge your battery fully and check for any signs of damage, such as leaks or swelling. Verify that the battery connections are tight and secure.

  3. Check the wiring: Examine the wiring for any frayed or exposed areas. Make sure all connections are properly insulated and protected.

  4. Troubleshoot common issues: If your motor or battery is not functioning properly, consult the manufacturer’s manual or reach out to a professional for assistance.

By thoroughly checking the motor and battery, you can avoid potential issues and ensure a smooth conversion process.

Now, let’s move on to testing the brakes and gears.

Test the Brakes and Gears

Now, it’s important to check if the brakes and gears on your bike are working properly.

To ensure a safe and efficient ride, start by checking the brake performance. Squeeze the brake levers and observe if they engage smoothly and provide sufficient stopping power. If the brake pads are worn out or the braking feels weak, it’s time for replacement.

Next, test the gear functionality. Shift through each gear while pedaling and pay attention to any hesitation or skipping. Ensure that the chain moves smoothly between the gears and that there are no unusual noises. If you encounter any issues, consider adjusting the derailleur or replacing worn-out components.

Advertisement

Make any Necessary Adjustments

After testing the brakes and gears, make sure to address any necessary adjustments promptly. Making necessary modifications to your electric mountain bike is crucial to ensure optimal performance and safety. Here are some key adjustments to consider:

  • Adjusting the suspension: Fine-tuning the suspension system is essential for a smooth and comfortable ride. You can adjust the air pressure, rebound, and compression settings to match your riding style and terrain.

  • Checking tire pressure: Maintaining the right tire pressure is vital for a balanced and controlled ride. Make sure to check and adjust the tire pressure regularly to prevent flats and improve traction.

  • Aligning the handlebars and seat: Proper alignment of the handlebars and seat is essential for a comfortable riding position and better control. Ensure that they are adjusted to the correct height and angle.

By making these necessary adjustments, you can optimize your electric mountain bike’s performance and ride quality.

Now, let’s move on to learning how to ride and control your electric mountain bike seamlessly.

Learn to Ride and Control Your Electric Mountain Bike

Once you’ve mastered riding a regular mountain bike, it’s time to learn how to ride and control your new electric mountain bike. Riding an electric mountain bike requires a slightly different approach and understanding of its capabilities. Here are some riding techniques and safety tips to help you get started:

Riding Techniques Safety Tips Equipment Check
Maintain a steady speed to optimize battery life Always wear a helmet Check the brakes and tires for proper functioning
Use the pedal-assist feature to tackle steep inclines Observe traffic rules and signals Ensure the battery is securely attached
Practice smooth acceleration and deceleration Use hand signals when turning Check the lights and reflectors for visibility
Be aware of the bike’s weight and balance when maneuvering Ride defensively and anticipate obstacles Inspect the chain and gears for wear and tear
Practice braking techniques to control speed Ride in well-lit areas at night Check the suspension and adjust if needed

Maintain and Care for Your Electric Mountain Bike

To keep your electric mountain bike in top condition, it’s important to regularly inspect and maintain its components. Proper electric bike maintenance is crucial for ensuring optimal performance and longevity. Here are three essential steps to help you troubleshoot common issues and keep your electric bike running smoothly:

Advertisement
  1. Battery Maintenance:
    Regularly check your battery’s charge level and ensure it is properly connected. Clean the battery terminals to prevent corrosion and maintain a good electrical connection. Follow the manufacturer’s guidelines for charging and storing your battery to maximize its lifespan.

  2. Drive System Inspection:
    Inspect your bike’s drive system, including the motor, chain, and gears. Look for any signs of wear or damage and make necessary adjustments or replacements. Regularly lubricate the chain and gears to reduce friction and extend their lifespan.

  3. Brake and Tire Check:
    Ensure your brakes are functioning properly and adjust them if necessary. Check the tire pressure and tread depth regularly to ensure optimal grip and safety on various terrains.

By following these maintenance steps, you can keep your electric mountain bike in excellent condition.

Now, let’s move on to the importance of observing safety precautions and regulations.

Observe Safety Precautions and Regulations

Make sure you follow all safety precautions and regulations when using your electric mountain bike. Safety gear is essential to protect yourself while riding. Always wear a helmet to safeguard your head from potential injuries. Additionally, knee and elbow pads can provide extra protection in case of falls or accidents.

It is also crucial to be aware of the legal requirements for using an electric mountain bike. Check your local regulations to ensure that your bike meets all the necessary specifications, such as speed limits or age restrictions.

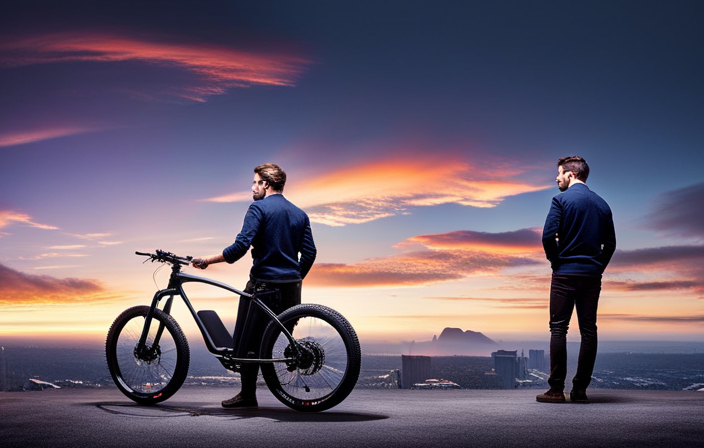
Enjoy the Benefits of Your Electric Mountain Bike

You can fully experience the advantages of your e-bike by exploring new trails and enjoying the thrill of off-road riding. Electric mountain bikes offer a range of benefits that enhance your riding experience. Here are some tips for maximizing your electric bike’s performance:

Advertisement
  • Extended Range: With an electric bike, you can cover longer distances without feeling exhausted. The motor assists your pedaling, allowing you to conquer challenging terrains and explore new trails effortlessly.

  • Improved Climbing: Electric mountain bikes provide extra power when climbing steep hills. The motor helps you maintain a consistent speed and tackle challenging ascents with ease, making your off-road adventures even more enjoyable.

  • Enhanced Control: Electric bikes often come equipped with advanced features like adjustable suspension and responsive brakes, enhancing your control over the bike. These features improve your handling on rough terrain, giving you a smoother and safer ride.

Frequently Asked Questions

How long does it usually take to complete the electric bike conversion process?

The average conversion time for turning a mountain bike into an electric bike varies depending on the complexity of the conversion and the individual’s experience. It typically ranges from a few hours to a few days. Cost estimation also depends on the components and accessories chosen.

Can I still use my mountain bike as a regular bike after the conversion?

Yes, you can still use your mountain bike as a regular bike after the conversion. This means you can enjoy off-road adventures using your mountain bike, while also benefiting from the convenience of an electric bike for commuting.

Will the electric bike conversion affect the weight and balance of my mountain bike?

Yes, the electric bike conversion will affect the weight and balance of your mountain bike. The addition of the electric motor and battery will increase the overall weight, potentially altering the bike’s balance and handling.

Are there any specific maintenance requirements for an electric mountain bike?

Maintaining an electric mountain bike requires attention to battery and motor maintenance. Regularly check and charge the battery, while ensuring proper motor lubrication. These essential tasks will keep your ride smooth and your adventures electrifying.

Are there any legal restrictions or regulations I need to be aware of when riding an electric mountain bike?

When riding electric mountain bikes, it is important to be aware of legal restrictions and regulations. These can vary depending on your location, but may include speed limits, age restrictions, and the requirement of a helmet or license.

Advertisement

Conclusion

As I wrap up this guide on how to turn your mountain bike into an electric bike, I can’t help but feel like a trailblazer in the world of cycling.

It’s truly amazing how technology has evolved to give us the power to transform our beloved bikes into electrifying rides.

With the right conversion kit and a little know-how, you can experience the thrill of effortless speed and power on your favorite trails.

So go ahead, embrace the future and electrify your ride.

Happy cycling!

Advertisement

Zane rides her bike because she loves it, but also because she is mindful of the need to leave a better world for her children.

Continue Reading
Advertisement

Electric Bike

How To Turn On Ancheer Electric Bike

Published

on

By

An image showcasing a person wearing a helmet, mounting their Ancheer Electric Bike, firmly holding the handlebars, effortlessly flipping the power switch, and confidently gliding away amidst a scenic backdrop

As I grip the smooth handlebars of my Ancheer electric bike, I feel a rush of excitement. With just a push of a button, I am whisked away into a realm of easy movement and exhilarating velocity.

In this article, I will guide you through the intricacies of turning on your own Ancheer electric bike. From checking the battery level to engaging the throttle, each step will be explained in detail, empowering you to embark on thrilling adventures with ease.

Let’s dive in and unlock the power of your Ancheer electric bike!

Key Takeaways

  • Press the power button to check the battery level.
  • Locate the power button on the Ancheer e-bike to turn it on.
  • Press and hold the power button to activate the bike’s power system and access additional features.
  • Check the battery indicator light on the handlebar console to determine the battery level.

Check the Battery Level

Check the battery level by pressing the power button on the Ancheer electric bike. This step is crucial to ensure that the bike has enough power for your ride.

Advertisement

The battery level is displayed on the bike’s control panel, indicating the percentage of charge remaining. If the battery level is low, you may need to charge it before starting your ride. Simply connect the charger to the battery and plug it into a power source.

In case the battery needs replacement, consult the user manual or contact Ancheer customer support for assistance.

Now that you have checked the battery level, let’s move on to the next step and locate the power button on the bike.

Locate the Power Button

Locating the power button on your Ancheer e-bike is easy. Once you have found it, you can perform various functions with it.

Here are three important things you can do with the power button:

Advertisement
  1. How to troubleshoot power button issues: If you encounter any problems with the power button, such as it not turning on or not functioning properly, check the connections and ensure that the battery is charged. If the issue persists, consult the user manual or contact Ancheer customer support for assistance.

  2. How to turn off the Ancheer electric bike: To turn off the bike, press and hold the power button for a few seconds until the display turns off. This will conserve battery power and ensure that the bike is completely powered down.

  3. How to turn on the Ancheer electric bike: To turn on the bike, simply press the power button once. You should see the display light up, indicating that the bike is ready to use.

Now that you know how to locate and operate the power button, let’s move on to the next step of pressing and holding the power button for other functions.

Press and Hold the Power Button

Press and hold the power button to access additional features and settings on your Ancheer e-bike. The power button is usually located on the handlebar or the control panel of the bike.

When you press and hold the power button, you activate the bike’s power system and turn it on. This allows you to start using the bike and take advantage of its electric assistance.

Advertisement

The power button is a crucial component of the bike, as it is responsible for turning the bike on and off. Once you have pressed and held the power button, you can then look for the battery indicator light, which will show you the current battery level of the bike.

This is important information to have, as it will let you know when it’s time to recharge the battery.

Look for the Battery Indicator Light

To find out the current battery level of your Ancheer e-bike, simply take a quick glance at the battery indicator light. It is located on the handlebar console and consists of a series of LED lights that indicate the remaining charge in your bike’s battery. The battery indicator light is an essential feature that allows you to monitor the battery level during your rides and plan your charging accordingly.

Here are some key points to keep in mind regarding the battery indicator light:

  • Green light: Indicates a full or almost full battery charge.
  • Yellow light: Indicates a partially depleted battery and suggests it may be time for a recharge.
  • Red light: Indicates a low battery level, and it is highly recommended to charge the battery as soon as possible.

Monitoring the battery indicator light is crucial for optimizing your riding experience and avoiding any unexpected power loss. Once you have checked the battery level, you can move on to the next step and listen for the motor to activate, indicating that your Ancheer e-bike is ready to go.

Listen for the Motor to Activate

Once you’ve checked the battery level, listen for the motor to activate, indicating that your e-bike is ready to go. Motor activation is a key step in troubleshooting any issues with your Ancheer electric bike.

Advertisement

When you turn on the bike, you should hear a distinct humming sound as the motor engages. If you don’t hear anything or if the motor sounds weak or irregular, there may be a problem with the motor or the electrical system. In such cases, it’s important to consult the user manual or contact customer support for further assistance.

Once the motor is activated and running smoothly, you can proceed to adjust the pedal assist level (if applicable) to enhance your riding experience.

Adjust the Pedal Assist Level (if applicable)

You can adjust the pedal assist level on your e-bike to enhance your riding experience. Here are four important things to know about adjusting the pedal assist level:

  1. Pedal resistance: The pedal assist level determines the amount of assistance you receive while pedaling. Higher levels provide more assistance, making it easier to pedal, while lower levels require more effort.

  2. Troubleshooting pedal assist problems: If you’re experiencing issues with the pedal assist, such as it not engaging or providing inconsistent assistance, try adjusting the level. Sometimes, a simple change in the assist level can solve the problem.

  3. Fine-tuning your ride: Adjusting the pedal assist level allows you to customize your ride to your preferences. You can increase the level when you need more assistance, like when climbing hills, or decrease it for a more challenging workout.

  4. Battery life preservation: Keep in mind that higher assist levels consume more battery power. If you want to extend your e-bike’s battery life, consider using lower assist levels when possible.

Now, let’s move on to the next section about engaging the throttle, if applicable, to further enhance your riding experience.

Engage the Throttle (if applicable)

When engaging the throttle, simply twist the handle to activate the motor. The throttle on the Ancheer electric bike is located on the handlebar, making it easily accessible while riding.

Advertisement

It is important to note that the throttle sensitivity can be adjusted according to your preference. If you find that the throttle is too sensitive or not responsive enough, you can make changes in the settings to suit your needs.

Additionally, if you encounter any issues with the throttle, such as it not working or being unresponsive, there are troubleshooting steps you can take. These may include checking the connections, ensuring the throttle is properly aligned, or consulting the user manual for further guidance.

Now, let’s move on to the next step and test the brakes and gears.

Test the Brakes and Gears

After engaging the throttle, it’s important to test the brakes and gears on your Ancheer electric bike to ensure they are in proper working order.

Start by squeezing the brake levers to check for any resistance or sticking. If the brakes feel loose or unresponsive, you may need to adjust the brake pads or replace them if they are worn out.

Advertisement

Next, shift through the gears to make sure they engage smoothly and without any skipping or grinding noises. Familiarize yourself with the different gear ratios and how they correspond to your riding style and terrain.

Proper brake maintenance and gear shifting techniques are essential for a safe and efficient ride.

Now, let’s move on to the next step and familiarize ourselves with the display panel.

Familiarize Yourself with the Display Panel

To get started, take a moment to familiarize yourself with the display panel on your Ancheer e-bike. The display panel serves as the control center for your bike, allowing you to easily navigate through various settings and modes. Here are a few key things to keep in mind:

  • Familiarize yourself with the motor settings: The display panel provides access to different motor settings, such as pedal assist levels and throttle control. Understanding these settings will help you customize your riding experience to suit your preferences.

  • Understand the different display modes: The display panel offers different modes, such as speed, distance, and battery level. Knowing how to switch between these modes will help you keep track of important information during your ride.

  • Monitor your battery level: The display panel provides a clear indication of your battery level, ensuring that you never run out of power during your ride.

  • Adjust your settings as needed: The display panel allows you to make adjustments to various settings, such as the backlight brightness and unit of measurement. Take the time to explore these options and personalize your biking experience.

Now that you are familiar with the display panel, it’s time to enjoy your ride!

Advertisement

Enjoy Your Ride!

Now that you’re familiar with the display panel on your Ancheer electric bike, it’s time to hit the road and enjoy your ride! As you embark on your journey, there are a few things you can do to improve battery life and ensure a safe and enjoyable experience.

First and foremost, it’s important to maintain a consistent speed and avoid sudden accelerations or decelerations. This will help conserve battery power and extend your riding range. Additionally, be mindful of the terrain you’re riding on. Uphill climbs and rough surfaces can put extra strain on the motor and drain the battery faster.

To further optimize battery life, make sure to keep your tires properly inflated and avoid excessive weight on the bike. Regularly check your brakes, lights, and other safety features to ensure they’re functioning correctly.

By following these safety tips and taking steps to improve battery life, you can have a smooth and enjoyable ride on your Ancheer electric bike. So, hop on, buckle up, and embrace the thrill of electric biking!

Frequently Asked Questions

How do I charge the battery of my Ancheer electric bike?

To charge the battery of my Ancheer electric bike, I first locate the charging port and connect the charger. I ensure the battery is properly inserted and wait for it to fully charge. If I encounter any issues, I troubleshoot by checking connections and contacting customer support.

Advertisement

Can I turn on the electric bike without using the power button?

When it comes to turning on an electric bike without using the power button, alternative methods and troubleshooting techniques can be used. However, it’s important to note that these methods may vary depending on the specific model and brand.

What should I do if the battery indicator light does not turn on?

If the battery indicator light on your Ancheer electric bike does not turn on, start troubleshooting by checking the power connection. Ensure that the battery is properly connected and securely attached.

How can I adjust the pedal assist level on my Ancheer electric bike?

To adjust the pedal assist level on my Ancheer electric bike, I can access the pedal assist settings on the control panel. By navigating through the menu, I can increase or decrease the level of assistance according to my preference.

Are there any safety precautions I should take before starting my ride on the electric bike?

It is important to wear a helmet while riding an electric bike for safety. To ensure a safe ride, proper maintenance is essential. Regularly check the brakes, tires, and battery, and keep the bike clean and lubricated.

Conclusion

And there you have it! Turning on your Ancheer electric bike is as easy as a breeze on a sunny day.

Advertisement

Just remember to check that battery level, locate the power button, and press and hold it until you see that battery indicator light.

Once you hear that motor purr to life, engage the throttle and feel the power at your fingertips.

Test the brakes and gears for a smooth ride, and take a moment to appreciate the display panel that keeps you informed.

Now, it’s time to hit the road and let the adventure begin!

Advertisement

Continue Reading

Electric Bike

How To Turn Mountain Bike Into Electric Bike

Published

on

By

An image showcasing a skilled cyclist effortlessly maneuvering through rugged mountain terrain on a modified electric bike

Converting your mountain bike into an electric powerhouse is an exciting project that will take your riding experience to the next level. With an electric bike conversion kit, you can easily tackle steep terrain and increase your riding range with ease.

In this comprehensive guide, we will walk you through the step-by-step process of turning your beloved mountain bike into an electrifying machine. Get ready to unlock a world of exhilaration and adventure as we delve into the intricacies of this electrifying transformation.

Key Takeaways

  • Assess frame design and consider compatibility with conversion kit components
  • Ensure sufficient space for battery pack and proper alignment of motor
  • Consider factors such as motor power, battery capacity, and overall weight when choosing a conversion kit
  • Properly remove existing bike components and keep track of small parts for smooth transition during installation

Assessing Your Mountain Bike’s Compatibility

Before you can turn your mountain bike into an electric bike, you’ll need to assess its compatibility. Start by examining your mountain bike for any specific modifications it may need for the electric bike conversion process.

Check the frame design, as some electric bike conversion kits require a certain frame type. Look for a suitable space to mount the battery pack, often located on the downtube or rear rack. Ensure that your bike has enough clearance for the motor, especially if you plan on using a hub motor. Consider the weight of the components and how it will affect your bike’s handling.

Advertisement

Once you’ve evaluated these factors, you can move on to choosing the right electric bike conversion kit, which will be discussed in the next section.

Choosing the Right Electric Bike Conversion Kit

First, you’ll want to select the appropriate conversion kit for your needs. When choosing an electric bike conversion kit, it’s important to consider the benefits and drawbacks.

On the positive side, conversion kits allow you to transform your mountain bike into an electric bike without having to buy a completely new one. This can save you money and allow you to keep using a bike you’re already familiar with.

However, there are some drawbacks to consider as well. Conversion kits can be quite expensive, especially if you opt for a high-quality kit. Additionally, the installation process can be challenging and time-consuming, requiring some technical skills.

Factors to consider when choosing an electric bike conversion kit include the motor power, battery capacity, and overall weight of the kit. You’ll want to ensure that the motor power is suitable for your desired level of assistance, whether you’re looking for a gentle boost or a more powerful ride. The battery capacity should be sufficient to meet your riding needs, and the overall weight of the kit shouldn’t make your bike too heavy or unbalanced.

Advertisement

Now that you have an understanding of the benefits and drawbacks of electric bike conversion kits and the factors to consider, it’s time to move on to gathering the necessary tools and equipment.

Gathering the Necessary Tools and Equipment

To gather all the tools and equipment you’ll need, start by checking what’s included in the electric bike conversion kit you’ve chosen. Most conversion kits will provide the necessary tools, such as wrenches, screwdrivers, and Allen keys, but it’s always a good idea to double-check.

In addition to the tools provided in the kit, you may also need some additional tools depending on your specific bike and the components you’ll be working with. Some common tools you might need include a torque wrench, a chain breaker tool, and cable cutters. Choosing the right tools is crucial to ensure proper installation and avoid any damage to your bike or the conversion kit.

Advertisement

Once you have gathered all the necessary tools, you can move on to the next step of removing the existing components.

Removing the Existing Components

Now, you’ll need to remove the components currently on your bike.

Before doing so, it’s important to assess the compatibility of your bike with an electric conversion kit. Look for a conversion kit that matches the specifications of your mountain bike, including the wheel size and frame type.

Once you have chosen the right conversion kit, you can begin the process of removing the existing components. Start by disconnecting the brakes, derailleurs, and chain from your bike. Use appropriate tools, such as a wrench or screwdriver, to carefully remove these components. Take your time and make sure to keep track of any small parts that you remove. This will ensure a smooth transition when installing the electric bike conversion kit later on.

With the existing components removed, you’re now ready to move on to installing the electric bike conversion kit.

Advertisement

Installing the Electric Bike Conversion Kit

Once you have removed the existing components, it’s time to begin installing the electric bike conversion kit. To ensure a smooth installation, follow these steps:

  • Carefully read the instructions provided with the kit.
  • Begin by installing the motor correctly on the frame. Make sure to align it properly and tighten all bolts securely.
  • Attach the motor controller to the frame, ensuring it is positioned in a way that allows for easy access and proper ventilation.
  • Connect the motor controller to the motor using the provided wiring harness, following the color-coding instructions.

Installing an electric bike conversion kit can sometimes present challenges. Troubleshooting common conversion issues such as motor alignment and wiring connectivity is crucial. Double-check all connections and consult the troubleshooting guide if any problems arise.

Now that the electric bike conversion kit is installed, it’s time to move on to connecting the battery and controller.

Connecting the Battery and Controller

Make sure you connect the battery and controller properly for the electric bike conversion kit to function correctly.

Advertisement

Begin by locating the battery and controller compartments on your mountain bike. Open the compartments and identify the positive and negative terminals on both the battery and controller.

Connect the positive terminal of the battery to the positive terminal of the controller, and the negative terminal of the battery to the negative terminal of the controller. Ensure the connections are secure and tight.

Once connected, double-check that the battery is fully charged and the controller is properly programmed. To maintain the battery, periodically check its voltage and charge it as needed.

Troubleshooting common issues such as loose connections or faulty wiring can help ensure the smooth operation of your electric bike.

With the battery and controller properly connected, you can now move on to mounting the motor and wiring.

Advertisement

Mounting the Motor and Wiring

To mount the motor and connect the wiring, you’ll need to locate the appropriate spots on your bike and secure the motor in place. Start by choosing a suitable location for the motor, typically near the bottom bracket or the rear wheel dropout. Ensure that the motor is aligned properly with the chain and sprocket. Use mounting brackets or clamps to secure the motor to the frame securely. Next, connect the wiring between the motor and the controller. Refer to the user manual or wiring diagram provided by the manufacturer for the correct connections. Make sure all connections are tight and insulated to prevent any electrical issues.

To engage the audience, here is a table with mounting techniques and wiring tips:

Mounting Techniques Wiring Tips
Choose a suitable location for the motor Refer to the wiring diagram for correct connections
Align the motor with the chain and sprocket Ensure all connections are tight and insulated
Secure the motor using mounting brackets or clamps Double-check all wiring connections before finalizing

Once you have successfully mounted the motor and connected the wiring, you can move on to adjusting the bike’s gearing system, improving the overall performance of your electric mountain bike.

Adjusting the Bike’s Gearing System

Now you can fine-tune the gearing system on your bike for optimal performance. Making the right gearing adjustments is crucial to ensure a smooth and efficient ride when converting your mountain bike into an electric bike.

One important aspect to consider is the gear ratio optimization. This involves finding the perfect balance between the motor’s power and your pedaling effort. Start by experimenting with different gear combinations to see which ones work best for your riding style and terrain. You may need to adjust the front and rear derailleurs to achieve the desired gear ratio.

Advertisement

Keep in mind that a lower gear ratio will provide more torque for climbing steep hills, while a higher gear ratio will give you more speed on flat roads.

Once you have fine-tuned the gearing system, you can move on to the next section about testing and fine-tuning the electric bike’s overall performance.

Testing and Fine-Tuning the Electric Bike

After adjusting the bike’s gearing system, it’s important to test and fine-tune the electric bike for optimal performance. Here are some fine-tuning techniques and troubleshooting common issues to help you with this process:

  1. Test the motor: Ensure that the motor engages smoothly and provides consistent power throughout the ride. Check for any unusual noises or vibrations.

  2. Adjust the pedal assist levels: Fine-tune the pedal assist settings to match your desired level of assistance. Test each level to ensure they’re functioning properly and providing the desired amount of assistance.

  3. Check the battery life: Monitor the battery’s performance by testing its capacity and range. Make sure it’s charging and discharging correctly and adjust any settings if needed.

  4. Troubleshoot common issues: Address any issues such as poor acceleration, uneven power delivery, or erratic behavior. Check the wiring connections, controller settings, and make necessary adjustments.

Once you have completed the testing and fine-tuning process, you can move on to ensuring safety and compliance with local regulations for your electric bike.

Ensuring Safety and Compliance

Make sure you prioritize safety and comply with local regulations when using your electric bike. Ensuring safety is crucial to prevent accidents and injuries. Additionally, meeting legal requirements will help you avoid fines and penalties. Before riding your electric bike, make sure to wear a helmet and other protective gear. Familiarize yourself with the bike’s features and controls, and always follow traffic laws and signals. It is also important to regularly inspect your bike for any damage or loose parts. Maintain a safe speed and be aware of your surroundings. To help you understand the importance of safety and compliance, consider the following table:

Advertisement
Safety Measures Legal Requirements Benefits
Wear protective gear Register your electric bike Prevent injuries
Follow traffic laws Obtain necessary permits Avoid fines
Regular inspections Install required lights Ensure bike’s safety

By ensuring safety and complying with legal requirements, you can enjoy a safe and trouble-free electric bike experience. Now let’s move on to maintaining and servicing your electric bike.

Maintaining and Servicing Your Electric Bike

Maintaining and servicing your e-bike is essential for its longevity and optimal performance. To maximize battery life and ensure smooth operation, follow these tips:

  • Keep your battery charged between 20% and 80% to avoid overcharging or deep discharging, which can shorten its lifespan.
  • Clean the battery terminals regularly with a soft cloth to prevent corrosion and ensure a good connection.
  • Store your e-bike in a cool and dry place, away from extreme temperatures and moisture, to prevent damage to the battery and electronic components.

Troubleshooting common issues can help you identify and fix problems quickly:

  • Check the connections and wiring for any loose or damaged parts.
  • Test the throttle, brakes, and motor to ensure they are functioning properly.
  • If you encounter any issues beyond your expertise, consult a professional e-bike technician for assistance.

By maintaining and troubleshooting your electric bike, you can enjoy its benefits for years to come.

Now, let’s explore how to upgrade and customize your e-bike.

Upgrading and Customizing Your Electric Bike

To enhance your riding experience, you can personalize and improve various aspects of your e-bike. There are a variety of customizing options available that allow you to make your electric bike unique to your preferences.

One way to upgrade your e-bike is by improving its performance. You can consider installing a more powerful motor or upgrading the battery for increased speed and range. Additionally, you can enhance the braking system by installing hydraulic disc brakes for better stopping power. Another option is to upgrade the suspension system to improve the bike’s handling and comfort on rough terrains.

Advertisement

Furthermore, you can customize the appearance of your electric bike by adding accessories such as fenders, lights, and racks. By making these performance enhancements and personalizing your e-bike, you can optimize your riding experience.

Now, let’s explore different riding modes and power levels.

Exploring Different Riding Modes and Power Levels

There are various riding modes and power levels available to choose from when using an e-bike. These options allow you to customize your riding experience and make the most out of your electric mountain bike.

When exploring different riding modes, you can select between modes such as pedal-assist, throttle-only, or a combination of both. Each mode offers a unique level of assistance and control, allowing you to adapt to different terrains and riding conditions.

Additionally, you can also adjust the power level of your e-bike, which determines the amount of assistance the motor provides. This is particularly useful when exploring battery life and finding the right balance between performance and range.

Advertisement

Comparing different motor options is also important, as each motor has different power outputs and efficiency levels. By understanding these factors, you can select the motor that best suits your riding style and needs.

With these various riding modes and power levels, you can truly customize your e-bike experience.

Now, let’s move on to some tips and tricks for maximizing performance.

Tips and Tricks for Maximizing Performance

Get the most out of your e-biking experience by implementing these tips and tricks to maximize performance. One of the key factors in maximizing performance is maximizing battery life. To do this, make sure to charge your battery fully before each ride and avoid overcharging. Additionally, try to ride in lower power levels whenever possible, as higher power levels drain the battery faster.

Troubleshooting common issues is also important for optimizing performance. If you notice a decrease in power or range, check for any loose connections or damaged wires. Clean the bike regularly to prevent dirt and debris from affecting the motor and battery.

Advertisement

To further enhance your e-biking experience, consider joining the electric bike community. This will allow you to connect with fellow e-bikers, share tips and tricks, and discover new trails.

Joining the Electric Bike Community

Joining the e-bike community allows you to connect with other riders, share tips, and discover new trails. When you become part of this community, you gain access to a wealth of knowledge and experience.

One of the first things you’ll notice is the wide variety of electric bike accessories available. From powerful batteries to comfortable saddles, these accessories can enhance your riding experience and make your electric bike even more efficient.

Additionally, being part of the e-bike community opens up a world of benefits. Electric biking not only provides a thrilling and exhilarating experience, but it also allows you to cover longer distances with ease. The electric assist feature helps you conquer challenging terrains and steep hills effortlessly.

Moreover, electric biking is an eco-friendly alternative to traditional modes of transportation, reducing your carbon footprint and contributing to a greener environment.

Advertisement

So, join the e-bike community today and start experiencing the numerous benefits of electric biking.

Frequently Asked Questions

Can I convert any type of mountain bike into an electric bike?

Yes, you can convert any type of mountain bike into an electric bike. The mountain bike conversion process involves adding an electric motor, battery, and controller to your existing bike.

By converting your mountain bike into an electric bike, you can enjoy the benefits of electric bike conversion, such as increased speed and range, easier uphill climbs, and reduced effort required while riding.

This conversion allows you to transform your regular mountain bike into a powerful and efficient electric bike.

How much does an electric bike conversion kit typically cost?

Converting your mountain bike into an electric bike with a conversion kit is a cost-effective option. The price for an electric bike conversion kit typically ranges from $200 to $1000, depending on the quality and features you desire.

Advertisement

There are various types of conversion kits available, such as front-wheel, rear-wheel, and mid-drive kits. Each type has its pros and cons, so it’s important to consider factors like ease of installation, power output, and battery life when choosing the right kit for you.

Are there any specific tools or equipment that I need to gather for the conversion process?

To successfully convert your mountain bike into an electric bike, there are a few essential tools and equipment you’ll need.

  • First, make sure to have a wrench set, screwdrivers, and pliers for disassembling and reassembling parts.

  • Additionally, an electric bike conversion kit, including a motor, battery, controller, and throttle, is crucial.

  • When choosing a battery, consider its capacity, voltage, and weight.

  • Avoid common mistakes like improper wiring or mismatched components.

  • Research extensively for the right battery that suits your conversion needs.

Is it possible to convert my mountain bike back to its original state after installing the electric bike conversion kit?

Yes, it’s possible to convert your mountain bike back to its original state after installing the electric bike conversion kit. This ensures that you have the flexibility to switch between an electric bike and a regular mountain bike whenever you desire.

The mountain bike conversion process offers numerous benefits. It includes increased speed and range, smoother rides, and the ability to tackle challenging terrains with ease. By installing the conversion kit, you can enjoy these advantages while still having the option to revert to your original bike.

Are there any legal requirements or regulations I should be aware of when converting my mountain bike into an electric bike?

When converting your mountain bike into an electric bike, it’s important to be aware of the legal requirements and regulations. Safety precautions should be a priority, such as wearing a helmet and following traffic laws.

Advertisement

Some advantages of converting include increased speed and assistance on uphill climbs. However, there are also disadvantages such as added weight and limited range.

It’s crucial to research and ensure your conversion complies with local laws to avoid any legal issues.

Conclusion

Congratulations on successfully transforming your mountain bike into an electric bike! By following the step-by-step process outlined in this article, you have joined a growing community of electric bike enthusiasts.

Did you know that the sale of electric bikes has been steadily increasing over the past few years? In fact, in 2020 alone, the global sales of electric bikes reached a staggering 40 million units! So, not only have you made a smart and eco-friendly choice, but you’ve also become part of a global trend.

Get out there and enjoy your new electric bike adventure!

Advertisement

Continue Reading

Electric Bike

How To Turn On Fiido Electric Bike

Published

on

By

An image showcasing a person wearing a helmet, standing beside a Fiido electric bike

Positioned between the excitement of embarking on a new journey and the eagerness of becoming proficient with innovative technology, activating a Fiido electric bike opens the door to a realm of easy exploration.

In this guide, I will walk you through the precise steps to activate your Fiido electric bike and unleash its full potential.

From connecting the battery to adjusting the settings, prepare to embark on a thrilling ride as we delve into the intricacies of powering up your Fiido electric bike.

Key Takeaways

  • The Fiido electric bike can be activated by pedaling on the bike, with a motion sensor engaging the motor for effortless propulsion.
  • The activation process from pedaling to electric power is smooth and seamless.
  • Regular maintenance, such as checking tire pressure, brakes, and chain, is important for optimal performance.
  • The electric motor of the Fiido electric bike provides convenience and assistance, making uphill climbs and long distances more manageable.

Unpack your Fiido electric bike and ensure all parts are present and in working condition.

First, unpack your Fiido electric bike and make sure all the parts are present and in working condition. Begin by carefully inspecting the bike for any damages during shipping or handling. Look for any scratches, dents, or loose components. It is crucial to ensure that the bike is in perfect condition before using it.

Advertisement

Next, test the brakes by gently squeezing the brake levers. Make sure they engage smoothly and that the brake pads make proper contact with the wheel rims. If there are any issues with the brakes, consult the user manual for troubleshooting steps or contact customer support.

Once you have completed the inspection and brake test, you can proceed to connect the battery to the bike by inserting the connectors into their corresponding slots. This will power the bike and enable it to function properly for your rides.

Connect the battery to the bike by inserting the connectors into their corresponding slots.

To connect the battery to your Fiido electric bike, simply insert the connectors into their corresponding slots. Here is a step-by-step guide on how to do it:

  1. Ensure that both the bike and the battery are turned off before connecting them.

  2. Locate the battery compartment on the bike, usually located near the rear wheel.

  3. Align the connectors on the battery with the slots on the bike. The connectors are usually color-coded for easy identification.

  4. Gently push the connectors into their corresponding slots until they are securely connected.

Troubleshooting common issues when connecting the battery to the Fiido electric bike and exploring the benefits of using an electric bike and how it can enhance your daily commute are important discussion ideas.

Once the battery is connected, make sure it is fully charged before turning on the bike.

Advertisement

Make sure the battery is fully charged before turning on the bike.

Before you start riding, ensure that the battery is fully charged. Properly charging the battery is essential for the optimal performance of your Fiido electric bike. Here are some battery charging tips to follow:

  1. Use the original charger provided by Fiido to avoid any compatibility issues.
  2. Plug the charger into a standard electrical outlet and connect it to the charging port on the battery.
  3. Monitor the charging progress through the LED indicator on the charger. It will typically turn green when the battery is fully charged.

To troubleshoot common battery charging issues, check for loose connections, damaged cables, or faulty charging ports. If you encounter any problems, refer to the user manual or contact Fiido customer support for assistance.

Now, let’s move on to locating the power button on the bike’s control panel or handlebar.

Locate the power button on the bike’s control panel or handlebar.

You can easily find the power button on the bike’s control panel or handlebar. The power button is a vital component of the fiido electric bike, responsible for turning on the bike and activating its various functions.

Advertisement

However, in some cases, users may encounter issues with the power button not working. Troubleshooting common issues with the power button on a fiido electric bike involves checking the battery connection, ensuring the power button is not stuck or damaged, and verifying that the bike is not in a locked or anti-theft mode.

If the power button still doesn’t work, there are alternative methods to turn on the bike. These methods may include using the key to activate the bike or accessing the bike’s settings menu to enable a different power-on option. By familiarizing yourself with these troubleshooting techniques, you can easily overcome any power button-related challenges.

Now, press and hold the power button for a few seconds until the bike’s display lights up, indicating that the bike is ready for use.

Press and hold the power button for a few seconds until the bike’s display lights up.

Advertisement

Simply hold the power button down for a few seconds and the bike’s display will illuminate. This is an essential step in turning on your Fiido electric bike.

Once the display lights up, you gain access to crucial information about your bike’s battery level and other important data.

To ensure the smooth functioning of your electric bike, it is vital to regularly perform maintenance tasks. This includes keeping the battery charged, inspecting the tires for wear and tear, and checking the brakes for proper functioning.

Troubleshooting common electric bike issues is also an important aspect of maintenance. If you encounter any problems, such as a loss of power or unusual noises, refer to the user manual for troubleshooting instructions.

Now, check the display screen for battery level and other important information.

Advertisement

Check the display screen for battery level and other important information.

After holding down the power button, take a look at the display screen to see the battery level and other important information.

The display screen of your Fiido electric bike provides you with crucial details about your ride. It shows the battery level, allowing you to monitor how much power you have left before needing to recharge. This information is essential for planning your routes and ensuring you don’t run out of battery in the middle of your ride.

Additionally, the display screen provides insights into your speed, distance traveled, and pedal assist level. To extend the battery life of your Fiido electric bike, consider adjusting your pedal assist level and reducing your speed when necessary.

Furthermore, it is important to maintain the display screen by keeping it clean and avoiding any physical damage. By doing so, you can ensure that the screen continues to provide accurate and reliable information.

Now, adjust the settings on the display screen, such as speed and pedal assist levels, according to your preferences, to enhance your overall riding experience.

Advertisement

Adjust the settings on the display screen, such as speed and pedal assist levels, according to your preferences.

To enhance your overall riding experience, adjust the settings on the display screen, like speed and pedal assist levels, according to your preferences.

The display screen on the Fiido electric bike allows you to easily customize various aspects of your ride. To begin, press the power button on the display screen to turn it on.

Once it is on, you can navigate through the various settings using the buttons on the display screen. To adjust the speed, simply use the up and down arrows to increase or decrease the desired speed level.

Additionally, you can customize the pedal assist levels by selecting the desired level from the options available on the display screen.

Remember to put on a helmet and any other safety gear before mounting the bike, ensuring a safe and enjoyable ride.

Advertisement

Put on a helmet and any other safety gear before mounting the bike.

Before mounting the bike, make sure to put on a helmet and any other necessary safety gear. Safety is paramount when engaging in mountain biking, and choosing the right size helmet is crucial to protect your head from potential injuries. To ensure a proper fit, measure the circumference of your head and refer to the manufacturer’s sizing chart. Additionally, don’t forget to wear knee and elbow pads, as well as sturdy shoes, to safeguard your body during the ride. Once you are fully geared up, sit on the bike, place your feet on the pedals, and start pedaling to activate the electric motor. By following these mountain biking tips and prioritizing safety, you can enjoy a thrilling ride while minimizing the risk of accidents.

Sit on the bike, place your feet on the pedals, and start pedaling to activate the electric motor.

Once you’re seated on the bike, simply place your feet on the pedals and start pedaling to activate the electric motor. This action triggers the motion sensor, which then engages the electric motor, propelling you forward effortlessly.

Electric bike maintenance is simplified with the Fiido electric bike, as the motor is designed to be low-maintenance and durable.

One of the key benefits of electric bikes is the assistance they provide, allowing you to travel longer distances and conquer challenging terrains with ease.

The smooth activation of the electric motor ensures a seamless transition from pedaling to electric power, providing a delightful riding experience.

Advertisement

So, buckle up, helmet securely fastened, and enjoy your ride on your newly turned-on Fiido electric bike!

Enjoy your ride on your newly turned-on Fiido electric bike!

Get ready to experience the thrill of riding your brand new Fiido electric bike! Now that you have successfully turned it on, it’s time to delve into the world of electric bike maintenance.

Regular maintenance is essential to keep your electric bike running smoothly and efficiently. Start by checking the tire pressure, brakes, and chain regularly. Cleaning the bike after every ride helps to remove dirt and debris, ensuring optimal performance. Additionally, don’t forget to charge the battery after each use to maximize its lifespan.

Now, let’s talk about the benefits of electric bikes. They offer a convenient and eco-friendly mode of transportation, reducing our carbon footprint. Electric bikes also provide a great alternative to traditional bicycles, especially for those who may have physical limitations or need assistance with pedaling. The electric motor adds an extra boost, making uphill climbs and long distances more manageable.

Moreover, electric bikes promote a healthier lifestyle by encouraging regular exercise and outdoor activities. So, hop on your Fiido electric bike and embark on an exciting journey, knowing that you are not only enjoying the ride but also contributing to a greener future.

Advertisement

Frequently Asked Questions

How long does it take to fully charge the Fiido electric bike battery?

It takes approximately X hours to fully charge the Fiido electric bike battery. To extend its battery life, you can follow these steps: minimize high-speed riding, avoid frequent stops and starts, and use pedal assist mode whenever possible. Additionally, the Fiido electric bike offers various charging options such as using a standard wall outlet or a portable battery charger.

Can I charge the Fiido electric bike battery while it is still connected to the bike?

Yes, you can charge the Fiido electric bike battery while it is connected to the bike. However, it is recommended to disconnect the battery for optimal charging time and to extend the battery life.

Is it necessary to adjust the settings on the display screen before riding the Fiido electric bike?

Yes, it is necessary to adjust the settings on the display screen before riding the Fiido electric bike. These adjustments can include things like selecting the desired mode, adjusting the pedal assist level, and checking battery life.

What is the maximum speed that the Fiido electric bike can reach?

The Fiido electric bike has a remarkable maximum speed of 25 mph, allowing for swift and efficient transportation. Its exceptional acceleration performance ensures quick and smooth acceleration, making it ideal for urban commuting.

Are there any specific maintenance tasks that should be performed regularly to keep the Fiido electric bike in good condition?

Regular maintenance is essential to keep the Fiido electric bike in good condition. Some tips include cleaning the bike regularly, checking tire pressure, lubricating the chain, inspecting the brakes, and ensuring all electrical components are functioning properly.

Advertisement

Conclusion

I carefully unpacked my Fiido electric bike, ensuring that all the parts were intact and in proper working condition. After connecting the battery, I made sure it was fully charged before I was ready to turn on the bike.

With a firm grip on the handlebar, I located the power button and pressed it for a few seconds. As if by magic, the bike’s display screen came to life, allowing me to customize the settings to my liking.

Equipped with my helmet and safety gear, I mounted the bike and started pedaling, feeling the electric motor seamlessly kick in. With a sense of excitement, I embarked on a thrilling ride, effortlessly gliding through the streets on my newly activated Fiido electric bike.

Continue Reading
Advertisement

Affiliate disclaimer

As an affiliate, we may earn a commission from qualifying purchases. We get commissions for purchases made through links on this website from Amazon and other third parties.

About us

We are a passionate team driven by the belief that cycling is a fantastic and accessible way to stay active while enjoying the beauty of the outdoors. Our mission is to share our love for cycling with as many people as possible. We provide a welcoming environment for individuals of all ages, abilities, and backgrounds to come together and ride bikes. With Ralf’s visionary leadership, Zane’s expertise in cycling adventures, and Olivia’s dedication to community building, we strive to create a vibrant space where everyone can experience the joy of cycling. Through group rides, workshops, and inclusive events, we inspire and empower individuals to embrace an active lifestyle. Join us in our quest to pedal together, embrace the joy of cycling, and foster connections that last a lifetime.

Advertisement

Trending