
Hello to all my fellow electric bike fans!
Did you know that a locked back wheel can be a common issue that many riders face?
Well, fear not, because today I’ll be sharing a step-by-step guide on how to unlock the back wheel of your electric bike.
With just a few simple tools and some handy techniques, you’ll have that wheel spinning freely in no time.
So, let’s dive in and get your bike back on the road!
Key Takeaways
- Loosen the Quick Release Lever or Axle Nut to remove the back wheel of an electric bike.
- Inspect the area where the wheel was removed for any obstructions or damage.
- Repair and maintain the wheel by fixing flat tires, addressing loose or broken spokes, aligning the wheel, and replacing worn-out or damaged wheel bearings.
- Perform regular maintenance for electric bikes, including inspecting the wheels, keeping the tires properly inflated, lubricating the wheel bearings and axles, and checking and adjusting the wheel trueness as needed.

Schwinn Sporterra RX Gravel Bike, 700c Mens and Womens Bike, 14-Speed Drop Bar Gravel Bicycle, Mechanical Disc Brakes, Rigid Fork, Aerodynamic Riding Position, Quick Release Seat Post, Adult Bicycle
GRAVEL BICYCLE: Enjoy next level riding with the Sporterra RX by Schwinn. With 700c wheels, this mens and...
As an affiliate, we earn on qualifying purchases.
Identify the Issue with the Wheel
First, you’ll need to figure out what’s causing the issue with the wheel. Troubleshooting tips can help you identify common wheel issues and determine the appropriate course of action.
One common issue is a flat tire. If the wheel feels wobbly or if you notice a hissing sound, it’s likely that you have a flat tire. To fix this, you’ll need to locate the puncture and patch it up or replace the inner tube.
Another issue could be a loose or broken spoke. Inspect the spokes carefully and tighten any loose ones using a spoke wrench. If you find a broken spoke, you’ll need to replace it with a new one.
A misaligned wheel can also cause problems. Check if the wheel is centered between the fork blades or the frame. If it’s not, you can adjust the wheel’s position by loosening the axle nuts and repositioning it.
Finally, a worn-out or damaged wheel bearing could be the culprit. To check this, spin the wheel and listen for any grinding or clicking sounds. If you hear any, you’ll need to replace the wheel bearings.
Now that you’ve identified the issue with the wheel, let’s move on to gathering the necessary tools for the repair.

Swagman Standard Fork Mount Rooftop Bike Carrier
EASY TO ASSEMBLE: The STANDARD is easy to assemble with no tools required, sets up in just minutes...
As an affiliate, we earn on qualifying purchases.
Gather the Necessary Tools
Next, you’ll need to gather the tools you’ll need for the task. Proper maintenance for electric bikes involves being prepared with the right tools to address any wheel issues that may arise. Here is a table outlining the essential tools:
| Tools | Description |
|---|---|
| Allen wrench set | Used to loosen bolts and screws |
| Adjustable wrench | Helps loosen and tighten nuts |
| Tire levers | Assist in removing the tire |
| Pliers | Useful for gripping and pulling |
| Bike stand | Provides stability during work |
Identifying wheel issues is crucial in determining the proper course of action. Common problems include loose or damaged spokes, misaligned wheel, or a punctured tire. By gathering the necessary tools, you are equipped to handle these issues effectively.
To transition into the subsequent section on loosening the quick release lever or axle nut, it is important to note that the tools mentioned above will be instrumental in this process. Now that we have the tools ready, let’s move on to the next step and work towards unlocking the back wheel of your electric bike.
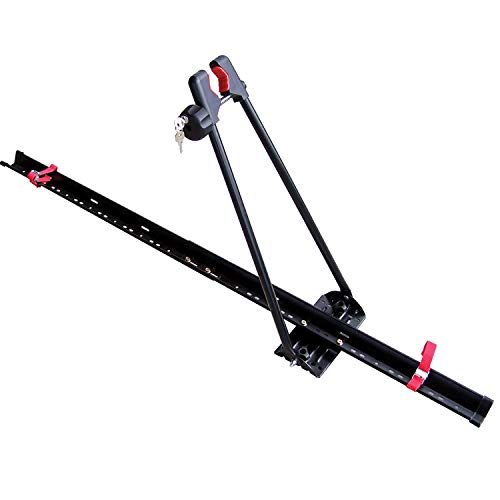
Swagman UPRIGHT Roof Mount Bike Rack
EASY TO ASSEMBLE: The UPRIGHT roof rack installs in minutes following the instructions and carries one bike with...
As an affiliate, we earn on qualifying purchases.
Loosen the Quick Release Lever or Axle Nut
Now, you’ll need to loosen either the quick release lever or the axle nut to proceed.
Loosening the back wheel of an electric bike requires a specific technique to ensure a smooth and efficient process. The most common method is to use the quick release lever, which is a lever located on the side of the axle. Simply flip the lever open to release the tension and allow for easy removal of the wheel.
However, if your bike doesn’t have a quick release lever, an alternative method is to use an adjustable wrench to loosen the axle nut. Locate the nut on the side opposite the chain and turn it counterclockwise to loosen it. Be careful not to loosen it too much, as this can cause the wheel to become misaligned.
Once the quick release lever or axle nut is loosened, you can proceed to remove the wheel from the bike frame. This step is crucial for repairs or maintenance tasks that require the wheel to be detached.

SYDSZ Roof Bike Rack Mount Upright Roof Bike Rack 1 Bike Carrier Car Roof Bicycle for Car Only Suitable for Removable Universal Crossbars
【COMPATIBILITY】Only applicable for installation on the driver's roof, fits 20" - 29" wheels. 64" long tray. Fits up...
As an affiliate, we earn on qualifying purchases.
Remove the Wheel from the Bike Frame
To proceed, you’ll need to detach the wheel from the frame of the bicycle. Before removing the wheel, it’s important to take some wheel removal precautions to ensure a smooth and safe process. First, shift the gears to the smallest chainring to release tension on the chain. Then, apply the brakes to prevent the bike from rolling. Now, let’s move on to removing the wheel.
| Tools Needed | Steps |
|---|---|
| Allen wrench set | 1. Begin by flipping the bike upside down, resting it on the handlebars and saddle. |
| 2. Locate the quick release lever or axle nut on the wheel hub. | |
| 3. If using a quick release lever, open it by flipping it to the open position. If using an axle nut, use the appropriate size wrench to loosen it. | |
| 4. Once the quick release lever or axle nut is loosened, you can now remove the wheel from the bike frame. |
After removing the wheel, it’s important to properly store it to avoid any damage. Place the wheel in a clean and dry area, away from any sharp objects or heavy items that could cause pressure or deformation. If possible, use a wheel bag or padded case to protect it further. Remember to store it in a cool and dry place to prevent rusting.
Now that the wheel is safely removed and stored, we can move on to the next section and check for any obstructions or damage.
Check for any Obstructions or Damage
Once the wheel is removed, it’s essential to check for any obstructions or damage in the frame. Here are some troubleshooting techniques for a thorough wheel inspection:
-
Examine the frame: Carefully inspect the area where the wheel was removed from. Look for any signs of damage, such as cracks, dents, or bent metal. These could indicate a serious problem that needs to be addressed before reattaching the wheel.
-
Check for debris or obstructions: Use a flashlight to inspect the inside of the frame. Look for any debris, such as dirt, rocks, or twigs, that may have gotten lodged in the frame. Clear away any obstructions to ensure a smooth reinstallation of the wheel.
-
Inspect the dropouts: These are the slots where the axle of the wheel fits into the frame. Check for any signs of wear or damage, such as uneven or worn surfaces. If the dropouts are damaged, it may be necessary to replace them before reinstalling the wheel.
-
Test the alignment: Place a straight edge, such as a ruler or a long level, against the frame and check if it aligns with the dropouts. Misalignment could indicate a bent frame or a problem with the wheel axle.
By thoroughly inspecting the frame for any obstructions or damage, you can ensure a safe and effective reinstallation of the wheel.
Once the inspection is complete, it’s time to either fix the flat tire or address the mechanical issue.
Fix the Flat Tire or Address the Mechanical Issue
After thoroughly inspecting the back wheel for any obstructions or damage, it is time to address any flat tires or common mechanical issues that may be causing the wheel to be locked. One of the most common issues is a flat tire, which can occur due to punctures or worn-out inner tubes.
To fix a flat tire, start by removing the wheel from the bike frame using the steps mentioned earlier. Once the wheel is detached, locate the puncture or damage and patch it up or replace the inner tube accordingly. It is important to ensure that the tire is properly inflated before reinstalling it onto the bike.
In addition to flat tires, there are several other common mechanical issues that can cause the back wheel to lock. These may include loose or damaged spokes, misaligned brakes, or issues with the derailleur. It is essential to carefully examine these components and make any necessary adjustments or repairs. If you are unsure about how to address these issues, it is advisable to consult a professional bike mechanic for assistance.
Now that the flat tire or mechanical issue has been resolved, it is time to proceed to the next step: reinstalling the wheel into the bike frame.
Reinstall the Wheel into the Bike Frame
First, make sure the tire is properly inflated before you reattach it to the frame of your bicycle. This is an important step in the reinstalling process to ensure a smooth and safe ride. To help guide you through the process, here are some troubleshooting tips to keep in mind:
| Troubleshooting Tips | Description |
|---|---|
| Check Alignment | Ensure that the wheel is aligned properly with the frame. |
| Secure the Quick Release Lever or Axle Nut | Make sure the quick release lever or axle nut is tightened securely to prevent any wobbling or shifting of the wheel. |
| Test for Smooth Rotation | Spin the wheel and check for any resistance or rubbing against the brake pads. If you notice any issues, adjust the wheel position accordingly. |
Tighten the Quick Release Lever or Axle Nut
After reinstalling the wheel into the bike frame, the next step is to ensure that it is securely fastened. To do this, I need to tighten the quick release lever or axle nut, depending on the type of wheel attachment system my bike has.
If my bike has a quick release lever, I simply need to flip it into the closed position. This lever tightens the axle and holds the wheel securely in place. I should make sure that the lever is tight enough so that there is no play in the wheel when I try to move it side to side.
For bikes with an axle nut, I will need to use a wrench to tighten it. The nut should be turned clockwise until it is snug against the frame. Again, I should check for any side-to-side movement of the wheel to ensure that it is properly secured.
If I notice any issues with wheel alignment after tightening the quick release lever or axle nut, I may need to troubleshoot the alignment. This could involve adjusting the quick release lever tension or realigning the wheel within the dropouts.
To ensure proper alignment of the wheel, I will now move on to the next section.
Ensure Proper Alignment of the Wheel
To make sure the wheel is aligned correctly, you should check if it is centered between the fork blades or the rear stays. Proper wheel alignment is essential for optimal performance and safety of your bike.
Here are three steps to ensure the wheel alignment is correct:
-
Visual Inspection: Start by visually inspecting the wheel’s position between the fork blades or rear stays. The wheel should be centered and aligned straight with the frame. If you notice any misalignment, it may indicate an issue with the axle or frame.
-
Adjusting the Quick Release Lever or Axle Nut: If the wheel is not aligned correctly, you can make adjustments using the quick release lever or axle nut. Loosen the lever or nut and gently push or pull the wheel to align it properly. Once aligned, tighten the lever or nut securely.
-
Troubleshooting Issues: If you encounter difficulties aligning the wheel, check for any obstructions or debris that may be causing the misalignment. Additionally, inspect the axle and dropouts for any damage or wear that could affect alignment. If necessary, consult a professional mechanic for further assistance.
Test the Wheel for Smooth Rotation
Now, you’ll want to spin the wheel and feel for any resistance or wobbling. This step is crucial to ensure proper wheel alignment on your electric bike. Start by lifting the back of the bike off the ground and giving the wheel a good spin. As it rotates, pay close attention to any signs of resistance or uneven movement. A smooth, effortless rotation indicates that the wheel alignment is likely in good shape. However, if you feel any resistance or notice wobbling, it may be an indication of misalignment.
In addition to checking the wheel rotation, it is also important to consider the tire pressure. Improper tire pressure can affect the wheel alignment and overall performance of your electric bike. Make sure to check the recommended tire pressure for your specific bike model and adjust it accordingly. Proper tire pressure not only improves the wheel alignment but also enhances the bike’s stability and handling.
Now, if you have completed the wheel rotation test and addressed any misalignment or tire pressure issues, it’s time to move on to the next step: adjusting the brakes if necessary.
Adjust the Brakes if Necessary
Make sure you assess the braking performance and, if needed, adjust the brakes accordingly to ensure optimal safety and control. Adjusting brake pads is a key step in troubleshooting brake issues.
Start by examining the brake pads for any signs of wear or damage. If the brake pads are worn down or have any unevenness, they may need to be replaced. To adjust the brake pads, locate the brake caliper and use an Allen wrench to loosen the bolt holding the pads in place. Slide the pads up or down until they are positioned correctly against the wheel rim. Make sure the pads are aligned with the rim and are not touching the tire. Once the pads are adjusted, tighten the bolt to secure them in place.
Test the brakes to ensure they engage smoothly and provide adequate stopping power. If the brakes still do not function properly, there may be other underlying issues that require further inspection.
To transition into the next section about double-checking the tightness of the quick release lever or axle nut, it is important to ensure that all components of the braking system are properly secured.
Double-check the Tightness of the Quick Release Lever or Axle Nut
Ensure that you double-check the tightness of the quick release lever or axle nut to guarantee the stability and safety of your brakes. This step is crucial in maintaining the proper functioning of your electric bike’s back wheel.
First, check the alignment of the wheel by spinning it and visually inspecting if it runs straight and true. If there is any noticeable wobbling or misalignment, adjust the axle or quick release lever accordingly.
To check the tightness of the quick release lever or axle nut, use a wrench or your hand to ensure that they are securely fastened. This will prevent any unwanted movement of the wheel during your ride.
Additionally, it is important to lubricate the axle before tightening the quick release lever or axle nut. Apply a small amount of lubricant to the axle to reduce friction and ensure smooth rotation of the wheel. This will enhance the overall performance of your electric bike.
Once you have double-checked the tightness of the quick release lever or axle nut and lubricated the axle, you are ready to take a test ride to confirm the wheel’s functionality. By doing so, you can ensure that your brakes are working properly and that the back wheel is securely locked in place.
Take a Test Ride to Confirm the Wheel’s Functionality
Take a spin around the block to confirm that everything is functioning properly with the wheel. It’s always important to wear protective gear during a test ride to ensure your safety. Before hopping on, make sure you have a helmet, knee pads, and elbow pads on to protect yourself from any potential accidents. Adjusting the seat height is crucial for a comfortable test ride. To do so, loosen the seat clamp bolt and raise or lower the seat to your desired height. Once you’ve found the right position, tighten the bolt securely to prevent any unwanted movement during your ride.
During the test ride, pay close attention to the wheel’s functionality. Check for any wobbling or unusual sounds that may indicate a problem with the wheel’s alignment or bearings. Additionally, test the brakes to ensure they are responsive and engage smoothly. Take note of how the bike handles corners and uneven terrain, as this can give you an idea of its overall stability and performance.
Transition: Now that you’ve finished your test ride and confirmed the wheel’s functionality, it’s important to maintain regular maintenance for your electric bike.
Maintain Regular Maintenance for Your Electric Bike
To keep your electric bike in top shape, don’t forget to regularly check and replace the battery when needed. Regular maintenance is crucial for ensuring the optimal performance and longevity of your electric bike. Here are some troubleshooting tips to help you maintain your electric bike effectively.
Firstly, it is important to regularly inspect the battery for any signs of damage or wear. Look for any cracks or leaks in the battery casing and check the battery connections for any loose or corroded wires. If you notice any issues, it may be necessary to replace the battery.
In addition to the battery, it is important to regularly clean and lubricate the drivetrain components, such as the chain, gears, and derailleur. This will help to prevent any unnecessary wear and ensure smooth and efficient operation.
Furthermore, it is recommended to periodically check the tire pressure and tread depth to ensure optimal traction and handling. Inspect the brake pads for wear and replace them if necessary, as well as check the brake cables for any signs of fraying or damage.
Regularly inspecting and maintaining your electric bike will help to prolong its lifespan and ensure a safe and enjoyable riding experience. However, if you encounter any issues that you are unsure how to address, or if the problem persists after troubleshooting, it’s always best to seek professional help.
Seek Professional Help if the Issue Persists or if You’re Unsure
If you’re unsure how to address any issues or if the problem persists after troubleshooting, it’s best to seek professional help. While troubleshooting tips can be helpful in solving common problems with electric bikes, there are certain situations where it’s important to consult a professional.
Here are three reasons why seeking professional help is crucial:
-
Expertise: Professionals have the knowledge and experience to accurately diagnose and fix complex issues with electric bikes. They are trained in the intricacies of the electrical components, motor systems, and other technical aspects. By seeking their help, you can ensure that the problem is properly addressed without causing further damage.
-
Safety: Electric bikes involve high voltage systems that can be dangerous if mishandled. Professionals are equipped with the necessary tools and safety protocols to handle these situations safely. Attempting to fix the issue yourself without proper knowledge can put you at risk of electrical shocks or other accidents.
-
Warranty: Many electric bikes come with warranties that are voided if unauthorized repairs or modifications are made. Seeking professional help ensures that the warranty remains intact, allowing you to benefit from any potential coverage for repairs or replacements.
Frequently Asked Questions
How do I identify the issue with the back wheel of my electric bike?
To identify common problems with the back wheel of an electric bike, inspect for loose spokes, misaligned wheel, or worn-out bearings. Troubleshooting tips include tightening spokes, adjusting wheel alignment, or replacing bearings to ensure smooth operation and prevent further damage.
What tools do I need to gather in order to unlock the back wheel of my electric bike?
To unlock the back wheel of my electric bike, I’ll need a few tools: a wrench or Allen key to loosen the axle nuts, a chain link remover to disconnect the chain, and a tire lever to remove the wheel. Then, I can perform the proper techniques for adjusting the rear derailleur and ensure the battery life is maintained by charging it regularly and avoiding overcharging.
Should I loosen the quick release lever or the axle nut to unlock the back wheel of my electric bike?
To unlock the back wheel of an electric bike, I recommend using the quick release lever for convenience. However, if you encounter any issues or want a more secure option, the axle nut is a reliable alternative.
How do I properly reinstall the back wheel into the bike frame after unlocking it?
To properly reinstall the back wheel into the bike frame, align the axle with the dropouts and tighten the axle nuts securely. Failing to align the wheel properly may result in misalignment, wheel wobbling, or even accidents while riding.
What regular maintenance should I perform on my electric bike’s back wheel to prevent future issues?
To prevent future issues with my electric bike’s back wheel, regular maintenance is crucial. This includes checking and adjusting spoke tension, inspecting the tire for wear and tear, lubricating the chain, and ensuring proper alignment of the wheel in the frame.
Conclusion
After successfully unlocking the back wheel of my electric bike, I realized the importance of regular maintenance. It’s like giving your bike a check-up, ensuring it’s in top-notch condition.
Remember, a well-maintained bike is a smooth ride, just like a well-oiled machine. So, don’t neglect the regular checks and keep your bike running smoothly.
And if you encounter any persistent issues or feel unsure, it’s always best to seek professional help. Your bike will thank you for it!