
To upgrade your bike’s brakes on a budget, start by checking your current setup and rotor sizes. Look for 160 mm to 180 mm rotors for better stopping power. Gather essential tools like a center lock tool and a torque wrench. Follow a simple step-by-step installation guide to replace rotors and adjust calipers. After the upgrade, test performance to verify improvement. Continue exploring tips for maximizing brake efficiency and maintenance for long-term benefits.
Key Takeaways
- Assess current rotor sizes and upgrade to larger rotors (e.g., 180 mm) for enhanced stopping power without a complete brake system replacement.
- Use a DIY approach for upgrades; this saves on labor costs and allows for personalized modifications.
- Purchase compatible adapters and rotors that fit your existing calipers to minimize expenses while maximizing performance.
- Regularly inspect and maintain brake components, such as pads and rotors, to extend their lifespan and improve braking efficiency.
- Focus on cost-effective upgrades like new rotors and pads instead of investing in an entire new brake system.

YITAHOME 700C Road Bike, 21 Speed Commuter Bicycle for Men Women, Lightweight Aluminum Frame Racing Bike, Adult Bicycle with Dual Disc Brake
All-Terrain 700 x 28C Wheels: Go further with less energy thanks to the road bike's large wheels; Enjoy...
As an affiliate, we earn on qualifying purchases.
Assessing Your Current Brake Setup

To effectively upgrade your bike brakes, you first need to assess your current brake setup.
Start by examining your rotor sizes; if you’ve got 160 mm or 180 mm rotors, check for signs of brake fade like reduced stopping power or discoloration. These can indicate overheating issues.
Next, evaluate your brake calipers; older models might need specific adapters or spacers to guarantee proper alignment with larger rotors.
Don’t forget about your brake pads—worn pads can drastically impact performance. Replace them if necessary before considering rotor upgrades.
Finally, think about the weight of new rotor options, like the Shimano RT mt800, which can enhance your bike’s performance without draining your wallet. You may also want to consider the impact of higher financing costs when budgeting for your brake upgrades.

RKJ Electric Bike for Adults, 2200W, 30/32MPH, 75 Miles, 48V 15.6AH Removable Battery, 7-Speed, 3 Modes, Full Suspension, Dual Disc Brakes, 20" All-Terrain Fat Tires, UL 2849 Certified Ebike
🔥 2200W PERFORMANCE: Powerful 750W motor (2200W Peak) delivers massive torque for 30° hills. Default 20MPH for city...
As an affiliate, we earn on qualifying purchases.
Understanding Rotor Sizes and Their Benefits

When you’re considering an upgrade, understanding rotor sizes is vital for enhancing your bike’s braking performance.
Larger rotors, like 180 mm or 203 mm, provide increased surface area, boosting stopping power and reducing brake fade during long descents. This is especially important on steep trails where heat dissipation becomes essential for consistent performance.
A bigger rotor also offers more leverage for your braking system, allowing you to apply effective braking force with less effort. Additionally, larger rotors contribute to better modulation, giving you a more predictable and controlled braking feel—key for technical descents. Moreover, upgrading your brakes can enhance the overall performance of your hybrid bike, particularly when navigating diverse terrains.
Just remember, when upgrading, verify the new rotor size is compatible with your bike’s calipers and frame, as specific adapters may be needed.

VEVOR Road Bike, 700C Wheels Racing Bike, Shimano 21 Speeds Drivetrain System City Commuter Road Bicycle, Urban Adult Sport Bike with Carbon Steel Frame, Drop Bar, Disc Brake, for Men and Women
Carbon Steel Frame: This road bike is built with a premium carbon steel frame and carbon steel front...
As an affiliate, we earn on qualifying purchases.
Essential Tools for Brake Upgrades
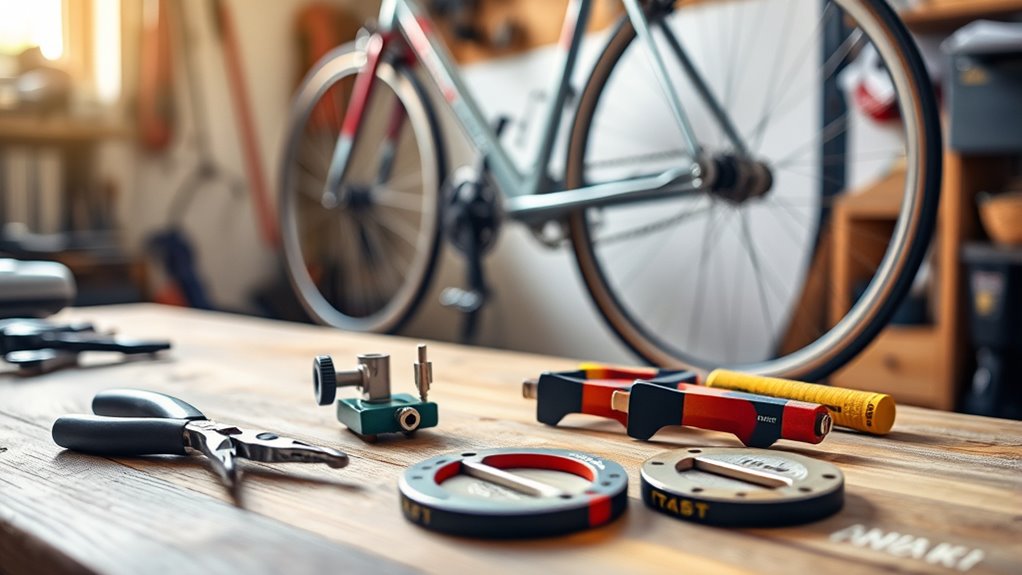
Upgrading your bike’s brakes requires the right tools to guarantee a smooth and effective installation.
You’ll need a center lock tool for easy rotor removal and installation, assuring a secure fit without damaging your components.
A torque wrench that measures up to 40 Nm is essential for properly tightening rotor and caliper bolts; this prevents loosening during your rides.
Don’t forget about standard hex keys, particularly the 5 mm size, as they’re vital for attaching calipers to adapters and maintaining proper spacing and alignment.
If you’re using different rotor sizes, make sure you have the correct adapter, like a Shimano brake adapter for a 203 mm rotor, to confirm compatibility and peak braking performance. Additionally, consider the optimal tire pressure for your gravel bike, as this can affect your braking efficiency and overall ride quality.

SAVADECK Carbon Disc Road Bike, Integrated Design Racing Bicycle Carbon Frame Carbon Fork with Shimano SORA R3000 Derailleur System 18 Speed Disc Brake Road Bike for Men or Women(Black,54cm)
TORAY T800 Carbon Fiber:We use high quality Japanese Carbon fiber for frame, fork, rims and seat post.This provides...
As an affiliate, we earn on qualifying purchases.
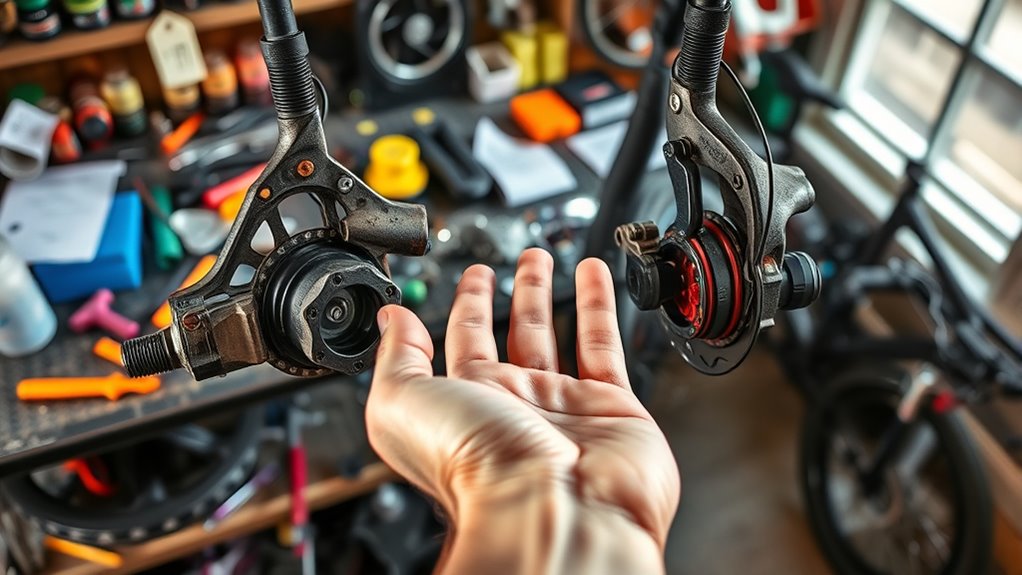
Step-by-Step Rotor Installation Guide

Removing and installing rotors is a straightforward process that can greatly enhance your bike’s braking performance.
Start by removing the front wheel and using a center lock tool to detach the existing rotor. Inspect the new rotor for defects before installing it. For the 203 mm front rotor, reuse the center lock nut and tighten it to 40 Nm without grease.
Next, swap the rear 160 mm rotor for the 180 mm rotor, ensuring you use the correct post mount adapter and washers for proper spacing.
After the rotor installation, check caliper alignment and tighten the caliper and adapter bolts to 6-8 Nm.
Finally, remember to bed in the new brake pads with the upgraded rotors before testing your bike on steeper trails. Additionally, investing in high-quality components can significantly impact your bike’s overall performance, similar to how indexed annuities link returns can lead to better financial outcomes.
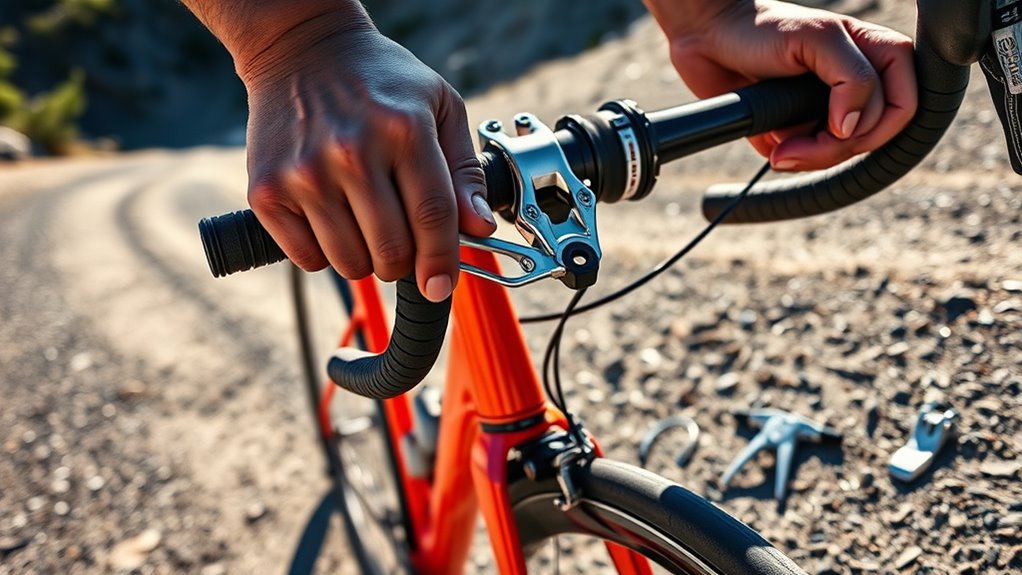
Caliper Alignment and Adjustment Techniques

When fitting your caliper, make certain it remains movable to achieve ideal rotor contact.
Pay attention to bolt length; shorter bolts can prevent stripping and guarantee a secure fit.
Once everything’s in place, check alignment by bedding in the pads during a test ride for effective braking performance. Additionally, consider using proper maintenance techniques to prolong the lifespan of your brake components.
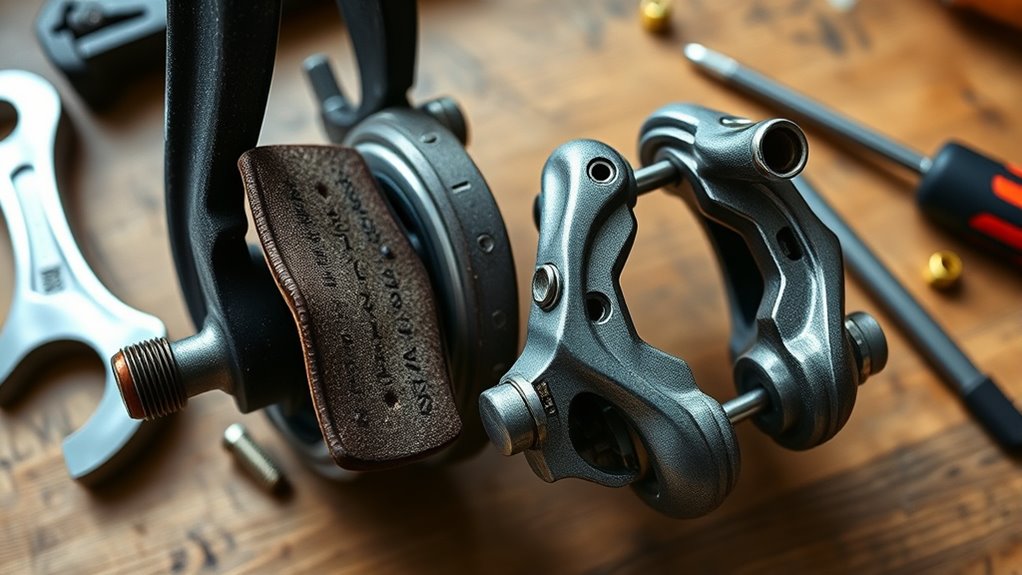
Optimal Rotor Contact
How can you guarantee ideal rotor contact for your bike’s braking system? Start by confirming your caliper remains movable during installation. This flexibility allows you to align it perfectly with the rotor before tightening the bolts.
Check for any burrs on both the rotor and caliper surfaces; even small imperfections can disrupt proper rotor contact and affect braking performance.
When securing the caliper and adapter bolts, use a torque wrench set to 6-8 Nm to avoid over-tightening. If the rotor bottoms out and fails to align with the adapter, consider using washers for proper spacing.
Finally, after installation, perform a bedding-in process to verify alignment and confirm even wear, maximizing your bike’s braking efficiency. Additionally, regular inspections can help identify potential issues early and ensure optimal braking performance.
Bolt Length Considerations
Achieving the right bolt length is essential for ensuring your caliper aligns perfectly with the rotor. When upgrading calipers, always check bolt length compatibility to avoid issues. Opt for bolts that provide at least three threads of engagement to prevent stripping.
For better fitment and adjustment, shorter bolts for the caliper attachment to the adapter work best. If the rotor bottoms out before touching the adapter surface, adding standard washers can create necessary spacing for proper caliper alignment.
Remember, proper torque settings—6-8 Nm for caliper bolts—are vital to maintaining alignment and preventing loosening from vibrations during rides. Additionally, regularly checking tire pressure can help ensure that your bike remains stable during braking.
Importance of Proper Torque Specifications

When upgrading your bike brakes, paying attention to torque specifications is essential for preventing component damage.
Proper torque guarantees safe performance and maintains brake efficiency; both are critical for a smooth ride.
Always refer to your manufacturer’s guidelines to keep everything in check and ride with confidence. Additionally, just like in color accuracy for projectors, ensuring each component is properly tightened enhances overall performance and safety.
Preventing Component Damage
Properly applying torque specifications is essential for preventing damage to your bike’s brake components. Over-tightening caliper bolts can strip threads or cause component damage, while under-tightening risks loose parts during rides.
Stick to a torque setting of 6-8 Nm for caliper and adapter bolts to guarantee they’re securely mounted. When installing rotors, use a torque of 40 Nm for center lock nuts to maintain rotor integrity and prevent warping.
Always opt for the correct length bolts, like m6x25 mm for caliper attachment, to guarantee proper thread engagement. Regularly checking and adhering to these torque specifications not only prolongs the lifespan of your brake components but also enhances your overall safety while riding. Consistent maintenance prevents costly repairs and keeps your bike in top shape!
Ensuring Safe Performance
Assuring your bike’s brakes perform safely starts with understanding the importance of torque specifications. Properly tightening brake components prevents loosening and guarantees reliable operation.
Here are key points to remember:
- Caliper and adapter bolts should be tightened to 6-8 Nm to prevent issues.
- Front rotor installations need a torque setting of 40 Nm to avoid warping.
- Longer bolts, like M6x25 mm, enhance thread engagement and reduce the risk of brake failure.
- Regularly check and re-torque your components to maintain consistent brake performance, especially during downhill rides. Additionally, suspension tuning can improve ride comfort and stability, which is essential for optimal braking performance.
Maintaining Brake Efficiency
While you might be tempted to overlook the specifics of brake maintenance, maintaining proper torque specifications is critical for your bike’s braking efficiency. Properly tightened brake components, like calipers and rotors, minimize the risk of loosening from vibrations during rides.
| Component | Torque Range | Importance |
|---|---|---|
| Caliper Bolts | 6-8 Nm | Secure caliper attachment |
| Rotor Bolts | 40 Nm | Guarantee rotor stability |
| Regular Checks | N/A | Extend component lifespan |
Insufficient torque can lead to brake fade, especially on steep descents. Conversely, over-tightening risks damaging components. So, grab a torque wrench and check those settings to enhance your bike’s braking efficiency!
Performance Testing After Upgrades
After upgrading your bike’s brakes, it’s essential to evaluate their performance through thorough testing.
Start by taking your bike on steep trails to assess the improvements in braking power and to pinpoint any potential brake fade. Keep an eye on the front rotor, as it handles most of the load and is prone to overheating during long descents.
Here are some performance tests you should conduct:
- Test braking power on various terrains.
- Monitor rotor temperatures after extensive downhill rides.
- Evaluate consistency and response in different riding conditions.
- Document your ride impressions pre- and post-upgrade.
These steps will help you understand how effective the upgrades are, ensuring your safety and performance on the trails.
Analyzing Cost vs. Benefits of Upgrades
When considering upgrades for your bike’s brakes, it’s crucial to weigh the costs against the benefits to make an informed decision.
Upgrading to larger rotors, like moving from a 180 mm to a 203 mm front rotor, can greatly boost your braking power and reduce brake fade during steep descents. The cost of this rotor and adapter upgrade is minimal compared to buying an entirely new brake system, making it a budget-friendly option.
By performing the upgrade yourself with basic tools, you can save on labor costs, too. Post-upgrade, evaluate your performance—if you notice reduced overheating and consistent braking, the investment is likely worthwhile.
This analysis helps you prioritize future upgrades tailored to your riding style.
Maintenance Tips for Enhanced Brake Performance
To keep your bike’s brakes performing at their best, regular maintenance is essential. By following a few simple tips, you can enhance your braking performance and extend the life of your components.
Regular maintenance is key to optimal brake performance, ensuring safety and longevity for your bike’s components.
- Inspect brake pads for wear and replace them when they reach 1-2 mm thickness.
- Clean brake rotors with isopropyl alcohol to eliminate contaminants that can affect braking efficiency.
- Periodically check and tighten all caliper bolts to the manufacturer’s torque specifications to guarantee secure components.
- Confirm proper alignment of the caliper over the rotor, adjusting spacers as needed to enhance braking power.
Lastly, bed in new brake pads by gradually applying the brakes at varying speeds, creating a consistent friction surface for improved responsiveness.
Frequently Asked Questions
Can Bike Brakes Be Upgraded?
Yes, you can definitely upgrade your bike brakes!
Replacing existing rotors with larger ones, like moving from a 180 mm to a 203 mm rotor, boosts your braking power. You can also swap out lower-quality components for higher-performance options to enhance efficiency.
Using adapters lets you customize your setup without a full overhaul. Regular maintenance, like checking caliper alignment, will also help keep your upgraded brakes performing at their best!
How Can I Improve My Bike Brakes?
Imagine gliding down a winding trail, the wind whipping past you, but your brakes aren’t quite up to the challenge.
To improve your bike’s brakes, start by upgrading to larger rotors for powerful stops.
Swap out worn pads for high-quality ones tailored to your rides.
Regularly inspect your calipers and tighten components with a torque wrench.
Don’t forget to align everything with spacers to guarantee smooth, responsive braking when you need it most.
How to Upgrade a Cheap Bike?
Upgrading a cheap bike can transform your ride without breaking the bank. Start by replacing the stock components with quality parts, focusing on the drivetrain, brakes, and tires.
You can also enhance your bike’s comfort by adding a better saddle and grips. Consider upgrading the wheels for improved performance, and don’t forget to check the gear ratios for better climbing ability.
Regular maintenance keeps everything running smoothly, ensuring you get the most out of your upgrades.
Are Upgraded Brakes Worth It?
Upgraded brakes are definitely worth it!
You’ll notice a significant improvement in stopping power and consistency, especially on steep trails. Even small changes, like swapping a 160 mm rotor for an 180 mm one, can enhance your ride without breaking the bank.
Plus, better components reduce brake fade and overheating during intense descents, improving your overall safety. Investing in quality brakes pays off in performance and confidence on the trails.
Conclusion
Upgrading your bike’s brakes on a budget can transform your ride from ho-hum to heart-pounding in the blink of an eye! With just a few simple steps and a sprinkle of DIY magic, you’ll be stopping on a dime like a superhero. Don’t underestimate the power of a good brake upgrade; it can turn your bike into a lightning-fast beast! So, roll up your sleeves, grab those tools, and get ready to conquer the roads with confidence!